
Planning meals for outdoor escapades doesn’t have to be a chore. With a little prep, you can enjoy tasty, hassle-free meals that fuel your fun in the wild. From hearty stews to quick snacks, there are plenty of premade options that hit the spot after a long day of hiking or fishing. The right food can elevate your experience, making those evenings around the campfire even more enjoyable. Let’s check out some delicious meal ideas that will keep you satisfied on your next trip!
BBQ Pulled Pork Sandwiches

Would you like to save this article?
BBQ pulled pork sandwiches are a crowd-pleaser that brings the taste of smoky, savory meat to your camping meals. This dish combines tender pulled pork, tangy barbecue sauce, and soft, warm buns for a satisfying bite. It’s simple to prepare and can be made ahead of time, making it perfect for enjoying in the great outdoors.
The rich flavors of the pork, complemented by the sweet and tangy sauce, create a delightful meal that everyone will love. Whether you’re gathered around a campfire or enjoying a picnic, these sandwiches are sure to be a hit. Plus, they’re easy to customize with your favorite toppings!
Ingredients
- 2 lbs pork shoulder
- 1 cup BBQ sauce
- 1 cup chicken broth
- 1 tablespoon smoked paprika
- 1 tablespoon garlic powder
- 1 teaspoon onion powder
- Salt and pepper to taste
- 4-6 hamburger buns
- Coleslaw (optional, for topping)
Instructions
- Prepare the Pork: Rub the pork shoulder with smoked paprika, garlic powder, onion powder, salt, and pepper. Place it in a slow cooker with chicken broth.
- Cook the Pork: Cover and cook on low for 8 hours or until the pork is tender and easily shredded with a fork.
- Shred the Pork: Remove the pork from the slow cooker and shred it with two forks. Mix in the BBQ sauce until well combined.
- Assemble the Sandwiches: Toast the hamburger buns, then pile on the pulled pork. Top with coleslaw if desired.
- Serve and Enjoy: Serve warm and enjoy your delicious BBQ pulled pork sandwiches!
Vegetarian Quinoa Salad

This Vegetarian Quinoa Salad is a light and refreshing dish that is perfect for outdoor dining. Packed with colorful vegetables and protein-rich quinoa, it offers a delightful combination of textures and flavors. The salad has a hint of brightness from fresh herbs and a satisfying crunch from various veggies. Plus, it’s simple to prepare, making it an ideal option for your camping meals.
Not only is this salad tasty, but it also provides essential nutrients, keeping you energized during your outdoor activities. Whether enjoyed as a side or a main dish, it’s a versatile option that can be customized to your liking. Bring along this easy-to-make dish and savor every bite while surrounded by nature!
Ingredients
- 1 cup quinoa, rinsed
- 2 cups vegetable broth or water
- 1 cup cherry tomatoes, halved
- 1 bell pepper, diced
- 1 can black beans, drained and rinsed
- 1 cup corn (fresh or frozen)
- 1/4 cup red onion, finely diced
- 1/4 cup fresh cilantro, chopped
- 1/4 cup lime juice
- 2 tablespoons olive oil
- Salt and pepper to taste
Instructions
- Cook the Quinoa: In a medium saucepan, bring vegetable broth or water to a boil. Add the rinsed quinoa, reduce heat to low, cover, and simmer for about 15 minutes or until the quinoa is fluffy and liquid is absorbed. Remove from heat and let it cool.
- Prepare the Veggies: While the quinoa cooks, chop the cherry tomatoes, bell pepper, red onion, and cilantro. If using frozen corn, thaw it under running water.
- Mix the Salad: In a large bowl, combine the cooked quinoa, chopped vegetables, black beans, and corn. Drizzle with lime juice and olive oil, then season with salt and pepper.
- Toss and Serve: Gently toss everything together until well mixed. Taste and adjust seasoning if needed. Serve immediately or refrigerate for a bit to let the flavors meld.
Classic Chicken and Rice Casserole
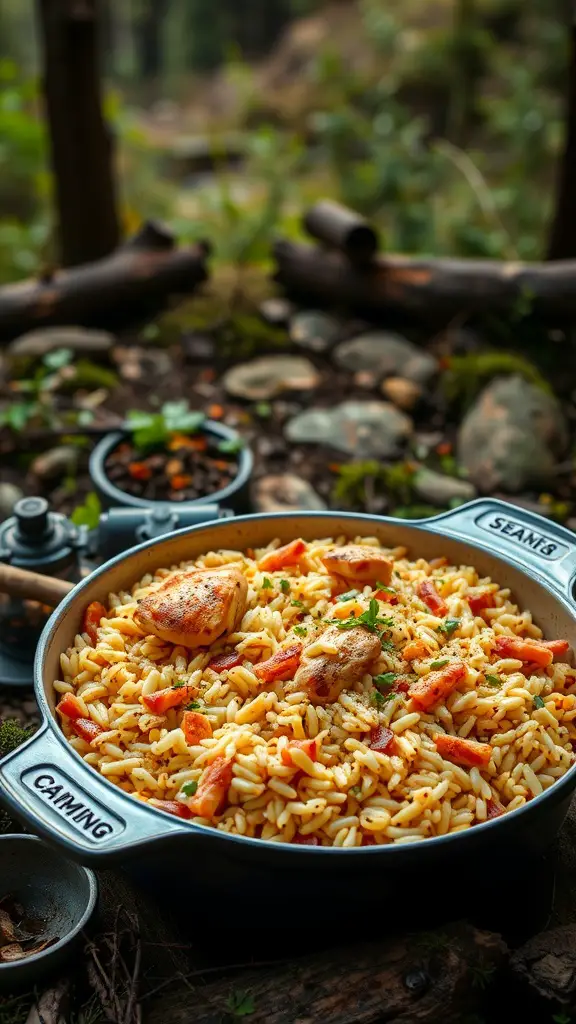
Classic Chicken and Rice Casserole is the perfect meal for camping, as it combines comfort food with simplicity. This dish is not only satisfying but also provides a tasty and hearty option for your outdoor meals. The blend of tender chicken, savory rice, and flavorful seasonings creates a delicious harmony that everyone will love. Plus, it’s easy to prepare in advance, making it a great choice for your camping trips.
The casserole is incredibly versatile, allowing you to add your favorite vegetables or spices to customize it to your taste. When you’re around the campfire, the warm aroma wafting through the air will surely make everyone’s mouth water. With minimal prep time and straightforward cooking methods, you’ll be able to enjoy this classic dish without the fuss.
Ingredients
- 2 cups cooked chicken, shredded or cubed
- 1 cup uncooked rice
- 1 can (10.5 oz) cream of chicken soup
- 1 can (15 oz) diced tomatoes, drained
- 1 cup chicken broth
- 1 teaspoon onion powder
- 1 teaspoon garlic powder
- 1 teaspoon paprika
- Salt and pepper to taste
- 1 cup shredded cheese (optional)
Instructions
- Preheat your oven to 350°F (175°C) if cooking at home. If camping, prepare your campfire or portable stove.
- In a large bowl, combine the cooked chicken, uncooked rice, cream of chicken soup, diced tomatoes, chicken broth, onion powder, garlic powder, paprika, salt, and pepper. Mix well.
- Transfer the mixture to a greased baking dish or a large pot suitable for your camping set-up.
- If using cheese, sprinkle it on top of the casserole.
- Bake in the oven for about 45-50 minutes, or until the rice is tender and the liquid is absorbed. If cooking over a campfire, cover your pot and allow it to cook for about 30-40 minutes, checking occasionally.
Creamy Tomato Basil Soup

Creamy tomato basil soup is a delightful dish that warms you up from the inside out. It’s rich, smooth, and bursting with fresh flavors, making it a perfect meal for cool evenings outdoors. Not only is it comforting, but it’s also simple to prepare, even while camping. You can enjoy each spoonful with a side of crusty bread, creating a satisfying meal that feels homemade, no matter where you are.
This soup is a blend of ripe tomatoes, aromatic basil, and a splash of cream, resulting in a harmony of taste that is both refreshing and hearty. Whether you’re gathered around a campfire or enjoying a cozy evening in, this soup brings a sense of comfort that elevates any camping experience. Plus, it can be made ahead of time and stored, making it a convenient option for your next trip!
Spicy Shrimp Tacos

Spicy shrimp tacos are a fantastic choice for a tasty meal on your camping trip. They bring a kick of flavor that pairs perfectly with the freshness of cilantro and lime, making each bite refreshing and satisfying. These tacos are simple to prepare, allowing you to spend more time enjoying the outdoors and less time cooking. With just a few ingredients, you can whip up a dish that impresses everyone around the campfire.
The combination of grilled shrimp, zesty lime, and crisp toppings creates a delicious flavor profile. Plus, they’re versatile! You can customize them with your favorite toppings like avocado or salsa. Whether you’re a seasoned camper or trying it out for the first time, these spicy shrimp tacos will surely be a hit.
Ingredients
- 1 lb shrimp, peeled and deveined
- 2 tablespoons olive oil
- 1 teaspoon chili powder
- 1 teaspoon cumin
- 1 teaspoon garlic powder
- 1/2 teaspoon salt
- 1/4 teaspoon cayenne pepper (optional for extra heat)
- 8 small tortillas
- 1 cup shredded cabbage
- 1/2 cup chopped cilantro
- 1 lime, cut into wedges
- Salsa or hot sauce, for serving
Instructions
- Prepare the Shrimp: In a bowl, mix the olive oil, chili powder, cumin, garlic powder, salt, and cayenne pepper (if using). Add the shrimp and toss to coat them in the seasoning blend.
- Cook the Shrimp: Heat a skillet over medium-high heat. Cook the shrimp for 2-3 minutes on each side until they turn pink and opaque. Remove from heat.
- Warm the Tortillas: Lightly toast the tortillas in the skillet or on a grill for about 30 seconds on each side to make them pliable.
- Assemble the Tacos: Place a handful of shredded cabbage on each tortilla, top with the cooked shrimp, and sprinkle with chopped cilantro. Squeeze lime juice over the top for added flavor.
- Serve: Serve the tacos with salsa or hot sauce on the side. Enjoy your meal under the stars!
Pasta Primavera with Fresh Veggies

Pasta Primavera is a delightful dish that showcases the freshness and vibrancy of seasonal vegetables. This colorful meal combines perfectly cooked pasta with an array of garden-fresh produce, making it both nutritious and tasty. The bright flavors of tomatoes, basil, and other veggies create a light yet satisfying dish that’s perfect for any outdoor setting.
What’s great about this recipe is its simplicity; you can easily whip it up with just a few ingredients. It’s a wonderful option for camping meals as it requires minimal prep and can be cooked quickly over a campfire or portable stove. The combination of flavors is refreshing, making it a favorite among pasta lovers.
Ingredients
- 8 ounces spaghetti or your favorite pasta
- 1 cup cherry tomatoes, halved
- 1 zucchini, sliced
- 1 bell pepper, chopped
- 1 cup broccoli florets
- 2 cloves garlic, minced
- 1/4 cup olive oil
- Salt and pepper to taste
- Fresh basil leaves, for garnish
- Grated Parmesan cheese (optional)
Instructions
- Cook the Pasta: In a large pot of boiling salted water, cook the pasta according to package instructions until al dente. Drain and set aside.
- Sauté the Veggies: In a large skillet, heat olive oil over medium heat. Add minced garlic and sauté for about 30 seconds until fragrant. Then add the zucchini, bell pepper, and broccoli. Cook for about 5-7 minutes until the vegetables are tender but still crisp.
- Add Tomatoes: Stir in the cherry tomatoes and cook for another 2-3 minutes until they soften slightly.
- Combine: Add the cooked pasta to the skillet, tossing everything together. Season with salt and pepper to taste.
- Serve: Garnish with fresh basil leaves and grated Parmesan cheese if desired. Enjoy your Pasta Primavera warm!
Savory Beef Stroganoff
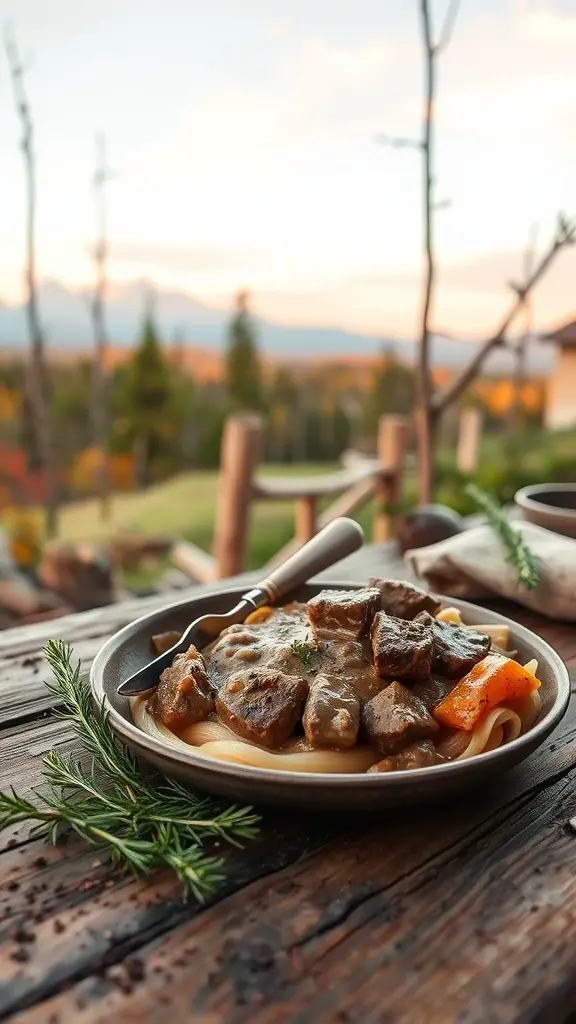
Beef stroganoff is a classic dish that brings comfort and warmth, making it perfect for camping meals. With tender chunks of beef simmered in a rich, creamy sauce, it pairs wonderfully with noodles for a hearty meal. The taste is a delightful balance of savory beef and earthy mushrooms, making every bite satisfying. Not only is it delicious, but it’s also simple to prepare, requiring just a few ingredients and minimal effort. This meal is sure to keep you fueled during your outdoor escapades.
When you’re cooking in the great outdoors, having a premade version of this dish can be a lifesaver. Simply reheat and enjoy a taste of home, even in the wild. It’s great for campfires or stoves, allowing for easy cleanup and minimal cooking time. Whether you’re gathered around a campfire or enjoying a meal under the stars, this beef stroganoff will make your camping experience even more memorable.
Ingredients
- 1 pound beef sirloin, cut into cubes
- 1 medium onion, chopped
- 2 cups mushrooms, sliced
- 2 cups beef broth
- 1 cup sour cream
- 2 tablespoons flour
- 1 tablespoon Worcestershire sauce
- Salt and pepper to taste
- 8 ounces egg noodles
- Fresh parsley for garnish
Instructions
- Cook the Noodles: In a pot, boil water and cook the egg noodles according to package instructions. Drain and set aside.
- Sear the Beef: In a large skillet, heat a little oil over medium-high heat. Add the beef cubes and sear until browned on all sides. Remove from the skillet and set aside.
- Sauté the Vegetables: In the same skillet, add the onions and mushrooms, cooking until the onions are translucent and the mushrooms are tender.
- Make the Sauce: Sprinkle flour over the vegetables and stir. Gradually add the beef broth, stirring continuously until the mixture thickens. Add the Worcestershire sauce and return the beef to the skillet.
- Finish with Sour Cream: Once the beef is heated through, remove from heat and stir in the sour cream. Season with salt and pepper to taste.
- Serve: Serve the beef stroganoff over the cooked noodles and garnish with fresh parsley.
Hearty Chili for Chilly Nights
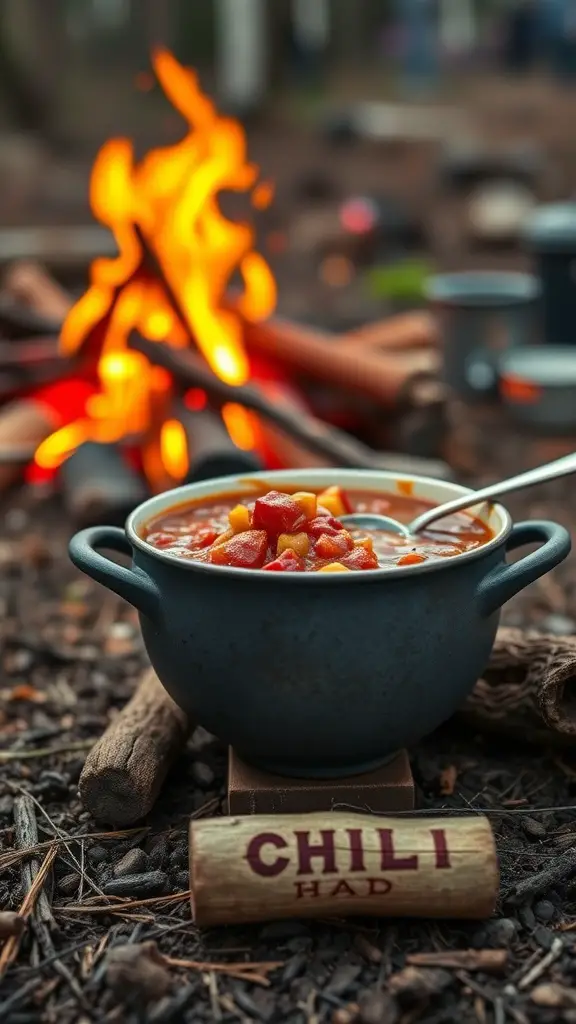
When the temperature drops, there’s nothing quite like a warm bowl of hearty chili to keep you cozy. This dish is not only delicious but also simple to prepare, making it a perfect addition to your camping meals. With a rich blend of spices and a variety of ingredients, it’s a satisfying option that warms you from the inside out. Expect a delightful mix of flavors that come together beautifully, creating a comforting meal that can easily be customized to suit your taste.
This chili is a great way to bring everyone together around the campfire. Whether you prefer a meat-based chili or a hearty vegetarian version, you can whip it up in no time. Plus, it’s a fantastic way to use up any leftover ingredients you might have on hand, making it both flexible and resourceful.
Ingredients
- 1 pound ground beef or turkey
- 1 can (15 oz) kidney beans, drained and rinsed
- 1 can (15 oz) diced tomatoes
- 1 can (6 oz) tomato paste
- 1 medium onion, chopped
- 2 cloves garlic, minced
- 2 tablespoons chili powder
- 1 teaspoon cumin
- 1/2 teaspoon paprika
- Salt and pepper to taste
- 1 cup bell peppers, diced
- 2 cups vegetable or beef broth
- Optional toppings: shredded cheese, sour cream, or chopped green onions
Instructions
- In a large pot over medium heat, brown the ground meat until fully cooked. Drain any excess fat.
- Add the chopped onion and garlic, cooking until softened, about 3-4 minutes.
- Stir in the chili powder, cumin, and paprika, cooking for an additional minute to enhance the flavors.
- Add the diced tomatoes, tomato paste, kidney beans, bell peppers, and broth. Stir well to combine.
- Bring the mixture to a boil, then reduce heat and let it simmer uncovered for about 30 minutes, stirring occasionally. Adjust seasoning with salt and pepper.
- Serve hot, garnished with your choice of toppings.
Breakfast Burritos for Early Risers
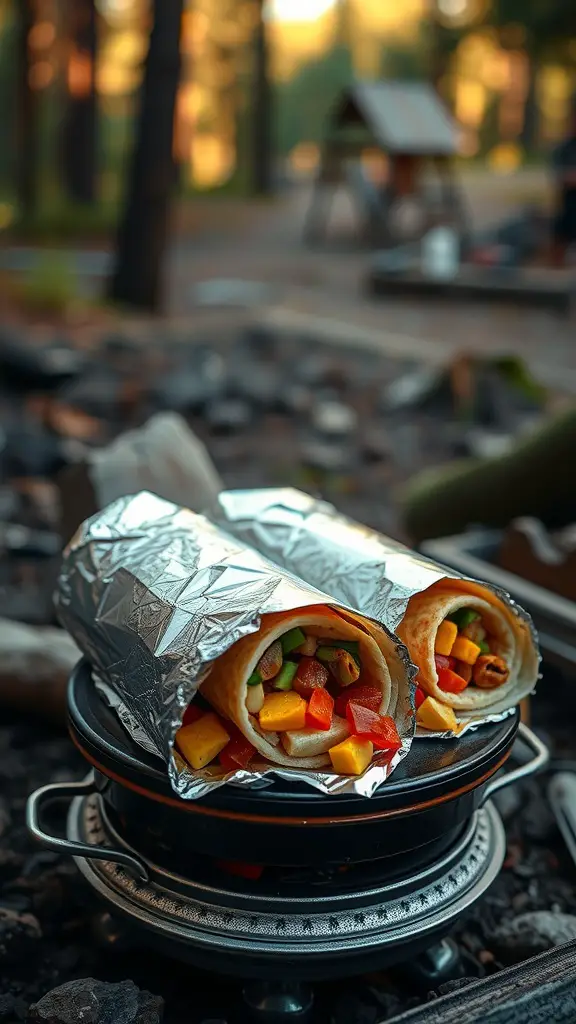
Breakfast burritos are a quick and satisfying way to start the day, especially when you’re camping. Packed with protein, veggies, and cheese, these burritos are flavorful and filling. They are easy to prepare ahead of time, making mornings hassle-free.
Simply wrap your favorite ingredients in tortillas, and you’ve got a meal that’s perfect for enjoying around the campfire. With a little planning, you can have a delicious breakfast ready in no time!
Ingredients
- 4 large flour tortillas
- 6 large eggs
- 1 cup diced bell peppers
- 1 cup diced onions
- 1 cup shredded cheese (cheddar or your choice)
- 1 cup cooked and crumbled breakfast sausage or bacon (optional)
- Salt and pepper to taste
- Olive oil or cooking spray
Instructions
- Scramble the Eggs: In a skillet, heat a bit of olive oil over medium heat. Whisk the eggs in a bowl, season with salt and pepper, and pour them into the skillet. Cook until scrambled, stirring occasionally.
- Add Veggies: Once the eggs are nearly done, add the diced bell peppers and onions. Cook for an additional 2-3 minutes until the vegetables are tender.
- Combine Ingredients: If using sausage or bacon, mix it into the egg and veggie mixture. Remove from heat and stir in the cheese until melted.
- Wrap the Burritos: Lay a tortilla on a flat surface. Spoon a portion of the filling onto the center, then fold in the sides and roll it up tightly.
- Heat and Serve: Wrap each burrito in aluminum foil and place them over the campfire or on a grill until heated through, about 10 minutes. Enjoy your tasty breakfast!
Fish Tacos with Cabbage Slaw
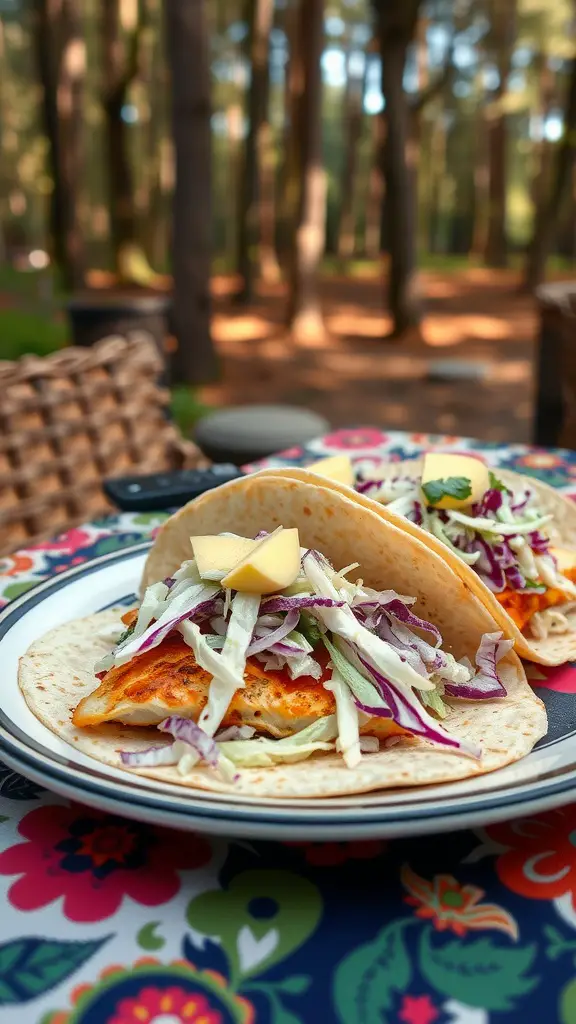
Fish tacos with cabbage slaw make for a light and flavorful meal, perfect for camping. The soft tortillas filled with flaky fish, crunchy cabbage, and zesty dressing come together for a refreshing bite. This dish is simple to prepare, allowing you to enjoy more time with nature. Plus, it’s a great way to use fresh ingredients available at local markets. The balance of savory fish and crisp slaw creates a delightful taste that everyone will love.
To make these tacos, start with your favorite white fish, season it well, and cook until golden. For the slaw, mix finely shredded cabbage with a tangy dressing made from lime juice, olive oil, and a hint of honey. Fill warm tortillas with the cooked fish, top with the slaw, and enjoy your delicious outdoor meal!
Loaded Nachos with Cheese and Beans
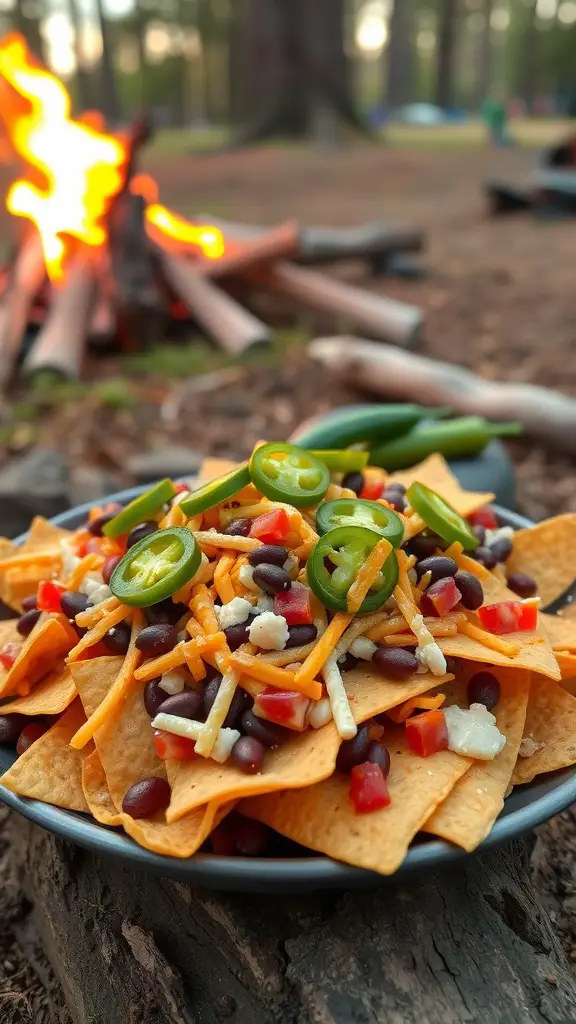
Loaded nachos are a crowd-pleaser, perfect for sharing around the campfire with friends and family. This dish combines crispy tortilla chips with melted cheese, hearty black beans, and fresh toppings, creating a delightful explosion of flavors in every bite. It’s easy to prepare and can be customized according to your taste, making it a flexible option for any outdoor meal. The blend of textures—from creamy cheese to crunchy chips—will satisfy even the hungriest hikers. Plus, you can whip it up in no time, allowing you to spend more time enjoying the great outdoors.
Gather your friends and enjoy this fun, interactive meal. Nachos are not just food; they’re an experience! Load them up with your favorite toppings, and don’t be shy about adding some spice. Let’s get cooking!
Ingredients
- 1 bag of tortilla chips
- 1 can black beans, rinsed and drained
- 2 cups shredded cheese (cheddar or a blend)
- 1 cup diced tomatoes
- 1/2 cup sliced jalapeños
- 1/2 cup diced onions
- 1/4 cup sour cream (optional)
- 1/4 cup salsa (optional)
- Chopped cilantro for garnish (optional)
Instructions
- Prepare the Base: On a large, heatproof plate or skillet, spread out the tortilla chips evenly.
- Add Beans: Sprinkle the rinsed black beans over the chips, ensuring an even distribution.
- Layer the Cheese: Generously sprinkle the shredded cheese on top of the chips and beans.
- Top it Off: Add diced tomatoes, sliced jalapeños, and onions to your liking.
- Heat Up: Place the assembled nachos over a campfire grill or on a hot surface until the cheese melts, about 5-10 minutes. Keep an eye on it to avoid burning.
- Serve: Once melted, remove from heat and garnish with sour cream, salsa, and cilantro if desired. Dig in and enjoy!
Stuffed Bell Peppers
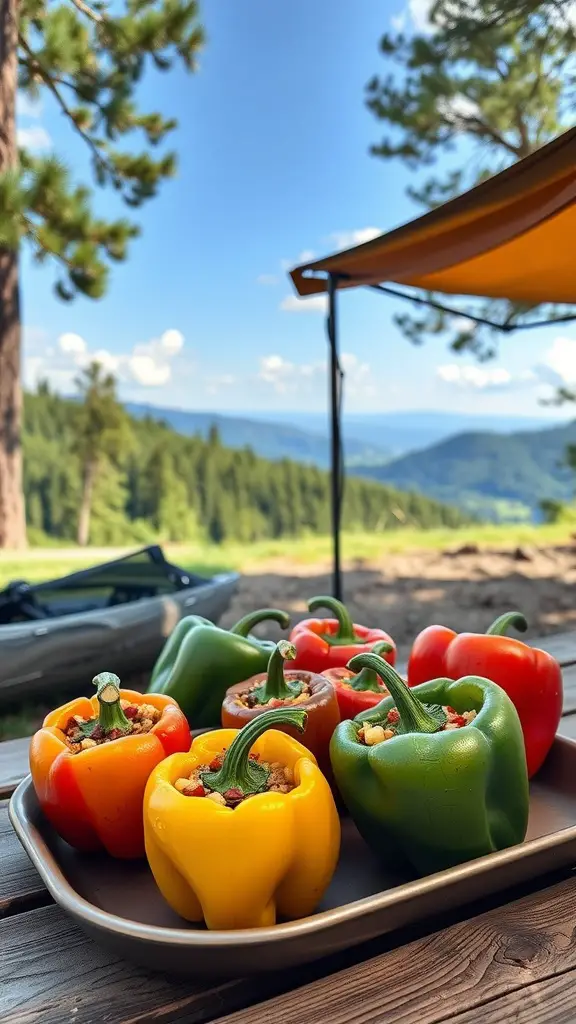
Stuffed bell peppers are a delightful camping meal that brings together vibrant colors and delicious flavors. They’re simple to prepare and packed with wholesome ingredients like rice, beans, and spices. Each bite is a burst of freshness, making them a satisfying option for outdoor dining. Plus, they can be tailored to suit your taste preferences or dietary needs!
This recipe is easy to prep ahead of time, so you can enjoy more time exploring and relaxing. The peppers can be cooked over a campfire or on a portable grill, creating an enjoyable and communal cooking experience. With their hearty filling and bright presentation, stuffed bell peppers are sure to impress family and friends around the campfire.
Ingredients
- 4 large bell peppers (any color)
- 1 cup cooked rice (white or brown)
- 1 can black beans, rinsed and drained
- 1 cup corn (canned or frozen)
- 1 small onion, diced
- 2 cloves garlic, minced
- 1 teaspoon cumin
- 1 teaspoon chili powder
- Salt and pepper to taste
- 1 cup shredded cheese (optional)
- Fresh cilantro for garnish (optional)
Instructions
- Prepare the Peppers: Cut the tops off the bell peppers and remove the seeds. Lightly brush the outside with olive oil.
- Make the Filling: In a bowl, mix together the cooked rice, black beans, corn, onion, garlic, cumin, chili powder, salt, and pepper. If desired, fold in half of the cheese.
- Stuff the Peppers: Fill each pepper with the rice mixture, pressing down gently to pack it in. Top with remaining cheese if using.
- Cook the Peppers: Place the stuffed peppers in a campfire-safe dish or wrap in foil. Cook over a grill or campfire for about 30 minutes, or until the peppers are tender and the filling is heated through.
- Serve: Remove from heat, garnish with fresh cilantro, and enjoy your delicious stuffed peppers!
Creamy Mushroom Risotto

Creamy Mushroom Risotto is a delightful dish that combines rich flavors and a comforting texture, making it perfect for those evenings around the campfire. The creamy consistency paired with earthy mushrooms creates a warm and satisfying meal. It’s fairly simple to prepare, requiring just a few basic ingredients but delivering a gourmet experience.
This risotto is not only filling but also versatile. You can easily customize it by adding your favorite veggies or proteins, making it a great option for everyone. Whether you’re a seasoned camper or just starting out, this dish will impress and satisfy your taste buds.
Ingredients
- 1 cup Arborio rice
- 4 cups vegetable broth
- 1 cup mushrooms, sliced
- 1/2 cup onion, finely chopped
- 2 cloves garlic, minced
- 1/2 cup grated Parmesan cheese
- 1 tablespoon olive oil
- 1 tablespoon butter
- Salt and pepper to taste
Instructions
- Prepare the Base: In a pot, heat olive oil and butter over medium heat. Add the onions and garlic, cooking until soft and fragrant.
- Add the Mushrooms: Stir in the sliced mushrooms and cook until they are tender and browned.
- Toast the Rice: Add Arborio rice to the pot, stirring for a couple of minutes until the rice is coated and slightly toasted.
- Incorporate the Broth: Slowly add vegetable broth, one ladle at a time, stirring frequently. Allow each addition to be absorbed before adding more.
- Finish the Risotto: Once the rice is creamy and al dente, stir in Parmesan cheese. Season with salt and pepper to taste, then serve warm.
Chicken Fajitas with Sizzling Peppers
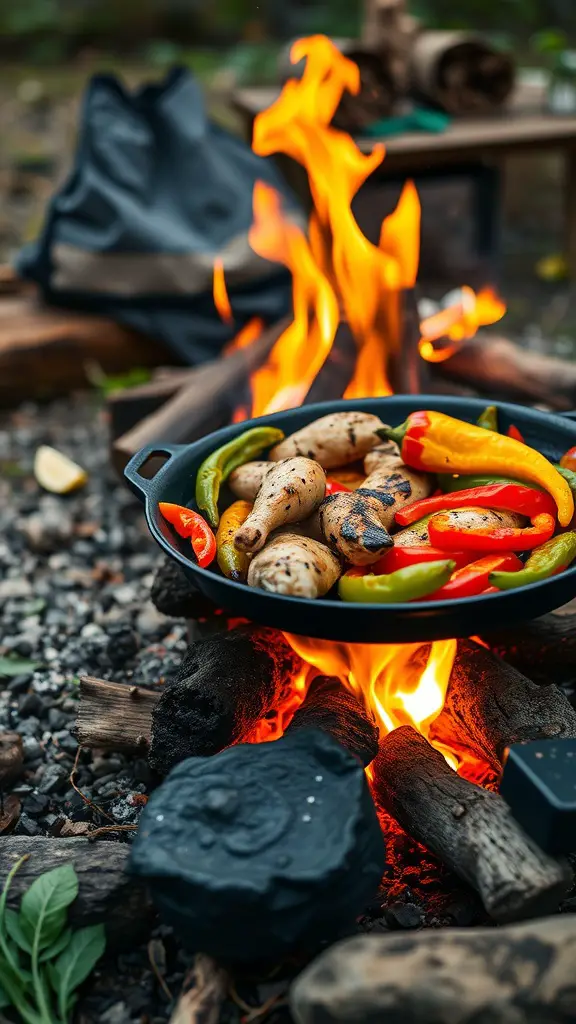
Chicken fajitas with sizzling peppers offer a delightful combination of smoky, spicy, and savory flavors that are perfect for a camping meal. The juicy chicken, grilled to perfection, pairs wonderfully with colorful bell peppers and onions, creating a feast for both the eyes and the palate. This dish is not only delicious but also simple to prepare, making it a great choice for cooking outdoors. Toss everything into a skillet over an open flame, and you’ll have a tasty meal in no time.
Whether you’re sitting around the campfire or enjoying a picnic, these fajitas bring a burst of flavor to your meal. The sweetness of the peppers complements the savory spices, making each bite satisfying and fun. Plus, they’re easy to customize with your favorite toppings, so everyone can enjoy their own personalized fajita!
Ingredients
- 1 lb boneless, skinless chicken breasts
- 1 tablespoon olive oil
- 2 bell peppers (any color), sliced
- 1 onion, sliced
- 2 teaspoons chili powder
- 1 teaspoon cumin
- Salt and pepper, to taste
- Flour tortillas
- Your choice of toppings (sour cream, guacamole, salsa, etc.)
Instructions
- Prepare the Chicken: Season the chicken breasts with olive oil, chili powder, cumin, salt, and pepper. Let them marinate for about 15 minutes.
- Cook the Chicken: Place the chicken on a heated skillet over the campfire. Cook for about 6-7 minutes on each side until fully cooked and juices run clear. Remove and let rest.
- Sauté the Vegetables: In the same skillet, add the sliced bell peppers and onion. Cook until tender, about 5-7 minutes, stirring occasionally.
- Slice the Chicken: Once the chicken has cooled slightly, slice it into strips and add it back into the skillet with the vegetables. Mix well to combine.
- Serve: Warm the tortillas over the fire if desired. Serve the chicken and pepper mixture in the tortillas with your favorite toppings.
Homemade Beef Jerky
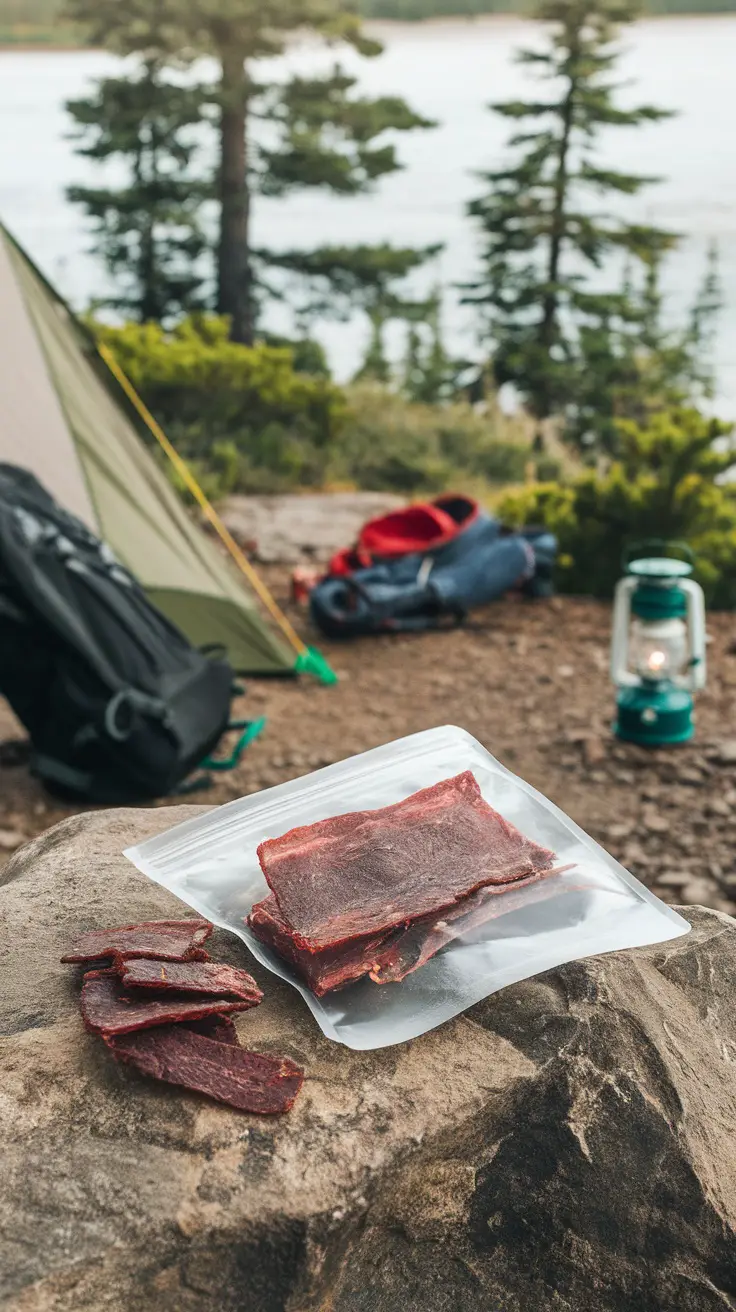
Homemade beef jerky is a fantastic camping snack that’s tasty and easy to make. This protein-packed treat is perfect for those long hikes or just relaxing by the campfire. With a chewy texture and rich flavors, it’s a satisfying way to keep your energy up. Making your own jerky allows you to customize the spices and marinades to suit your taste, ensuring you get exactly what you enjoy. Plus, it’s incredibly simple to prepare, making it a great option for your next outdoor trip.
To start, you’ll need some lean cuts of beef, soy sauce, and your favorite seasonings. The marinating process helps the meat absorb all those delicious flavors, while the drying method locks it in for future enjoyment. Whether you prefer it spicy, sweet, or smoky, you can easily adjust the recipe to match your cravings. Get ready to impress your camping buddies with this homemade delight!
Ingredients
- 2 pounds lean beef (like flank steak or sirloin)
- 1/2 cup soy sauce
- 1/4 cup Worcestershire sauce
- 2 tablespoons liquid smoke (optional)
- 2 tablespoons brown sugar
- 1 teaspoon garlic powder
- 1 teaspoon onion powder
- 1 teaspoon black pepper
- 1 teaspoon smoked paprika
- 1/2 teaspoon red pepper flakes (optional for heat)
Instructions
- Prepare the Meat: Trim any excess fat from the beef and slice it into 1/4-inch thick strips, going against the grain for a tender bite.
- Make the Marinade: In a bowl, mix together soy sauce, Worcestershire sauce, liquid smoke, brown sugar, garlic powder, onion powder, black pepper, smoked paprika, and red pepper flakes.
- Marinate the Beef: Place the beef strips in a resealable bag and pour the marinade over them. Seal the bag and refrigerate for at least 4 hours, or overnight for best results.
- Dry the Jerky: Preheat your dehydrator or oven to 160°F (70°C). Remove the beef from the marinade and pat dry with paper towels. Arrange the strips in a single layer in the dehydrator or on a baking rack.
- Dehydrate: If using a dehydrator, dry the beef for 4-6 hours until it’s dry yet flexible. In the oven, bake for 4-6 hours, flipping halfway through. Check for doneness; the jerky should snap when bent but not crumble.
- Store: Once cooled, store the jerky in airtight containers or vacuum-sealed bags. Enjoy it during your camping trip or as a tasty snack at home!
Vegetable Stir-Fry with Tofu

Vegetable stir-fry with tofu is a perfect camping meal that’s quick, tasty, and packed with nutrients. The vibrant colors of the vegetables make it visually appealing, while the tofu adds a wonderful texture and protein boost. This dish is easy to prepare, requiring minimal ingredients and effort, making it great for outdoor cooking.
The combination of fresh veggies and savory tofu, sautéed in a light sauce, delivers a satisfying and hearty meal that everyone will enjoy. You can customize the vegetables based on what you have on hand, ensuring it remains a versatile option for your camping menu.
Ingredients
- 1 block firm tofu, cubed
- 2 tablespoons soy sauce
- 1 tablespoon olive oil
- 1 bell pepper, sliced
- 1 cup green beans, trimmed
- 1 carrot, julienned
- 1 small onion, sliced
- 2 cloves garlic, minced
- 1 inch ginger, grated
- Salt and pepper to taste
Instructions
- Prepare the Tofu: Pat the tofu dry with paper towels and cut it into cubes. In a bowl, toss the tofu with soy sauce and let it marinate for at least 10 minutes.
- Sauté the Tofu: Heat olive oil in a pan over medium heat. Add the marinated tofu and cook until golden brown on all sides. Remove from the pan and set aside.
- Cook the Vegetables: In the same pan, add the onion, garlic, and ginger. Sauté for a minute, then add the bell pepper, green beans, and carrot. Stir-fry for about 5-7 minutes until the vegetables are tender-crisp.
- Combine: Add the cooked tofu back into the pan with the vegetables. Stir everything together and season with salt and pepper to taste. Cook for another 2-3 minutes.
- Serve: Enjoy your stir-fry hot, either alone or over rice for a complete meal.
Sweet Potato and Black Bean Chili

Sweet Potato and Black Bean Chili is a hearty and nutritious dish that packs a punch of flavor. It’s a delightful blend of sweet potatoes, black beans, and spices, making it a perfect meal for camping. The sweetness of the potatoes balances beautifully with the earthy beans, creating a comforting warmth that’s satisfying after a long day outdoors. Plus, it’s super simple to prepare, requiring just one pot and minimal prep work. You’ll love how easy it is to throw together, making it an ideal choice for your next meal in nature.
This chili can be customized with your favorite toppings like avocado, cilantro, or a squeeze of lime for some zesty freshness. It’s not only delicious but also packed with nutrients, keeping you energized for your outdoor activities. Make it ahead of time, and freeze it in portions for a quick and easy camping meal!
Ingredients
- 2 medium sweet potatoes, peeled and diced
- 1 can black beans, drained and rinsed
- 1 can diced tomatoes (14 oz)
- 1 medium onion, chopped
- 2 cloves garlic, minced
- 1 bell pepper, chopped
- 1 tablespoon chili powder
- 1 teaspoon cumin
- Salt and pepper to taste
- 2 cups vegetable broth
- Fresh cilantro for garnish
Instructions
- In a large pot, heat a splash of oil over medium heat. Add the chopped onion and bell pepper, cooking until softened, about 5 minutes.
- Stir in the garlic, chili powder, and cumin, cooking for an additional minute until fragrant.
- Add the diced sweet potatoes, black beans, diced tomatoes, and vegetable broth. Bring to a boil, then reduce heat to simmer.
- Cover and let simmer for about 20-25 minutes, or until sweet potatoes are tender. Stir occasionally and add more broth if necessary for desired consistency.
- Season with salt and pepper to taste, and serve hot, garnished with fresh cilantro.
Grilled Sausage and Veggie Skewers

Grilled sausage and veggie skewers are a perfect meal for camping, combining simplicity and flavor in a fun way. These skewers are easy to prepare, making them a great option for outdoor cooking. The smoky flavor from the grill enhances the deliciousness of both the sausage and the fresh veggies. Plus, they’re versatile; you can customize them with your favorite sausage types and a rainbow of vegetables.
This meal is not only satisfying but also offers a great way to enjoy fresh ingredients while soaking up the great outdoors. Gather your friends or family around the fire, and enjoy these tasty skewers that bring everyone together. Ready to get grilling? Let’s dive into the recipe!
Ingredients
- 1 pound of your favorite sausage (chicken, pork, or turkey)
- 1 bell pepper, cut into chunks
- 1 zucchini, sliced into rounds
- 1 red onion, cut into wedges
- 8 cherry tomatoes
- 2 tablespoons olive oil
- 1 teaspoon garlic powder
- Salt and pepper to taste
- Skewers (metal or soaked wooden ones)
Instructions
- Prepare the Skewers: If using wooden skewers, soak them in water for about 30 minutes to prevent burning. Preheat your grill to medium-high heat.
- Cut the Ingredients: Slice the sausage into bite-sized pieces and chop the bell pepper, zucchini, red onion, and cherry tomatoes into manageable sizes.
- Assemble the Skewers: Thread the sausage and veggies onto the skewers, alternating between them for a colorful presentation.
- Season: Drizzle the assembled skewers with olive oil, then sprinkle with garlic powder, salt, and pepper. Make sure everything is evenly coated.
- Grill: Place the skewers on the grill and cook for about 10-15 minutes, turning occasionally, until the sausage is cooked through and the veggies are tender.
Coconut Curry Lentil Soup
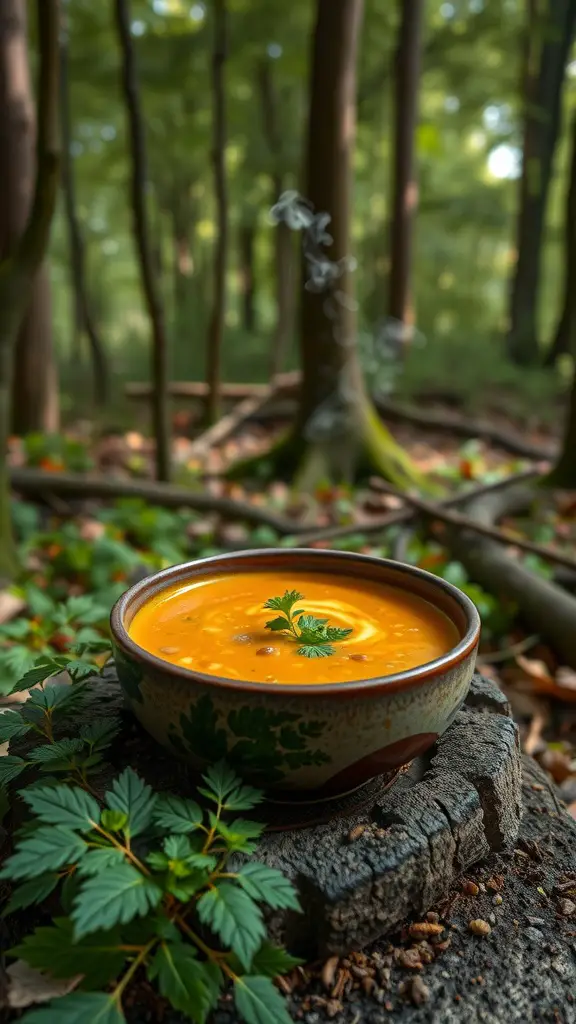
Coconut Curry Lentil Soup is a warming, hearty dish that’s perfect for any camping trip. This soup combines the creamy richness of coconut milk with the earthy flavor of lentils and a medley of spices. It’s not only delicious but also simple to prepare, making it an ideal choice for enjoying in the great outdoors. The warm spices and a hint of sweetness from the coconut create a comforting bowl that will warm you from the inside out.
With minimal prep and cooking time, you can have this tasty soup ready to enjoy around the campfire. It’s packed with protein and nutrients, ensuring you stay energized for your day of exploring. Plus, it’s easy to customize with your favorite vegetables or spices, allowing you to make it your own!
Ingredients
- 1 cup red lentils
- 1 can (14 oz) coconut milk
- 4 cups vegetable broth
- 1 onion, chopped
- 2 garlic cloves, minced
- 1 tablespoon ginger, grated
- 2 tablespoons curry powder
- 1 teaspoon turmeric
- 1 tablespoon olive oil
- Salt and pepper to taste
- Cilantro for garnish
Instructions
- Heat the olive oil in a large pot over medium heat. Add the chopped onion and sauté until translucent, about 5 minutes.
- Stir in the garlic and ginger, cooking for an additional minute until fragrant.
- Add the curry powder, turmeric, and red lentils, stirring to coat the lentils with the spice mixture.
- Pour in the coconut milk and vegetable broth, bringing the mixture to a boil. Reduce heat and let it simmer for about 20 minutes, or until the lentils are tender.
- Season with salt and pepper, then serve hot, garnished with fresh cilantro.
Spinach and Feta Stuffed Chicken Breasts

Spinach and feta stuffed chicken breasts make a delicious and healthy meal that’s perfect for camping. The combination of tender chicken, sautéed spinach, and creamy feta cheese is not just tasty but also easy to prepare. These stuffed beauties explode with flavor, making them a great option to satisfy your hunger after a day of hiking or outdoor fun. Plus, they can be prepped ahead of time, so you can focus on enjoying the great outdoors.
For a quick and simple meal, you just need to stuff the chicken breasts, sear them for a bit, and then finish cooking them on the grill or over the campfire. The juicy chicken paired with the savory filling is sure to impress everyone around the campfire. Let’s get cooking!
Ingredients
- 4 boneless, skinless chicken breasts
- 2 cups fresh spinach, chopped
- 1/2 cup feta cheese, crumbled
- 1/4 cup onion, finely chopped
- 2 cloves garlic, minced
- 1 tablespoon olive oil
- Salt and pepper to taste
- Optional: Fresh basil for garnish
Instructions
- Preheat your grill or campfire to medium heat.
- In a skillet, heat olive oil over medium heat. Sauté the chopped onion and garlic until they become fragrant and translucent.
- Add the chopped spinach to the skillet and cook until wilted. Remove from heat and mix in crumbled feta cheese. Season with salt and pepper.
- With a sharp knife, create a pocket in each chicken breast. Stuff each pocket with the spinach and feta mixture.
- Secure the openings with toothpicks if necessary. Season the outside of the chicken breasts with salt and pepper.
- Place the stuffed chicken on the grill. Cook for about 6-7 minutes on each side, or until the internal temperature reaches 165°F (75°C).
- Remove from heat, let rest for a few minutes, and garnish with fresh basil before serving.
Apple Cinnamon Oatmeal
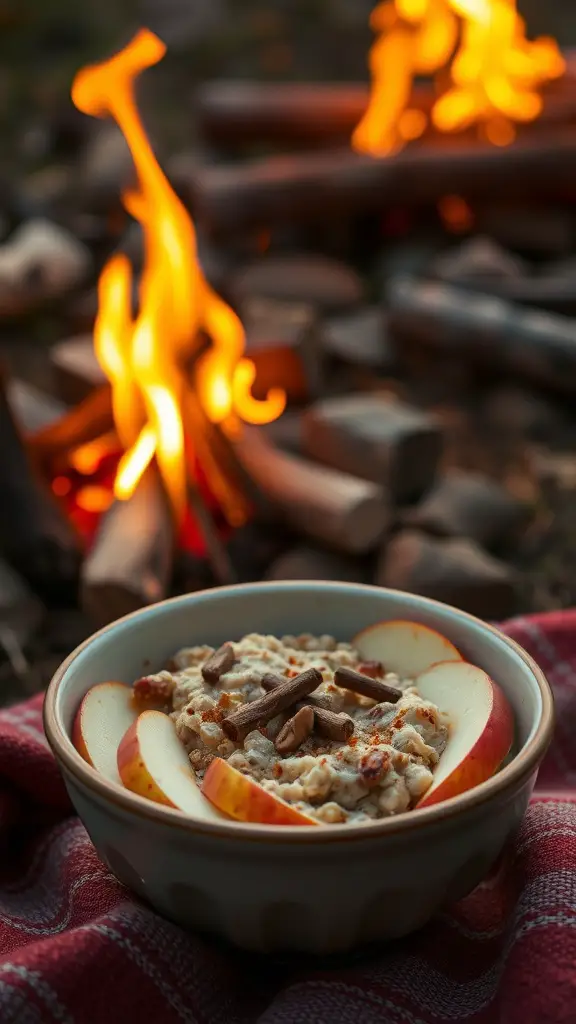
Apple Cinnamon Oatmeal is a warm, comforting dish that brings the flavors of fall right to your camping experience. It’s a delightful mix of sweet, spiced apples and creamy oats, making for a satisfying breakfast that will fuel your day of outdoor fun. This recipe is incredibly simple to prepare, which is perfect when you’re out enjoying nature and want to keep meal prep hassle-free.
The combination of tender apples, a hint of cinnamon, and hearty oats creates a deliciously cozy bowl of goodness. Plus, it’s a great way to use fresh, seasonal apples if you have them on hand. You can easily customize it by adding nuts or a splash of maple syrup for extra sweetness. Get ready for a delightful start to your day!
Ingredients
- 1 cup rolled oats
- 2 cups water or milk
- 1 apple, diced
- 1 teaspoon ground cinnamon
- 1/4 cup chopped nuts (walnuts or pecans)
- 2 tablespoons maple syrup (optional)
- Salt to taste
Instructions
- In a pot, combine the rolled oats and water (or milk) over medium heat. Bring to a boil.
- Add the diced apple, cinnamon, and a pinch of salt. Stir well.
- Reduce the heat to a simmer and cook for about 5-7 minutes, stirring occasionally, until the oats are creamy and cooked through.
- If desired, stir in the maple syrup for added sweetness and mix in the chopped nuts.
- Serve warm, garnished with extra apple slices or nuts if you like.
Maple Glazed Carrots

Maple glazed carrots are a tasty and easy addition to any camping meal. They bring a delightful sweetness that pairs perfectly with the natural flavor of the carrots. This dish is not only simple to prepare but also adds a bit of color to your plate, making it visually appealing. The glaze caramelizes beautifully when cooked, enhancing the carrots’ earthy tones with a touch of maple syrup and butter. Perfect for cooking over a campfire or on a portable stove, these carrots will brighten up your camping dinner!
Here’s how to make these delicious maple glazed carrots that will surely impress your camping mates.
Ingredients
- 1 pound baby carrots
- 1/4 cup maple syrup
- 2 tablespoons unsalted butter
- 1/2 teaspoon salt
- 1/4 teaspoon black pepper
- 1 tablespoon fresh thyme (optional)
Instructions
- Prepare the Carrots: Rinse the baby carrots under cold water and trim their tops if needed.
- Make the Glaze: In a bowl, mix together maple syrup, melted butter, salt, and pepper.
- Cook the Carrots: Place the carrots in a skillet over medium heat. Pour the maple glaze over the carrots and stir to coat.
- Simmer: Cover the skillet and let the carrots cook for about 10-15 minutes, stirring occasionally, until they are tender and the glaze thickens.
- Finish: If using, sprinkle fresh thyme over the carrots just before serving for an extra burst of flavor.
Chocolate Banana Campfire Cones

Chocolate Banana Campfire Cones are a delightful treat that combine the sweet taste of bananas with rich chocolate, making them a perfect dessert for your camping trip. These cones are simple to prepare, requiring just a few ingredients, which makes them a hit among both kids and adults. The combination of melted chocolate, gooey marshmallows, and warm banana creates a flavor explosion that’s hard to resist.
To make these cones, you simply fill waffle cones with banana slices, chocolate chips, and marshmallows, then wrap them in aluminum foil and place them over the campfire. The result is a warm and indulgent dessert that’s sure to brighten up your evening by the fire. It’s a fun, hands-on way to enjoy a sweet treat in the great outdoors!
Ingredients
- 4 waffle cones
- 2 ripe bananas, sliced
- 1 cup chocolate chips
- 1 cup mini marshmallows
- Aluminum foil
Instructions
- Preheat your campfire or grill.
- Fill each waffle cone with banana slices, chocolate chips, and mini marshmallows, layering them as you go for a delicious mix.
- Wrap each filled cone in aluminum foil, making sure it’s sealed well.
- Place the wrapped cones on the grill or near the campfire for about 5-10 minutes, turning occasionally until the chocolate and marshmallows are melted.
- Carefully unwrap and enjoy your warm, chocolatey banana treat!
Chickpea Salad with Feta
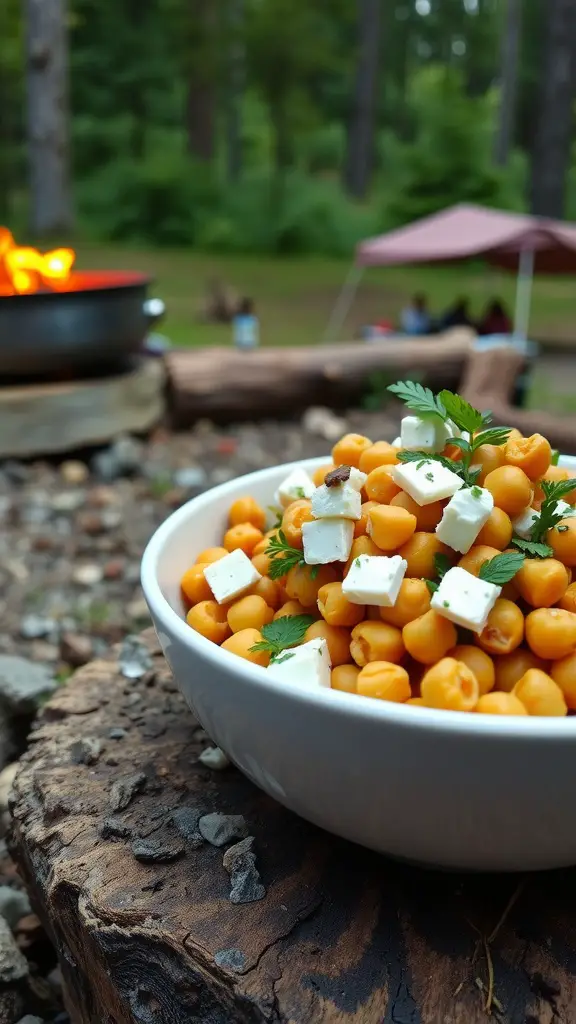
Chickpea salad with feta is a delightful and refreshing dish perfect for any outdoor meal. Its combination of creamy feta cheese and hearty chickpeas creates a satisfying texture that will surely please your taste buds. Not only is this salad tasty, but it’s also incredibly simple to make, making it an ideal choice for camping. Just toss a few ingredients together, and you’re ready to enjoy a healthy meal under the stars.
This salad packs a punch with bright flavors and a hint of tanginess from the feta, while the chickpeas provide plenty of protein to keep you energized. You can easily customize it by adding your favorite veggies or herbs, making it a versatile option for any campfire gathering. So, grab your ingredients and make this easy chickpea salad for your next outdoor feast!
Ingredients
- 1 can chickpeas, drained and rinsed
- 1 cup diced cucumbers
- 1 cup cherry tomatoes, halved
- 1/2 cup crumbled feta cheese
- 1/4 cup red onion, finely chopped
- 2 tablespoons olive oil
- 1 tablespoon lemon juice
- Salt and pepper to taste
- Fresh parsley or cilantro for garnish
Instructions
- In a large bowl, combine the chickpeas, cucumbers, cherry tomatoes, red onion, and feta cheese.
- In a small bowl, whisk together the olive oil, lemon juice, salt, and pepper.
- Pour the dressing over the salad and gently toss to combine.
- Top with fresh parsley or cilantro for garnish.
- Serve immediately or let it chill in the cooler for some time to enhance the flavors.
S’mores with a Twist

S’mores are a classic camping treat that everyone loves, but why not shake things up a bit? This twist on the traditional recipe introduces delicious fillings that take the experience to a whole new level. Whether you’re enjoying a campfire or just hanging out with friends, these updated s’mores are simple to make and sure to impress. The combination of rich chocolate, gooey caramel, and crunchy graham crackers creates a delightful mix of textures and flavors that will satisfy any sweet tooth.
Making these s’mores is a breeze! All you need are a few ingredients, and you can customize them to fit your taste. Whether you prefer a little extra chocolate or a hint of sea salt, this recipe is versatile and fun. Get ready to create a new favorite camping treat that’ll have everyone smiling!
Ingredients
- 4 graham crackers
- 2 large marshmallows
- 2 squares of milk chocolate
- 2 tablespoons caramel sauce
- 1 tablespoon sea salt (optional)
Instructions
- Prepare the S’mores: Break the graham crackers in half to create eight squares. Place a square on a plate or camping dish.
- Toast the Marshmallows: Roast the marshmallows over a campfire until golden brown and gooey. Adjust the toasting time based on your preference for doneness.
- Assemble the S’mores: Place a toasted marshmallow on the graham cracker, followed by a square of chocolate and a drizzle of caramel sauce.
- Add Another Layer: If you want an extra kick, sprinkle a pinch of sea salt over the top before placing another graham cracker square on top to complete the s’more.
- Enjoy: Press down gently and enjoy your deliciously twisted s’more!
Trail Mix for On-the-Go Snacking

Trail mix is the perfect snack for any outdoor enthusiast. It’s a simple blend of tasty ingredients that not only provides energy but also satisfies your cravings. You can customize it to your liking, mixing nuts, dried fruits, candies, and seeds. The sweet and salty combination is delightful, making it easy to munch on during hikes or camping trips. Plus, making your own trail mix means you can skip the preservatives found in store-bought versions.
Whether you’re exploring new trails or relaxing by the campfire, this snack is a must-have. Prep is quick and easy, so you can whip it up in no time. Grab your favorite ingredients, and let’s get started on creating your personalized trail mix!
Ingredients
- 1 cup mixed nuts (almonds, walnuts, cashews)
- 1 cup dried fruits (raisins, cranberries, apricots)
- 1/2 cup chocolate chips or M&Ms
- 1/4 cup sunflower seeds
- 1/4 cup pumpkin seeds
- 1/2 teaspoon cinnamon (optional)
Instructions
- In a large bowl, combine all the ingredients. Adjust the quantities based on your preference for sweetness or salty flavors.
- If using cinnamon, sprinkle it over the mixture and toss to combine evenly.
- Store your trail mix in an airtight container or zip-top bags for easy transport.
- Enjoy your homemade trail mix while hiking, camping, or as a quick snack during the day!


