You know what’s better than using a sketchy highway rest stop bathroom? Having your own personal bathroom that travels with you everywhere! RV bathrooms might be small, but with the right upgrades, they can feel just as comfortable as your bathroom at home. The space-saving modifications and smart accessories featured in this video can transform your cramped RV bathroom into a functional oasis.
Whether you’re a full-time RVer or a weekend warrior, these twelve bathroom upgrades will help you save water, maximize storage, and actually enjoy using your tiny bathroom. Most RV manufacturers install cheap plastic fixtures to save money, but you don’t have to settle for that.
With some simple swaps and clever accessories, you can create a bathroom experience that rivals any residential setup. These modifications range from easy DIY projects to simple product swaps that anyone can do. You’ll learn how to reduce water consumption when boondocking, keep your bathroom organized during travel days, and eliminate those annoying plastic fixtures. Let’s dive into the twelve best RV bathroom upgrades that’ll make your mobile bathroom the envy of every campground!
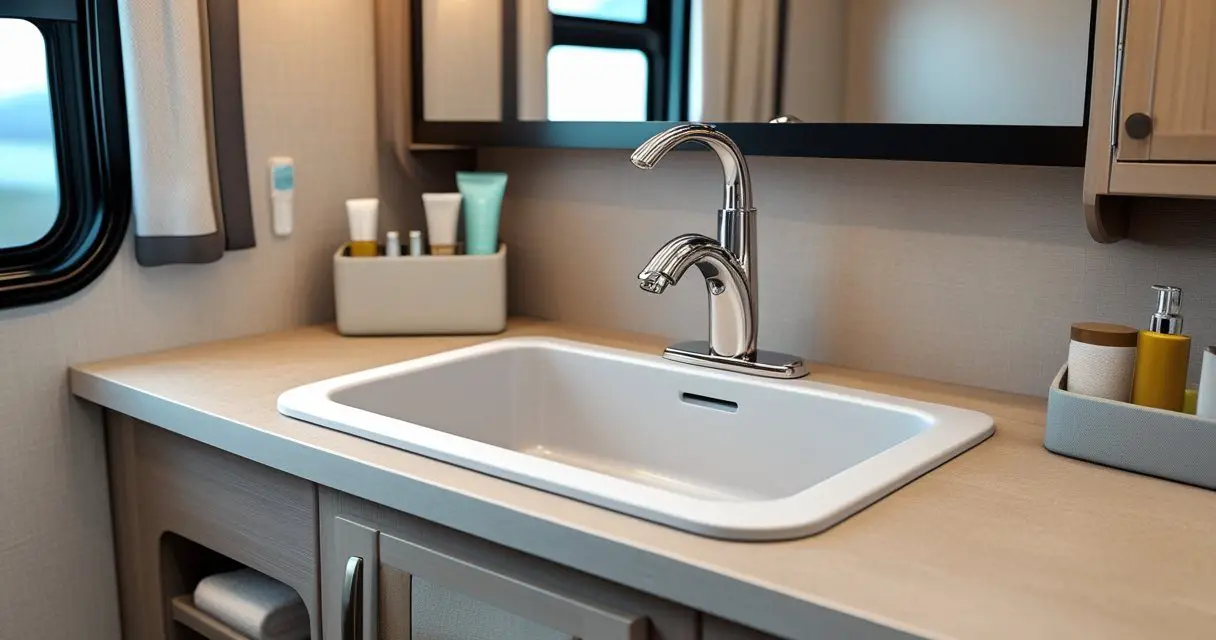
1. Upgrade That Plastic Faucet to a Real One
You’ve probably noticed that RV manufacturers love plastic fixtures – and not because they save weight, despite what the salespeople tell you. They’re just cheap! Swapping out your plastic bathroom faucet for a residential metal one is one of the easiest upgrades you can make.
The beauty of residential faucets is that they come with aerators on the bottom. This means you can control water flow much better than those flimsy plastic RV faucets. You can even swap the aerator for a water-saving version that uses less than half the water.
Here’s the breakdown of water savings you can achieve:
| Aerator Type | Water Flow | Water Savings |
|---|---|---|
| Standard RV Faucet | 2.2 GPM | Baseline |
| Stock Residential | 1.2 GPM | 45% savings |
| Water-Saving Aerator | 0.5 GPM | 77% savings |
Would you like to save this article?
You’re basically getting two upgrades in one – a better-looking faucet AND the ability to save water when you’re off-grid. According to the EPA’s WaterSense program, bathroom faucets account for more than 15% of indoor household water use, and reducing flow to 1.5 GPM or less can save the average family 700 gallons per year.
Here’s the thing: You’ll wonder why you ever put up with that wobbly plastic faucet in the first place. It’s like upgrading from a tricycle to a sports car – there’s just no comparison.
2. Install a Real Toilet (Yes, It Makes a Difference)
Nothing screams “cheap RV” quite like an all-plastic toilet. If you’re serious about RV life, one of the first things you should swap out is that plastic throne. Upgrading to a porcelain bowl toilet with a soft-close seat will make your bathroom feel 1000% more civilized.
The “full-time RV toilet” still uses the foot pedal flush system you’re used to, but with a porcelain bowl and wooden enamel seat, it feels like a real toilet. RV toilets are actually easier to replace than residential home toilets because they don’t have as much water storage or a P-trap built into them.
According to RV industry statistics, toilet upgrades are among the top five most common RV modifications, with over 60% of full-time RVers replacing their stock toilet within the first year. The improved comfort and durability make this upgrade worth every penny.
Let’s be real: You’re going to spend a lot of quality time in that bathroom. You might as well be comfortable! Plus, your guests will actually feel like they’re using a real toilet instead of sitting on a plastic kiddie potty.
3. Add Water Shut-Off Valves (For When Things Go Wrong)
Most RVs don’t come with nearly enough shut-off valves, which is crazy considering how many water lines are running through your rig. Adding angle stops or water shut-off valves near your fixtures is a game-changer.
With a shut-off valve right at the toilet, you can swap out fixtures or make repairs without shutting off water to the entire RV. If you’re living in your RV full-time, this is essential. Nobody wants to turn off all the water just to fix a leaky toilet.
The National RV Dealers Association reports that water damage is the number one cause of RV insurance claims, accounting for over 40% of all claims. Having accessible shut-off valves can help you respond quickly to leaks and prevent catastrophic damage.
Think about it: When your toilet decides to spring a leak at 2 AM, you’ll be thanking yourself for having that shut-off valve. Otherwise, you’re stumbling around in the dark trying to shut off the main water supply while water sprays everywhere like a comedy sketch.
4. Get a High-Quality Shower Head
The stock RV shower head is basically a garden hose with holes in it. Upgrading to a quality shower head like an Oxygenics model will transform your shower experience. These shower heads have selector switches so you can choose different spray patterns.
Better shower heads also provide improved water pressure, which is crucial when you’re working with an RV’s water system. The difference between a cheap RV shower head and a quality one is like comparing a water fountain to a waterfall.
According to the EPA, replacing old shower heads with WaterSense labeled models can save the average family 2,900 gallons of water per year. For RVers who are often off-grid, these savings are even more critical.
| Shower Head Type | Pressure Quality | Price Range |
|---|---|---|
| Stock RV | Weak & Inconsistent | Free (included) |
| Basic Upgrade | Moderate | $20-40 |
| Oxygenics/Premium | Strong & Adjustable | $40-70 |
You’ll actually look forward to showering instead of dreading that sad trickle of water. It’s amazing what a little water pressure can do for your mood!
5. Install a Thermostatic Shower Valve (The Real Game-Changer)
Here’s where things get exciting. A thermostatic shower valve isn’t just a fancy upgrade – it’s the modification you didn’t know you desperately needed. This valve has two controls: temperature on the right and flow on the left.
The magic happens inside the valve where thermostatic technology adjusts the hot and cold water mixture based on the actual temperature. This means no more blasts of cold water when you turn the shower back on after soaping up! The valve automatically compensates for the cooling water in the lines.
Here’s what makes this valve special:
- Temperature control: Set it once and forget it
- Flow control: Adjust water flow without changing temperature
- Thermostatic mixing: Maintains consistent temperature automatically
- Water saving: Dial down the flow to conserve water while boondocking
The flow control is especially brilliant for off-grid camping. You can reduce the water flow to a trickle while staying soaped up, then increase it for rinsing. According to boondocking experts, this modification alone can reduce shower water usage by 40-60%.
You’ll feel like a water-bending wizard controlling the perfect temperature and flow with just two simple knobs. Plus, the all-metal construction means it’ll outlast your RV.
6. Consider a Shower Miser Valve (If You’re Serious About Boondocking)
The Shower Miser is a clever little bypass valve that redirects cold water back into your freshwater tank while you’re waiting for hot water to reach the shower. This is specifically for off-grid situations when you’re running on tank water.
When you turn on the shower, cold water normally goes down the drain while you wait for hot water. With a Shower Miser, that cold water gets recycled back into your freshwater tank instead. It’s like catching rainwater, but for your shower!
Here’s the catch: You need to run an additional water line from your shower to your freshwater tank. If your RV didn’t come with this installed, it can be challenging depending on your RV’s layout and accessible channels.
Studies on RV water conservation show that the average RVer wastes 1-2 gallons of water per shower just waiting for hot water to arrive. Over a week of boondocking, that’s 14-28 gallons of precious water down the drain!
It’s like having a recycling bin for your shower water – environmentally friendly and practical. However, if your water heater is already close to your shower, you might not see enough benefit to justify the installation hassle.
7. Upgrade Your Bathroom Fan
That tiny white fan in your RV bathroom is basically decorative. It moves about as much air as a butterfly’s wings. Upgrading to a proper ventilation fan will actually remove moisture from your bathroom after showers.
A quality fan prevents mold, mildew, and that musty RV bathroom smell. Good ventilation is crucial in such a small space, especially if you’re full-timing. The featured upgrade was easy because it didn’t require messing with the roof seal – just a simple swap.
According to the RV Industry Association, inadequate bathroom ventilation is a leading cause of interior moisture damage in RVs. Proper ventilation can extend the life of your RV’s interior by years.
| Fan Type | Air Movement (CFM) | Moisture Removal |
|---|---|---|
| Stock RV Fan | 20-40 CFM | Minimal |
| Basic Upgrade | 60-90 CFM | Moderate |
| MaxxAir/Premium | 100-150 CFM | Excellent |
You’ll actually notice the difference immediately. No more foggy mirrors for 30 minutes after your shower or water dripping from the ceiling!
8. Get a Compact Trash Can with Toilet Brush Storage
Every bathroom needs a trash can and a toilet brush, but RV bathrooms don’t have space for both. Enter the genius combo unit that has a trash can on top and hidden toilet brush storage inside.
This accessory is simple but incredibly effective for maximizing your limited bathroom space. You won’t have that toilet brush awkwardly sitting in the corner anymore, and you’ll have a proper trash can instead of hanging a grocery bag somewhere.
The average RV bathroom is only 30-40 square feet, compared to the typical residential bathroom’s 40-100 square feet. Every inch counts, and dual-purpose accessories are essential for making small spaces functional.
It’s like getting a Swiss Army knife for your bathroom – two essential tools in one compact package. Plus, keeping the toilet brush hidden means your bathroom looks cleaner and more organized.
9. Add Cabinet Organizing Bins
Ever hit the brakes hard and heard a crash from the bathroom? That’s all your medicine cabinet contents hitting the floor. Simple dollar-store bins can solve this problem completely.
Small organizing bins keep all your bathroom items contained during travel. Medicine, toiletries, first aid supplies – everything stays put no matter how bumpy the road gets.
Organization experts recommend containerizing items in RVs to prevent shifting during travel. According to RV travel surveys, over 70% of RVers report items falling or breaking during transit before implementing proper storage solutions.
You’ll save money on replacing broken bottles and you’ll save your sanity from constantly picking things up off the bathroom floor. Plus, everything stays organized so you can actually find what you need.
10. Install Wire Shelving with Command Hooks
RV cabinets are tall but shallow, wasting tons of vertical space. Adding wire shelves held up by Command hooks doubles your storage capacity without permanent modifications.
These shelves are surprisingly sturdy despite not being permanently mounted. They’re changeable if you want to adjust the configuration, and they come down easily if you ever need to remove them.
Research on small-space living shows that utilizing vertical space can increase storage capacity by 50-100% in compact areas. For RVers, this translates to more room for supplies and less clutter.
| Storage Solution | Installation | Removability | Added Space |
|---|---|---|---|
| Stock Cabinet | N/A | N/A | Baseline |
| Wire Shelves | 15 minutes | Easy (Command hooks) | +75% |
| Permanent Shelves | 1-2 hours | Difficult | +100% |
You’ll wonder how you ever lived without these extra shelves. It’s like discovering a secret compartment in your RV that was there all along!
11. Mount Your Toothbrush Holders to the Wall
Tipping toothbrush holders are an RV life hazard. One sharp turn and your toothbrushes are rolling around the bathroom floor. Wall-mounted toothbrush holders solve this problem permanently.
You can make your own or find similar ones on Amazon. The key is having them securely mounted so they never fall over, no matter how rough the road gets.
Your toothbrushes will stay clean and sanitary instead of taking a tour of your bathroom floor every time you drive somewhere. It’s such a simple fix for such an annoying problem!
12. Replace Glass Shower Doors with a Curtain Rod
Glass shower doors in RVs are a ticking time bomb. They’re heavy, they leak, and they often shatter during travel. Replacing them with a curved shower curtain rod is lighter, easier to clean, and much safer.
Shower curtains are incredibly easy to refresh – when they get dingy, just buy a new one. Cleaning those glass door tracks is a nightmare, and many RVers report leaks from day one with their glass shower enclosures.
According to RV manufacturer data, glass shower doors add 25-40 pounds of weight compared to curtain systems. For RVers watching their weight limits, this is significant. Plus, the National RV Inspectors Association reports that glass shower door failures are among the top 10 most common RV issues.
You’ll offset weight for other upgrades (like those solar panels you’ve been eyeing), and you’ll never have to deal with those annoying door tracks again. When it’s time to clean, just toss the old curtain and hang up a fresh one!
Final Thoughts
These twelve RV bathroom modifications prove that you don’t need a mansion-sized bathroom to have a comfortable experience. With smart upgrades and clever accessories, your tiny RV bathroom can be functional, water-efficient, and actually enjoyable to use.
The beauty of these modifications is that most are simple DIY projects that don’t require professional installation. From water-saving faucets to thermostatic shower valves, each upgrade makes your RV bathroom work harder for you while using less water.
Whether you’re weekend camping or living the full-time RV lifestyle, these bathroom improvements will make every trip more comfortable. So stop settling for cheap plastic fixtures and sketchy shower doors – upgrade your bathroom and enjoy the freedom of having your own personal facilities wherever you roam!


