Camping with a crowd? No worries! This guide offers a collection of quick and easy meal ideas that are perfect for feeding a group without the fuss. From hearty one-pot dishes to simple snacks, we’ve got recipes that everyone will love while keeping your outdoor cooking stress-free.
Would you like to save this article?
Skewered Chicken Fajitas
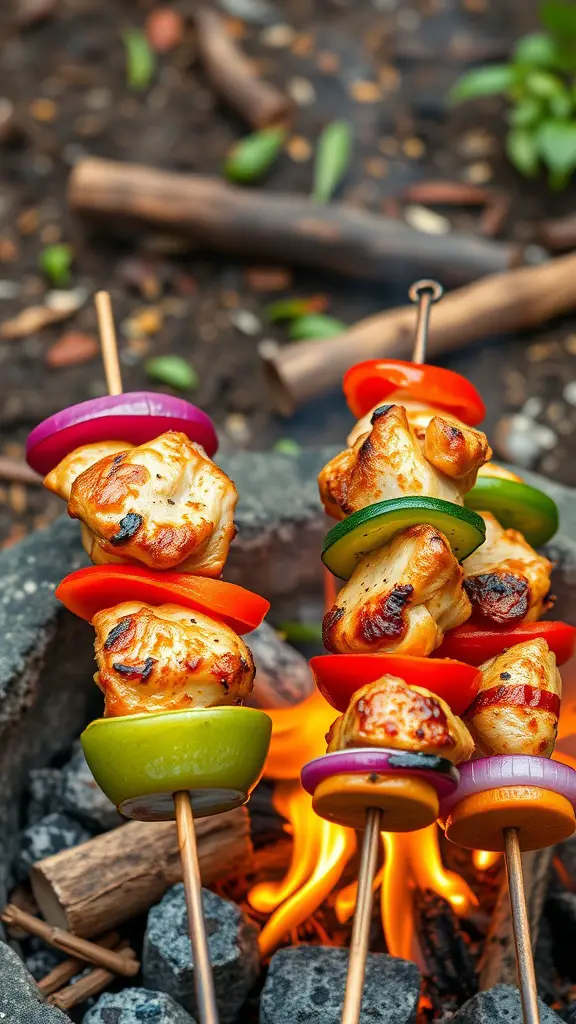
Skewered chicken fajitas bring all the flavors of a classic dish to your camping experience. They are quick to prepare, and grilling them over an open flame adds a smoky touch that enhances the taste. Packed with colorful veggies and seasoned chicken, these skewers are sure to please a crowd.
Easy to make and fun to eat, skewered chicken fajitas make for a perfect camping meal. Just assemble your ingredients, and let everyone customize their skewers with their favorite toppings. This dish is not only satisfying but also a great way to enjoy the great outdoors!
Ingredients
- 1 pound chicken breast, cut into bite-sized pieces
- 1 bell pepper, sliced (any color)
- 1 onion, cut into chunks
- 1 tablespoon olive oil
- 2 teaspoons fajita seasoning
- Salt and pepper, to taste
- Wooden or metal skewers
Instructions
- Prepare the Marinade: In a bowl, mix olive oil, fajita seasoning, salt, and pepper. Add the chicken pieces and marinate for at least 30 minutes.
- Assemble the Skewers: Thread the marinated chicken, bell pepper, and onion onto the skewers, alternating between each ingredient.
- Grill the Skewers: Preheat your grill or campfire. Cook the skewers for about 10-15 minutes, turning occasionally, until the chicken is cooked through and slightly charred.
- Serve: Remove from the grill and enjoy with your favorite toppings like salsa, guacamole, or tortillas.
Savory Breakfast Burritos

Start your camping mornings right with these quick and easy breakfast burritos. Packed with fluffy scrambled eggs, melty cheese, and tasty toppings, they offer a warm and satisfying way to fuel your day. The combination of flavors makes each bite delightful, ensuring everyone in your group will be ready for whatever adventure lies ahead.
What makes these burritos great for camping is their simplicity. You can prepare the filling ahead of time, or whip it up over the campfire. Just wrap everything in a tortilla, and you’re set. It’s a no-fuss meal that brings everyone together around the campfire!
Ingredients
- 8 large eggs
- 1 cup shredded cheese (cheddar or your choice)
- 1/2 cup diced tomatoes
- 1/4 cup diced bell peppers
- Salt and pepper to taste
- 4 large tortillas
- 1/4 cup salsa (for serving)
Instructions
- Scramble the Eggs: In a skillet over medium heat, crack the eggs and whisk them together. Season with salt and pepper, and cook until fully scrambled and fluffy.
- Prepare the Filling: Once the eggs are cooked, remove them from heat and stir in the shredded cheese, diced tomatoes, and bell peppers until combined.
- Assemble the Burritos: Lay a tortilla flat and spoon the egg mixture onto the center. Fold in the sides and roll it up tightly.
- Warm the Burritos: If desired, you can toast the burritos over the campfire or on a skillet for a few minutes until golden brown.
- Serve: Enjoy the burritos warm, topped with salsa if you like!
Pasta Salad with Grilled Veggies
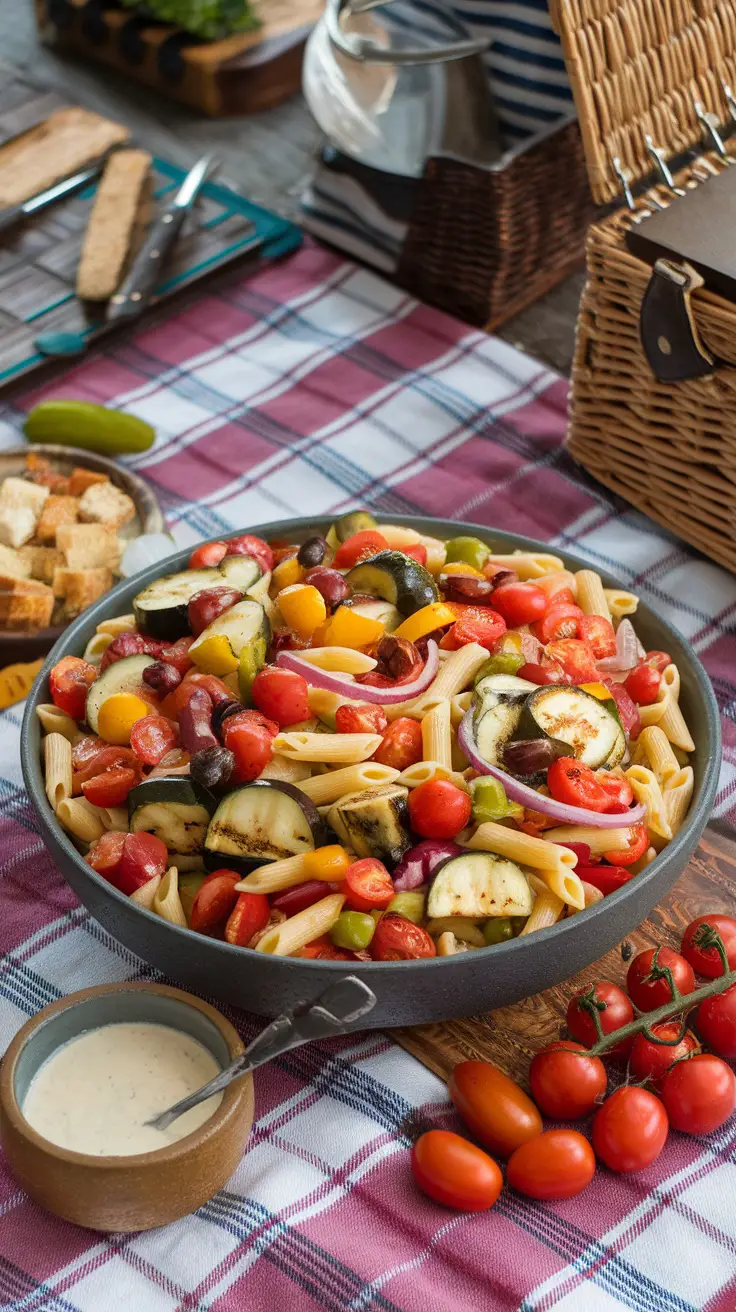
Pasta salad with grilled veggies is a perfect camping meal that combines vibrant flavors and easy preparation. This dish is light yet filling, making it an ideal choice for group outings.
The combination of grilled vegetables, fresh herbs, and pasta creates a refreshing taste that everyone will enjoy. Plus, it’s super simple to make, requiring minimal cooking time. Just prepare the ingredients, grill the veggies, and toss everything together!
Ingredients
- 1 pound of penne pasta
- 2 cups cherry tomatoes, halved
- 1 cup black olives, sliced
- 1 cup mozzarella cheese, cubed
- 1 bell pepper, diced
- 1 zucchini, sliced
- 1/4 cup olive oil
- 2 tablespoons balsamic vinegar
- 1 teaspoon garlic powder
- Salt and pepper to taste
- Fresh basil for garnish
Instructions
- Cook the Pasta: In a large pot of salted boiling water, cook the penne pasta according to package instructions. Drain and let cool.
- Grill the Veggies: Preheat a grill or grill pan. Toss the bell pepper and zucchini with a bit of olive oil, salt, and pepper. Grill until tender and slightly charred, about 5-7 minutes.
- Combine Ingredients: In a large bowl, combine the cooked pasta, grilled veggies, cherry tomatoes, olives, and mozzarella cheese.
- Make the Dressing: In a small bowl, whisk together the olive oil, balsamic vinegar, garlic powder, salt, and pepper. Pour over the pasta salad and toss to combine.
- Serve: Garnish with fresh basil and serve chilled or at room temperature.
Classic Campfire Nachos
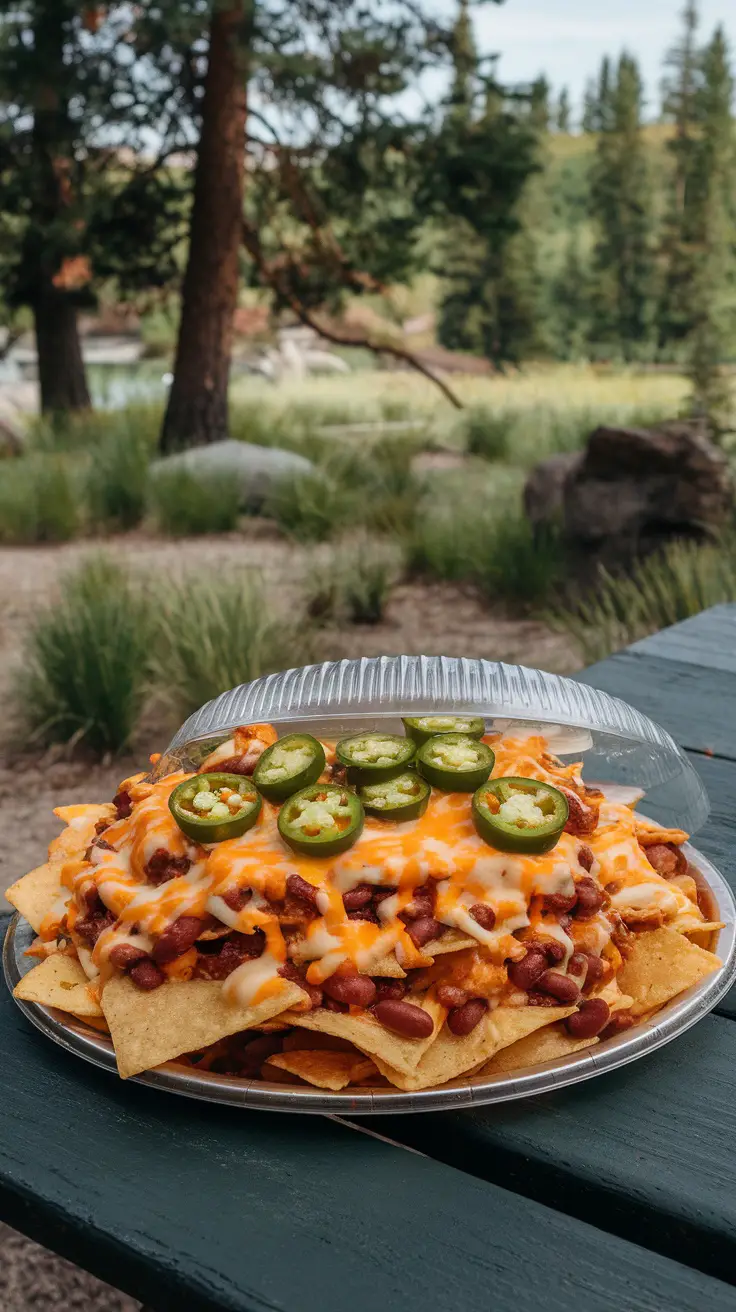
Campfire nachos are the ultimate crowd-pleaser for your outdoor gatherings. With layers of crispy tortilla chips, melted cheese, and your favorite toppings, this dish is both easy to prepare and deliciously satisfying. Whether you’re lounging by the fire or gathered around the picnic table, these nachos bring a comforting taste that everyone will love.
Making campfire nachos is a breeze. Simply layer the ingredients in a cast-iron skillet or on a piece of aluminum foil, and let the campfire do the rest! It’s a quick meal that requires minimal effort, making it perfect for camping trips or RV adventures.
Ingredients
- 1 bag of tortilla chips
- 2 cups shredded cheese (cheddar or your choice)
- 1 can black beans, drained and rinsed
- 1/2 cup diced tomatoes
- 1/4 cup sliced jalapeños
- 1/4 cup chopped green onions
- 1/4 cup sour cream (optional)
- 1/4 cup salsa (optional)
Instructions
- Prepare the Base: In a cast-iron skillet or on a large piece of aluminum foil, spread a layer of tortilla chips evenly.
- Add the Cheese: Sprinkle shredded cheese generously over the chips, making sure to cover them well.
- Layer the Toppings: Add black beans, diced tomatoes, and sliced jalapeños on top of the cheese.
- Cook Over the Fire: Place the skillet over the campfire or wrap the foil tightly and set it on hot coals. Cook for about 10-15 minutes, or until the cheese is melted and bubbly.
- Serve and Enjoy: Once done, remove from the fire and top with chopped green onions, sour cream, and salsa, if desired. Dig in with friends and family!
One-Pot Chili with Cornbread Topping
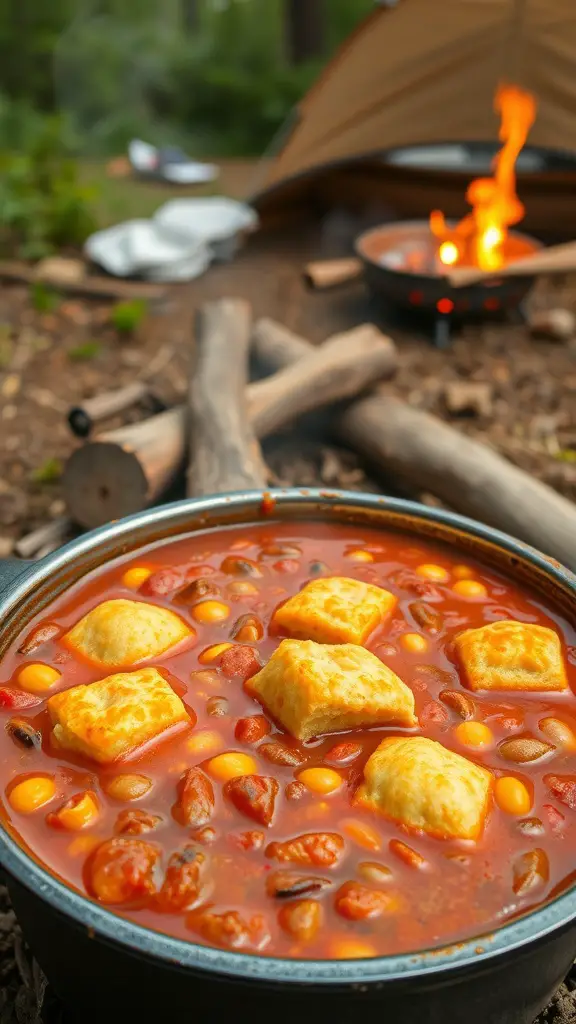
This One-Pot Chili with Cornbread Topping is the perfect meal for camping with a crowd. It’s hearty, full of flavor, and incredibly easy to whip up over a campfire or on your RV stove. The combination of spicy chili and sweet cornbread creates a satisfying dish that warms you up after a day of outdoor fun.
The recipe is straightforward and requires minimal cleanup, making it a favorite among campers. Just one pot means less fuss and more time to relax with friends. You can customize the ingredients to suit your tastes, whether you prefer it extra spicy or loaded with veggies. Enjoy this delicious meal under the stars!
Ingredients
- 1 lb ground beef or turkey
- 1 can kidney beans, drained
- 1 can black beans, drained
- 1 can corn, drained
- 2 cans diced tomatoes
- 1 packet chili seasoning
- 1 cup water
- 1 box cornbread mix
- 1 egg (for cornbread)
- 1/3 cup milk (for cornbread)
Instructions
- Cook the Meat: In a large pot over medium heat, brown the ground beef or turkey until fully cooked. Drain any excess fat.
- Add Ingredients: Stir in the kidney beans, black beans, corn, diced tomatoes, chili seasoning, and water. Bring to a simmer and let it cook for about 15 minutes.
- Prepare Cornbread: In a separate bowl, mix the cornbread mix, egg, and milk according to package instructions.
- Add Cornbread Topping: Pour the cornbread batter over the chili in the pot, spreading evenly. Cover and cook for another 20 minutes, or until the cornbread is cooked through.
- Serve: Let cool slightly before serving. Enjoy with friends around the campfire!
Vegetable Foil Packets
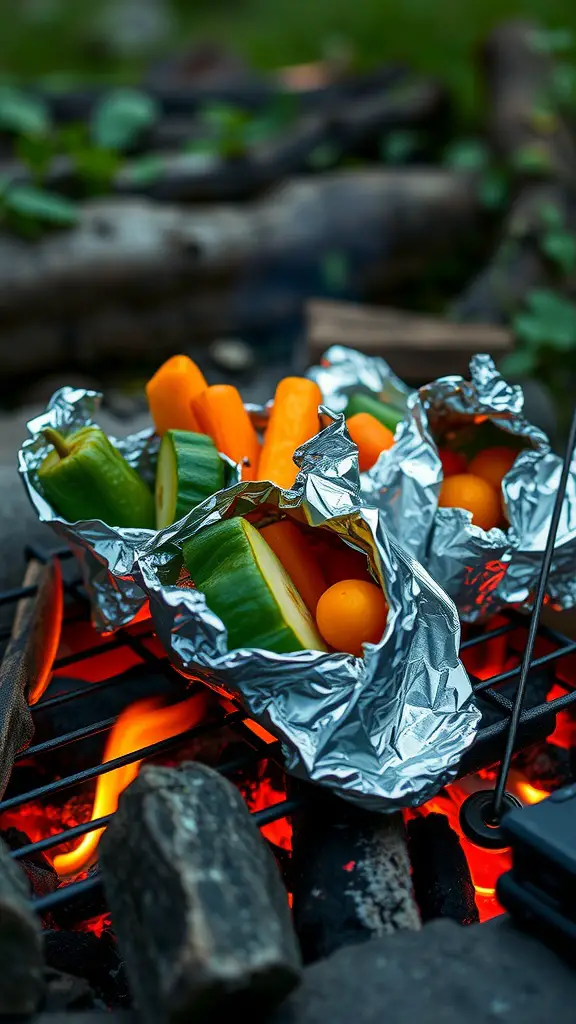
Vegetable foil packets are a simple and delicious camping meal that everyone will love. Packed with vibrant vegetables, these packets are easy to prepare and cook over a campfire, making them perfect for RV trips or family outings. The flavors meld beautifully as they steam in their own juices, offering a tasty and nutritious side or main dish for a crowd.
These packets can be customized with your favorite veggies and seasonings, allowing for quick and easy meals that suit everyone’s tastes. Plus, cleanup is a breeze—just toss the foil when you’re done! Here’s how to make your own vegetable foil packets.
Ingredients
- 2 zucchinis, sliced
- 2 carrots, sliced
- 1 red bell pepper, chopped
- 1 cup cherry tomatoes
- 2 tablespoons olive oil
- 1 teaspoon garlic powder
- Salt and pepper, to taste
- Aluminum foil
Instructions
- Prepare the Foil: Cut a large piece of aluminum foil, enough to hold all the vegetables. Make sure it’s large enough to fold over and seal.
- Mix the Veggies: In a bowl, combine all the chopped vegetables. Drizzle with olive oil and sprinkle with garlic powder, salt, and pepper. Toss to coat.
- Add to Foil: Place the vegetable mixture in the center of the foil. Fold the sides over to enclose the vegetables, creating a sealed packet.
- Cook: Place the foil packet over a campfire grill grate or on hot coals. Cook for about 15-20 minutes, turning occasionally until the veggies are tender.
- Serve: Open the foil carefully (steam will escape) and enjoy your flavorful vegetable medley!
Easy S’mores Dip
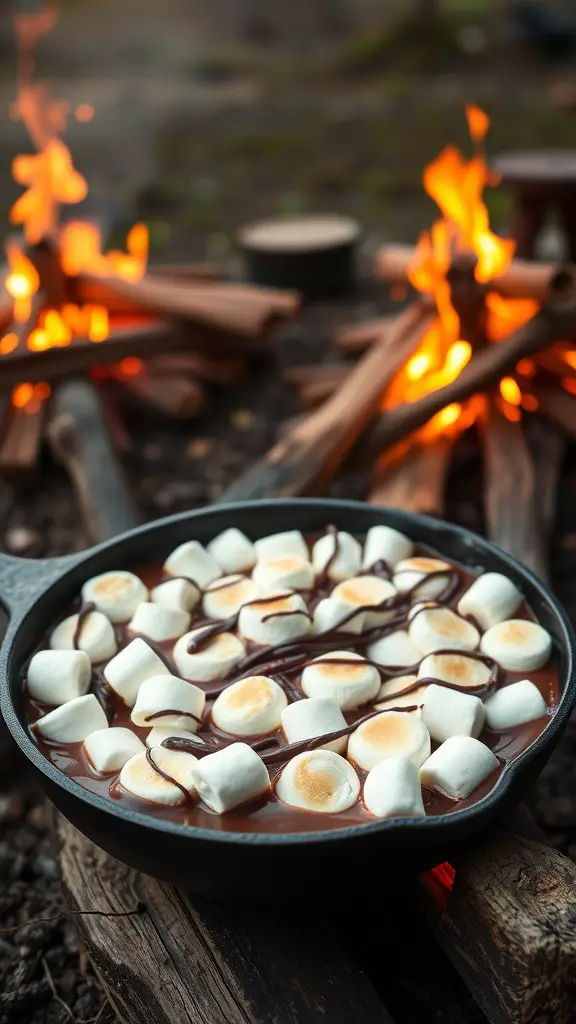
Picture this: gooey chocolate, toasted marshmallows, and a hint of graham cracker goodness all in one delicious dip. Easy S’mores Dip is a fun twist on the classic campfire treat, bringing that familiar campfire vibe straight to your table. This simple recipe is perfect for gatherings, making it ideal for camping trips or RV adventures with friends and family.
Not only is it quick to whip up, but it’s also a crowd-pleaser. Just gather around the fire, dip your favorite snacks, and enjoy the warm, melted flavors. Whether you’re using graham crackers, fruit, or cookies, the options are endless!
Ingredients
- 1 cup semi-sweet chocolate chips
- 1 cup mini marshmallows
- 1/2 cup heavy cream
- 1/4 cup crushed graham crackers
- 1/4 teaspoon vanilla extract
Instructions
- Preheat your campfire or grill. In a cast-iron skillet, combine the chocolate chips and heavy cream over medium heat. Stir until the chocolate is melted and smooth.
- Remove from heat and stir in the vanilla extract. Top with mini marshmallows and sprinkle crushed graham crackers on top.
- Place the skillet back over the fire or grill until the marshmallows are golden brown, about 3-5 minutes. Watch closely!
- Serve immediately with graham crackers, fruits, or cookies for dipping.
Campfire Quesadillas
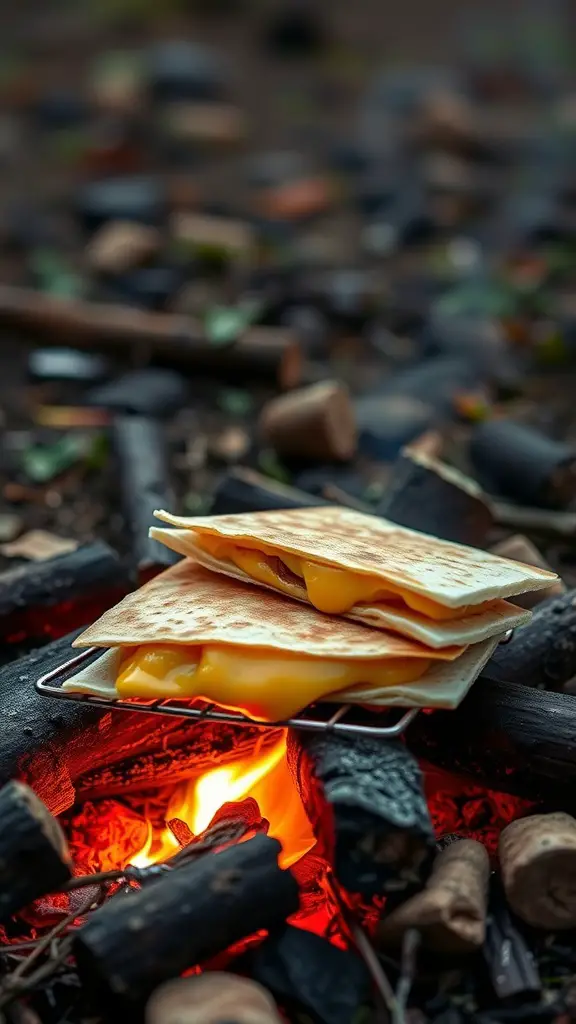
Campfire quesadillas are a delightful and easy meal perfect for a crowd during your camping trip. With gooey melted cheese and your choice of fillings tucked between crispy tortillas, they offer a satisfying taste that everyone will enjoy. This dish is not only quick to prepare but also gives you the chance to get creative with ingredients, making it a hit for both kids and adults.
Cooking quesadillas over a campfire is simple and fun. Just gather around the fire, and with minimal prep, you can whip up delicious quesadillas in no time. They are great for sharing and can easily be customized to cater to everyone’s tastes!
Ingredients
- 4 large flour tortillas
- 2 cups shredded cheese (cheddar, mozzarella, or your choice)
- 1 cup cooked chicken, beef, or veggies (optional)
- 1/2 cup salsa
- Cooking spray or butter for greasing
Instructions
- Prepare the Campfire: Start your campfire and let it burn down until you have hot coals for cooking. You can use a grill rack over the coals for better cooking.
- Assemble the Quesadillas: On one half of a tortilla, sprinkle a generous amount of cheese. If using, add your cooked meat or veggies, followed by a spoonful of salsa. Fold the tortilla in half.
- Cook: Spray the grill rack with cooking spray or lightly butter it. Place the folded quesadilla on the rack, cooking for about 3-5 minutes on each side, or until the cheese is melted and the tortilla is golden brown.
- Serve: Remove from the heat, let cool slightly, and cut into wedges. Enjoy with extra salsa or your favorite dipping sauce!
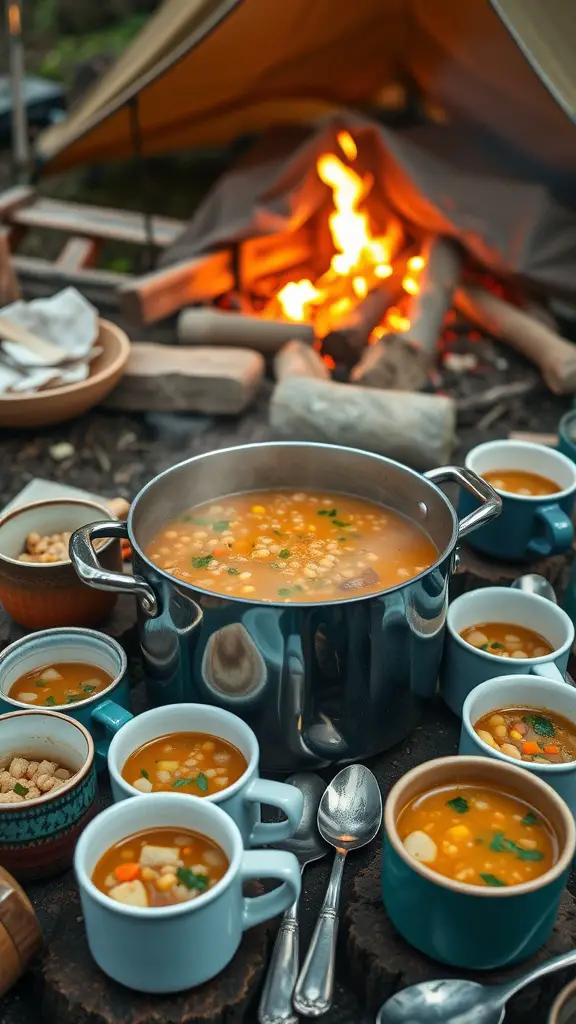
Canned Soup and Bread Rolls
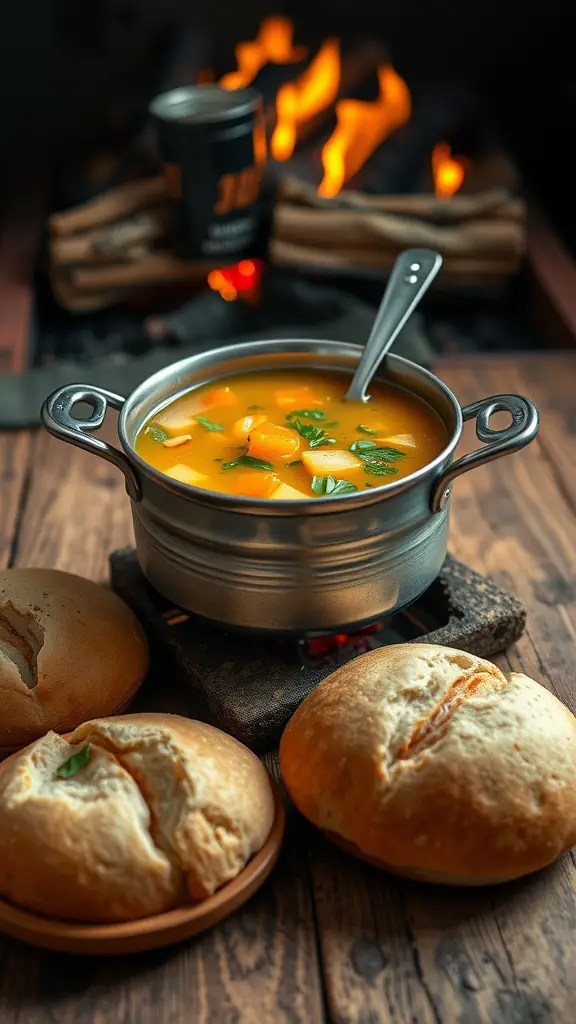
Canned soup paired with fresh bread rolls is a quick and easy meal perfect for camping. It’s warm, comforting, and the flavors meld beautifully. This meal is not only simple to prepare but also requires minimal cleanup, making it an ideal option for a crowd.
Whether you’re enjoying a chilly evening by the campfire or need something hearty after a long day of hiking, this dish delivers both satisfaction and simplicity. You can customize the soup with your favorite ingredients, and the rolls add a delightful crunch that complements the dish.
Ingredients
- 2 cans of your favorite soup (vegetable, chicken noodle, or tomato)
- 4 cups water (if needed)
- 1 tablespoon olive oil
- 1 teaspoon garlic powder
- Salt and pepper to taste
- 1 package of pre-made bread roll dough
- 1 tablespoon dried herbs (like thyme or oregano)
Instructions
- Heat the Soup: In a pot over the campfire, combine the canned soup with water if necessary. Stir in olive oil, garlic powder, salt, and pepper. Heat until warmed through, stirring occasionally.
- Bake the Rolls: Prepare the bread roll dough according to package instructions. If using a Dutch oven, place the prepared rolls in the oven over the campfire. Cover and allow to bake until golden brown, about 15-20 minutes.
- Serve: Once the soup is heated and the rolls are baked, ladle the soup into bowls and serve with hot rolls on the side. Enjoy your simple yet satisfying camping meal!
Tortilla Wrap Sandwiches
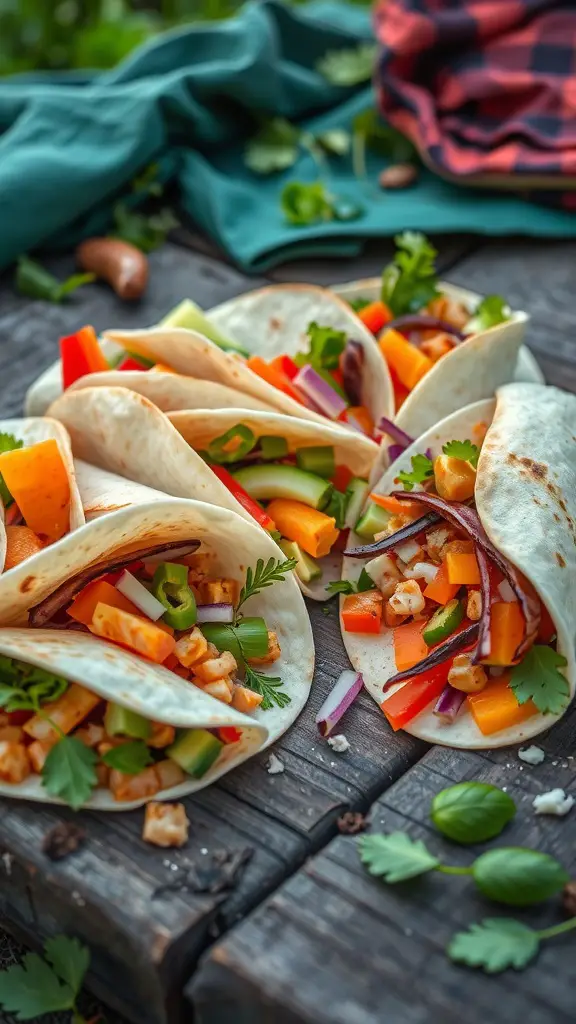
These tortilla wrap sandwiches are perfect for camping, offering a quick and easy meal that everyone can enjoy. Packed with fresh veggies and your choice of protein, they bring a burst of flavor that’s both satisfying and healthy.
Making these wraps is a breeze, requiring minimal prep time and ingredients. Simply gather your favorite fillings, spread them on a tortilla, roll it up, and you’re ready to go! Ideal for RV trips or around the campfire, these wraps are a hit with friends and family.
Ingredients
- 4 large flour tortillas
- 1 cup cooked chicken or turkey, shredded
- 1 cup bell peppers, diced
- 1 cup cucumber, diced
- 1/2 cup red onion, thinly sliced
- 1 cup shredded cheese (cheddar or mozzarella)
- 1/2 cup ranch dressing or hummus
- Fresh cilantro or parsley, for garnish
Instructions
- Prepare the Tortillas: Lay out the tortillas on a clean surface.
- Spread the Base: Spread a generous layer of ranch dressing or hummus over each tortilla.
- Add Fillings: Evenly distribute the shredded chicken, diced bell peppers, cucumber, red onion, and cheese over the tortillas.
- Wrap It Up: Roll each tortilla tightly, folding in the ends as you go to keep the fillings secure.
- Slice and Serve: Cut each wrap in half and garnish with fresh cilantro or parsley. Enjoy your delicious tortilla wraps!
Instant Oatmeal Bar

Setting up an instant oatmeal bar is a simple and fun way to keep everyone satisfied during your camping trip. This meal is not only quick to prepare but also allows everyone to customize their breakfast just the way they like it. With a variety of toppings and flavors, you can create a warm, hearty meal that appeals to all tastes.
The best part? You can make it as easy as you want. Just prepare the base oatmeal and let everyone mix in their favorite ingredients, from fruits to nuts. It’s a delightful way to start the day in the great outdoors.
Ingredients
- 4 cups rolled oats
- 8 cups water or milk
- 1/2 cup brown sugar
- 1 teaspoon cinnamon
- 1/2 cup raisins
- 1/2 cup chopped nuts (walnuts, almonds, or pecans)
- 1 cup fresh or dried fruits (berries, bananas, or apples)
- 1/4 cup honey or maple syrup
- 1 cup yogurt (optional)
Instructions
- Boil the Water or Milk: In a pot over your campfire or portable stove, bring the water or milk to a boil.
- Add Oats: Stir in the rolled oats and reduce heat to medium. Cook for about 5 minutes, stirring occasionally until the oats are creamy.
- Mix in Flavorings: Add brown sugar, cinnamon, and raisins. Stir until fully combined.
- Serve: Set out toppings like nuts, fresh or dried fruits, honey, and yogurt. Let everyone create their own bowl of oatmeal goodness!
Grilled Cheese Sandwiches
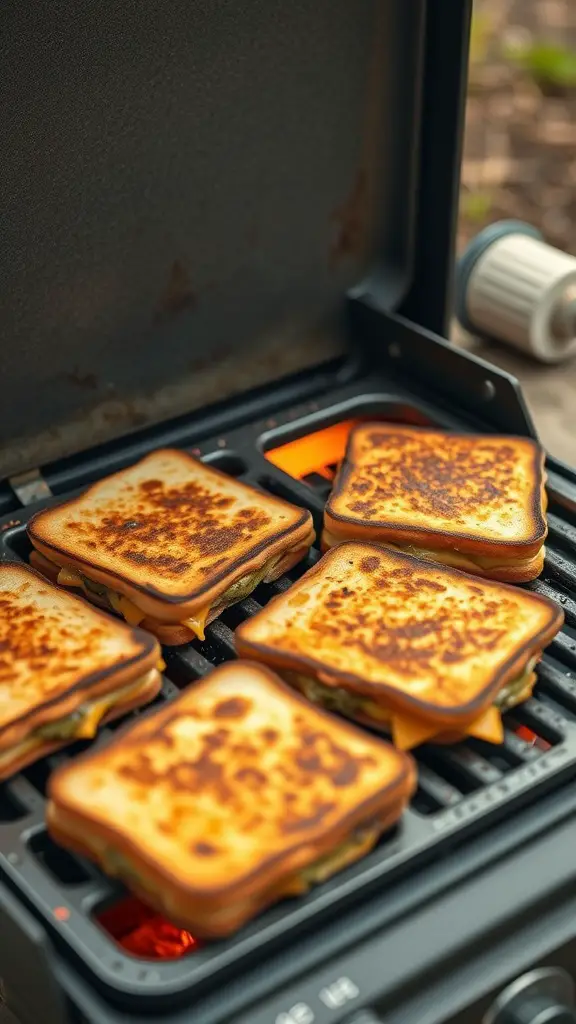
Grilled cheese sandwiches are a classic choice for camping meals that everyone loves. They are warm, gooey, and satisfyingly crispy, making them perfect for chilly evenings around the campfire. Plus, they are incredibly easy to prepare, requiring just a few ingredients and minimal cooking time.
Gather your friends and family for a quick and delicious meal that is sure to please a crowd. You can customize each sandwich with different cheeses, add in some veggies, or even throw in slices of ham or turkey. Grilled cheese sandwiches are not only tasty but also a fun dish to assemble together!
Ingredients
- 8 slices of bread (your choice)
- 4 tablespoons butter, softened
- 8 slices of cheese (cheddar, mozzarella, or your favorite)
- Optional: tomato slices, spinach, ham, or any preferred toppings
Instructions
- Prep the Bread: Spread butter on one side of each slice of bread.
- Assemble the Sandwiches: Place cheese and any optional toppings between two slices of bread, with the buttered side facing out.
- Cook: Heat a camping grill or skillet over medium heat. Place the sandwiches on the grill and cook until golden brown, about 2-4 minutes per side. Press gently with a spatula to ensure even cooking.
- Serve: Once the cheese is melted and the bread is nicely toasted, remove from heat and slice in half. Enjoy your grilled cheese sandwiches warm!
Vegetarian Lentil Soup
This Vegetarian Lentil Soup is a perfect choice for your next camping trip. It’s hearty, packed with flavor, and incredibly simple to make, making it ideal for a crowd. The earthy taste of lentils combined with a variety of vegetables creates a comforting meal that everyone will enjoy.
Making this soup is straightforward and requires minimal prep time, so you can spend more time enjoying the great outdoors. Plus, it’s nutritious and filling, ensuring you have the energy for all your camping adventures.
Ingredients
- 1 tablespoon olive oil
- 1 onion, chopped
- 2 carrots, diced
- 2 celery stalks, diced
- 3 cloves garlic, minced
- 1 teaspoon ground cumin
- 1 teaspoon smoked paprika
- 1 cup dried green or brown lentils, rinsed
- 6 cups vegetable broth
- 1 can (14.5 oz) diced tomatoes
- 2 cups chopped kale or spinach
- Salt and pepper to taste
- Fresh parsley for garnish
Instructions
- Heat the olive oil in a large pot over medium heat. Add the chopped onion, carrots, and celery. Cook until the vegetables are softened, about 5 minutes.
- Stir in the garlic, cumin, and smoked paprika, cooking for an additional minute until fragrant.
- Add the lentils, vegetable broth, and diced tomatoes (with their juices) to the pot. Bring the mixture to a boil, then reduce to a simmer.
- Cover and cook for about 25-30 minutes, or until the lentils are tender. Stir in the chopped kale or spinach and cook for another 5 minutes.
- Season with salt and pepper to taste. Serve hot, garnished with fresh parsley.
Loaded Baked Potatoes

Loaded baked potatoes are a crowd-pleaser that brings comfort and heartiness to any camping meal. With a fluffy interior and crispy skin, they serve as the perfect base for a variety of toppings, making them versatile and fun to customize. This dish is not only easy to prepare but also quick to cook over a campfire, ensuring you spend less time cooking and more time enjoying the great outdoors with friends and family.
The taste of a loaded baked potato is a delightful mix of creamy, cheesy, and savory flavors. You can pile on your favorite toppings like shredded cheese, sour cream, chives, and even chili for a filling meal. Whether you’re relaxing by the campfire or serving up dinner at an RV site, these potatoes are sure to satisfy and keep everyone fueled for adventure.
Ingredients
- 4 large russet potatoes
- 1 cup shredded cheddar cheese
- 1 cup sour cream
- 1/2 cup chopped green onions
- 1 cup cooked bacon bits (optional)
- Salt and pepper to taste
Instructions
- Prep the Potatoes: Wash and pierce each potato several times with a fork. Wrap them in aluminum foil.
- Cook Over Fire: Place the wrapped potatoes near the edges of the campfire or on a grill grate. Cook for about 45-60 minutes, turning occasionally, until soft.
- Unwrap and Slice: Carefully unwrap the potatoes and slice them open lengthwise. Fluff the insides with a fork.
- Add Toppings: Top each potato with cheddar cheese, a dollop of sour cream, chopped green onions, and bacon bits if using. Season with salt and pepper.
- Serve: Enjoy your loaded baked potatoes hot and fresh, perfect for sharing by the fire!
Chickpea Salad with Feta
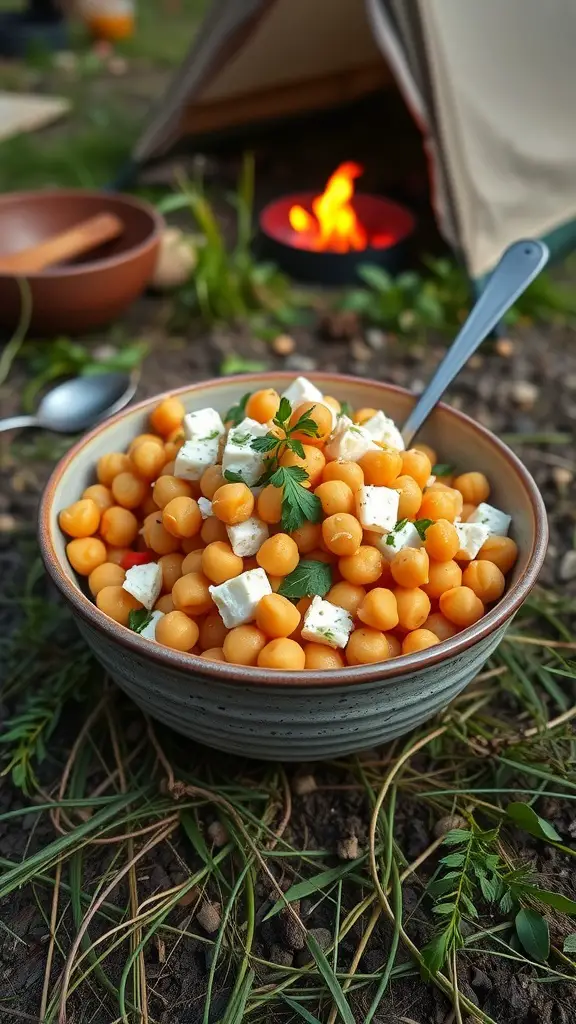
This Chickpea Salad with Feta is a refreshing and satisfying dish, perfect for your next camping trip. It combines the creamy goodness of feta cheese with the nutty flavor of chickpeas, creating a delightful balance that’s both filling and light. Easy to prepare and quick to assemble, this salad is ideal for feeding a crowd without spending hours in the kitchen.
The salad is not only delicious but also packed with nutrients, making it a great option for those outdoor gatherings. It’s a perfect side dish or can stand alone as a main meal. Whether you’re at a campsite or in an RV, this recipe brings convenience and flavor to your table.
Ingredients
- 2 cans (15 oz each) chickpeas, drained and rinsed
- 1 cup feta cheese, crumbled
- 1 cup cherry tomatoes, halved
- 1/2 cucumber, diced
- 1/4 red onion, finely chopped
- 1/4 cup fresh parsley, chopped
- 3 tablespoons olive oil
- 2 tablespoons lemon juice
- Salt and pepper, to taste
Instructions
- In a large bowl, combine the chickpeas, feta cheese, cherry tomatoes, cucumber, red onion, and parsley.
- In a separate small bowl, whisk together the olive oil, lemon juice, salt, and pepper.
- Pour the dressing over the salad and toss gently to combine.
- Let the salad sit for about 10 minutes before serving, allowing the flavors to meld together.
- Serve chilled or at room temperature, and enjoy your easy camping meal!
Marinated Shrimp Skewers
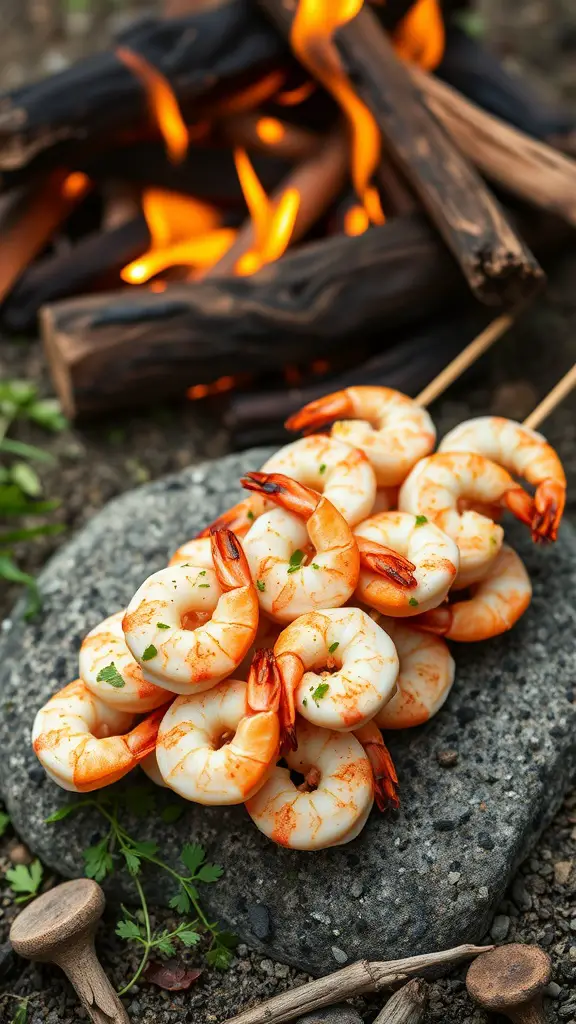
Marinated shrimp skewers are a quick and easy choice for camping meals that are sure to please a crowd. These flavorful skewers are light, zesty, and can be thrown together in no time, making them perfect for a relaxed outdoor cookout. With just the right balance of spices and a hint of citrus, they offer a delicious taste that pairs wonderfully with the great outdoors.
Preparing these skewers is simple. You can marinate the shrimp ahead of time and keep them chilled in an RV or cooler. When you’re ready to cook, just thread the marinated shrimp onto skewers and grill them over an open flame or on a portable grill. It’s a fun and interactive way to enjoy a meal with friends and family while soaking in the beauty of nature.
Ingredients
- 1 pound large shrimp, peeled and deveined
- 1/4 cup olive oil
- 3 tablespoons lemon juice
- 2 cloves garlic, minced
- 1 teaspoon paprika
- 1 teaspoon cumin
- Salt and pepper to taste
- Fresh parsley, chopped (for garnish)
- Skewers (soaked in water if wooden)
Instructions
- Prepare the Marinade: In a bowl, whisk together olive oil, lemon juice, garlic, paprika, cumin, salt, and pepper.
- Marinate the Shrimp: Add the shrimp to the marinade and toss to coat. Let them marinate for at least 30 minutes, or up to 2 hours in the refrigerator.
- Skewer the Shrimp: Thread the marinated shrimp onto the skewers, leaving a little space between each for even cooking.
- Grill: Preheat your grill or campfire. Grill the skewers for about 2-3 minutes on each side, or until the shrimp are pink and opaque.
- Serve: Remove from the grill and garnish with fresh parsley before serving. Enjoy your delicious shrimp skewers with your favorite sides!
Fruit and Yogurt Parfaits

Fruit and yogurt parfaits are a delightful and healthy choice for camping meals. They combine creamy yogurt with fresh fruits and crunchy granola, creating a lovely balance of textures and flavors. This quick and easy recipe is perfect for serving a crowd, making it a fantastic addition to your camping menu.
With a few simple ingredients, you can whip up these parfaits in no time. Everyone can customize their own layers, making it a fun and interactive treat. You’ll love how refreshing and satisfying they are, especially after a day of outdoor activities.
Ingredients
- 4 cups yogurt (plain or flavored)
- 2 cups granola
- 2 cups mixed berries (strawberries, blueberries, raspberries)
- 2 mangoes, diced
- Honey or maple syrup for drizzling (optional)
Instructions
- Prepare the Ingredients: Wash and slice the berries and dice the mangoes.
- Layer the Parfaits: In clear cups or bowls, add a layer of yogurt at the bottom. Follow this with a layer of granola, then a layer of mixed berries and mangoes.
- Repeat Layers: Continue layering until the cups are filled, finishing with a generous layer of fruits on top.
- Add Sweetness: Drizzle honey or maple syrup over the top if desired.
- Serve and Enjoy: These parfaits can be served immediately or chilled for a refreshing snack later.
Cabbage and Sausage Foil Packs
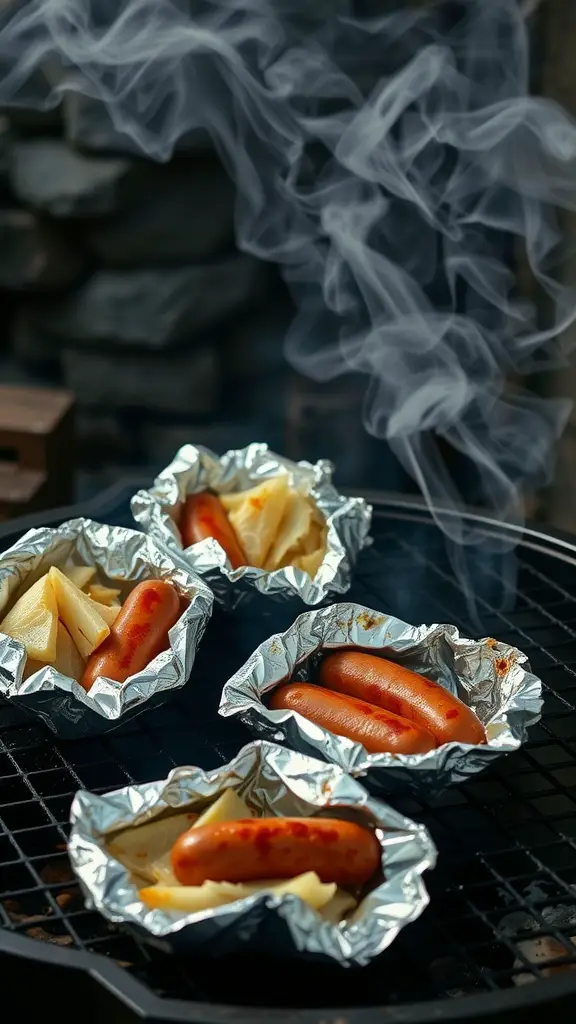
Cabbage and sausage foil packs are a fantastic camping meal that brings together the savory flavors of smoky sausage and tender cabbage. They are super easy to prepare, making them perfect for feeding a crowd. Just toss everything in foil, seal it up, and let the grill or fire do the work!
This meal is not only delicious but also allows for customization. You can add your favorite seasonings or vegetables to make it your own. Plus, cleanup is a breeze since everything is contained in the foil! Enjoy a hearty, warm meal under the stars.
Ingredients
- 1 pound smoked sausage, cut into pieces
- 4 cups cabbage, chopped
- 1 medium onion, sliced
- 2 tablespoons olive oil
- 1 teaspoon garlic powder
- 1 teaspoon paprika
- Salt and pepper to taste
- Aluminum foil
Instructions
- Prepare the Foil: Tear off large pieces of aluminum foil, enough to create individual packets.
- Mix the Ingredients: In a large bowl, combine sausage, cabbage, onion, olive oil, garlic powder, paprika, salt, and pepper. Mix well.
- Assemble the Packs: Divide the mixture among the foil pieces. Fold the foil to create tight packets, ensuring no steam can escape.
- Grill or Cook: Place the foil packs on a grill or over a campfire. Cook for about 20-25 minutes, flipping halfway through, until the cabbage is tender and the sausage is heated through.
- Serve: Carefully open the foil packs (watch out for steam) and enjoy your delicious meal!
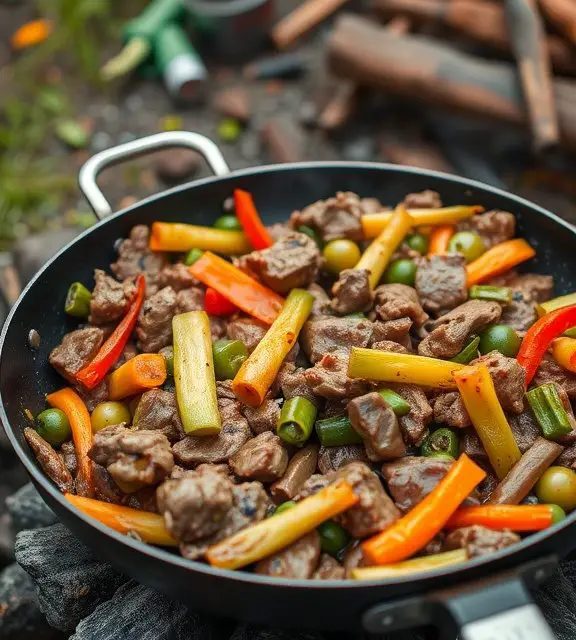
Beef and Veggie Stir-fry
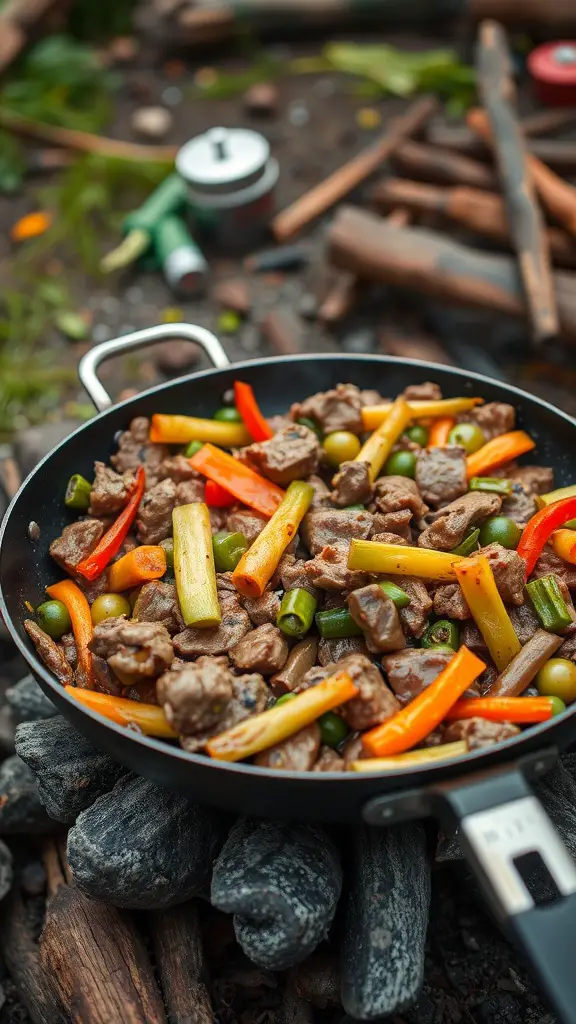
This beef and veggie stir-fry is a quick and easy meal perfect for camping with a crowd. Packed with savory beef and colorful vegetables, it delivers a satisfying taste that everyone will love. Plus, it’s simple to make on an open flame or portable stove, making it ideal for your next outdoor trip.
The mix of juicy beef and crunchy veggies not only keeps the meal light and healthy but also ensures you can whip it up in no time. Gather your friends around the campfire and enjoy this delightful dish without the fuss!
Ingredients
- 1 lb beef sirloin, cut into bite-sized pieces
- 2 tablespoons soy sauce
- 1 tablespoon olive oil
- 2 cups mixed vegetables (bell peppers, carrots, snap peas)
- 2 cloves garlic, minced
- 1 teaspoon ginger, grated
- Salt and pepper to taste
- Cooked rice or noodles (optional)
Instructions
- Marinate the Beef: In a bowl, combine beef, soy sauce, garlic, ginger, salt, and pepper. Let it marinate for at least 15 minutes.
- Heat the Oil: In a large skillet over medium heat, add olive oil until hot.
- Cook the Beef: Add the marinated beef to the skillet. Sauté for about 5-7 minutes until browned and cooked through.
- Add Vegetables: Toss in the mixed vegetables and stir-fry for an additional 3-5 minutes until everything is cooked but still crisp.
- Serve: Enjoy the stir-fry on its own or over a bed of rice or noodles for a complete meal.
Easy Campfire Pizza
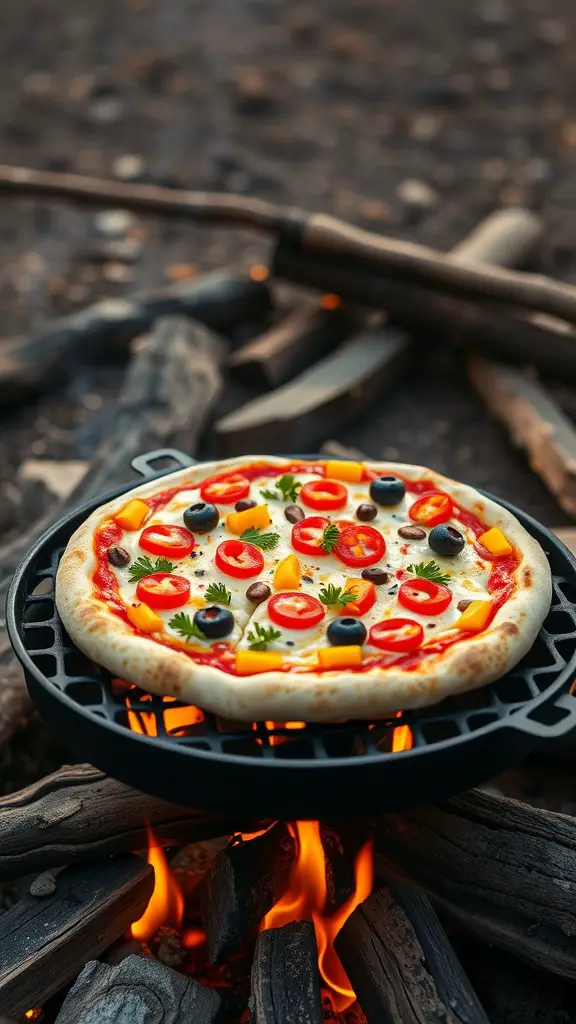
Campfire pizza is a game-changer for outdoor meals. It’s easy to put together and brings all the comforting flavors of pizza to your campsite. The crispy crust combined with melted cheese and your favorite toppings makes for a delicious meal that everyone will love.
Making pizza over a campfire is not only quick but also fun, as you can get the whole family involved. Whether you prefer classic pepperoni or a veggie-loaded version, this recipe is flexible to suit all tastes. Get ready to impress your camping crew with this easy and satisfying dish!
Ingredients
- 1 pre-made pizza crust (store-bought or homemade)
- 1 cup pizza sauce
- 2 cups shredded mozzarella cheese
- 1/2 cup sliced olives
- 1/2 cup diced bell peppers
- 1/2 cup sliced cherry tomatoes
- 1 teaspoon Italian seasoning
- Optional: pepperoni, mushrooms, or any other favorite toppings
Instructions
- Prepare Your Fire: Start your campfire and let it burn down until you have a nice bed of hot coals.
- Assemble the Pizza: On a flat surface, spread the pizza sauce over the crust. Sprinkle with mozzarella cheese, and add your desired toppings.
- Cook the Pizza: Place the assembled pizza on a grill grate over the fire. Cook for about 10-15 minutes, keeping an eye on it to ensure it doesn’t burn. The cheese should be melted, and the crust should be golden brown.
- Serve: Once cooked, carefully remove the pizza from the fire. Let it cool for a minute, slice it up, and enjoy your delicious campfire pizza!
Pineapple Teriyaki Chicken
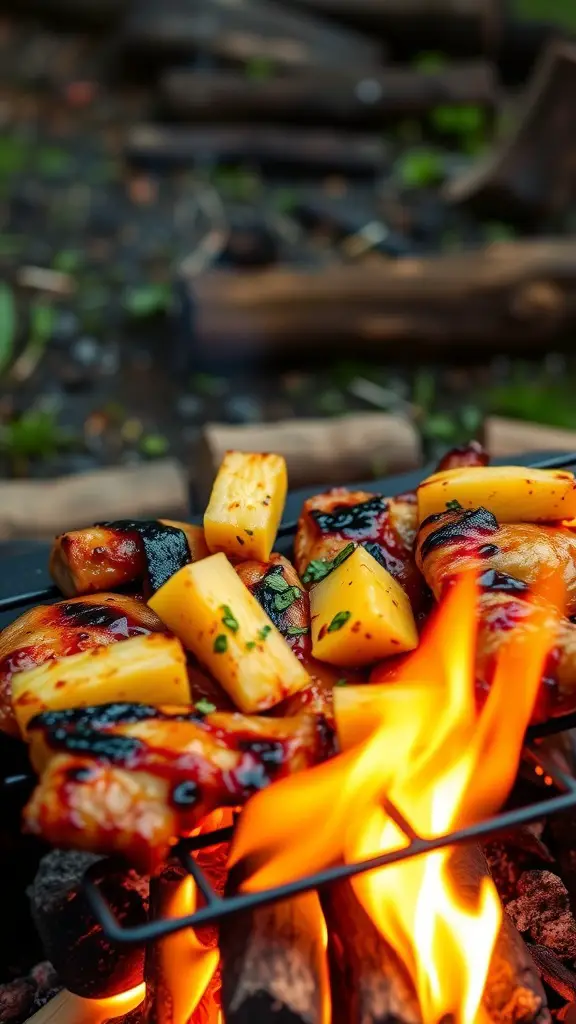
Pineapple Teriyaki Chicken is a sweet and savory dish that’s perfect for outdoor gatherings. The juicy chicken paired with the tangy pineapple creates a delightful flavor that everyone will love. This recipe is simple to make, making it a great choice for those camping trips where you want to impress your crew without spending all day cooking.
The combination of teriyaki sauce and grilled pineapple adds a tropical twist to your meal, making it a standout option for any camping cookout. With just a few ingredients and quick prep, you’ll serve up a delicious feast that’s both easy and satisfying.
Ingredients
- 4 boneless chicken thighs
- 1 cup teriyaki sauce
- 1 can pineapple chunks, drained
- 1 tablespoon olive oil
- Salt and pepper to taste
- Green onions, chopped (for garnish)
Instructions
- Marinate the Chicken: In a bowl, combine the chicken thighs and teriyaki sauce. Let it marinate for at least 30 minutes.
- Prepare the Grill: Heat the grill over medium-high heat and brush the grill grate with olive oil to prevent sticking.
- Cook the Chicken: Place the marinated chicken on the grill. Cook for about 5-7 minutes on each side or until fully cooked through.
- Add Pineapple: During the last few minutes of cooking, place the pineapple chunks on the grill. Grill until they’re caramelized and heated through.
- Serve: Once done, remove the chicken and pineapple from the grill. Slice the chicken, top with grilled pineapple, and garnish with chopped green onions. Enjoy your quick and easy camping meal!
BBQ Chicken Sliders
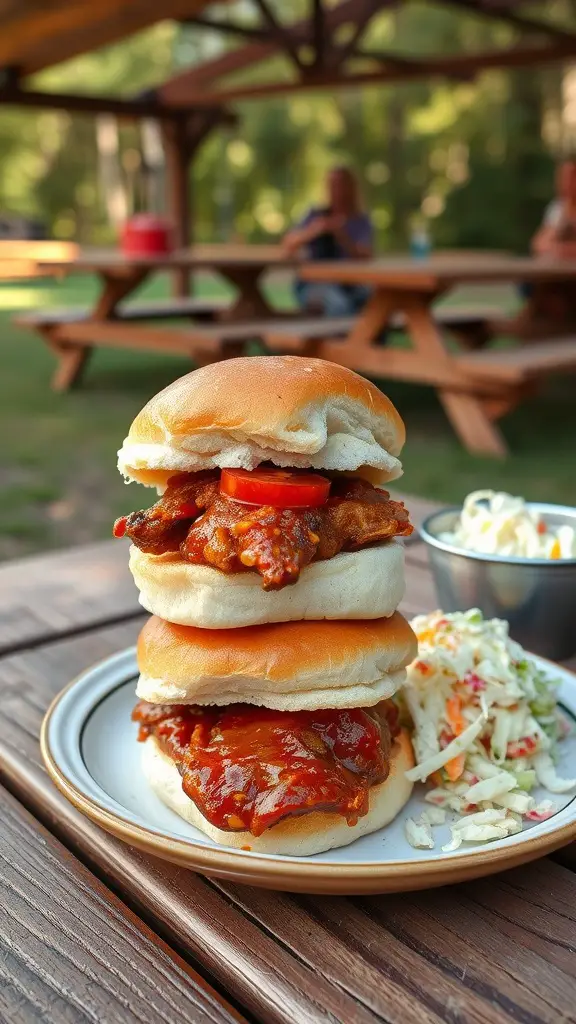
BBQ chicken sliders are a crowd-pleasing option for any camping trip. These tasty little sandwiches are packed with flavor from tender, juicy chicken drenched in a tangy barbecue sauce. They are simple to make and perfect for serving a group, making them an ideal choice for your next outdoor gathering.
These sliders are not only quick to prepare but also customizable. You can add your favorite toppings like pickles, coleslaw, or cheese to enhance the flavor. Everyone will love these delicious sandwiches, making them a staple for camping situations.
Ingredients
- 2 pounds boneless, skinless chicken thighs
- 1 cup barbecue sauce
- 12 slider buns
- 1 cup coleslaw mix
- 1/4 cup mayonnaise
- 1 tablespoon apple cider vinegar
- Salt and pepper to taste
- Sliced pickles (optional)
Instructions
- Cook the Chicken: In a slow cooker or over a campfire, cook the chicken thighs until they are tender. This usually takes about 6-8 hours on low or 3-4 hours on high in a slow cooker.
- Shred and Mix: Once cooked, shred the chicken with two forks and mix in the barbecue sauce. Let it warm through for about 15 minutes.
- Prepare the Coleslaw: In a bowl, mix the coleslaw mix with mayonnaise, apple cider vinegar, salt, and pepper. Stir until combined.
- Assemble the Sliders: Place a generous scoop of BBQ chicken on the bottom half of each slider bun. Top with coleslaw and sliced pickles if desired. Close with the top bun.
- Serve and Enjoy: These sliders are best served warm. Enjoy them around the campfire or pack them for a picnic!
Instant Noodles with Vegetables
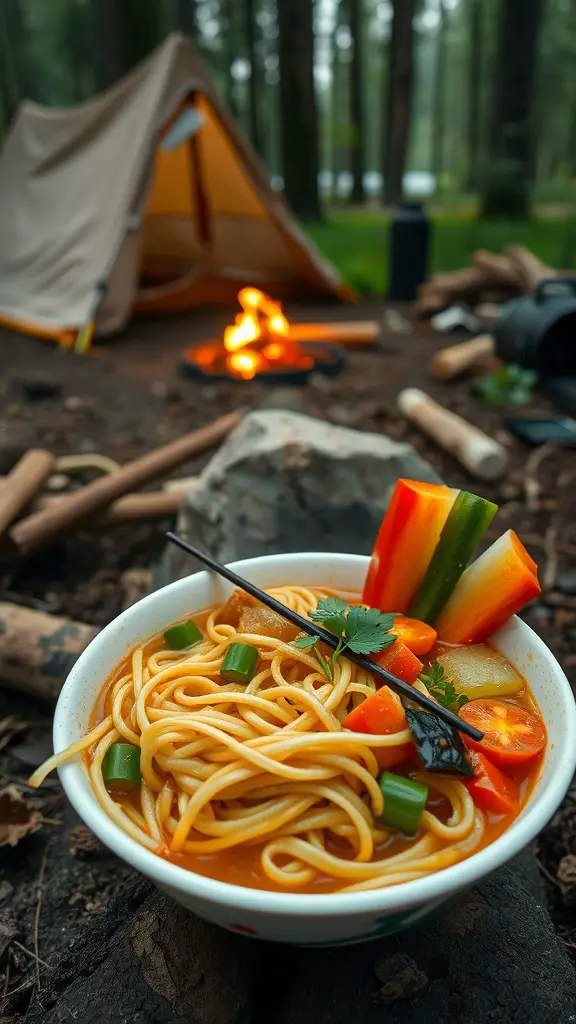
Instant noodles with vegetables are a perfect meal for anyone camping with a group. They’re quick to make and loaded with flavors, making them a satisfying dish after a day of outdoor fun. You can customize the vegetables to match what you have on hand or what you enjoy most, ensuring everyone gets something they like.
This easy recipe can be prepared in just a few minutes, so you won’t spend too much time cooking when you could be enjoying the great outdoors. Plus, the combination of noodles and fresh veggies creates a lovely balance of textures and tastes, from crunchy to soft and savory!
Ingredients
- 2 packs of instant noodles
- 4 cups of vegetable broth
- 1 cup mixed vegetables (carrots, bell peppers, snap peas)
- 1 tablespoon soy sauce
- 1 teaspoon sesame oil
- 2 green onions, chopped
- Fresh cilantro, for garnish
Instructions
- Boil the broth: In a pot, bring the vegetable broth to a boil over your camping stove.
- Add noodles: Once boiling, add the instant noodles and cook according to package instructions, usually about 3 minutes.
- Add vegetables: In the last minute of cooking, add the mixed vegetables so they soften but still retain some crunch.
- Season: Stir in the soy sauce and sesame oil for added flavor.
- Serve: Ladle into bowls, garnish with chopped green onions and fresh cilantro, and enjoy!
Simple Fruit Salad
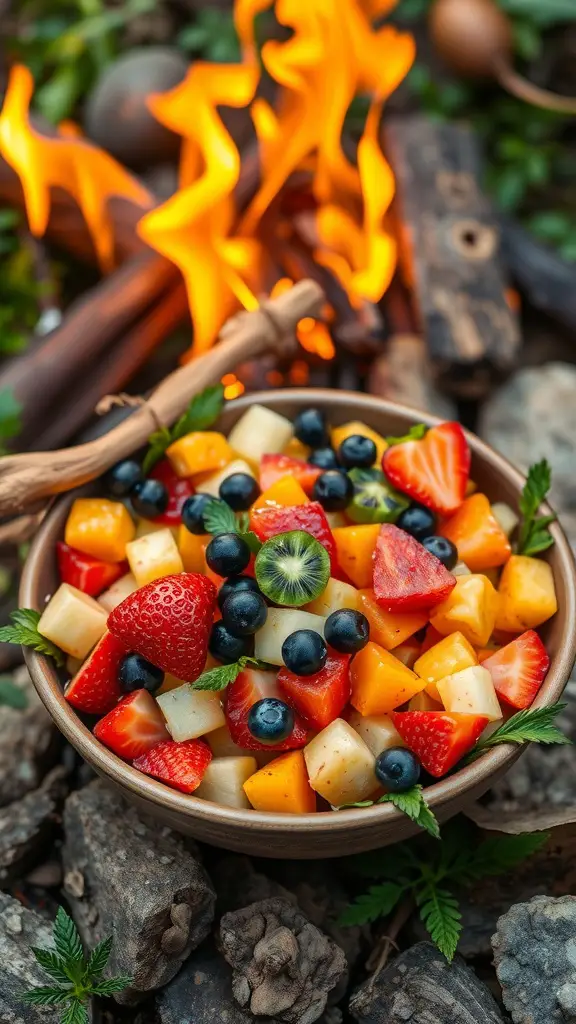
A simple fruit salad is the perfect side for any camping meal. It’s fresh, colorful, and bursting with flavors, making it a hit for both kids and adults. This quick recipe requires only a few ingredients, and you can customize it with whatever fruits are in season or available in your RV.
Not only is it easy to whip up, but it also adds a refreshing touch to your outdoor dining. Plus, it’s a great way to incorporate some healthy options into your meals while enjoying nature.
Ingredients
- 2 cups strawberries, hulled and halved
- 2 cups blueberries
- 2 cups pineapple, diced
- 2 cups cantaloupe, diced
- 1 tablespoon honey (optional)
- 1 tablespoon fresh mint, chopped (for garnish)
Instructions
- Prepare the Fruits: Wash and chop all the fruits as needed. Place them in a large mixing bowl.
- Add Honey: If you like a touch of sweetness, drizzle honey over the fruits and gently mix to combine.
- Serve: Scoop the fruit salad into individual bowls and garnish with fresh mint. Enjoy it chilled or at room temperature.
Zucchini and Corn Fritters
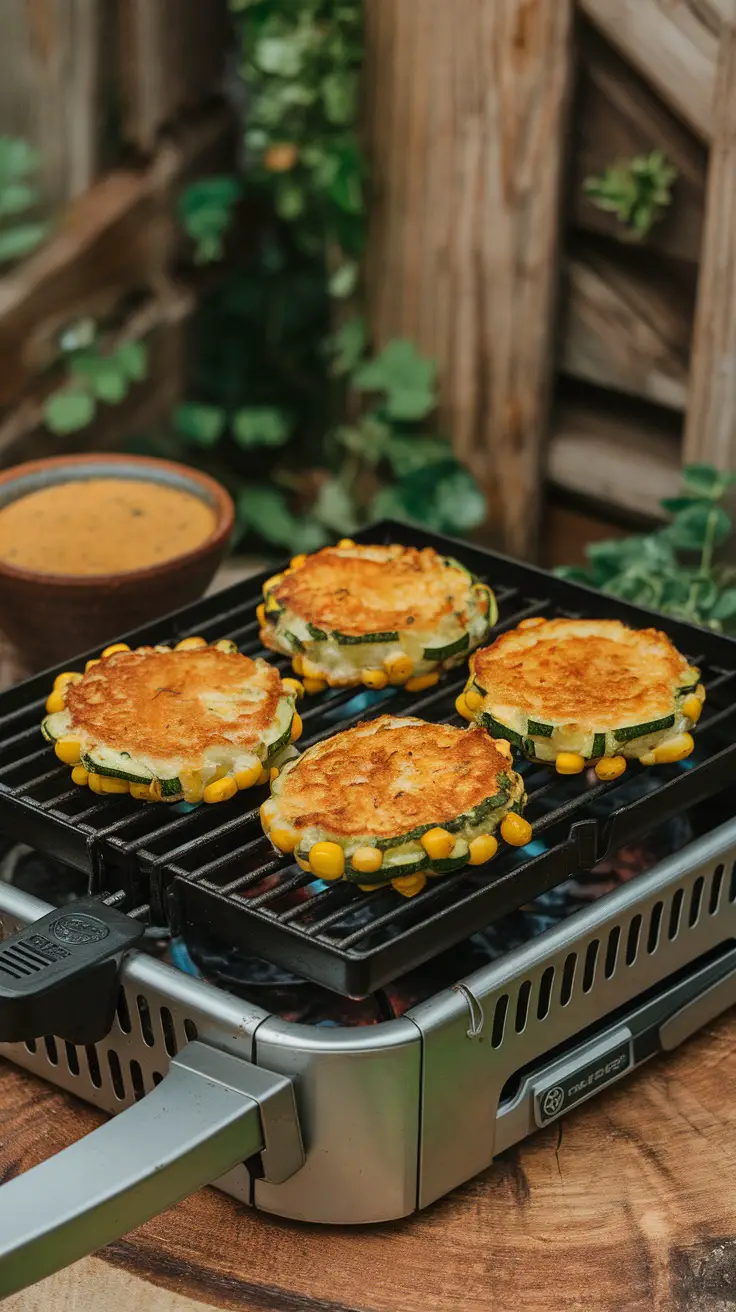
Zucchini and corn fritters are a delightful option for your camping meals. These crispy treats are bursting with flavor and have a light, fluffy texture that everyone will love. They are quick to prepare and require minimal ingredients, making them perfect for outdoor cooking.
These fritters are not only tasty but also versatile. You can serve them as a snack, a side dish, or even as the main course. Pair them with your favorite dipping sauce for an extra kick. Easy to whip up on a campsite or RV, these fritters are sure to satisfy your group’s hunger after a day of outdoor fun.
Ingredients
- 2 medium zucchinis, grated
- 1 cup corn kernels (fresh or canned)
- 1/2 cup all-purpose flour
- 1/2 cup shredded cheese (cheddar or your choice)
- 2 large eggs
- 1 teaspoon baking powder
- Salt and pepper to taste
- Olive oil for frying
Instructions
- Prep the Zucchini: Grate the zucchinis and squeeze out excess moisture using a clean kitchen towel.
- Mix Ingredients: In a large bowl, combine the grated zucchini, corn, flour, cheese, eggs, baking powder, salt, and pepper. Mix until well combined.
- Heat the Pan: In a skillet over medium heat, add a drizzle of olive oil.
- Cook the Fritters: Spoon dollops of the mixture into the pan, flattening them slightly. Cook for about 3-4 minutes on each side, or until golden brown.
- Serve: Remove from the pan and drain on paper towels. Serve warm with your favorite dipping sauce.
Hard-Boiled Eggs with Seasoning

Hard-boiled eggs are a fantastic option for camping meals. They are nutritious, filling, and very easy to prepare. With a simple seasoning, they become a tasty snack that everyone can enjoy. Perfect for sharing, they can also be customized to suit different tastes.
These eggs are great for quick meals around the campfire. Just boil them ahead of time, pack them in your cooler, and you’re set. You can add spices or toppings to spice things up. They’re protein-packed and can be eaten on their own or added to salads and sandwiches.
Ingredients
- 12 large eggs
- 1 teaspoon salt
- 1 teaspoon paprika
- 1 teaspoon black pepper
- 1 teaspoon garlic powder
- 1 teaspoon onion powder
- Optional toppings: hot sauce, fresh herbs, or cheese
Instructions
- Boil the Eggs: Place eggs in a large pot and cover them with water. Bring the water to a boil over medium heat.
- Cook: Once boiling, cover the pot and remove it from heat. Let the eggs sit for 10-12 minutes.
- Cool and Peel: Drain the hot water and place the eggs in cold water to cool for about 5 minutes. Once cooled, gently tap the eggs on a hard surface to crack the shell, then peel them.
- Season: Slice the eggs in half and sprinkle with salt, paprika, pepper, garlic powder, and onion powder. Add optional toppings as desired.
- Serve: Enjoy your seasoned hard-boiled eggs cold or at room temperature.
Stuffed Bell Peppers
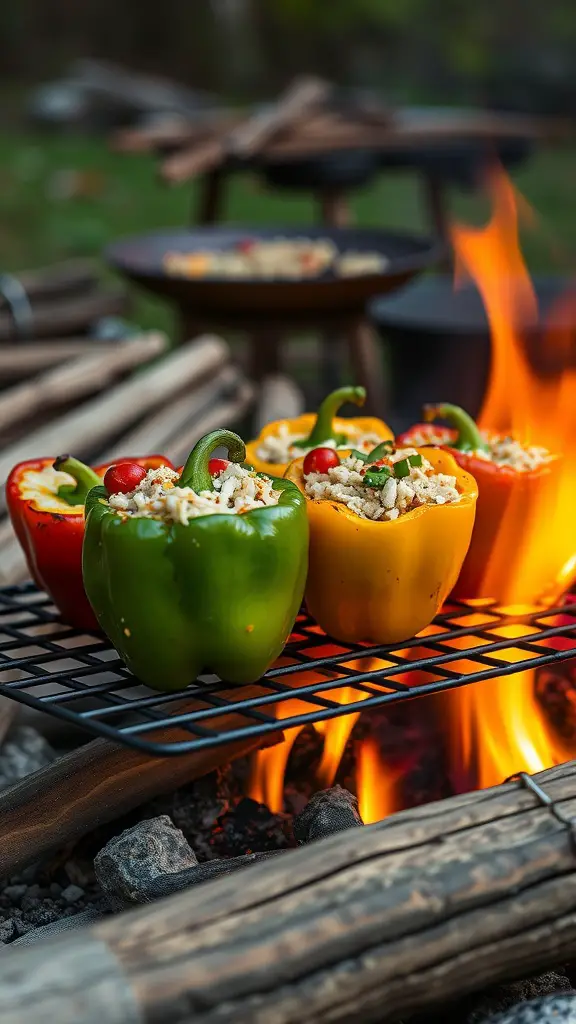
Stuffed bell peppers are a fantastic camping meal that packs a punch of flavor and nutrition. They are easy to prepare and allow you to customize the filling to suit your taste. Whether you prefer a meat-based mixture or a vegetarian option, these peppers can be as simple or elaborate as you like.
Cooking these treats over a campfire adds a smoky flavor that elevates the experience. Plus, they are a great way to feed a crowd without much fuss! Everyone can enjoy the colorful presentation and delightful taste of these stuffed veggies.
Ingredients
- 4 large bell peppers (any color)
- 1 cup cooked rice (white or brown)
- 1 cup ground meat (beef or turkey)
- 1 can diced tomatoes (14 ounces)
- 1 small onion, chopped
- 1 teaspoon garlic powder
- 1 teaspoon Italian seasoning
- Salt and pepper to taste
- 1 cup shredded cheese (cheddar or mozzarella)
Instructions
- Prepare the Peppers: Cut the tops off the bell peppers and remove the seeds. Set aside.
- Cook the Filling: In a skillet over your campfire, sauté the chopped onion until translucent. Add the ground meat and cook until browned.
- Mix Ingredients: Stir in the cooked rice, diced tomatoes, garlic powder, Italian seasoning, salt, and pepper. Cook for an additional 5 minutes, allowing flavors to meld.
- Stuff the Peppers: Fill each bell pepper with the meat and rice mixture. Top with shredded cheese.
- Cook Over Fire: Place the stuffed peppers on a grill rack over the fire or in a camping pot. Cover and cook for about 15-20 minutes, until the peppers are tender and the cheese is melted.
One-Pot Chili with Beans and Ground Meat
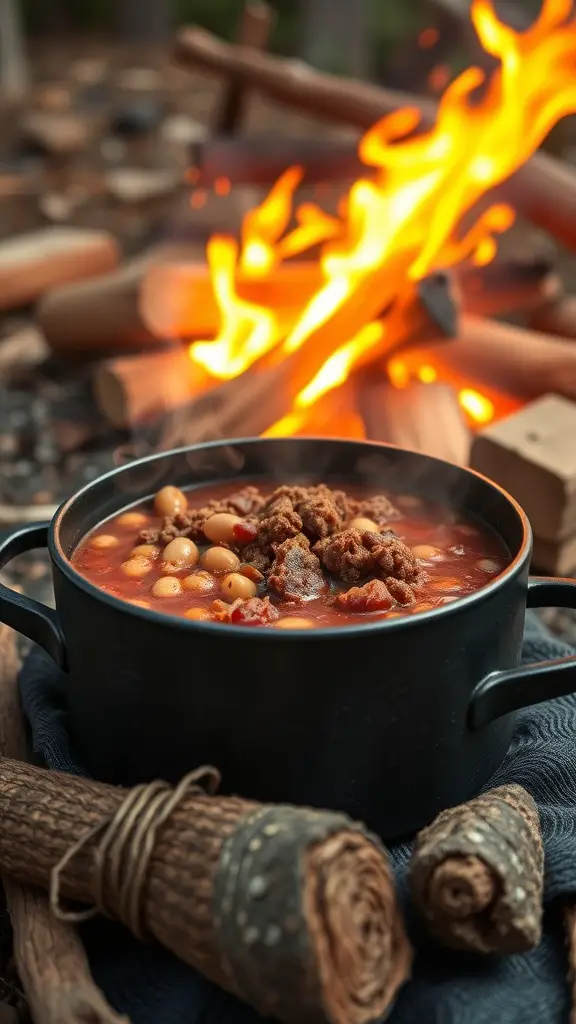
One-Pot Chili with Beans and Ground Meat is a fantastic camping meal that brings warmth and comfort to your outdoor gatherings. Packed with flavors, this chili combines hearty ground meat, beans, and spices, creating a satisfying dish that’s perfect for sharing around the campfire. Plus, it’s quick and easy to make, allowing you to spend more time enjoying the great outdoors and less time cooking.
This recipe is ideal for RV trips or camping with friends. You can use a single pot to cook everything, making cleanup a breeze. The rich, savory taste of the chili paired with fresh toppings will have everyone coming back for seconds.
Ingredients
- 1 pound ground beef or turkey
- 1 can (15 oz) kidney beans, drained and rinsed
- 1 can (15 oz) black beans, drained and rinsed
- 1 can (14.5 oz) diced tomatoes
- 1 medium onion, chopped
- 2 cloves garlic, minced
- 2 tablespoons chili powder
- 1 teaspoon cumin
- 1 teaspoon paprika
- Salt and pepper to taste
- 1 cup beef or vegetable broth
- Optional toppings: shredded cheese, sour cream, jalapeños, or avocado
Instructions
- In a large pot over medium heat, cook the ground meat until browned. Drain any excess fat.
- Add the chopped onion and minced garlic to the pot. Sauté until the onion is translucent.
- Stir in the chili powder, cumin, paprika, salt, and pepper. Cook for another minute to let the spices bloom.
- Add the canned tomatoes, drained beans, and broth. Stir everything together and bring to a simmer.
- Reduce the heat to low and let it cook uncovered for about 20-30 minutes, stirring occasionally. Adjust seasonings to taste.
- Serve hot with your choice of toppings. Enjoy your quick, easy camping meal!
Campfire Popcorn
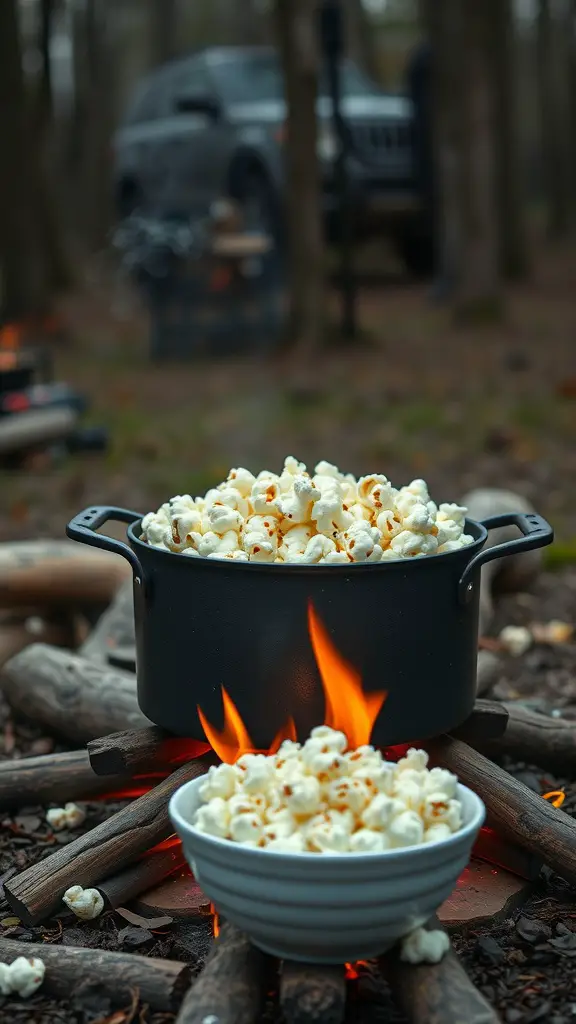
Campfire popcorn is a fun and tasty treat that’s perfect for sharing around the fire. The crunchy, fluffy popcorn pairs wonderfully with the smoky flavor from the campfire, creating a unique snacking experience. This recipe is simple and quick, making it an ideal option for campers or RV adventurers looking to whip up something delightful without much fuss.
Gather your friends and family, and enjoy a cozy night under the stars with this classic campfire snack that everyone will love. It’s easy to customize with your favorite seasonings, so feel free to get creative!
Ingredients
- 1/2 cup popcorn kernels
- 2 tablespoons vegetable oil or melted butter
- Salt, to taste
- Your choice of seasonings (cheese powder, garlic powder, or chili powder)
Instructions
- Prepare the Fire: Start your campfire and let it burn down until you have a nice bed of hot coals.
- Heat the Oil: In a large, heavy-duty pot with a lid, heat the vegetable oil or melted butter over the fire. Make sure to keep it away from direct flames.
- Add Popcorn: Once the oil is hot, add the popcorn kernels and cover the pot with the lid, leaving it slightly ajar to allow steam to escape.
- Shake the Pot: Gently shake the pot over the fire to ensure the kernels pop evenly. Listen for the popping to start and continue shaking until the popping slows down.
- Season and Serve: Once the popping has stopped, remove the pot from the heat. Carefully take off the lid (watch out for steam!), and add salt and any additional seasonings you like. Stir to coat the popcorn evenly and enjoy!
Chocolate Banana Boats

Chocolate banana boats are a fun and tasty treat that everyone will love. They combine the natural sweetness of bananas with gooey chocolate and marshmallows, making them a delightful dessert perfect for camping. This recipe requires minimal ingredients and is super easy to prepare, making it a great choice for gatherings in the great outdoors.
The best part? You can customize each banana boat with your favorite toppings. Whether you prefer crunchy nuts, drizzled caramel, or even a sprinkle of cinnamon, the possibilities are endless! This quick recipe will keep everyone satisfied around the campfire, and it’s a sweet way to end the day.
Ingredients
- 4 ripe bananas
- 1 cup chocolate chips
- 1 cup mini marshmallows
- Aluminum foil
Instructions
- Prepare the Bananas: Slice each banana lengthwise down the middle, leaving the peel on. Be careful not to cut all the way through.
- Fill the Boats: Open the bananas slightly and fill the grooves with chocolate chips and mini marshmallows.
- Wrap Them Up: Wrap each filled banana in aluminum foil, making sure it’s sealed well.
- Cook Over Heat: Place the foil-wrapped bananas on a campfire grate or grill for about 10-15 minutes, until the chocolate and marshmallows are melted.
- Enjoy: Carefully unwrap the foil and dig into the warm, gooey chocolate banana boats with a spoon or fork!
Grilled Vegetable and Chicken Skewers
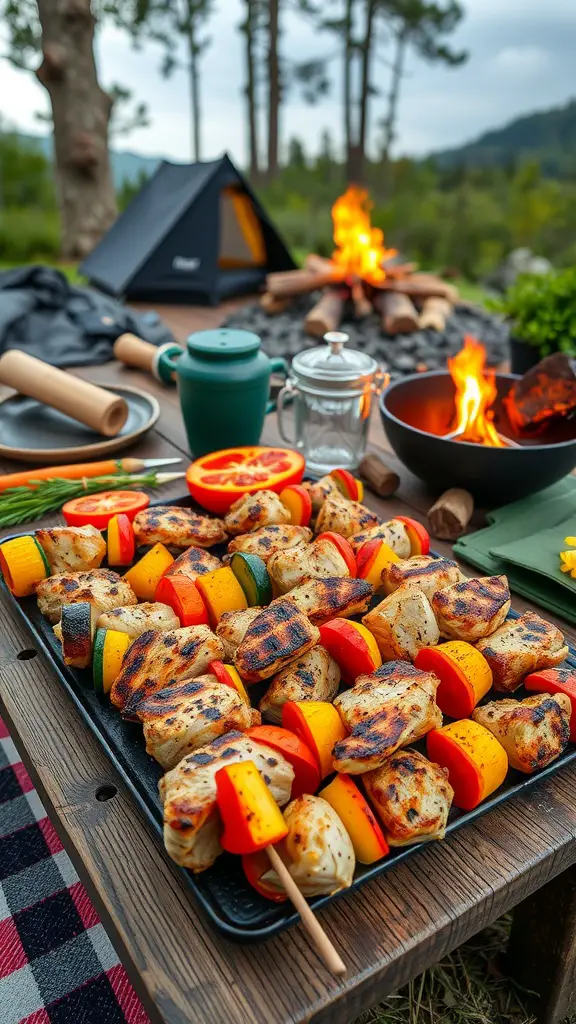
Grilled Vegetable and Chicken Skewers are a fantastic option for camping, especially when cooking for a crowd. They’re bursting with flavor and wonderfully easy to prepare. The combination of tender chicken and fresh vegetables creates a delicious meal that everyone will enjoy.
These skewers are perfect for a quick and easy dinner around the campfire. You can customize them with your favorite veggies and marinate the chicken for extra taste. It’s a hands-on meal that’s fun to eat and leaves no mess behind!
Ingredients
- 2 lbs chicken breast, cut into bite-sized pieces
- 1 red bell pepper, cut into chunks
- 1 yellow bell pepper, cut into chunks
- 1 green bell pepper, cut into chunks
- 1 zucchini, sliced
- 1 red onion, cut into wedges
- 1/4 cup olive oil
- 3 tablespoons soy sauce
- 2 cloves garlic, minced
- 1 teaspoon ground black pepper
- 1 teaspoon paprika
- Skewers (wooden or metal)
Instructions
- Marinate the Chicken: In a bowl, mix olive oil, soy sauce, garlic, black pepper, and paprika. Add chicken pieces and stir to coat. Let it marinate for at least 30 minutes.
- Prepare the Skewers: If using wooden skewers, soak them in water for 30 minutes to prevent burning. Then, thread the marinated chicken and vegetables onto the skewers, alternating between chicken and veggies.
- Grill: Preheat your grill or campfire. Place the skewers on the grill and cook for about 10-15 minutes, turning occasionally, until chicken is fully cooked and vegetables are tender.
- Serve: Remove from the grill and let cool slightly before serving. Enjoy your delicious skewers around the campfire!


