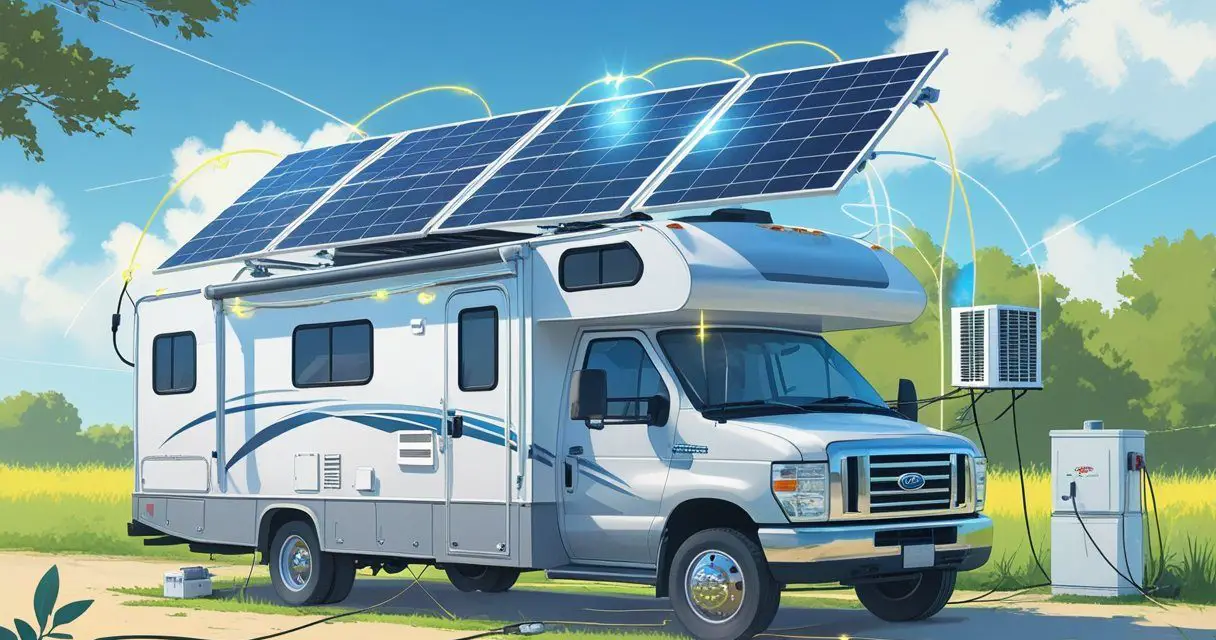
Many RV owners wonder if they can escape crowded campgrounds and high electric hookup fees by powering their air conditioner with solar panels. The good news is that this dream of off-grid comfort is achievable with the right setup and realistic expectations.
Yes, RV solar panels can run an air conditioner, but it requires a substantial solar system with adequate panels, batteries, and an inverter sized to handle the AC unit’s power demands. Most RV air conditioners need between 1,700 and 3,500 starting watts and 600 to 1,500 running watts.
This means a typical setup requires at least 1,800 watts of solar panels and 700-800 amp hours of battery storage to run an AC unit for about 8 hours per day. The reality is that running RV AC on solar power involves significant upfront costs and careful planning.
Factors like available roof space, daily sunlight hours, and your cooling needs all play crucial roles in determining whether a solar-powered AC system makes sense for your RV lifestyle.
Key Takeaways
- RV solar panels can power air conditioners but require substantial investment in panels, batteries, and inverters.
- A typical system needs at least 1,800 watts of solar panels and 700-800 amp hours of battery capacity for 8 hours of daily AC use.
- Success depends on proper system sizing, adequate sunlight exposure, and realistic expectations about power limitations.
Can RV Solar Panels Power an Air Conditioner?
RV solar panels can power an air conditioner, but it requires a substantial system with adequate panels, batteries, and inverters. The feasibility depends on the AC unit’s power consumption, available solar capacity, and usage patterns.
Typical Power Demands of RV Air Conditioners
Most RV air conditioners consume between 1,000 to 1,500 watts during operation. Standard units rated at 13,500 or 15,000 BTUs typically use 1.0 to 1.5 kilowatt-hours (kWh) per hour of runtime.
A 13,500 BTU unit draws approximately 12-13 amps at 120 volts. This equals about 1,560 watts when starting up and 1,200-1,300 watts during continuous operation.
Power Requirements by AC Size:
- 9,000 BTU: 900-1,100 watts
- 13,500 BTU: 1,200-1,400 watts
- 15,000 BTU: 1,300-1,500 watts
The compressor uses most of this power. It cycles on and off to maintain the set temperature, creating variable power demands throughout the day.
Feasibility of Running AC on Solar Power
Running an RV air conditioner on solar requires a complete system with panels, batteries, charge controller, and inverter. For a typical 1,200-watt AC unit running 3 hours daily, the system needs:
Minimum System Requirements:
- 615+ watts of solar panels
- 400 amp-hours of lithium batteries (or 640 Ah lead-acid)
- 30-amp MPPT charge controller
- 2,000-4,000 watt inverter
Each hour of AC operation requires about 200 watts of solar panels to offset the energy used. Running AC for 5 hours daily would need 1,000-1,500 watts of solar panels.
Battery storage becomes critical since AC often runs when solar production is low. Lithium batteries work better than lead-acid due to deeper discharge capability and faster charging.
Comparing Solar Power to Shore Power for AC Use
Shore power delivers unlimited electricity directly from the grid, making it ideal for continuous AC operation. RVers can run their air conditioner as long as needed without worrying about power limits.
Solar power has constraints based on panel capacity, battery storage, and weather conditions. Cloudy days reduce solar production significantly, limiting AC runtime.
Shore Power Benefits:
- Unlimited power supply
- No battery concerns
- Consistent voltage delivery
- Lower upfront costs
Solar Power Limitations:
- Weather dependent
- High initial investment ($3,000-8,000+ for AC-capable systems)
- Limited runtime without sun
- Complex system requirements
Solar works best for partial AC use during peak sun hours. Shore power remains more practical for extended cooling needs or extreme temperatures.
Essential Components for Running RV AC on Solar
Running an RV air conditioner on solar power requires four main components that work together as a complete system. The solar panels generate electricity, batteries store that power for when it’s needed, and an inverter converts the stored DC power to AC power for the air conditioner.
Solar Panels and Solar Array
A typical RV air conditioner needs 1,000 to 1,500 watts of solar panels to run effectively. Most RVers need at least 600-800 watts of solar capacity for moderate AC use.
The exact number depends on your location and daily usage hours. If you run AC for 3 hours daily, expect to need around 615 watts minimum in sunny areas like Utah.
Monocrystalline panels work best for RVs because they produce more power in smaller spaces. Roof space limits how many panels you can install.
Most RV roofs can fit 400-800 watts of panels depending on size. You’ll need to balance panel capacity with available roof space and other equipment.
Solar panels alone cannot run AC directly. They charge batteries during sunny hours while the AC runs off stored battery power.
Battery Bank and Battery Options
The battery bank stores solar energy for AC use during cloudy weather and nighttime hours. Most RV AC setups need 400-800 amp hours of battery capacity.
Lithium iron phosphate batteries are the best choice for RV solar systems. They last longer and charge faster than lead-acid batteries.
A typical setup uses 4-8 lithium batteries rated at 100Ah each. This provides enough stored power to run AC for several hours without sunlight.
| Battery Type | Amp Hours Needed | Typical Cost |
|---|---|---|
| Lithium | 400-600 Ah | $2,000-$4,000 |
| Lead-Acid | 800-1,200 Ah | $1,000-$2,000 |
Would you like to save this article?
Lithium batteries can discharge to 20% capacity safely. Lead-acid batteries should only discharge to 50% to avoid damage.
Inverter Selection and Sizing
The inverter converts 12V DC battery power to 120V AC power that air conditioners need. RV air conditioners require either 2,000W or 4,000W inverters depending on the AC unit size.
Most 13,500 BTU RV air conditioners need at least a 3,000W inverter. Larger 15,000 BTU units often require 4,000W inverters to handle startup power surges.
Soft start devices can reduce inverter size requirements by 30-50%. These devices limit the initial power draw when the AC compressor starts up.
Pure sine wave inverters work best with air conditioners. Modified sine wave inverters can cause efficiency problems and equipment damage over time.
The inverter must handle both running watts and surge watts. AC units draw 2-3 times their running power during the first few seconds of operation.
System Sizing and Power Calculations
Proper system sizing requires understanding your air conditioner’s power demands and converting those needs into specific solar equipment requirements. The key is calculating exact energy consumption and accounting for system inefficiencies.
Calculating Energy Needs for AC
RV air conditioners consume significant power that varies by BTU rating and runtime. A 13,500 BTU air conditioner typically uses 1,200 to 1,500 watts while running.
A 15,000 BTU unit draws 1,500 to 1,800 watts. Starting watts are much higher than running watts. The compressor needs 2 to 3 times more power to start.
A unit running at 1,500 watts might need 3,000 to 4,500 watts to kick on. Daily energy needs depend on runtime hours.
An RV solar setup must account for total watt-hours consumed. For example, running a 1,500-watt AC for 6 hours requires 9,000 watt-hours per day.
System losses reduce available power by 15 to 25 percent. Inverters, batteries, and wiring create inefficiencies. Add this buffer to your calculations for realistic sizing.
Understanding Watts, Volts, and Amps
These three measurements work together in solar power systems. Watts equal volts multiplied by amps. This relationship helps determine battery and inverter requirements.
Most RV systems operate at 12 volts DC for batteries and solar panels. Air conditioners run on 120 volts AC, requiring an inverter for conversion.
Battery capacity is measured in amp-hours (Ah). To find needed capacity, divide daily watt-hours by system voltage. A 9,000 watt-hour need requires 750 amp-hours at 12 volts.
Inverter sizing depends on both continuous and surge power needs. The inverter must handle the AC’s starting watts without shutting down.
Tips for Sizing Your Solar System
Start with peak sun hours in your camping area. Most locations receive 4 to 5 effective sun hours daily.
Divide daily energy needs by sun hours to find required panel wattage. For 9,000 watt-hours with 5 sun hours, you need 1,800 watts of solar panels minimum.
Add extra capacity for cloudy days and panel aging. Roof space limits panel installation. Standard RV roofs may not accommodate large arrays needed for AC power.
Consider portable panels or ground-mounted options. Battery bank sizing should include backup power for multiple days.
Lithium batteries offer the best performance for high-power applications like air conditioning. Soft start devices reduce surge requirements by up to 70 percent.
This allows smaller inverters and reduces battery strain during AC startup.
Optimizing Efficiency for Solar-Powered RV AC
Smart upgrades and proper maintenance can reduce your RV air conditioner’s power demands by 30-50%. Temperature control strategies and component optimization help maximize solar system performance while keeping cooling costs low.
Using Soft Start Devices
A soft start device reduces the initial power surge when your RV air conditioner starts up. Standard AC units draw 2-3 times their normal running watts during startup, which can overload your solar system.
Soft start kits cost $300-500 but allow you to use a smaller inverter. Instead of needing a 4000W inverter, you might only need a 2000W unit with a soft start installed.
The device works by gradually ramping up the compressor instead of starting it instantly. This prevents the power spike that typically lasts 3-5 seconds.
Most RV owners see immediate benefits after installation. Your batteries last longer, and your inverter doesn’t shut down from overload protection.
Popular brands include Micro-Air and SoftStartRV. Both offer models designed specifically for 13,500 BTU and 15,000 BTU RV air conditioners.
Maintaining and Upgrading Components
Clean solar panels produce 15-25% more power than dirty ones. Dust, bird droppings, and debris block sunlight and reduce charging efficiency.
Check your panels monthly and clean them with soap and water. Avoid harsh chemicals that might damage the panel surface.
Battery maintenance affects your entire RV solar system performance. Lithium batteries need proper ventilation and should stay between 20-80% charge when possible.
Replace air conditioner filters every 30 days during heavy use. Clogged filters make your AC work harder and consume more power from your solar air conditioner setup.
Upgrade to a programmable thermostat for better temperature control. These units cost $50-150 and can reduce energy use by automatically adjusting temperatures when you’re away.
Check all electrical connections twice per year. Loose wires create resistance and waste power that your solar system worked hard to generate.
Temperature Management and Usage Tips
Set your thermostat to 78°F instead of 70°F to reduce power consumption by up to 40%. Each degree lower significantly increases energy demands on your solar system.
Use ceiling fans to circulate air and make higher temperatures feel comfortable. A small 12V fan uses only 1-3 amps compared to your AC’s 100+ amp draw.
Park in shade when possible to reduce your RV’s internal temperature. Even partial shade can lower cooling demands by 20-30%.
Close vents in unused rooms to concentrate cooling where you need it. This simple step makes your solar air conditioner more efficient.
Run your AC during peak sun hours (10 AM – 4 PM) when your panels produce maximum power. Your batteries can handle evening cooling with stored energy.
Add reflective window covers and vent insulators to keep heat out. These upgrades cost under $100 and reduce AC runtime significantly.
Setup and Installation of an RV Solar AC System
Setting up solar panels to run an RV air conditioner requires careful planning. Proper installation of multiple components is essential.
The process involves mounting panels and connecting electrical components safely. Integration of a charge controller manages power flow.
Installation Steps for a Complete Setup
The first step involves calculating power needs based on the air conditioner’s requirements. Most RV AC units need 1,000 to 2,000 watts of power to operate effectively.
RV owners should mount solar panels on the roof using appropriate brackets and sealants. The panels must face south when possible and avoid shaded areas from vents or other roof equipment.
Essential components include:
- Solar panels (800-2,500 watts total)
- Pure sine wave inverter (3,000-4,000 watts)
- Lithium batteries (400-800 amp hours)
- MPPT charge controller (30-60 amps)
The battery bank connects to the inverter first. The inverter then connects to the RV’s electrical panel or directly to the air conditioner outlet.
Solar panels wire in series or parallel depending on the system voltage. Series connections increase voltage while parallel connections increase amperage.
All connections require marine-grade wire and proper fuses or breakers. The system needs a battery monitor to track power usage and remaining capacity.
Safety Considerations and Professional Help
Electrical work on RV solar setups can be dangerous without proper knowledge. High-voltage systems pose risks of shock, fire, or equipment damage if installed incorrectly.
Professional installation ensures code compliance and warranty protection. Many solar installers specialize in RV systems and understand the unique challenges of mobile applications.
Key safety requirements:
- Proper grounding of all components
- Correct fuse and breaker sizing
- Weatherproof connections on the roof
- Adequate ventilation for batteries and inverters
DIY installers should turn off all power sources before beginning work. They must use insulated tools and follow manufacturer instructions exactly.
Battery installations require proper ventilation, especially with lithium systems that can overheat. The inverter needs adequate clearance for cooling and should mount in a dry location.
Local electrical codes may apply to RV modifications. Some states require permits or inspections for large solar installations.
Wiring and Charge Controller Integration
The charge controller regulates power flow from solar panels to batteries. MPPT controllers offer better efficiency than PWM types for RV solar setups with air conditioning loads.
Charge controller wiring sequence:
- Connect batteries to controller first
- Connect solar panels to controller last
- Install fuses on both positive connections
- Ground the controller to the RV frame
Wire sizing depends on the distance between components and current flow. Longer runs require thicker wire to prevent voltage drop and power loss.
The charge controller mounts near the batteries when possible. This reduces wire length and improves system efficiency.
Programming the charge controller correctly protects batteries from overcharging. Lithium batteries require different settings than lead-acid types.
Temperature sensors help the charge controller adjust charging rates based on battery temperature. This feature extends battery life and improves performance in extreme weather.
A battery monitor connects between the charge controller and batteries. This device tracks energy production, consumption, and remaining battery capacity for the RV solar setup.
Limitations, Real-World Considerations, and Alternative Solutions
Running RV AC on solar requires significant power that many standard systems cannot provide consistently. Off-grid cooling demands careful energy planning.
Challenges of Off-Grid AC with Solar
Traditional RV air conditioners need 1,000-1,500 watts to run continuously. This power demand creates serious challenges for solar systems.
Most RV roofs have limited space for solar panels. A typical RV can fit 800-1,200 watts of panels maximum.
Battery requirements become expensive quickly:
- Running AC for 8 hours needs 8,000-12,000 watt-hours
- This requires a massive battery bank costing $3,000-$6,000
- Lithium batteries work best but add significant weight
Cloudy weather cuts solar production by 70-80%. Night operation relies entirely on stored battery power.
Starting watts pose another problem. RV air conditioners need 2,000-3,500 watts when they first turn on.
The inverter must handle these power surges. Many RVers find their systems work for 2-4 hours of AC runtime per day.
Alternatives Like Solar Air Conditioners and Hybrid Solutions
Solar air conditioner units designed for RVs use much less power than standard models. These specialized units need only 500-900 watts to operate.
Zero Breeze and similar brands make 12V DC air conditioners. They skip the inverter step and run directly from batteries.
This saves 10-15% of total power consumption. Evaporative coolers work well in dry climates.
They use only 100-300 watts and can drop temperatures by 15-20 degrees.
Hybrid solutions combine multiple cooling methods:
- Solar air conditioner for peak heat hours
- Fans and ventilation for mild temperatures
- Shore power hookups when available at campgrounds
Portable AC units offer flexibility. RVers can position them where needed and move them between indoor and outdoor use.
Some travelers use window units with flexible ducting. These cost less than rooftop models and often use less power.
Boondocking and Energy Management Strategies
Boondocking with AC requires smart energy management. Successful off-grid cooling depends on reducing overall power needs.
Insulation upgrades cut AC runtime by 30-50%. Reflective window covers and ventilation fans help maintain cooler interior temperatures.
Time-based cooling strategies work best:
- Run AC during peak solar production (10 AM – 4 PM)
- Pre-cool the RV before evening
Use fans and natural ventilation at night. Energy monitoring helps track power consumption.
Smart battery monitors show exactly how much power the AC uses per hour. Many boondocking experts recommend the “partial cooling” approach.
They cool the RV to 78-80°F instead of 72°F. This cuts power usage by 25-40%.
Parking strategies matter too. Finding shaded campsites reduces heat load significantly.
Morning sun exposure helps charge batteries while keeping the RV cooler. Some RVers install zone cooling systems.
They cool only the bedroom or main living area instead of the entire RV.


