Did you know that over 85% of RV owners feel their mobile home’s interior looks dated within just five years? That outdated appearance can make your adventure vehicle feel less like home and more like a time capsule.
Many travelers hesitate to tackle interior updates, fearing complex projects. But countless owners have discovered that refreshing their space with new colors creates a dramatic transformation. The right approach turns this into an achievable weekend project.
Proper preparation and quality materials ensure professional results, even for first-time DIYers. Lighting in recreational vehicles affects how colors appear, making sample testing essential before committing to a full application.
This guide will walk you through the entire process from initial prep to final brush strokes. You’ll learn techniques that deliver stunning results while working within your vehicle’s unique environment.
Key Takeaways
- A fresh coat of paint dramatically updates your RV’s interior appearance
- Proper preparation ensures professional-looking results
- The project typically completes within a single day
- Color samples are crucial due to unique RV lighting conditions
- Beginner-friendly techniques yield impressive transformations
- Focusing on walls alone creates maximum impact with minimal effort
- Quality materials make the difference between good and great results
Can RV Walls Be Painted? Understanding the Basics
Recreational vehicle interiors feature specialized construction methods that differ from residential homes. These differences affect how you approach color updates.
What Makes RV Walls Different From Regular Walls
Mobile home construction prioritizes weight savings and durability. Most interior surfaces consist of thin luan plywood with permanently adhered wallpaper textures.
These materials create smooth, sometimes slippery surfaces that challenge coating adhesion. The lightweight nature means these panels flex during travel, requiring flexible finish systems.
Unlike drywall, you shouldn’t remove the original textured coverings. The good news? These surfaces accept new colors beautifully with proper preparation.
Common RV Wall Materials: Vinyl, Wood Veneer and Laminate
Manufacturers use three primary materials for recreational vehicle interiors. Each requires slightly different preparation approaches.
Vinyl-covered panels appear in many modern models. This material offers excellent moisture resistance but needs special primers for proper coating bonding.
Wood veneer surfaces provide classic warmth and character. These thin wood layers show their grain pattern through new colors, adding visual interest.
Laminate finishes offer durability and easy cleaning. Their non-porous nature demands thorough cleaning and light sanding before color application.
Many vehicles combine these materials throughout the living space. Kitchens and bathrooms sometimes feature removable decorative borders for easier updating.
Original textures and patterns remain visible after color updates. This characteristic actually enhances the finished look, preserving some original charm while refreshing the entire space.
With correct techniques, these specialized surfaces transform beautifully. The key lies in understanding their unique properties and preparing accordingly.
Pros and Cons of Painting Your RV Interior
Transforming your adventure vehicle’s appearance involves important considerations before starting. This permanent change affects both daily enjoyment and long-term value.
Understanding both sides helps make an informed choice about your mobile home’s future.
Benefits of Painting: Customization and Updating Your Space
A fresh coat transforms outdated interiors into personalized retreats. You gain complete control over the final look.
Modern colors replace dated patterns from previous decades. This update makes your travel home feel contemporary and inviting.
Covering stains becomes simple with the right paint selection. Water marks, smoke residues, and other imperfections disappear under new colors.
Personal expression shines through your color choices. Your vehicle reflects your unique style instead of factory defaults.
Potential Drawbacks: Maintenance and Resale Considerations
Original vinyl surfaces offer superior wipe-clean convenience. Painted surfaces require more careful cleaning methods.
Scratches and nicks show more visibly on colored finishes. Touch-up work becomes part of regular maintenance.
Future buyers might prefer untouched original interiors. Neutral tones minimize this concern but don’t eliminate it completely.
The process demands significant time investment. Numerous corners and tight spaces challenge even experienced DIYers.
Reversing the decision typically requires full wall replacement. There’s no simple way to return to the original surface once painted.
Consider less permanent options before committing. Accent trim removal, valance updates, or artwork installation offer customization without permanence.
Your lifestyle and long-term plans should guide this important choice. Weigh these factors carefully for the best outcome.
Essential Preparation: Getting Your RV Walls Ready for Paint
Proper groundwork separates amateur results from professional-looking finishes. This crucial stage ensures your new colors adhere properly and last for years.
Cleaning and Degreasing Surfaces Properly
Start with a thorough cleaning using degreasers like TSP or Simple Green. These products remove hidden grime that might interfere with adhesion.
Natural alternatives like vinegar-water solutions also work well. Always test cleaners on a small hidden area first.
Proper ventilation becomes essential during this step. Open all windows and consider using a fan for air circulation.
Would you like to save this article?
Light Sanding Techniques for Better Adhesion
Light scuffing creates microscopic texture for better paint bonding. Use medium grit paper and gentle pressure.
Sanding blocks make handling easier in tight spaces. Work methodically across all surfaces needing coverage.
Some professionals prefer sanding before cleaning to minimize dust spread. Others find degreasers reduce sanding needs.
Thorough dust removal completes this step. Tack cloths capture fine particles regular cloths miss.
Repairing Damage and Filling Imperfections
Address scratches, nail holes, or other imperfections before painting. Use paintable wood filler or spackling for repairs.
Allow fillers to dry completely according to package directions. Light sanding creates smooth, flush surfaces.
Cover floors and furniture with drop cloths during prep work. This protects your interior from cleaning solutions and dust.
Complete drying after cleaning prevents future problems. Rushing this step risks adhesion issues.
Quality preparation prevents poor performance. The extra time invested upfront saves frustration later.
While time-consuming, proper prep work ensures beautiful, long-lasting results. Your patience will reward you with a transformed space that feels fresh and new.
Choosing and Applying the Right Primer
Your preparation work leads to this critical stage. The primer selection makes or breaks your entire painting project.
Specialized surfaces demand specific products. Regular primers simply won’t stick to slick recreational vehicle materials.
Bonding primers create chemical connections with challenging surfaces. This foundation ensures your topcoat stays beautiful for years.
Why Bonding Primer is Critical for Your Walls
Vinyl and laminate surfaces repel standard primers. Their slick finishes cause peeling and chipping over time.
Bonding primers contain special adhesives that grip these surfaces. They create a perfect foundation for your color coats.
Many DIYers learned this lesson the hard way. Skipping proper primer led to complete rework within months.
These products also help with caulking adhesion. Resealed edges bond better when applied over primed surfaces.
Popular Primer Options: Gripper vs. Kilz Adhesion
Several excellent bonding primers work beautifully on mobile home interiors. Each offers unique advantages for different situations.
| Product | Best For | Cleanup | Drying Time |
|---|---|---|---|
| PPG Gripper | High-humidity areas | Soap and water | 1 hour |
| Kilz Adhesion | Glossy surfaces | Mineral spirits | 4 hours |
| INSL-X Stix | Problematic surfaces | Soap and water | 2 hours |
| Glidden Gripper | Budget projects | Soap and water | 1 hour |
Water-based options simplify cleanup with just soap and water. Oil-based versions sometimes offer stronger adhesion on difficult surfaces.
Application Techniques for Best Results
Proper application ensures maximum performance from your primer. Follow these steps for professional outcomes.
Stir the product thoroughly without thinning. These primers have thicker consistency designed for optimal performance.
Apply two thin coats rather than one heavy application. This approach prevents drips and ensures even coverage.
Wait the recommended time between coats. Most products need 1-4 hours depending on temperature and humidity.
Tint your primer when using dark paint colors. This technique reduces the number of topcoats needed.
Clean tools immediately after use. Water-based primers wash easily while oil-based need mineral spirits.
“The primer stage seems extra work but actually saves time later. Proper bonding prevents future headaches and rework.”
This investment in quality materials pays dividends through beautiful, long-lasting results. Your patience during this stage ensures a spectacular finish.
The Painting Process: Techniques for a Professional Finish
Your mobile home transformation reaches its most rewarding phase. This exciting step brings your vision to life with careful application methods.
Quality tools and proper techniques create magazine-worthy results. Even first-time DIYers achieve stunning outcomes with these professional approaches.
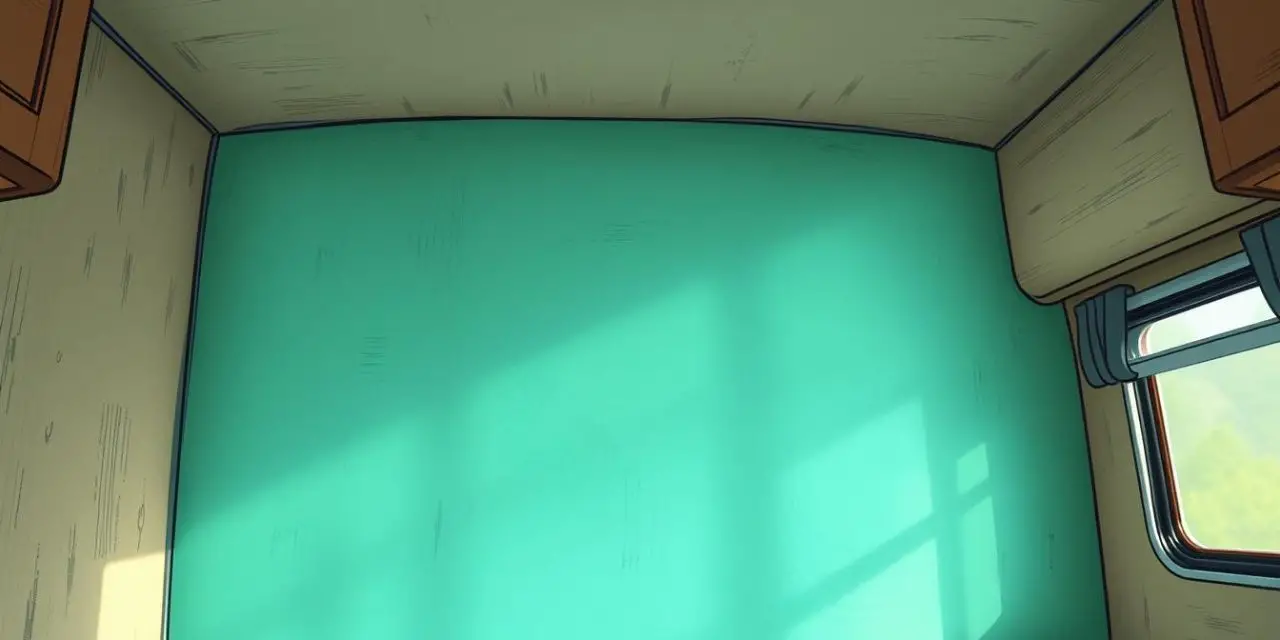
Selecting the Perfect Paint Color and Sheen
Choose high-quality water-based formulas for your project. These products offer excellent durability and easy cleanup.
Eggshell or satin finishes work beautifully for mobile living spaces. They balance cleanability with attractive light reflection.
Lighting dramatically affects how colors appear inside your vehicle. Test samples in different areas before final selection.
Many travelers discover their chosen shade looks completely different on the road. Natural light through windows changes throughout the day.
Consider painting ceilings white when using light wall colors. This technique maximizes brightness throughout your interior space.
Cutting In and Rolling: Proper Application Methods
Begin with edges using quality angled brushes. Purdy or Wooster brushes provide excellent control for detailed work.
Cutting in around trim, corners, and edges creates clean lines. This preparation makes rolling larger areas much simpler.
Use small rollers designed for tight spaces. These tools navigate around cabinets and furniture with ease.
Maintain wet edges to avoid visible lap marks. Work in manageable sections for consistent coverage.
Paint sprayers offer speed and smooth finishes. They require extensive masking of surrounding surfaces beforehand.
How Many Coats You’ll Need and Drying Times
Most colors require two coats for complete coverage. Pure whites might need additional applications for full opacity.
Allow proper drying between each application. Follow manufacturer recommendations for specific timing.
Temperature and humidity affect drying durations. Warmer conditions typically accelerate the process.
Wait before reassembling your space or using surfaces. Rushing this step risks damaging your fresh finish.
| Paint Type | Recommended Coats | Drying Time | Best For |
|---|---|---|---|
| Light Colors | 2-3 coats | 2-4 hours | Brightening spaces |
| Dark Colors | 2 coats | 3-6 hours | Creating drama |
| Pure White | 3+ coats | 4-8 hours | Ceilings and trim |
| Tinted Primer | 1 coat | 1-2 hours | Color preparation |
Accidental marks on unintended surfaces happen to everyone. Magic erasers or rubbing alcohol remove fresh mistakes quickly.
Many renovators share surprising color transformation stories. Identical paint shades appear completely different in various lighting conditions.
“The right application technique makes all the difference. Quality tools and patience create professional results that last for years.”
Your careful work transforms the entire feeling of your adventure vehicle. This rewarding project creates a personalized retreat for countless journeys ahead.
Conclusion: Enjoy Your Newly Transformed RV Interior
Your refreshed mobile home interior now reflects your personal style. The paint application transforms the entire space with minimal investment.
Proper preparation ensures lasting results that withstand travel vibrations. Take time to appreciate the new look before planning additional projects.
Share your success with fellow travelers and inspire others. Your dedication created a beautiful backdrop for countless adventures ahead.


