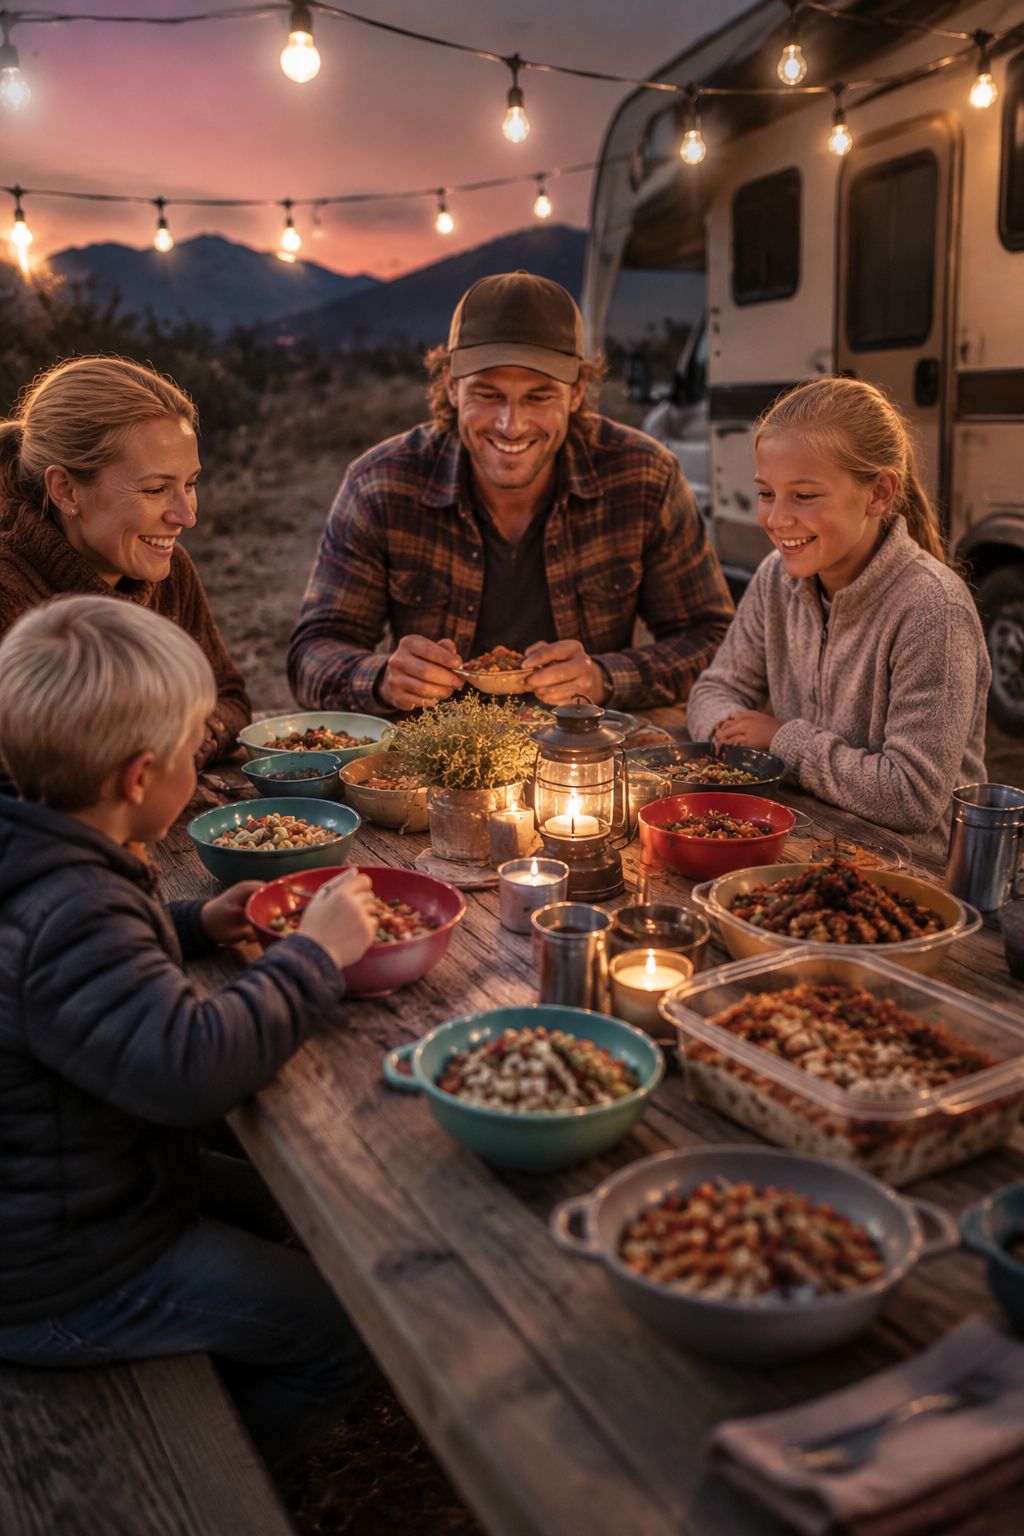
More than 60 million Americans go camping every year — and the number one complaint? Spending more time cooking than actually enjoying the outdoors. That’s exactly why these 12 make ahead camping food ideas for your next RV trip are about to change the game. Prep everything at home, pack it smart, and spend your campsite hours doing what actually matters: hiking, stargazing, and making memories. Whether you’re a seasoned road warrior or a first-time RV adventurer, this guide delivers delicious, stress-free meals that are ready when you are. 🏕️
Would you like to save this article?
Key Takeaways
- Prep at home, eat like royalty at camp — make-ahead meals save time and reduce campsite stress dramatically.
- Freezer-friendly meals are your best friend for multi-day RV trips.
- Labeling and portioning containers before you leave home makes mealtime effortless.
- Variety matters — cover breakfast, lunch, dinner, snacks, and desserts to avoid food fatigue.
- The right storage containers (glass, BPA-free plastic, or vacuum-sealed bags) keep food fresh and safe for the road.
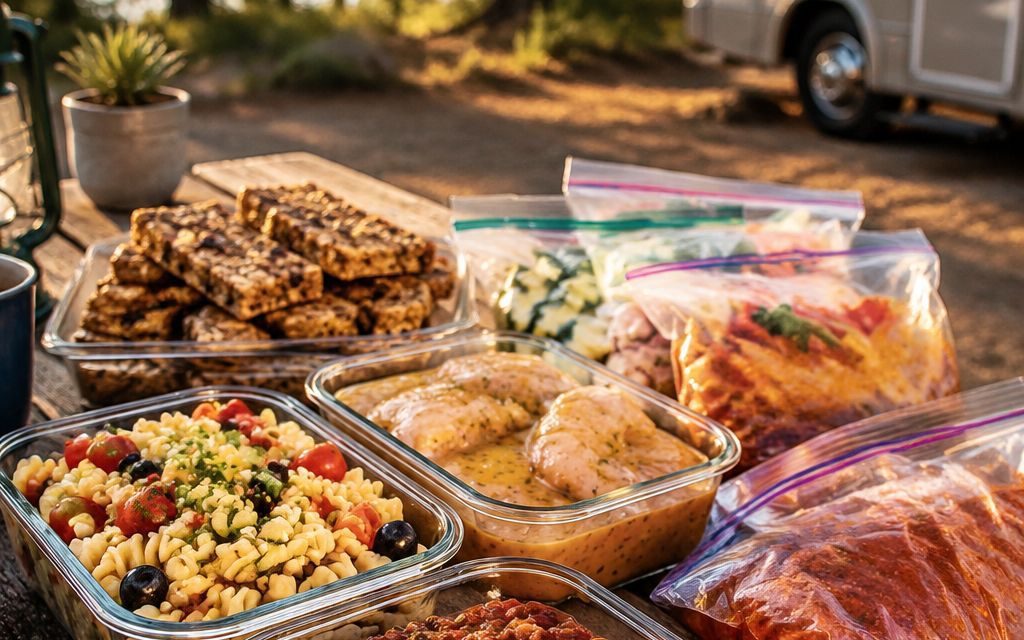
Why Make Ahead Camping Food Is a Total Game-Changer
Let’s be honest — nobody wants to chop onions at a campsite while mosquitoes circle overhead. Make-ahead camping food solves that problem completely. By doing the heavy lifting in your own kitchen before you hit the road, you get:
| Benefit | What It Means for You |
|---|---|
| 🕐 Time savings | More hours for hiking, swimming, and relaxing |
| 💰 Budget control | Less impulse buying at camp stores |
| 🥗 Healthier eating | You control the ingredients |
| ❄️ Less waste | Portioned meals mean nothing goes bad |
| 🔥 Faster cooking | Reheat vs. cook from scratch |
“The secret to a perfect camping trip isn’t the destination — it’s never having to wonder what’s for dinner.”
RV cooking comes with real limitations: small stovetops, limited counter space, and no desire to spend an hour washing dishes. Make-ahead meals fit perfectly into that lifestyle.
12 Make Ahead Camping Food Ideas for Your Next RV Trip: Breakfast Edition
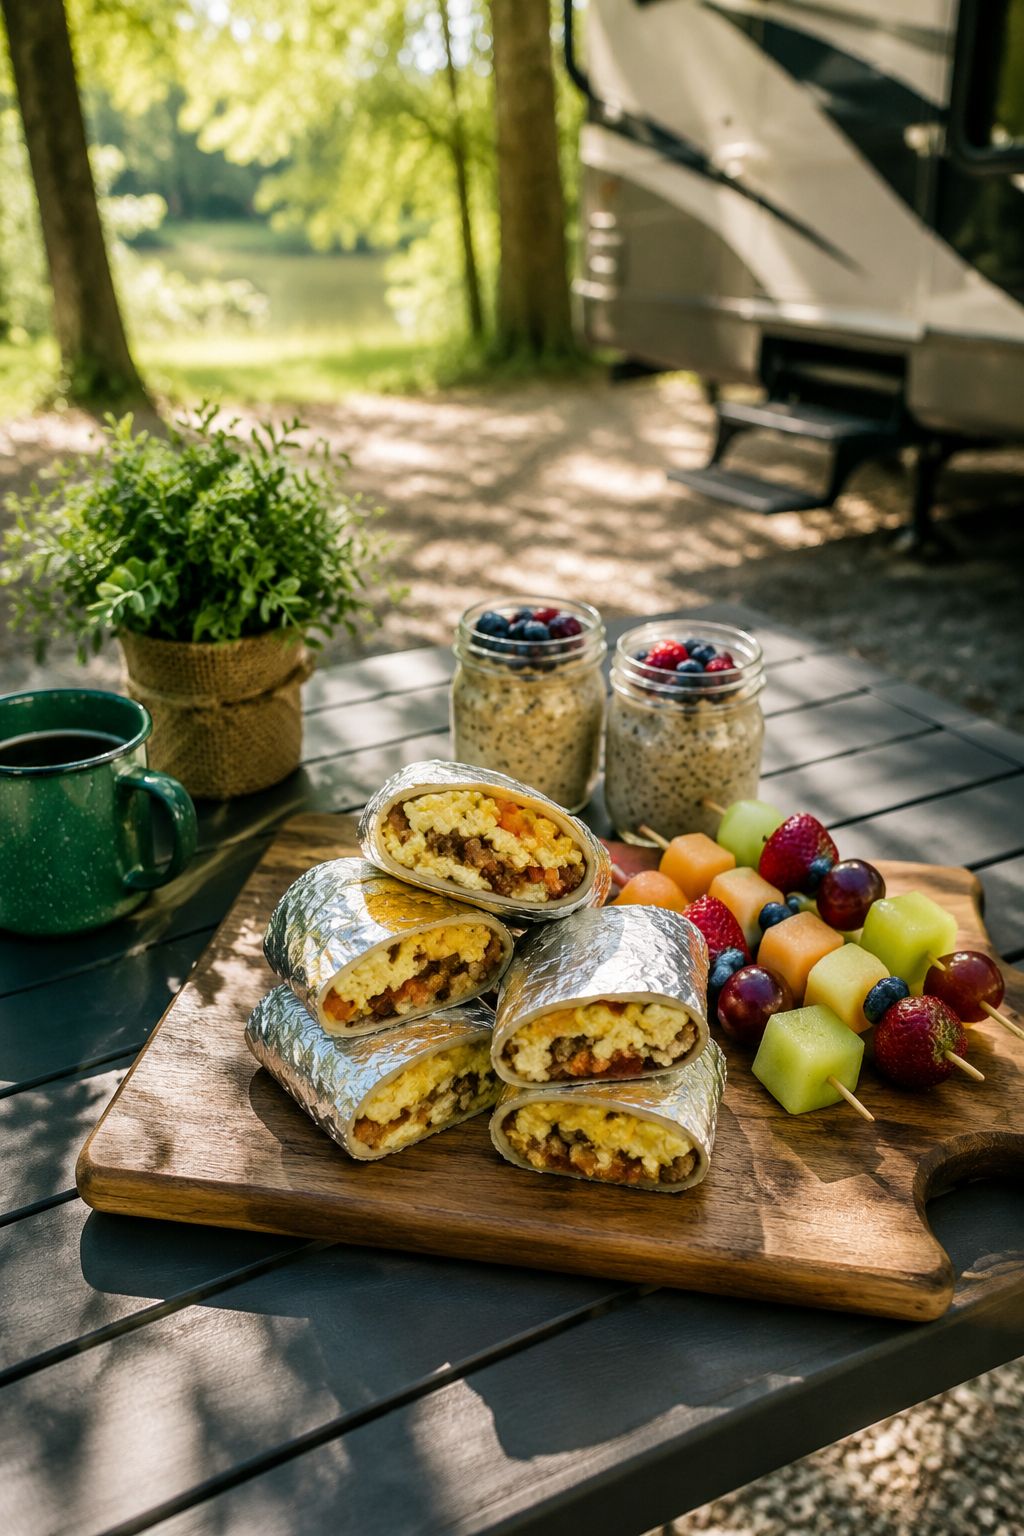
1. 🍳 Freezer Breakfast Burritos
Breakfast burritos are the undisputed king of make-ahead camping breakfasts. Make a big batch, wrap them individually in foil, freeze them, and reheat on the campfire grate or in the RV microwave.
Key Ingredients:
- 8 large flour tortillas
- 10 large eggs
- 1 lb breakfast sausage or bacon, cooked and crumbled
- 1 cup shredded cheddar cheese
- 1 cup diced bell peppers and onions (sautéed)
- Salt, pepper, and hot sauce to taste
Step-by-Step Instructions:
- Scramble eggs in a large skillet over medium heat. Season with salt and pepper.
- Cook sausage or bacon separately; drain excess fat.
- Sauté diced peppers and onions until soft.
- Lay out tortillas and divide eggs, sausage, peppers, and cheese evenly.
- Roll each tortilla tightly, folding in the sides.
- Wrap each burrito individually in aluminum foil.
- Place in a zip-lock freezer bag and freeze for up to 3 months.
- At camp, reheat in foil directly on the grill grate for 10–15 minutes, turning halfway.
2. 🥣 Overnight Oats (Mason Jar Style)
Zero cooking required at camp. These creamy, customizable oats are ready to grab from the cooler and eat immediately.
Key Ingredients:
- 2 cups old-fashioned rolled oats
- 2 cups milk (dairy or plant-based)
- 1 cup Greek yogurt
- 4 tbsp chia seeds
- 4 tbsp honey or maple syrup
- Toppings: berries, banana slices, granola, nut butter
Step-by-Step Instructions:
- Divide oats evenly among 4 mason jars (16 oz each).
- Add ½ cup milk and ¼ cup yogurt to each jar.
- Stir in 1 tbsp chia seeds and 1 tbsp sweetener per jar.
- Seal jars tightly and refrigerate overnight (or up to 5 days).
- Pack jars in the cooler for the trip.
- At camp, add toppings and eat cold — no heating needed!
3. 🧁 Banana Oat Muffins
Bake a batch of these wholesome muffins the night before departure. They stay fresh for 3–4 days and double as a snack or dessert.
Key Ingredients:
- 3 ripe bananas, mashed
- 2 cups rolled oats
- 2 eggs
- ¼ cup honey
- 1 tsp baking powder
- 1 tsp vanilla extract
- ½ cup chocolate chips or blueberries (optional)
Step-by-Step Instructions:
- Preheat oven to 350°F (175°C).
- Mash bananas in a large bowl until smooth.
- Add eggs, honey, and vanilla; mix well.
- Stir in oats and baking powder until combined.
- Fold in chocolate chips or blueberries if using.
- Spoon batter into a greased muffin tin.
- Bake for 18–22 minutes until golden and a toothpick comes out clean.
- Cool completely, then store in an airtight container or zip-lock bag.
12 Make Ahead Camping Food Ideas for Your Next RV Trip: Lunch & Dinner Edition
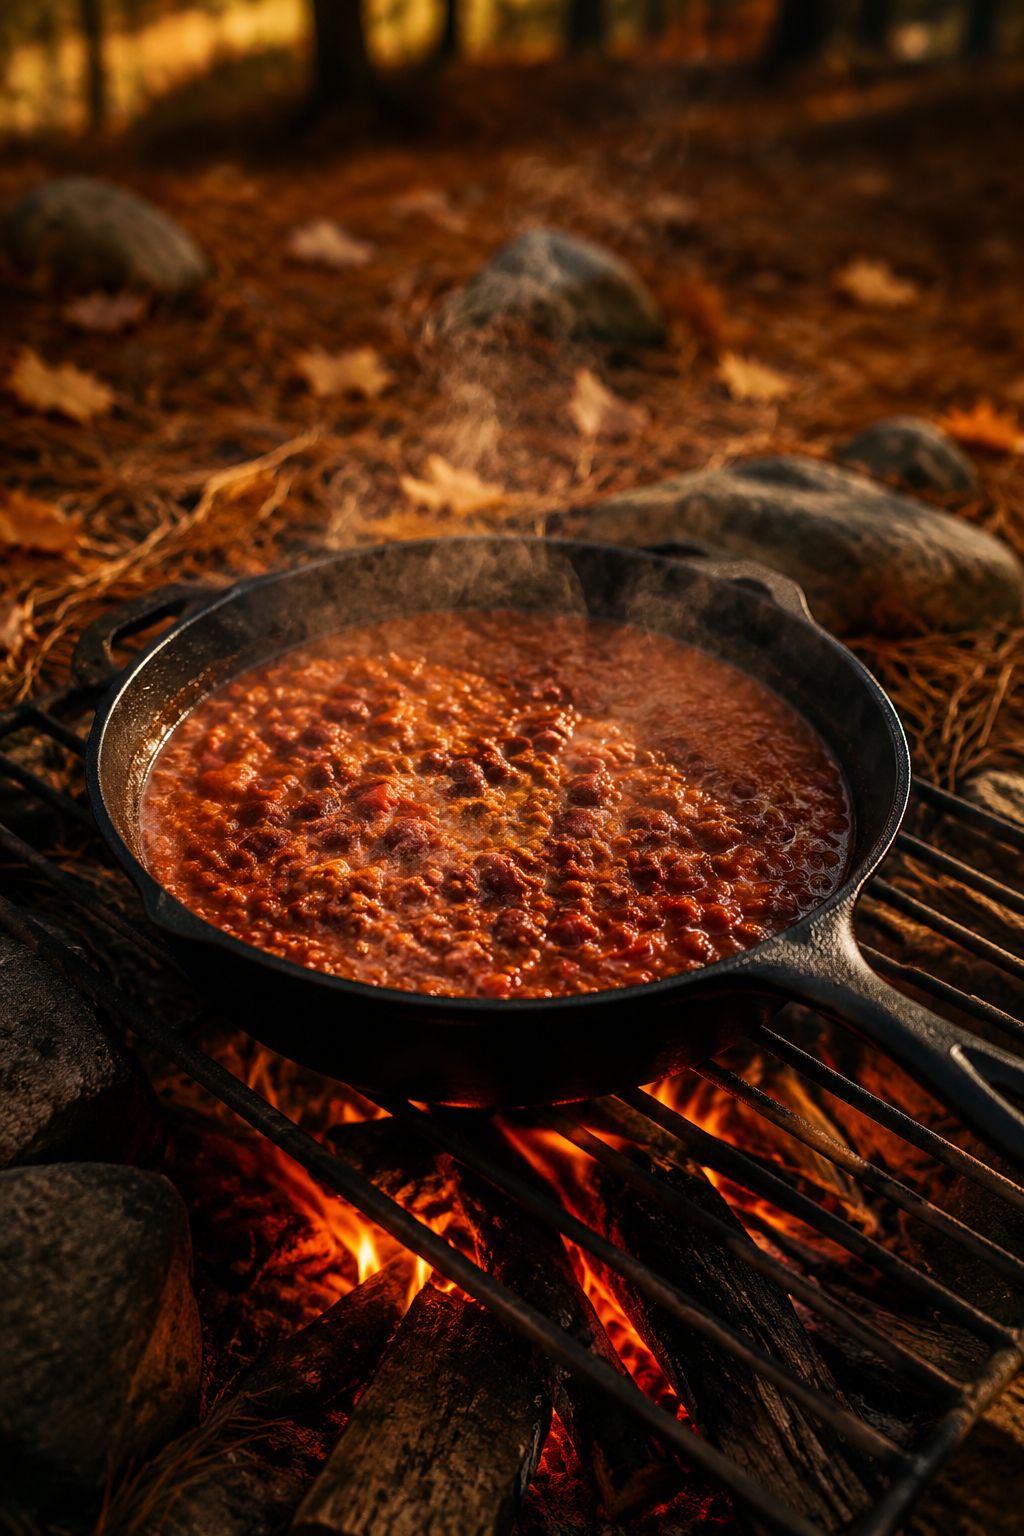
4. 🍲 Slow Cooker Chili (Freeze & Reheat)
Chili is the ultimate make-ahead camping dinner. It actually tastes better after a day or two, and it reheats beautifully on any heat source.
Key Ingredients:
- 1.5 lbs ground beef or turkey
- 2 cans (15 oz each) kidney beans, drained
- 1 can (28 oz) crushed tomatoes
- 1 can (15 oz) diced tomatoes
- 1 large onion, diced
- 3 garlic cloves, minced
- 2 tbsp chili powder
- 1 tsp cumin, smoked paprika, and oregano
- Salt and pepper to taste
Step-by-Step Instructions:
- Brown ground meat in a large pot over medium-high heat; drain fat.
- Add onion and garlic; cook 3–4 minutes until softened.
- Stir in all spices and cook 1 minute.
- Add crushed tomatoes, diced tomatoes, and beans. Stir well.
- Simmer on low heat for 30–45 minutes, stirring occasionally.
- Cool completely, then portion into freezer-safe containers or zip-lock bags.
- Freeze flat for easy packing. Thaws in the cooler overnight.
- At camp, reheat in a pot over the stove or campfire. Serve with cornbread or crackers.
5. 🍝 Pasta Salad with Italian Dressing
This no-reheat lunch option is refreshing, filling, and endlessly customizable. It keeps well in the cooler for 3–4 days.
Key Ingredients:
- 1 lb rotini or penne pasta, cooked and cooled
- 1 cup Italian dressing
- 1 cup cherry tomatoes, halved
- 1 cup sliced black olives
- 1 cup diced cucumber
- ½ cup diced red onion
- ½ cup cubed salami or pepperoni
- ½ cup shredded Parmesan cheese
Step-by-Step Instructions:
- Cook pasta according to package directions; drain and rinse with cold water.
- Toss pasta with Italian dressing while still slightly warm.
- Add tomatoes, olives, cucumber, red onion, and salami.
- Toss everything together until evenly coated.
- Sprinkle Parmesan on top and mix gently.
- Transfer to an airtight container and refrigerate for at least 2 hours before packing.
- At camp, serve cold straight from the cooler. Add extra dressing if needed.
6. 🍗 Marinated Grilled Chicken
Do the marinating at home and freeze the raw chicken in the marinade. By the time you’re ready to grill at camp, it’s perfectly seasoned and thawed.
Key Ingredients:
- 4 boneless, skinless chicken breasts or thighs
- ¼ cup olive oil
- 3 tbsp soy sauce
- 2 tbsp lemon juice
- 3 garlic cloves, minced
- 1 tsp dried oregano, paprika, and black pepper
Step-by-Step Instructions:
- Whisk together olive oil, soy sauce, lemon juice, garlic, and spices in a bowl.
- Place chicken in a large zip-lock freezer bag.
- Pour marinade over chicken; seal the bag and squish to coat evenly.
- Freeze the bag flat. The chicken marinates as it thaws!
- Transfer from freezer to cooler the night before you plan to cook it.
- At camp, grill chicken over medium-high heat for 6–7 minutes per side.
- Let rest 5 minutes before slicing. Serve with pasta salad or veggies.
7. 🥘 Foil Packet Fajita Kits
Prep all the ingredients at home and store them in individual foil packets. At camp, just toss them on the grill or campfire coals.
Key Ingredients:
- 1.5 lbs flank steak or chicken, sliced thin
- 3 bell peppers (red, yellow, green), sliced
- 1 large onion, sliced
- 3 tbsp fajita seasoning
- 2 tbsp olive oil
- Flour tortillas (packed separately)
- Toppings: salsa, sour cream, shredded cheese
Step-by-Step Instructions:
- Toss sliced meat and vegetables with fajita seasoning and olive oil.
- Divide mixture into 4 equal portions.
- Place each portion on a large sheet of heavy-duty aluminum foil.
- Fold foil tightly to create sealed packets.
- Store packets in a zip-lock bag in the freezer until departure.
- Thaw in the cooler overnight before cooking.
- At camp, place foil packets on the grill grate or directly on coals for 15–20 minutes, flipping once.
- Open carefully (steam is hot!), serve in tortillas with toppings.
8. 🍜 Hearty Vegetable Soup
This thick, comforting soup is perfect for cool camping evenings. Make a big pot, freeze in portions, and reheat in minutes.
Key Ingredients:
- 4 cups vegetable or chicken broth
- 2 cups diced potatoes
- 1 cup diced carrots
- 1 cup diced celery
- 1 can (15 oz) diced tomatoes
- 1 can (15 oz) white beans, drained
- 2 cups chopped kale or spinach
- 2 garlic cloves, minced
- 1 tsp Italian seasoning, salt, and pepper
Step-by-Step Instructions:
- Sauté garlic, carrots, and celery in a large pot with a drizzle of oil for 4–5 minutes.
- Add potatoes, broth, and diced tomatoes. Bring to a boil.
- Reduce heat and simmer 15 minutes until potatoes are tender.
- Stir in white beans and kale; cook 5 more minutes.
- Season with Italian seasoning, salt, and pepper.
- Cool completely, then ladle into freezer-safe bags or containers.
- At camp, reheat in a pot on the stove or campfire until steaming hot.
9. 🌮 Taco Meat (Seasoned & Frozen)
Pre-cooked taco meat is one of the most versatile make-ahead camping foods. Use it for tacos, burritos, nachos, or rice bowls.
Key Ingredients:
- 2 lbs ground beef or turkey
- 1 packet taco seasoning (or homemade blend)
- ½ cup water
- 1 can (15 oz) black beans, drained (optional)
Step-by-Step Instructions:
- Brown ground meat in a large skillet over medium-high heat; drain excess fat.
- Add taco seasoning and water; stir well.
- Simmer 5 minutes until liquid is absorbed and meat is well-coated.
- Stir in black beans if using.
- Cool completely, then portion into zip-lock freezer bags.
- Freeze flat. Thaws quickly in a bowl of warm water at camp.
- Reheat in a skillet with a splash of water or serve at room temperature in tacos.
Snacks, Sides & Desserts to Complete Your Camping Menu
10. 🍫 No-Bake Energy Balls
These little powerhouses are the perfect trail snack, post-hike treat, or quick breakfast bite. Make a big batch and store in the freezer.
Key Ingredients:
- 2 cups rolled oats
- ½ cup peanut butter or almond butter
- ⅓ cup honey
- ½ cup mini chocolate chips
- ¼ cup ground flaxseed
- 1 tsp vanilla extract
Step-by-Step Instructions:
- Combine all ingredients in a large mixing bowl.
- Stir until everything is evenly mixed (the mixture should be sticky).
- Refrigerate the mixture for 30 minutes to firm up.
- Roll into 1-inch balls using your hands.
- Place on a parchment-lined baking sheet and freeze for 1 hour.
- Transfer frozen balls to a zip-lock bag or airtight container.
- Store in the cooler at camp. They stay fresh for up to 2 weeks frozen.
11. 🥗 Chopped Veggie Snack Packs
Prep individual snack bags of cut vegetables for easy grab-and-go munching throughout the trip.
Key Ingredients:
- 3 large carrots, peeled and cut into sticks
- 3 celery stalks, cut into sticks
- 1 cucumber, sliced
- 1 cup cherry tomatoes
- 1 cup snap peas
- Hummus or ranch dip (portioned into small containers)
Step-by-Step Instructions:
- Wash and prep all vegetables.
- Divide vegetables evenly into 6–8 zip-lock snack bags.
- Portion hummus or ranch into small lidded containers.
- Store veggie bags and dip containers in the cooler.
- Grab a bag anytime hunger strikes — no prep needed at camp!
Pro Tip: 🧊 Keep veggie snack packs in the most accessible part of your cooler so they’re the first thing grabbed when hunger hits.
12. 🍪 S’mores Brownie Bars
Who says camping desserts can’t be gourmet? Bake these fudgy, campfire-inspired bars at home and enjoy them all week.
Key Ingredients:
- 1 box brownie mix (plus ingredients listed on box)
- 1 cup mini marshmallows
- ½ cup crushed graham crackers
- ½ cup chocolate chips
- 2 tbsp butter, melted
Step-by-Step Instructions:
- Preheat oven to 350°F (175°C). Grease a 9×13 baking pan.
- Mix brownie batter according to package directions.
- Toss crushed graham crackers with melted butter; press into the bottom of the pan.
- Pour brownie batter over the graham cracker layer.
- Bake for 20 minutes, then remove from oven.
- Scatter mini marshmallows and chocolate chips on top.
- Return to oven for 5–8 more minutes until marshmallows are golden.
- Cool completely, then cut into bars.
- Store in an airtight container or wrap individually in plastic wrap. Keeps 5–7 days.
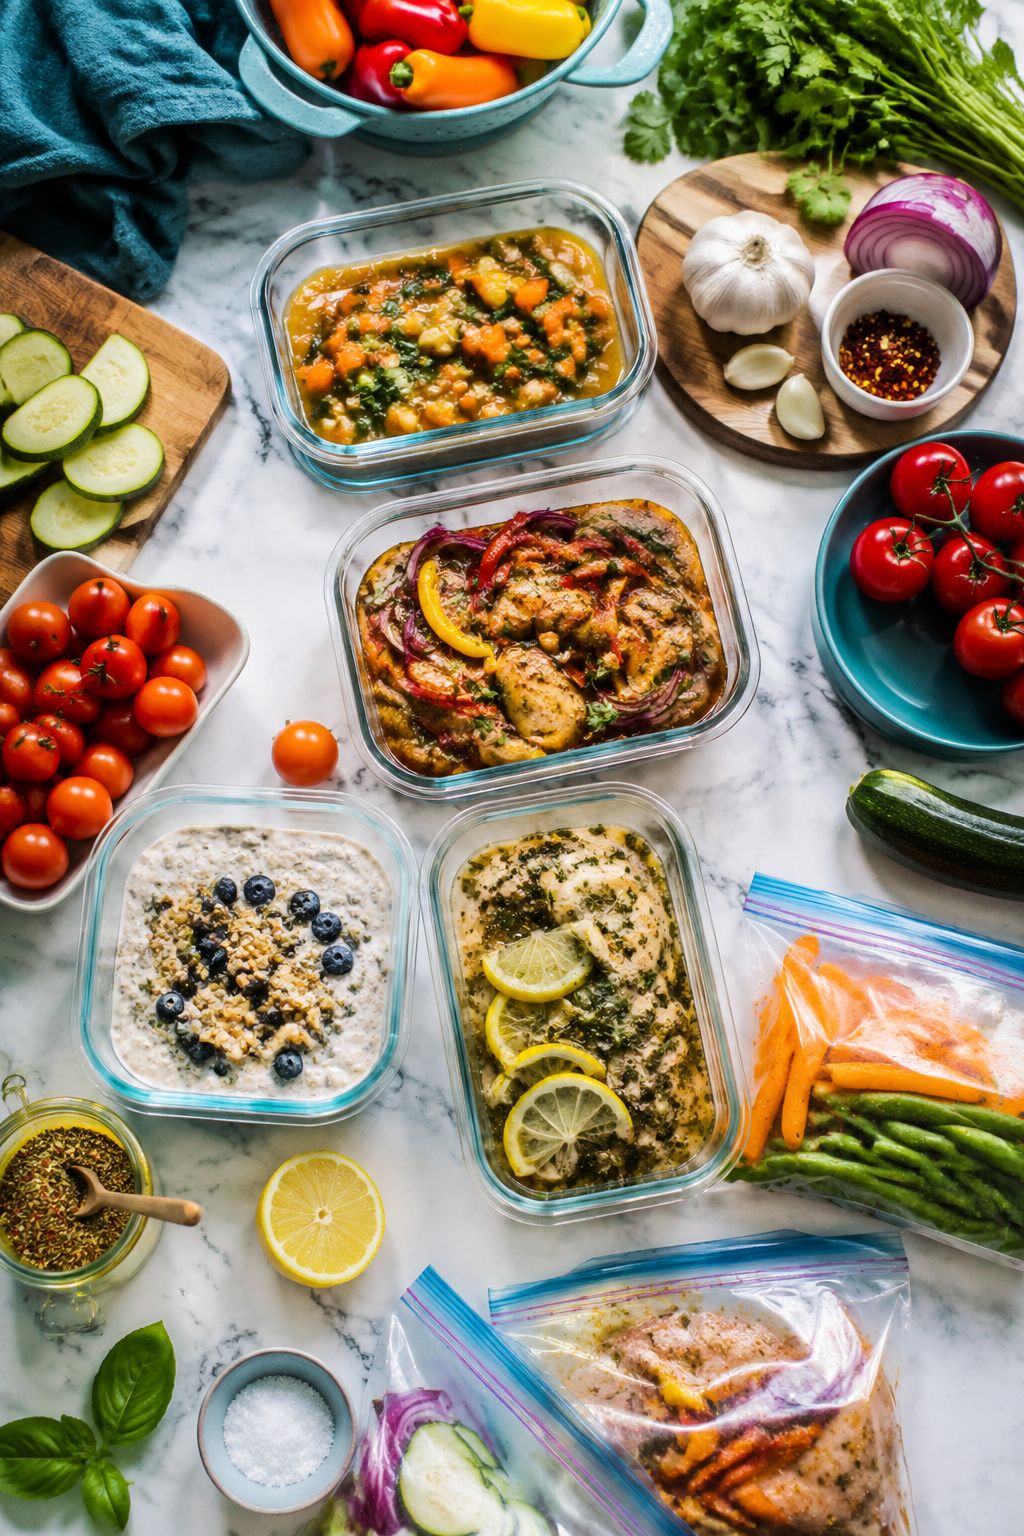
Smart Packing & Storage Tips for Make-Ahead Camping Food
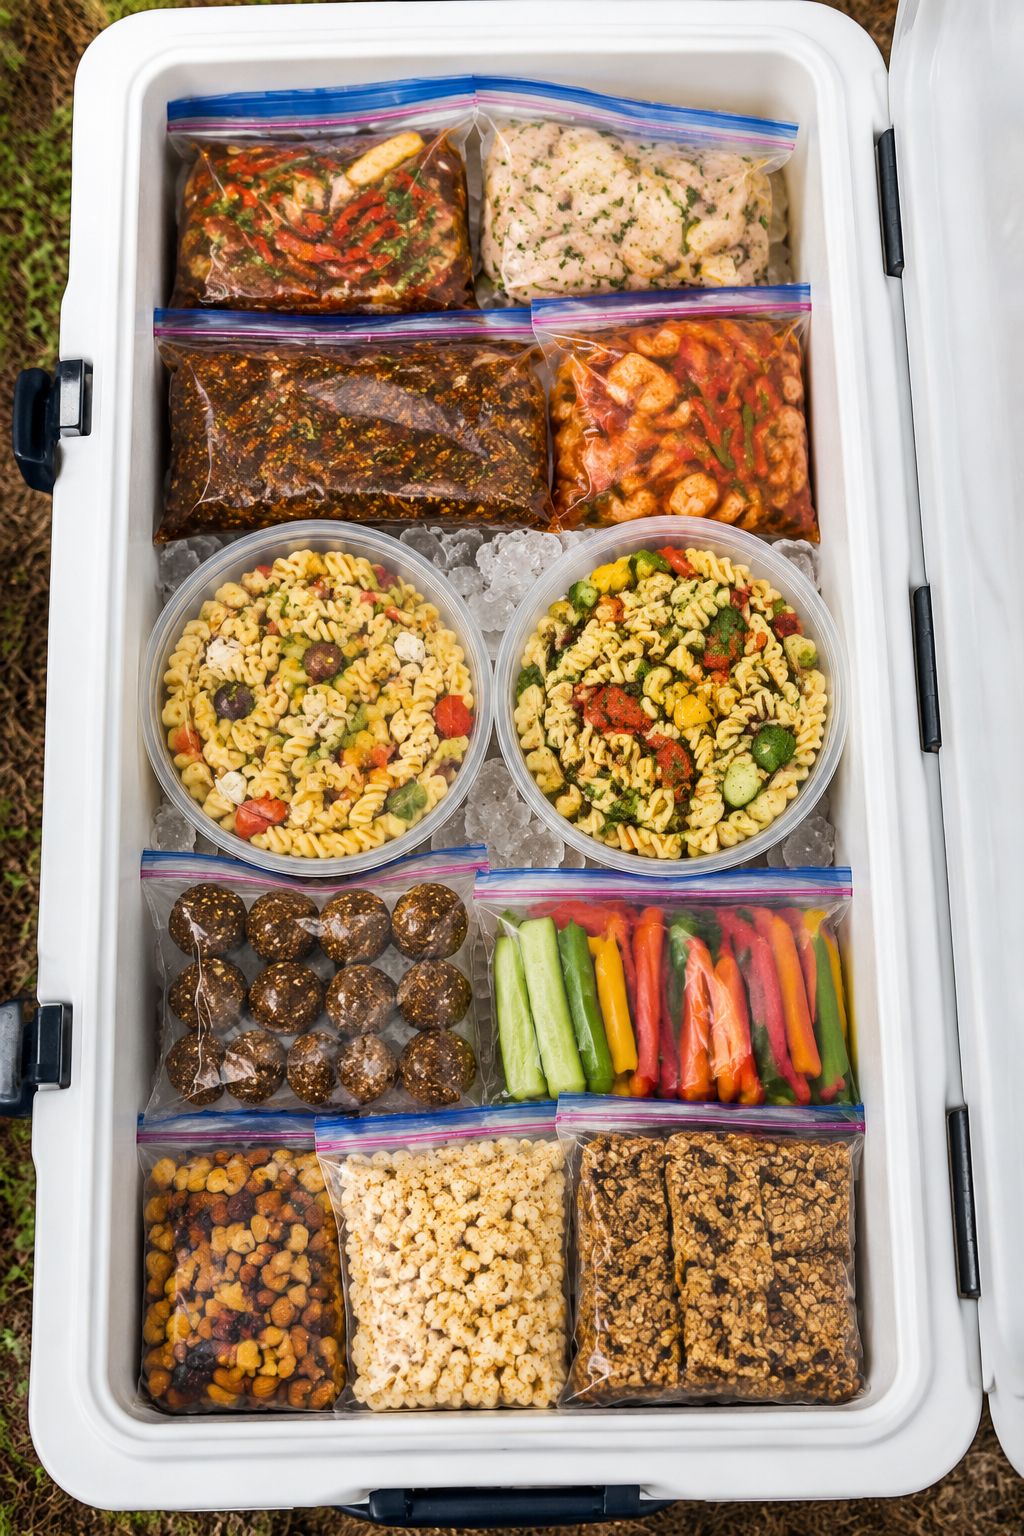
Getting the food right is only half the battle — storing it properly is what keeps everything safe and delicious. Here’s a quick reference guide:
| Food Type | Best Storage Method | Fridge/Freezer Life |
|---|---|---|
| Breakfast burritos | Foil + freezer bag | Up to 3 months (frozen) |
| Overnight oats | Mason jars | 5 days (refrigerated) |
| Chili / soup | Freezer-safe containers | 3 months (frozen) |
| Pasta salad | Airtight container | 4 days (refrigerated) |
| Marinated chicken | Zip-lock bag | 2–3 days (refrigerated) |
| Energy balls | Zip-lock bag | 2 weeks (frozen) |
| Brownie bars | Airtight container | 5–7 days (room temp) |
Essential packing supplies to bring:
- ✅ Heavy-duty zip-lock freezer bags (multiple sizes)
- ✅ Glass or BPA-free plastic containers with locking lids
- ✅ Permanent marker for labeling (include date and meal name)
- ✅ Vacuum sealer (optional but excellent for longer trips)
- ✅ A quality cooler with ice packs (not loose ice, which creates water)
Label everything. Seriously — at 7 AM when everyone’s hungry, you don’t want to play “guess that frozen bag.”
Meal Planning Your RV Trip with These 12 Make Ahead Camping Food Ideas
Planning a 4–5 day RV trip? Here’s a sample meal plan using the 12 make ahead camping food ideas for your next RV trip covered above:
| Day | Breakfast | Lunch | Dinner | Snacks/Dessert |
|---|---|---|---|---|
| Day 1 | Freezer Breakfast Burritos | Pasta Salad | Slow Cooker Chili | Energy Balls |
| Day 2 | Overnight Oats | Taco Meat Rice Bowls | Foil Packet Fajitas | Veggie Snack Packs |
| Day 3 | Banana Oat Muffins | Hearty Vegetable Soup | Marinated Grilled Chicken | S’mores Brownie Bars |
| Day 4 | Overnight Oats | Pasta Salad | Taco Night | Energy Balls |
| Day 5 | Banana Oat Muffins | Leftovers | Chili (Round 2) | Brownie Bars |
Weekend trip? Focus on recipes 1, 4, 6, 10, and 12 for a simple, satisfying two-day menu.
Batch Cooking Timeline
Getting everything prepped before departure is easier with a plan:
- 1 week before: Buy all groceries; bake muffins and brownie bars.
- 3–4 days before: Make chili, soup, and pasta salad; refrigerate.
- 2 days before: Brown taco meat; prepare energy balls; freeze.
- 1 day before: Assemble breakfast burritos; marinate chicken; prep veggie snack packs.
- Morning of departure: Pack cooler strategically (most-used items on top).
Conclusion: Hit the Road Hungry for Adventure, Not Stress
The 12 make ahead camping food ideas for your next RV trip covered in this guide prove one thing clearly: great camping food doesn’t have to mean complicated campsite cooking. With a little prep time at home, every meal becomes something to look forward to rather than something to dread.
Here are your actionable next steps:
- Choose 3–4 recipes from this list that match your trip length and group size.
- Make a master grocery list combining all ingredients to avoid duplicate shopping.
- Set aside one prep day (usually 1–2 days before departure) to batch cook and freeze.
- Label every container with the meal name and date.
- Pack your cooler strategically — frozen items on the bottom, frequently accessed items on top.
The road is calling. The campfire is waiting. And now, dinner is already handled. 🔥🚐
References
- Outdoor Foundation. (2023). Outdoor Participation Trends Report. Outdoor Industry Association.
- USDA Food Safety and Inspection Service. (2023). Freezing and Food Safety. United States Department of Agriculture. https://www.fsis.usda.gov
- Academy of Nutrition and Dietetics. (2022). Food Safety for Outdoor Eating. eatright.org
Tags: make ahead camping food, RV trip meals, camping food ideas, freezer camping meals, easy camping recipes, campsite cooking, meal prep for camping, RV cooking, camping breakfast ideas, outdoor cooking, make ahead meals, camping snacks


