Creating a clutter-free shabby chic camper is all about making every inch feel purposeful, pretty, and easy to maintain. The best organization hacks do more than hide mess; they help your daily routines flow better so cooking, relaxing, and packing up are less stressful. In a small RV, vertical storage, hidden compartments, and matching containers can make the space feel larger without stripping away its cozy charm. Soft textures, light finishes, and carefully chosen storage pieces keep the camper practical while still delivering that romantic cottage-on-wheels look. If you want your camper to stay calm, functional, and Pinterest-ready, these simple organization ideas will help you clear the clutter and keep the shabby chic style intact.
1. Use Wall-Mounted Entry Baskets
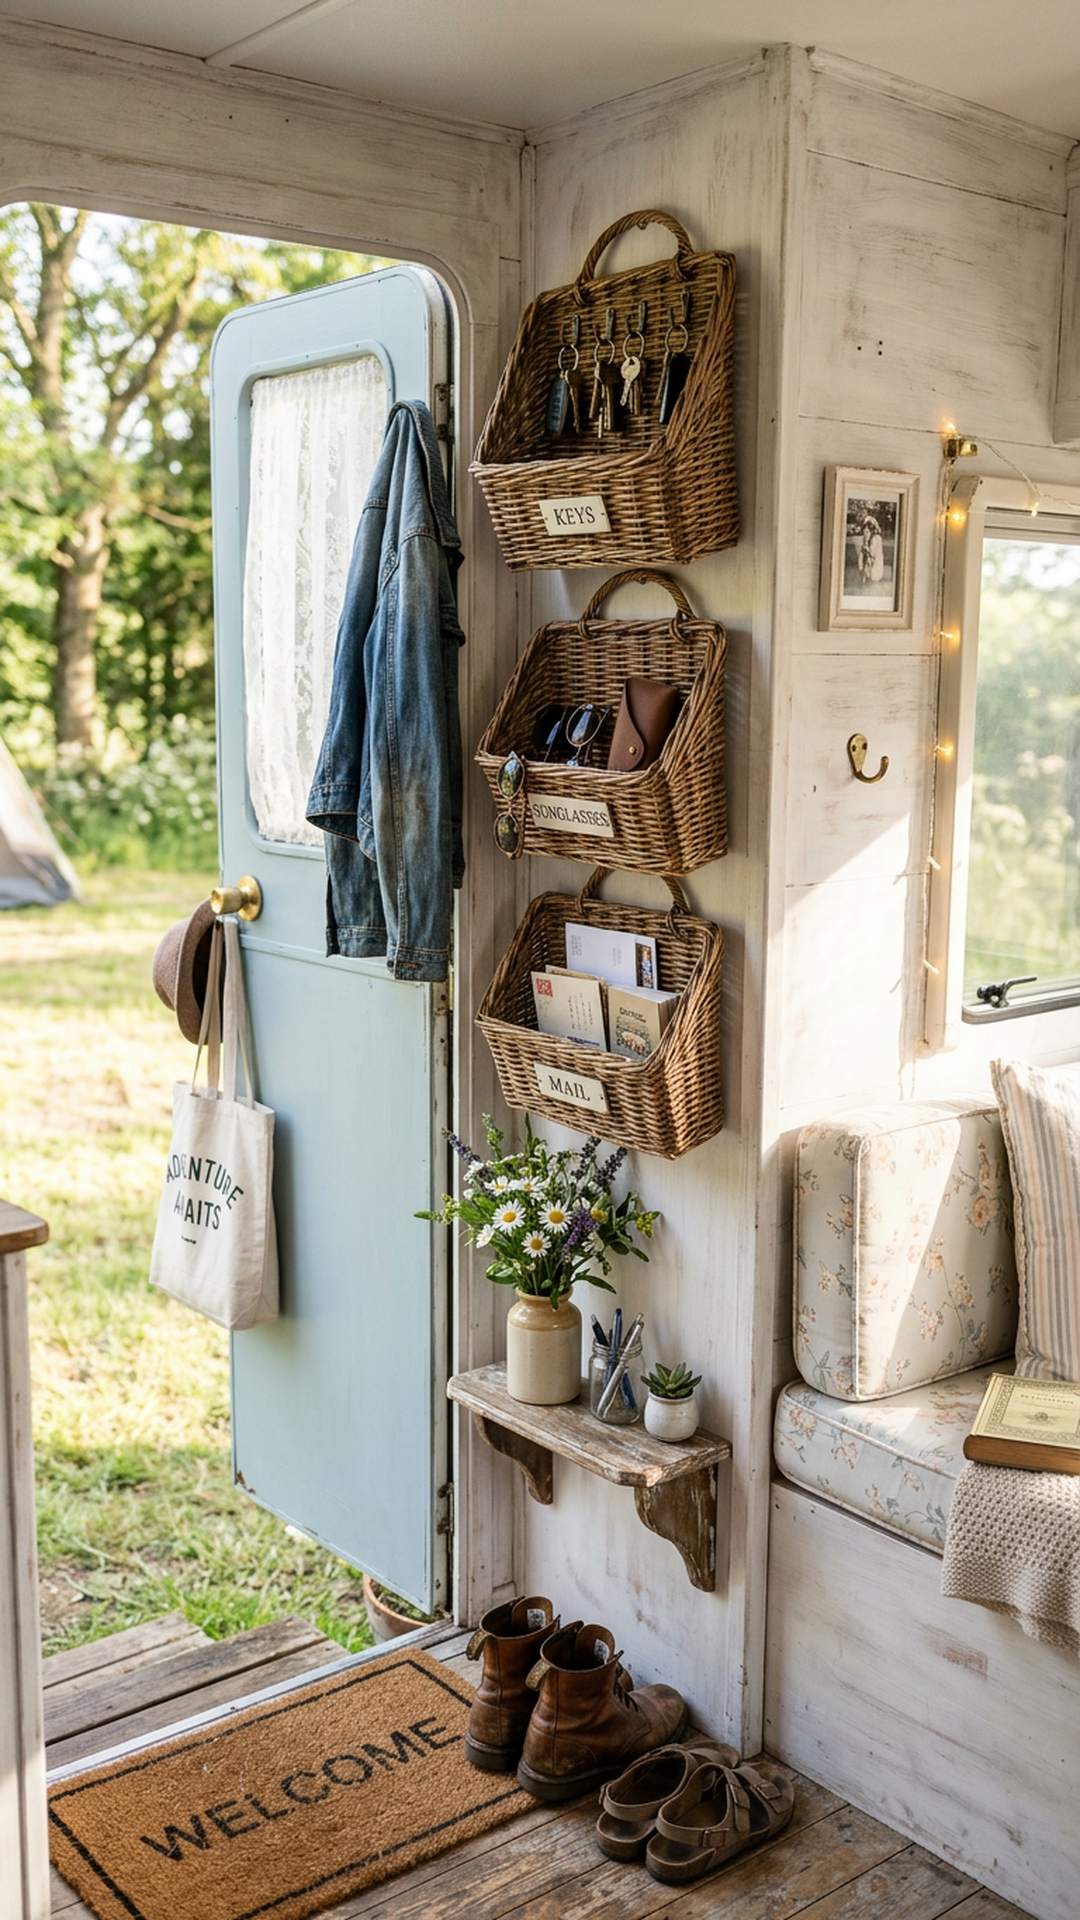
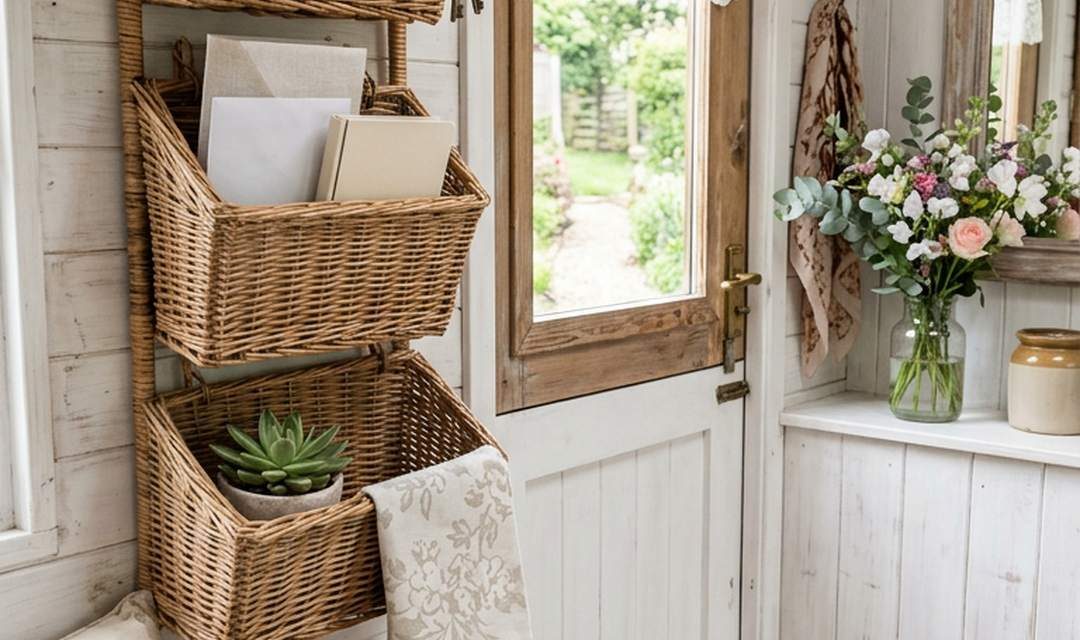
Turn the camper door area into a tidy landing zone with slim wall baskets for keys, sunglasses, mail, and dog leashes. In a shabby chic space, woven textures and soft painted wood keep the storage practical without losing the cottage feel.
This image shows how vertical storage keeps everyday grab-and-go items off counters and dinette seats. Choose shallow baskets so they do not crowd the walkway, and group only the essentials by the door to prevent clutter from spreading.
PRO TIP: Add a small tray or boot mat under the baskets so shoes stay contained and dirt never travels through the camper.
2. Decant Pantry Staples Into Clear Jars
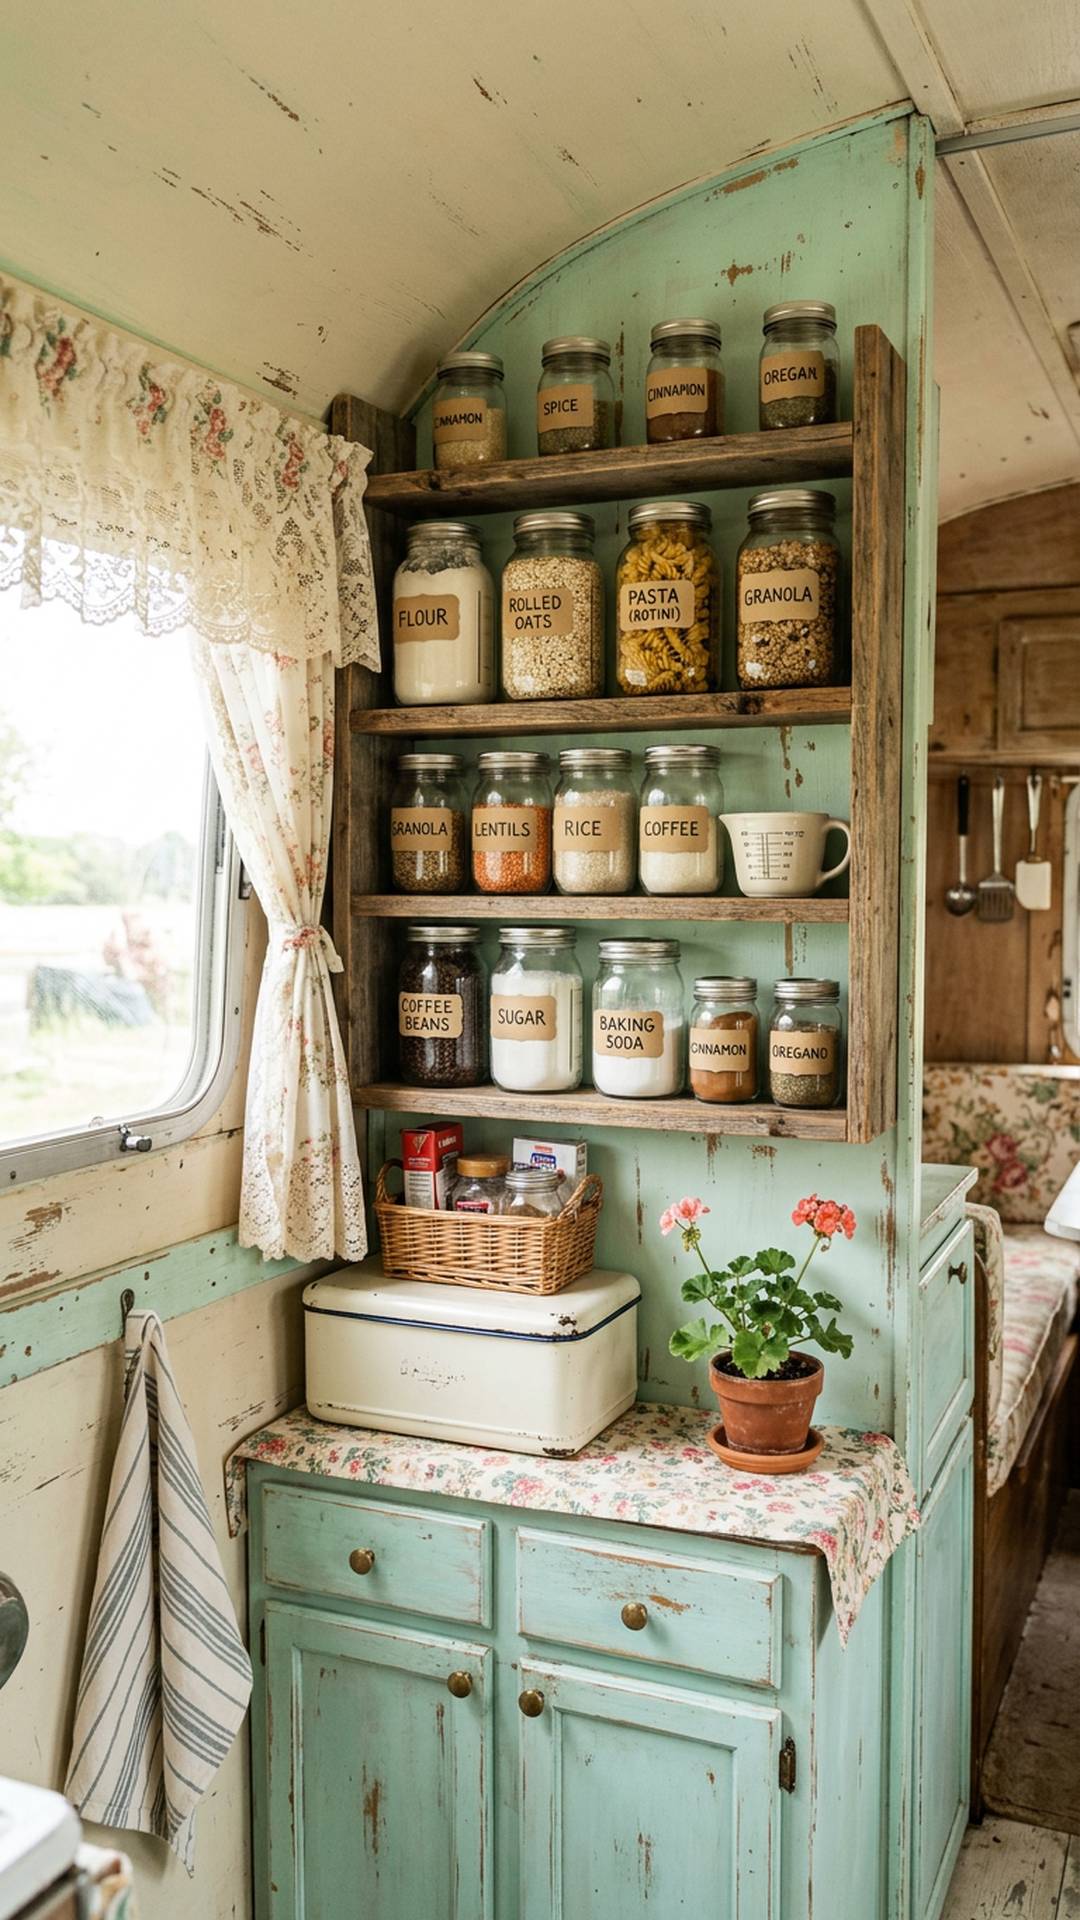
Clear jars instantly make a tiny pantry feel lighter and more intentional. Flour, pasta, oats, coffee, and snacks are easier to see at a glance, which helps you avoid buying duplicates and makes meal prep faster on the road.
The photo highlights how matching containers create calm even inside a compact camper kitchen. Stick with stackable shapes, leave a little breathing room between rows, and store the items you use most often on the easiest-to-reach shelf.
PRO TIP: Keep a small scoop inside your most-used dry goods so quick breakfasts and one-pan dinners are easier to pull together.
3. Roll Linens Under the Bed
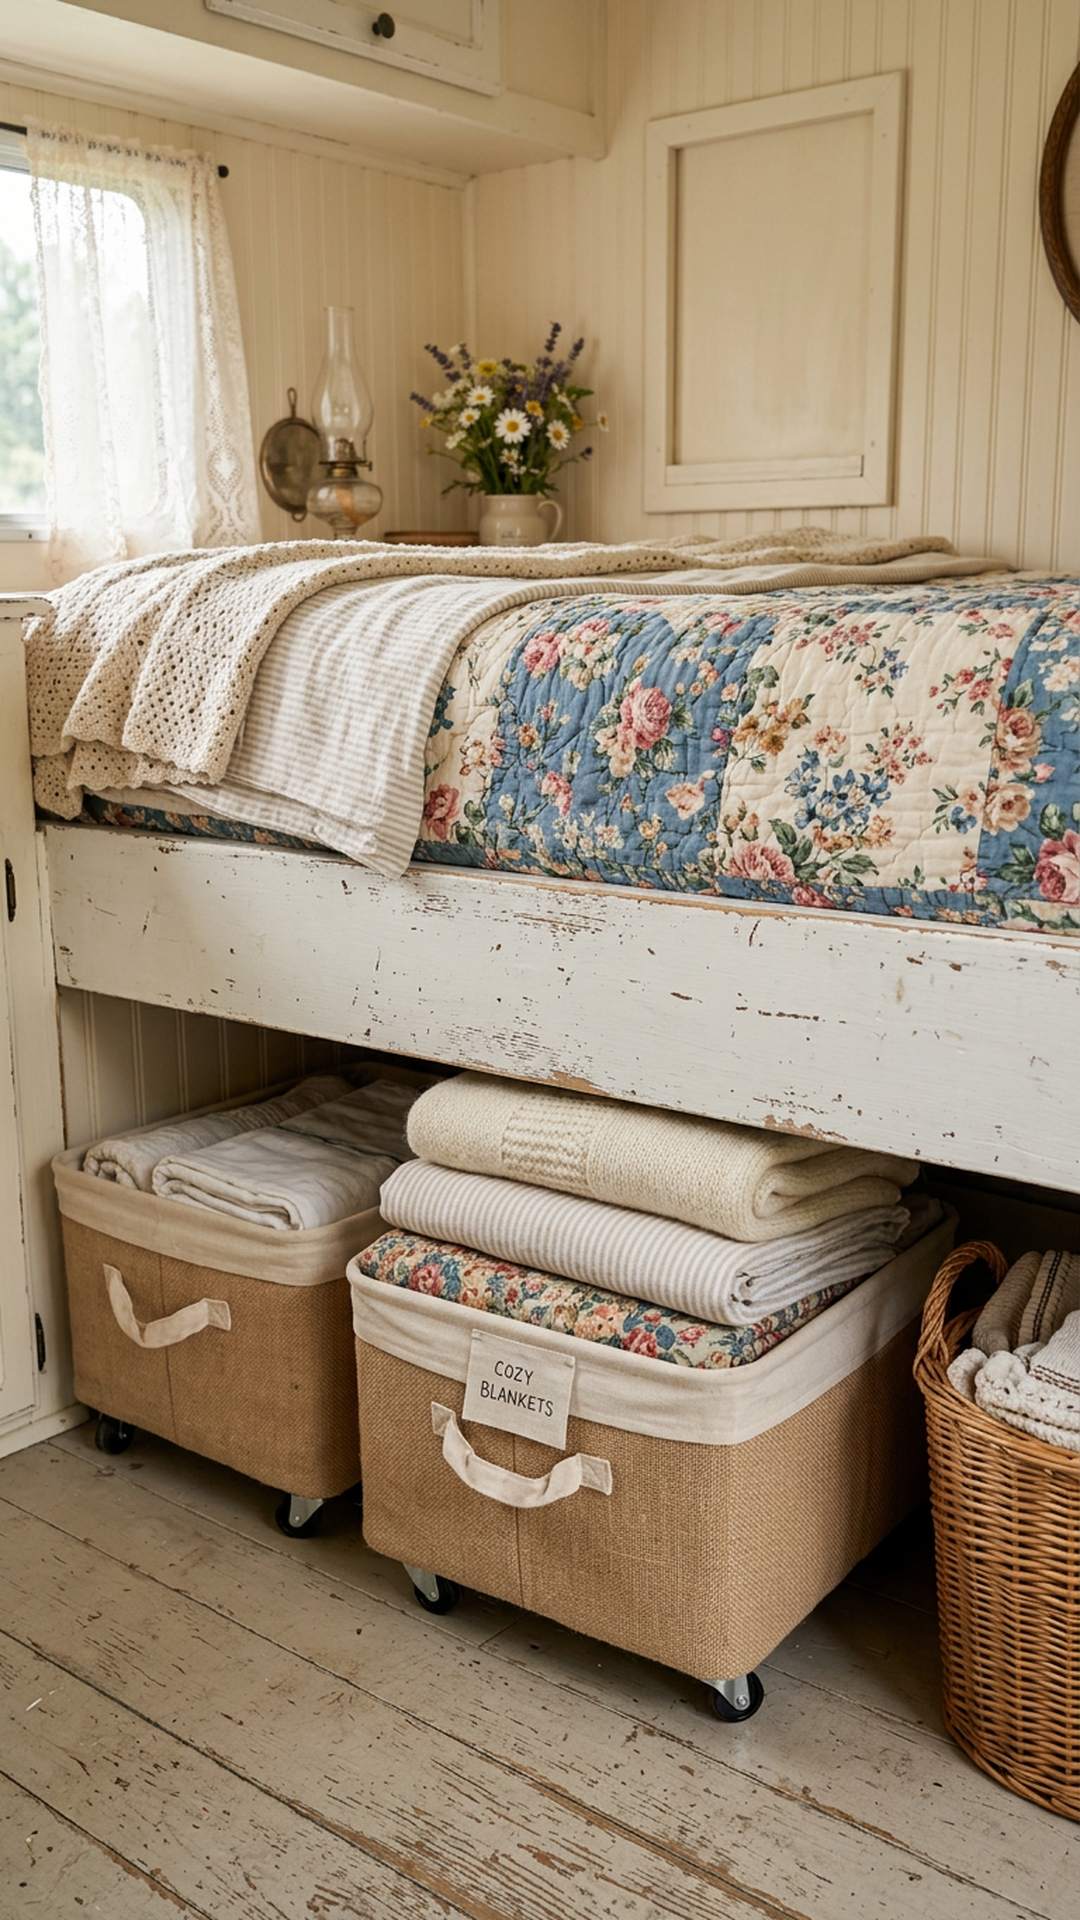
Under-bed space is one of the best hidden storage zones in any camper, especially for bedding, extra towels, and off-season layers. Rolling bins or soft fabric boxes keep these bulkier items together without making the bedroom feel crowded.
In this image, the storage stays neat because each bin has one purpose and slides out easily when needed. Use low-profile containers, fold items vertically where possible, and avoid overpacking so the space remains functional instead of stuffed.
PRO TIP: Store a lavender sachet in each under-bed bin to keep linens fresh and make the bedroom feel even cozier.
4. Hang Baskets in the Bathroom
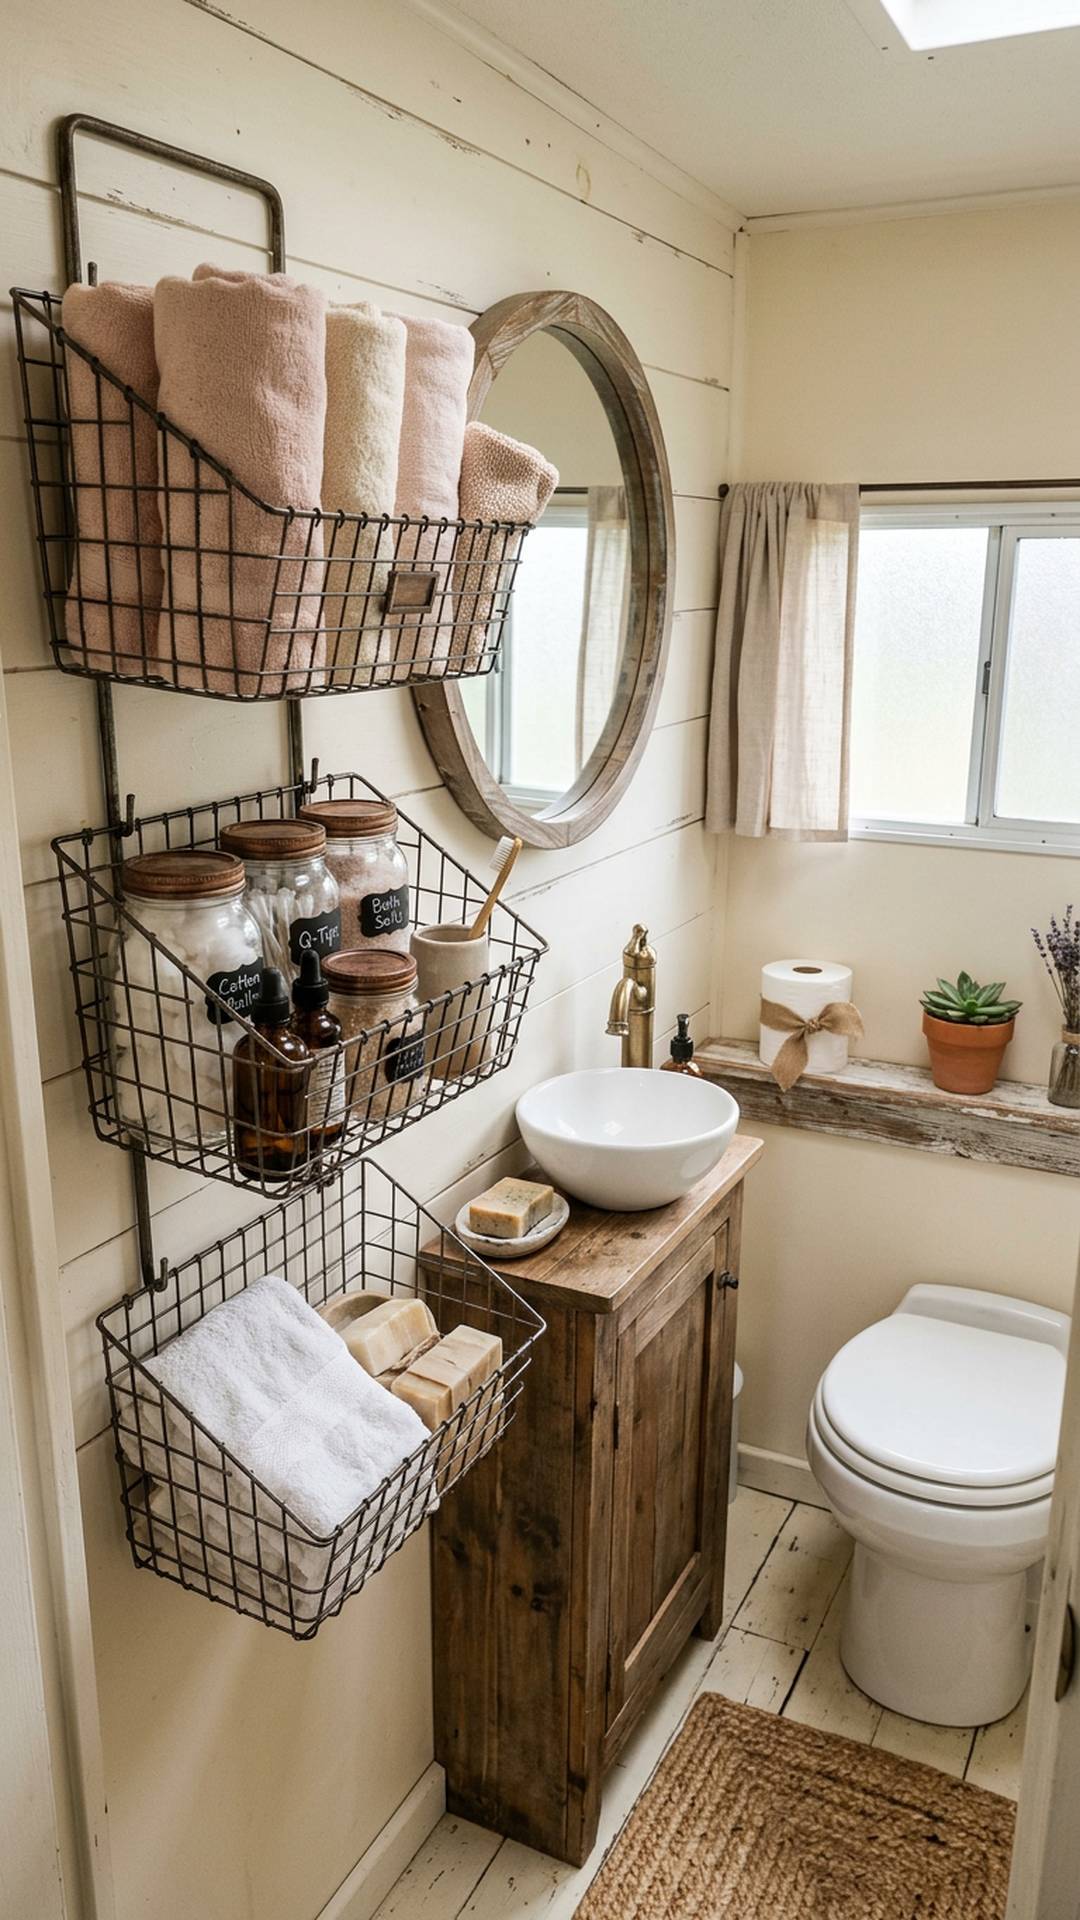
A camper bathroom needs storage that works upward, not outward. Hanging baskets make room for rolled towels, soaps, cotton rounds, and toiletries while keeping the vanity surface open for everyday use.
The image shows how open wire baskets add texture without making the room feel heavy. Use the highest basket for backup supplies, the middle for daily skincare, and the lowest for items everyone reaches for so the setup stays simple.
PRO TIP: Move anything leak-prone into a small removable caddy before travel days to prevent spills inside your pretty storage baskets.
5. Hide Everyday Extras Under the Dinette Bench
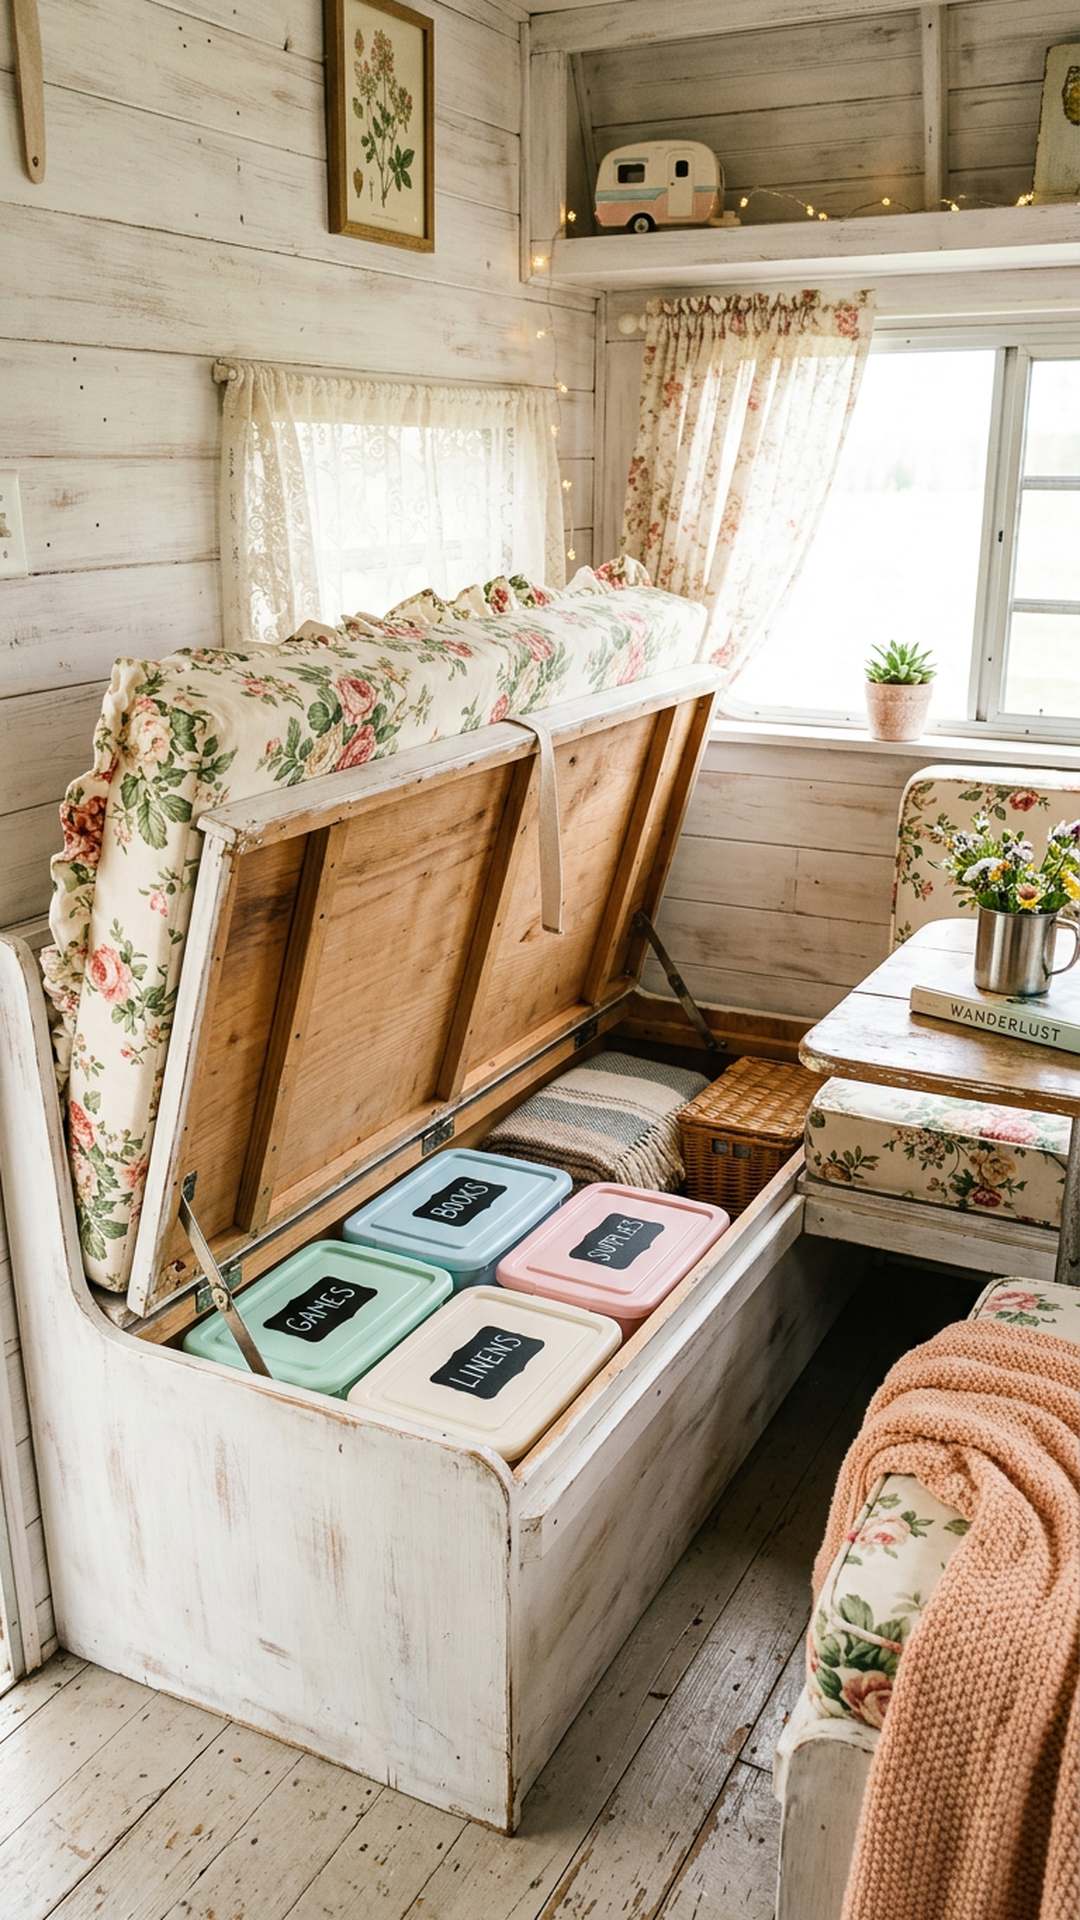
Lift-up dinette benches are prime real estate in a small camper. They are perfect for board games, table linens, chargers, paper goods, and backup pantry items that you do not need sitting out in plain sight.
This scene shows how sorted bins prevent the classic “dump and dig” problem that makes hidden storage frustrating. Choose a few matching containers, group items by activity, and leave one bin partially empty for the odds and ends that appear during trips.
PRO TIP: Keep a simple inventory note on your phone for bench storage so you can find supplies fast without opening every container.
6. Add Decorative Hooks Wherever You Have Blank Wall Space
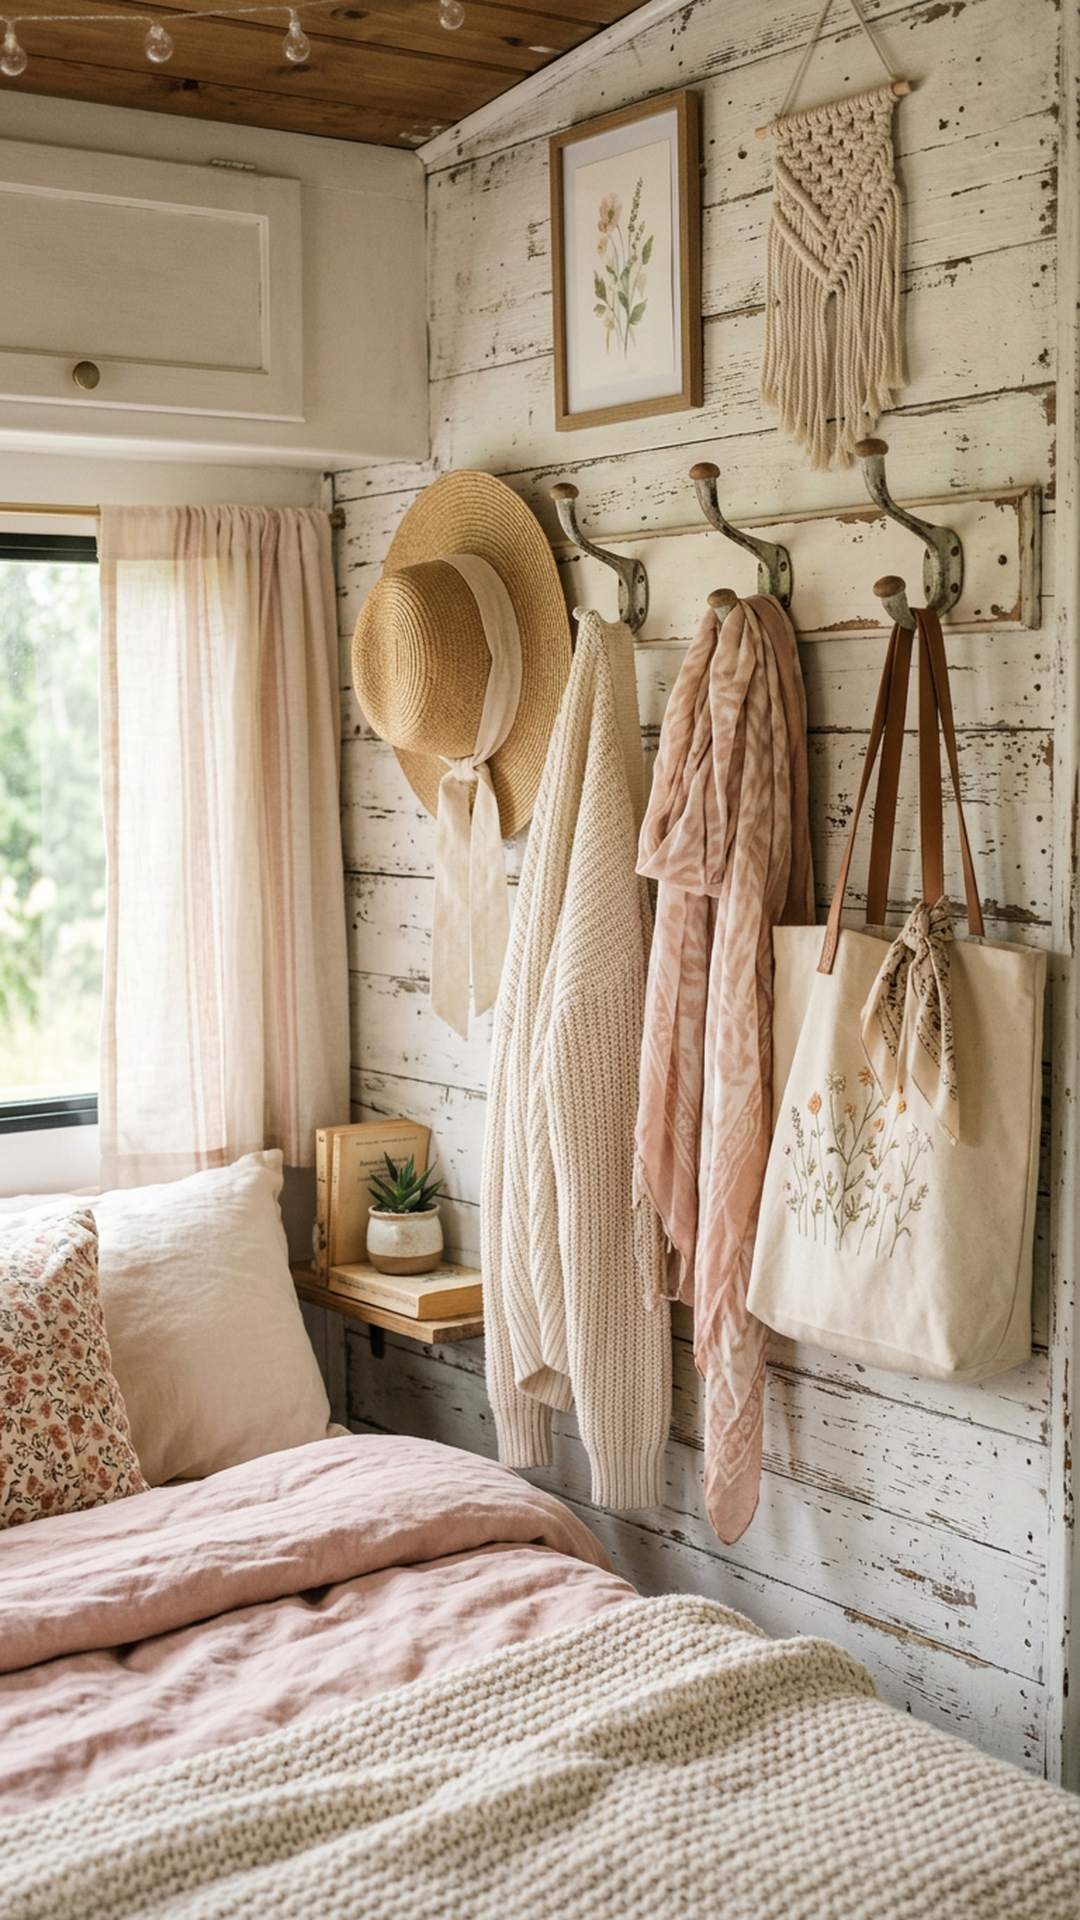
Decorative hooks are one of the easiest ways to organize a shabby chic camper without adding bulk. They give hats, cardigans, tote bags, scarves, and light jackets a home while doubling as part of the decor.
The image works because the hanging items stay curated instead of chaotic. Limit each hook to one main piece, choose a consistent color palette, and avoid turning the wall into overflow storage if you want the room to feel airy.
PRO TIP: Use removable wall-safe anchors when possible so you can test placements before committing to a permanent layout.
7. Switch to Nesting and Collapsible Cookware
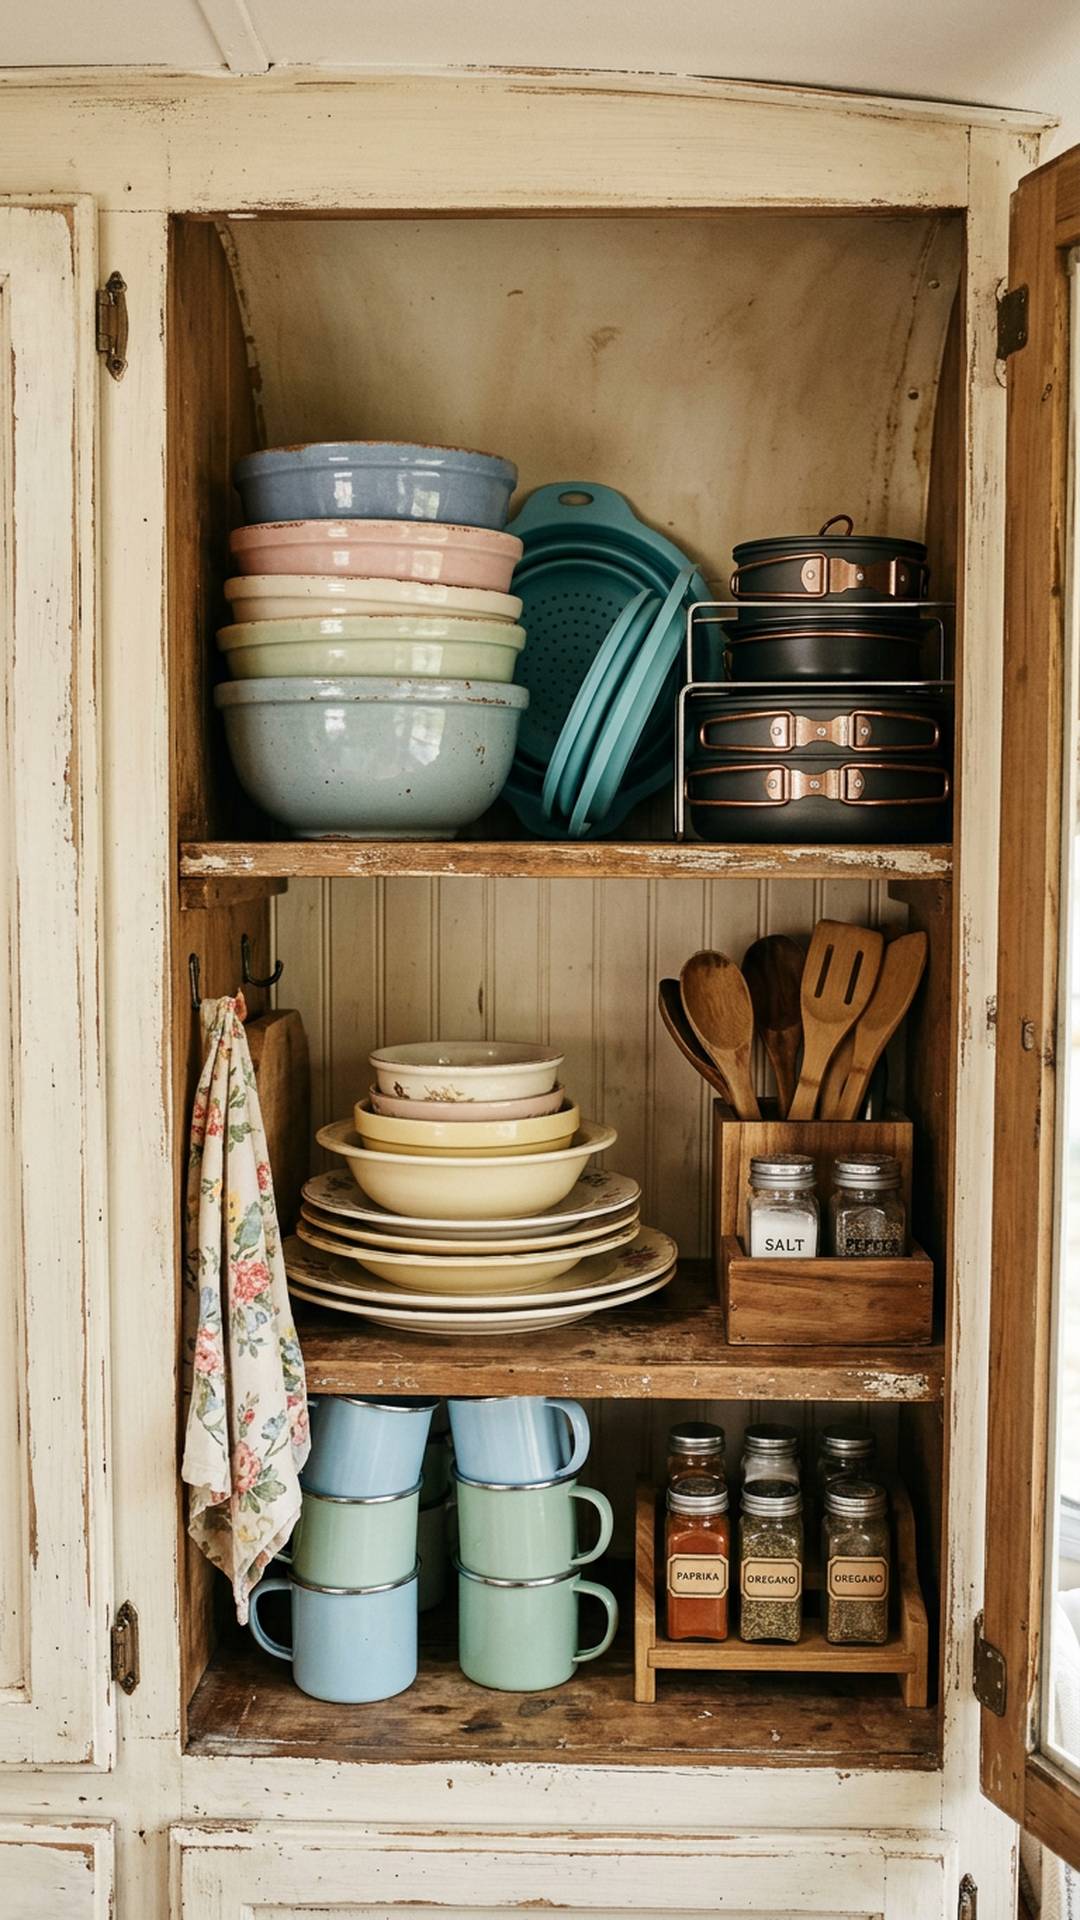
Bulky pots and mixing bowls can steal an entire cabinet in a camper kitchen. Nesting cookware and collapsible tools free up shelf space while still giving you what you need to cook comfortably on weekends or long stays.
This photo shows how tidy a cabinet looks when every item stacks cleanly instead of fighting for room. Keep lids together in a slim rack, store your most-used pan on top, and edit out duplicates that only create cabinet avalanches.
PRO TIP: Choose one color family for cookware and dishes so open cabinets and glass doors still look intentional and Pinterest-worthy.
8. Trade Bulky Hangers for Slim Ones
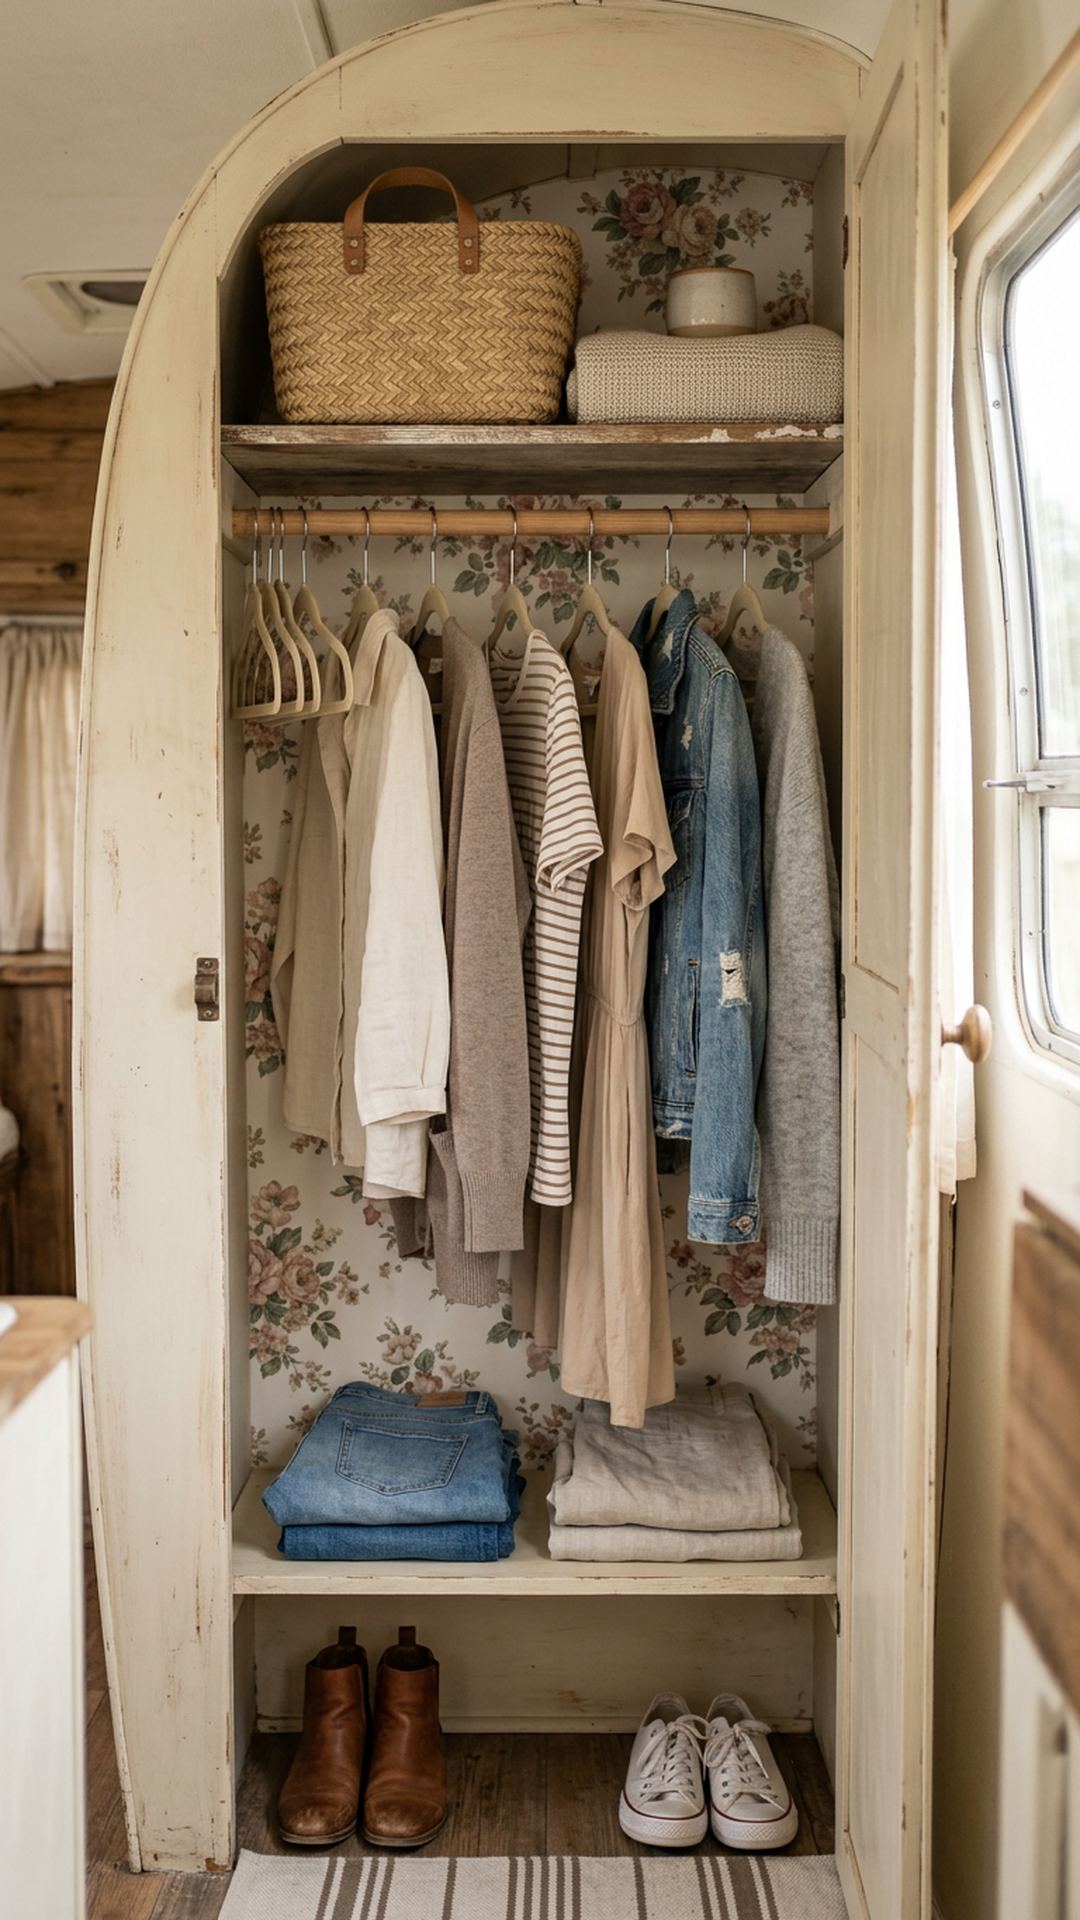
Closet space disappears quickly in a camper, and oversized hangers make the problem worse. Slim hangers instantly create breathing room so more clothing fits neatly while your wardrobe stays visible and easy to manage.
The closet in this image feels organized because the clothing is edited, coordinated, and evenly spaced. Keep only your current travel capsule hanging, fold bulky sweaters elsewhere, and store accessories in one top basket instead of scattering them everywhere.
PRO TIP: Turn hangers backward at the start of a season and flip them after use to see which clothes you never actually wear.
9. Mount a Magnetic Spice Strip
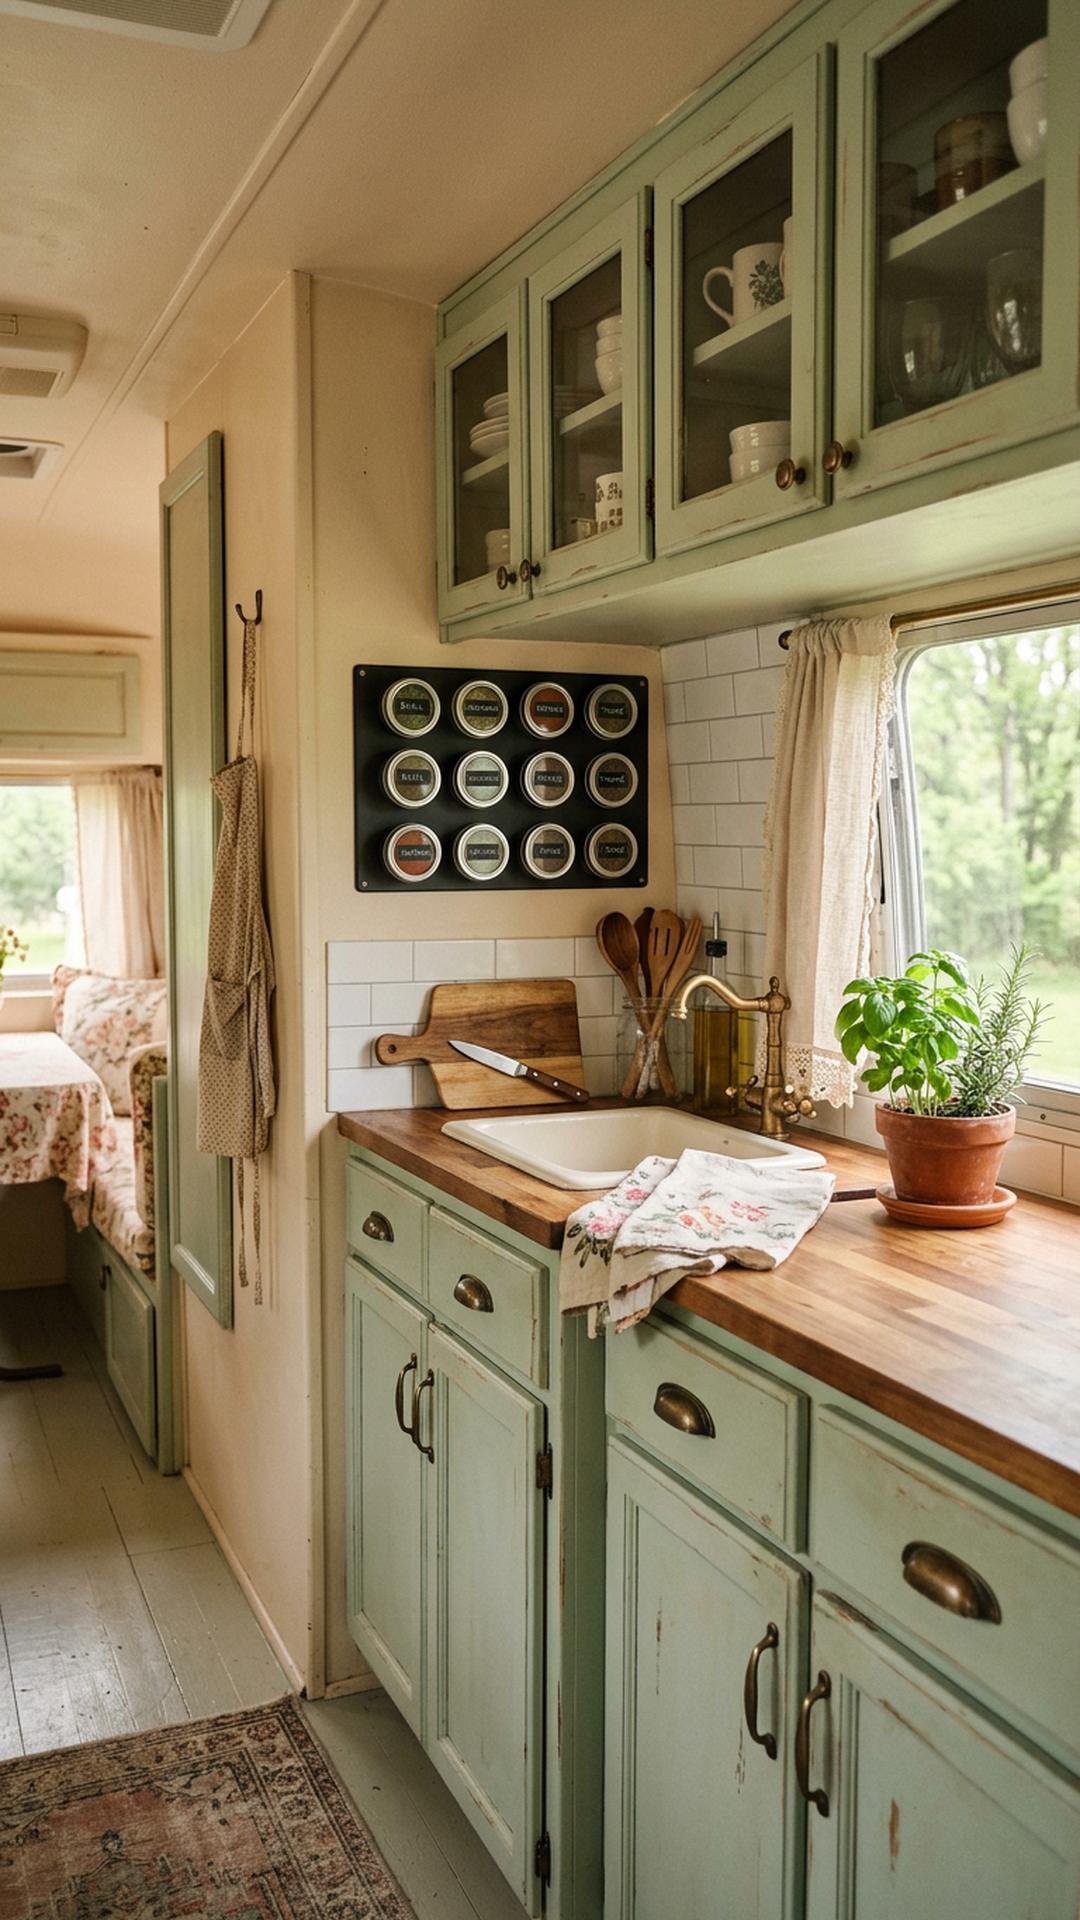
Spices are small, but they create surprising clutter when they roll around in drawers or crowd the counter. A magnetic strip uses skinny wall space to keep seasonings visible, accessible, and safely out of the way.
In this image, the spice area feels charming because it stays compact and intentional rather than busy. Limit your collection to the blends you truly cook with, use matching tins, and keep the strip away from high-heat splatter zones if possible.
PRO TIP: Create a tiny travel refill jar for your top three spices so meal prep stays easy even when the main tins are packed tight.
10. Install a Floating Shelf Over the Bed or Nook
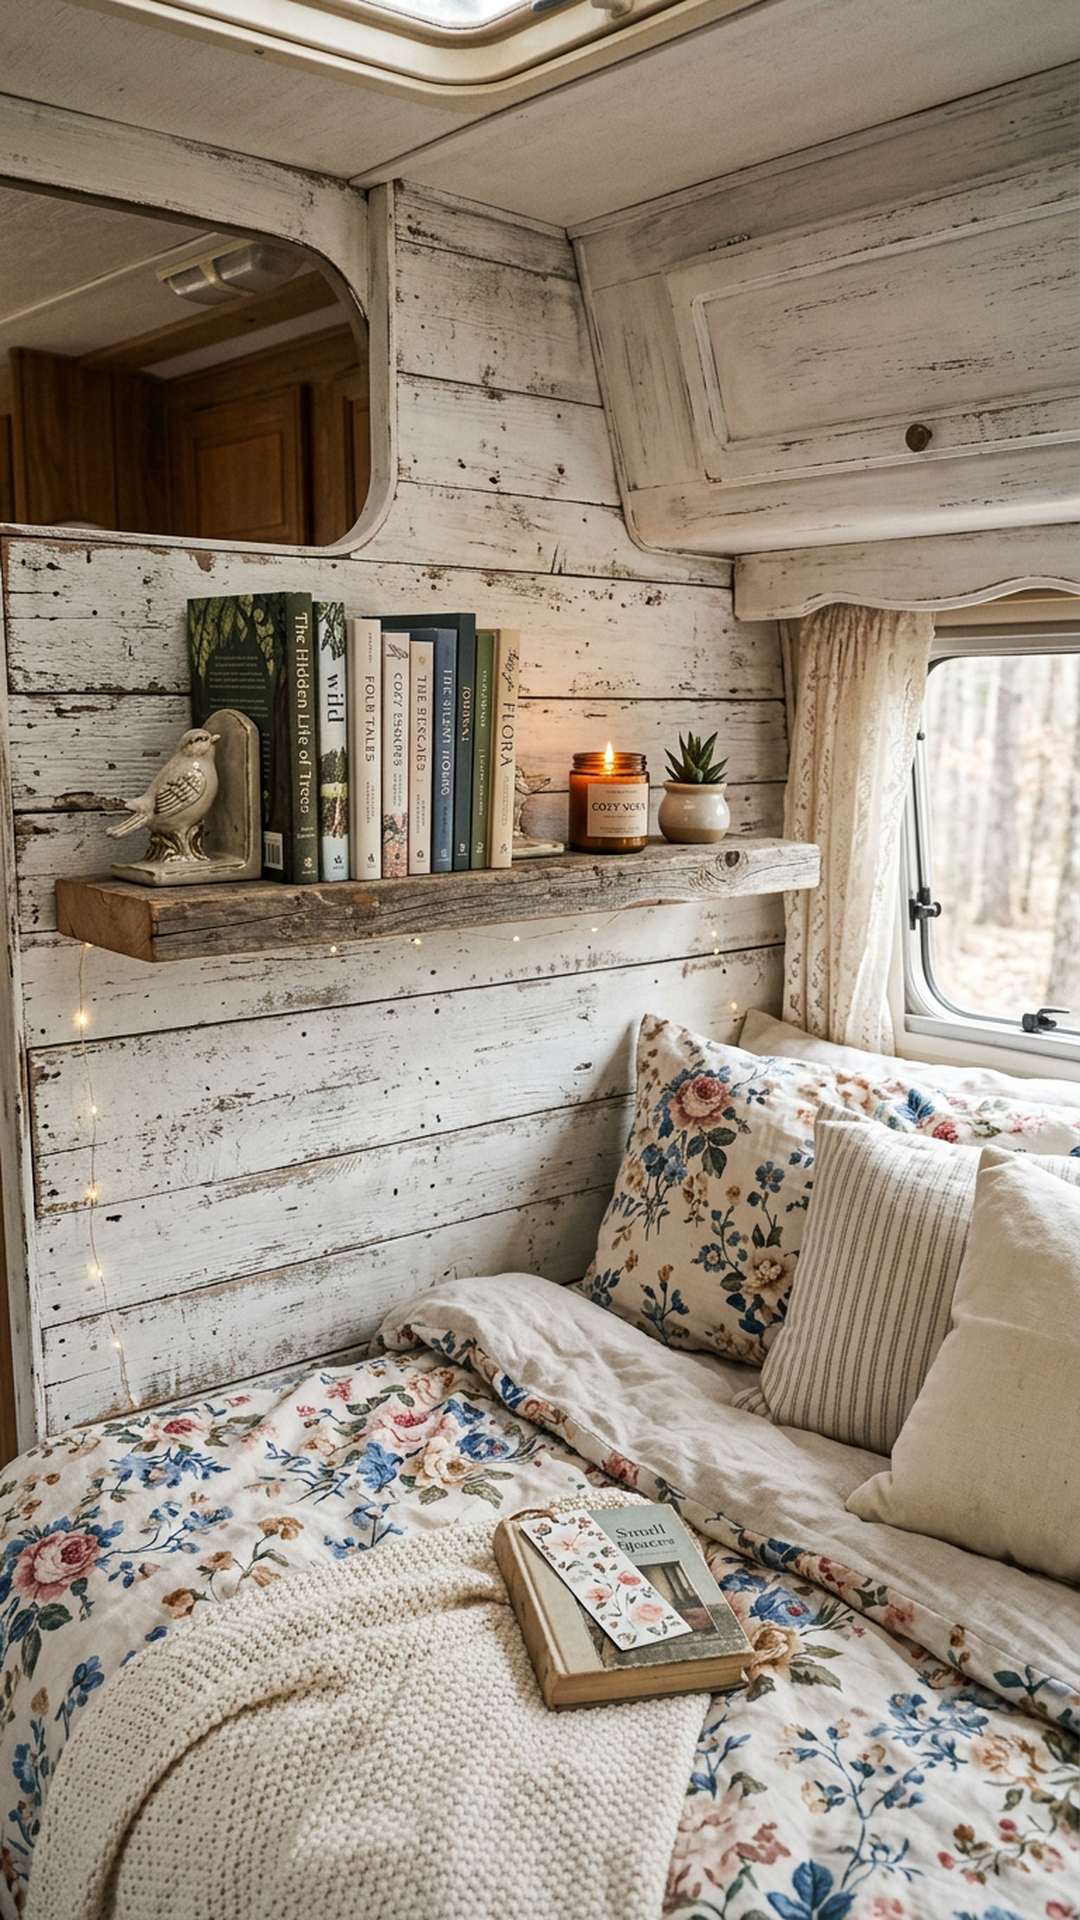
A slim floating shelf adds storage without eating up floor space, which is exactly what a camper needs. It is ideal for books, a candle, a tiny plant, or a few decorative pieces that make the interior feel personal but not crowded.
The photo shows a balanced setup where the shelf holds just enough to look styled, not stuffed. Keep heavier items anchored, avoid overdecorating, and use the shelf to replace clutter that would otherwise land on nightstands or countertops.
PRO TIP: Mix one practical item, one cozy accent, and one natural element on the shelf for a styled look that still feels useful.
11. Divide Kitchen Drawers by Task
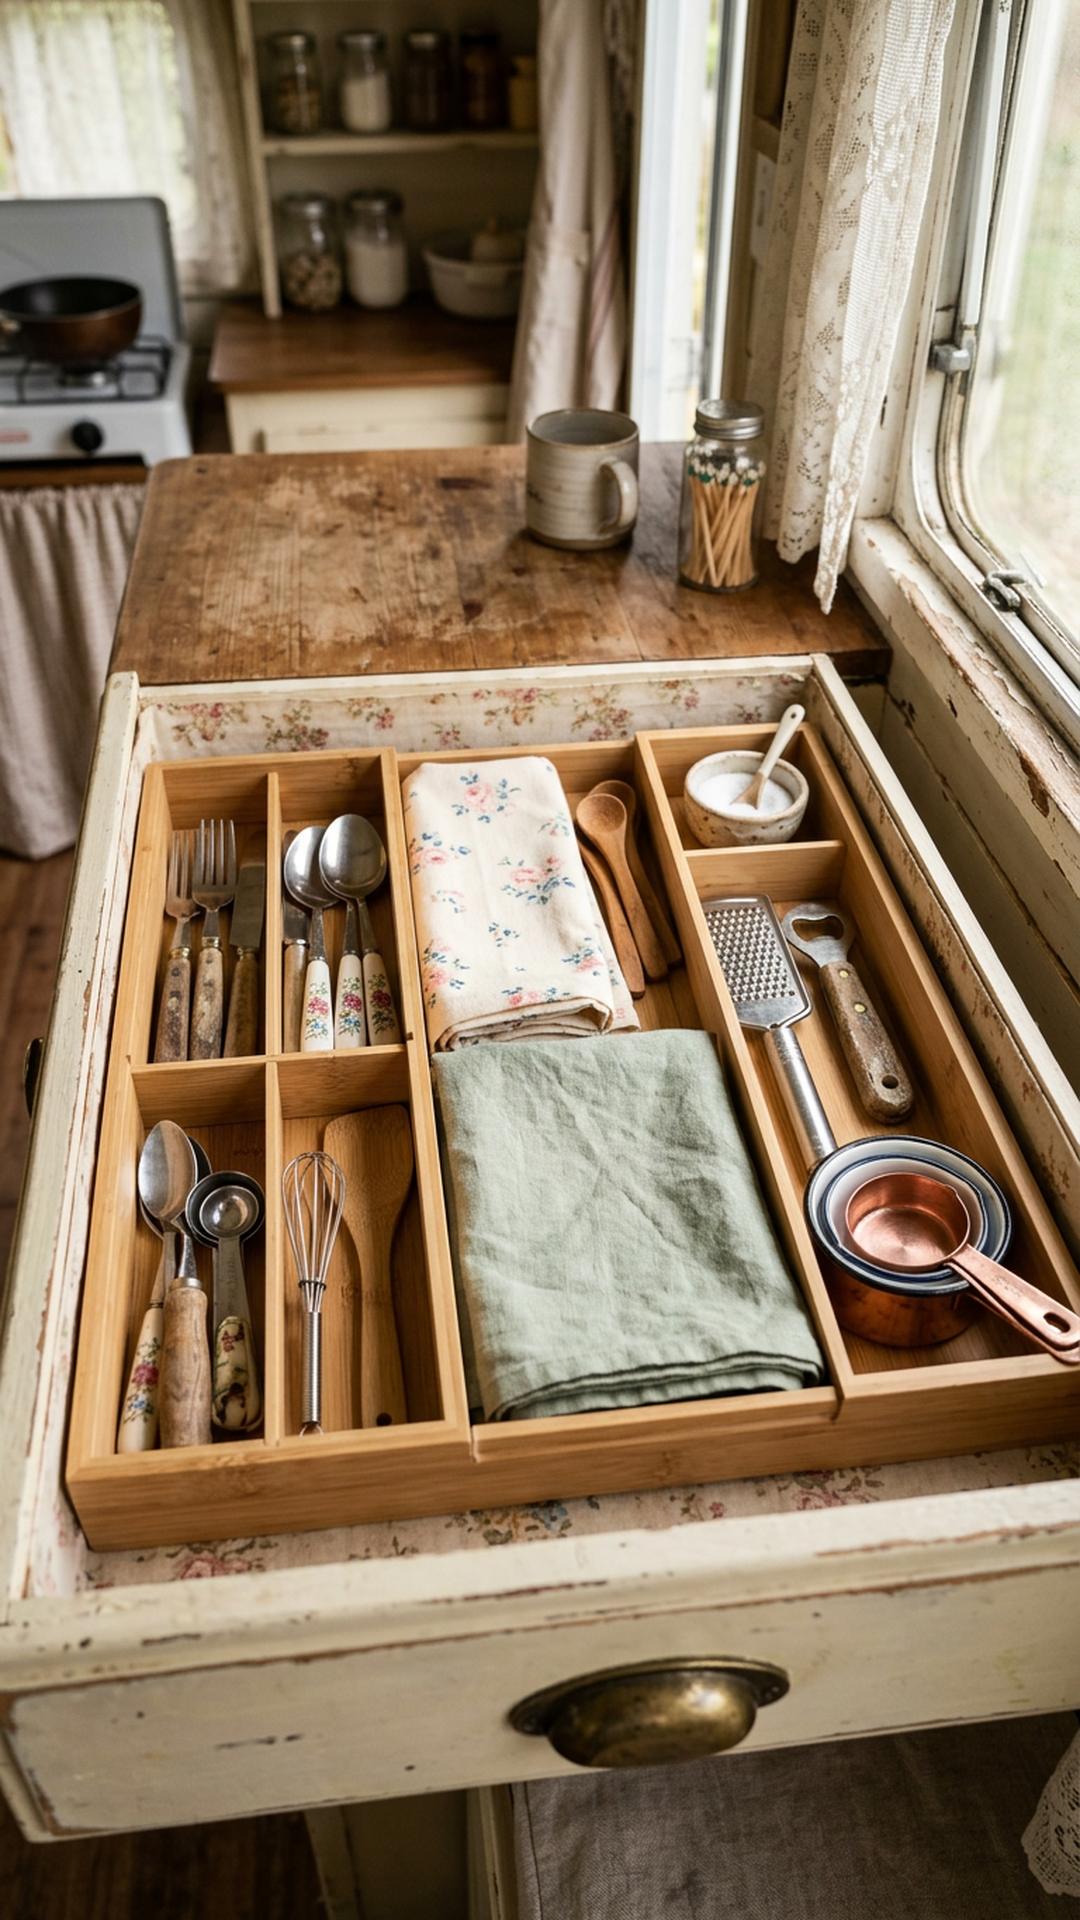
When every utensil shares one drawer, cooking in a camper becomes slower and messier. Drawer dividers create clear zones for cutlery, prep tools, tea towels, and gadgets so you can reach what you need without rummaging.
This image feels calm because each section has a purpose and nothing spills into the next zone. Measure your drawer first, choose adjustable dividers, and keep only your most-used tools inside so the layout stays easy to maintain.
PRO TIP: Store one empty compartment in a drawer for temporary items during travel, like takeout cutlery or loose bag clips.
12. Use a Fold-Down Desk for Office and Craft Supplies
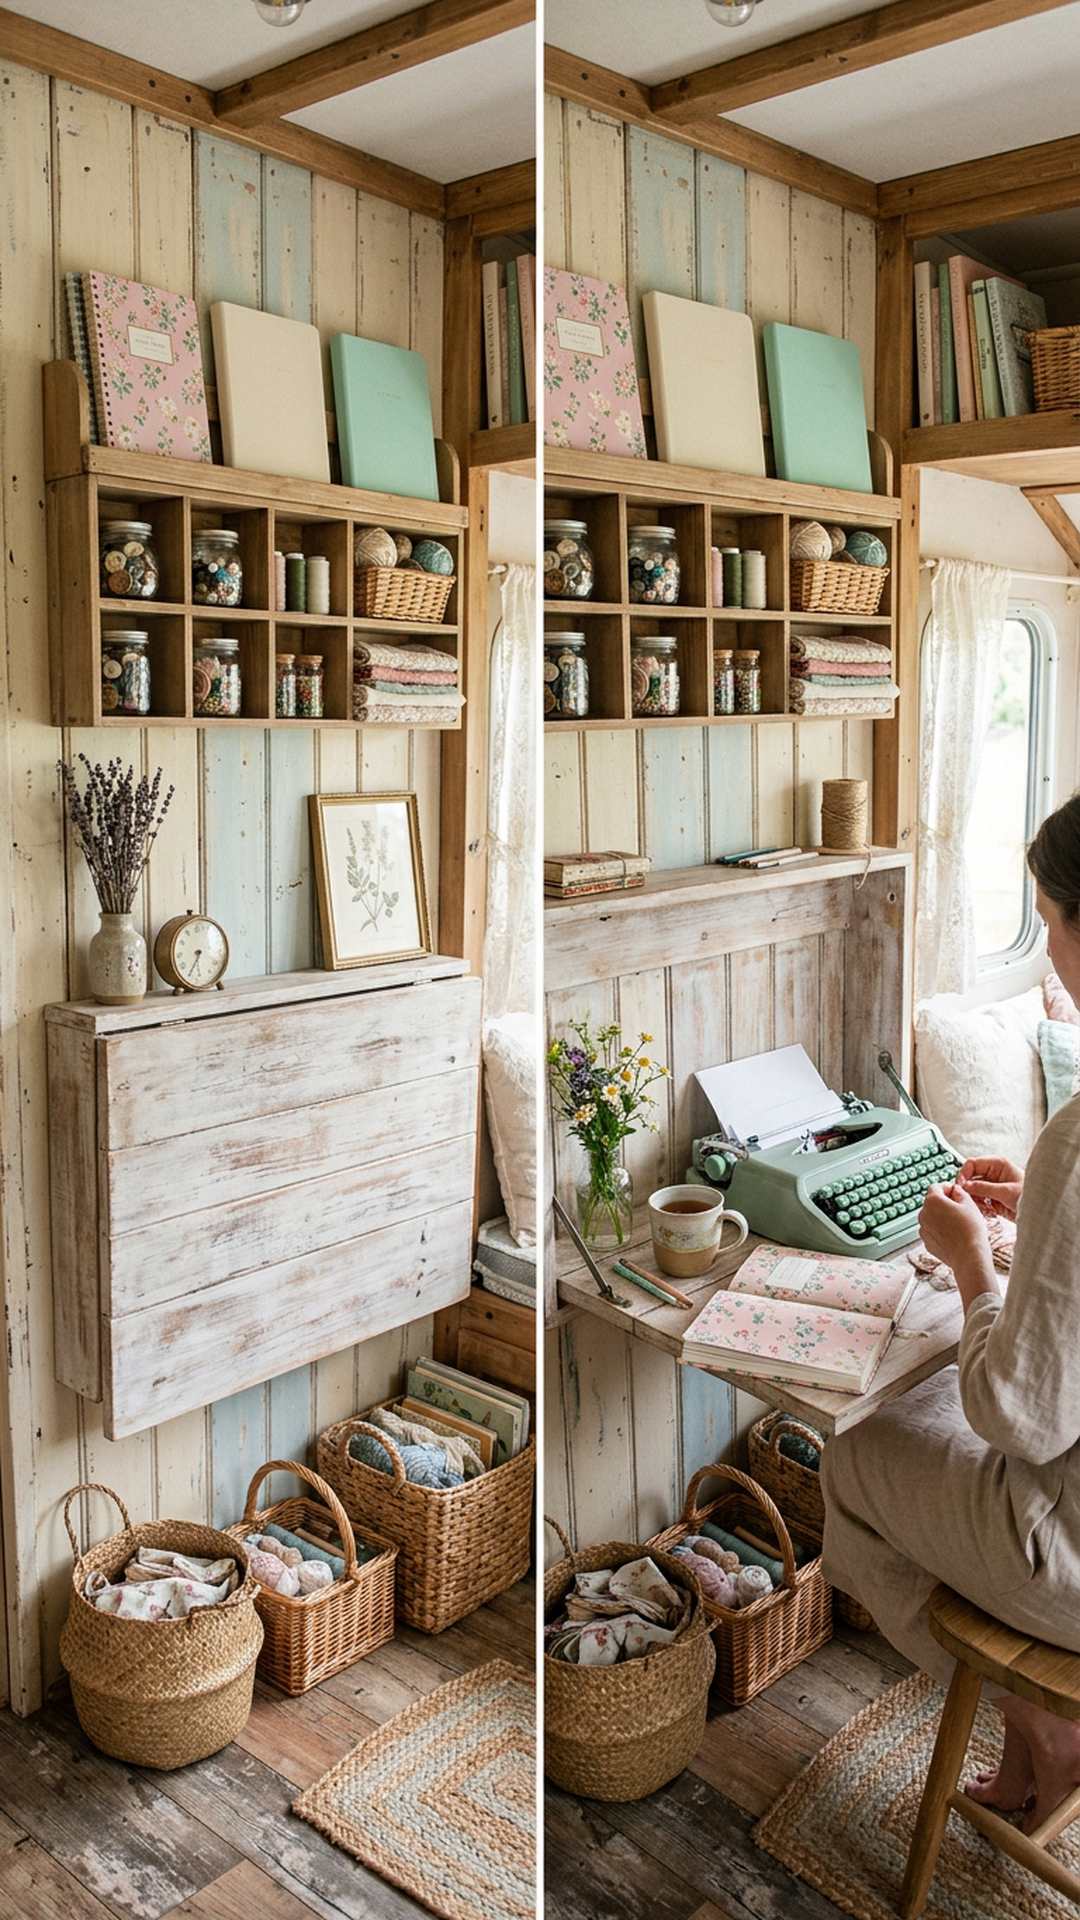
A fold-down desk is a smart solution when you want workspace and storage without sacrificing precious square footage. It can hide notebooks, chargers, pens, stickers, and small craft tools behind a pretty compact front.
The image shows how this hack keeps a creative corner ready to use and easy to close back up. Give every supply a cubby, keep the desktop mostly clear, and limit what stays inside to items you use weekly.
PRO TIP: Add a tiny charging hub inside the desk so electronics stay contained instead of migrating across the camper.
13. Corral the Fridge With Clear Bins
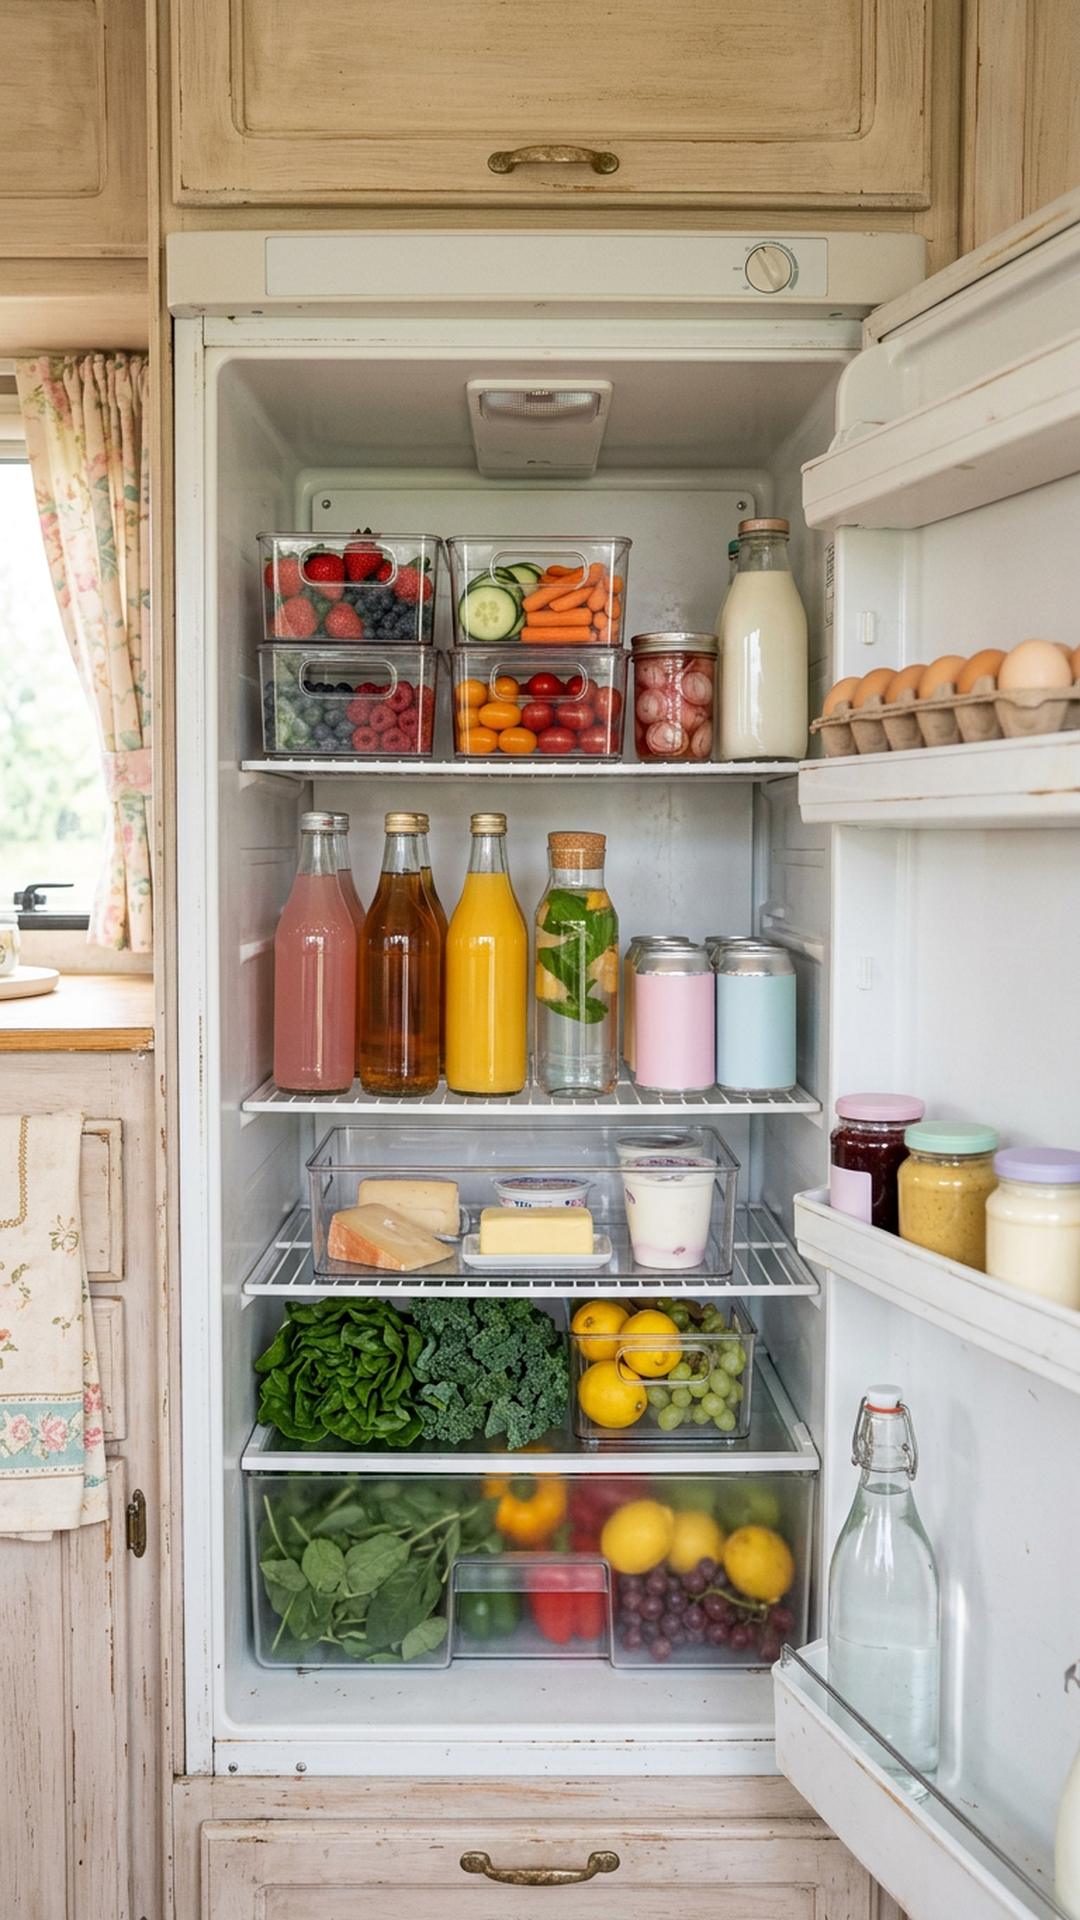
A clutter-free camper is easier to maintain when the refrigerator has zones just like the pantry. Clear bins keep produce, drinks, snacks, and condiments grouped together so food is easier to see and less likely to go to waste.
This photo works because the bins create boundaries in a space that usually turns chaotic after one grocery run. Use stackable pieces only if they do not block visibility, and leave a little open room so air can circulate properly.
PRO TIP: Make one grab-and-go snack bin for road days so nobody has to dig through the fridge when you stop.
14. Create a Tiny Mudroom by the Door
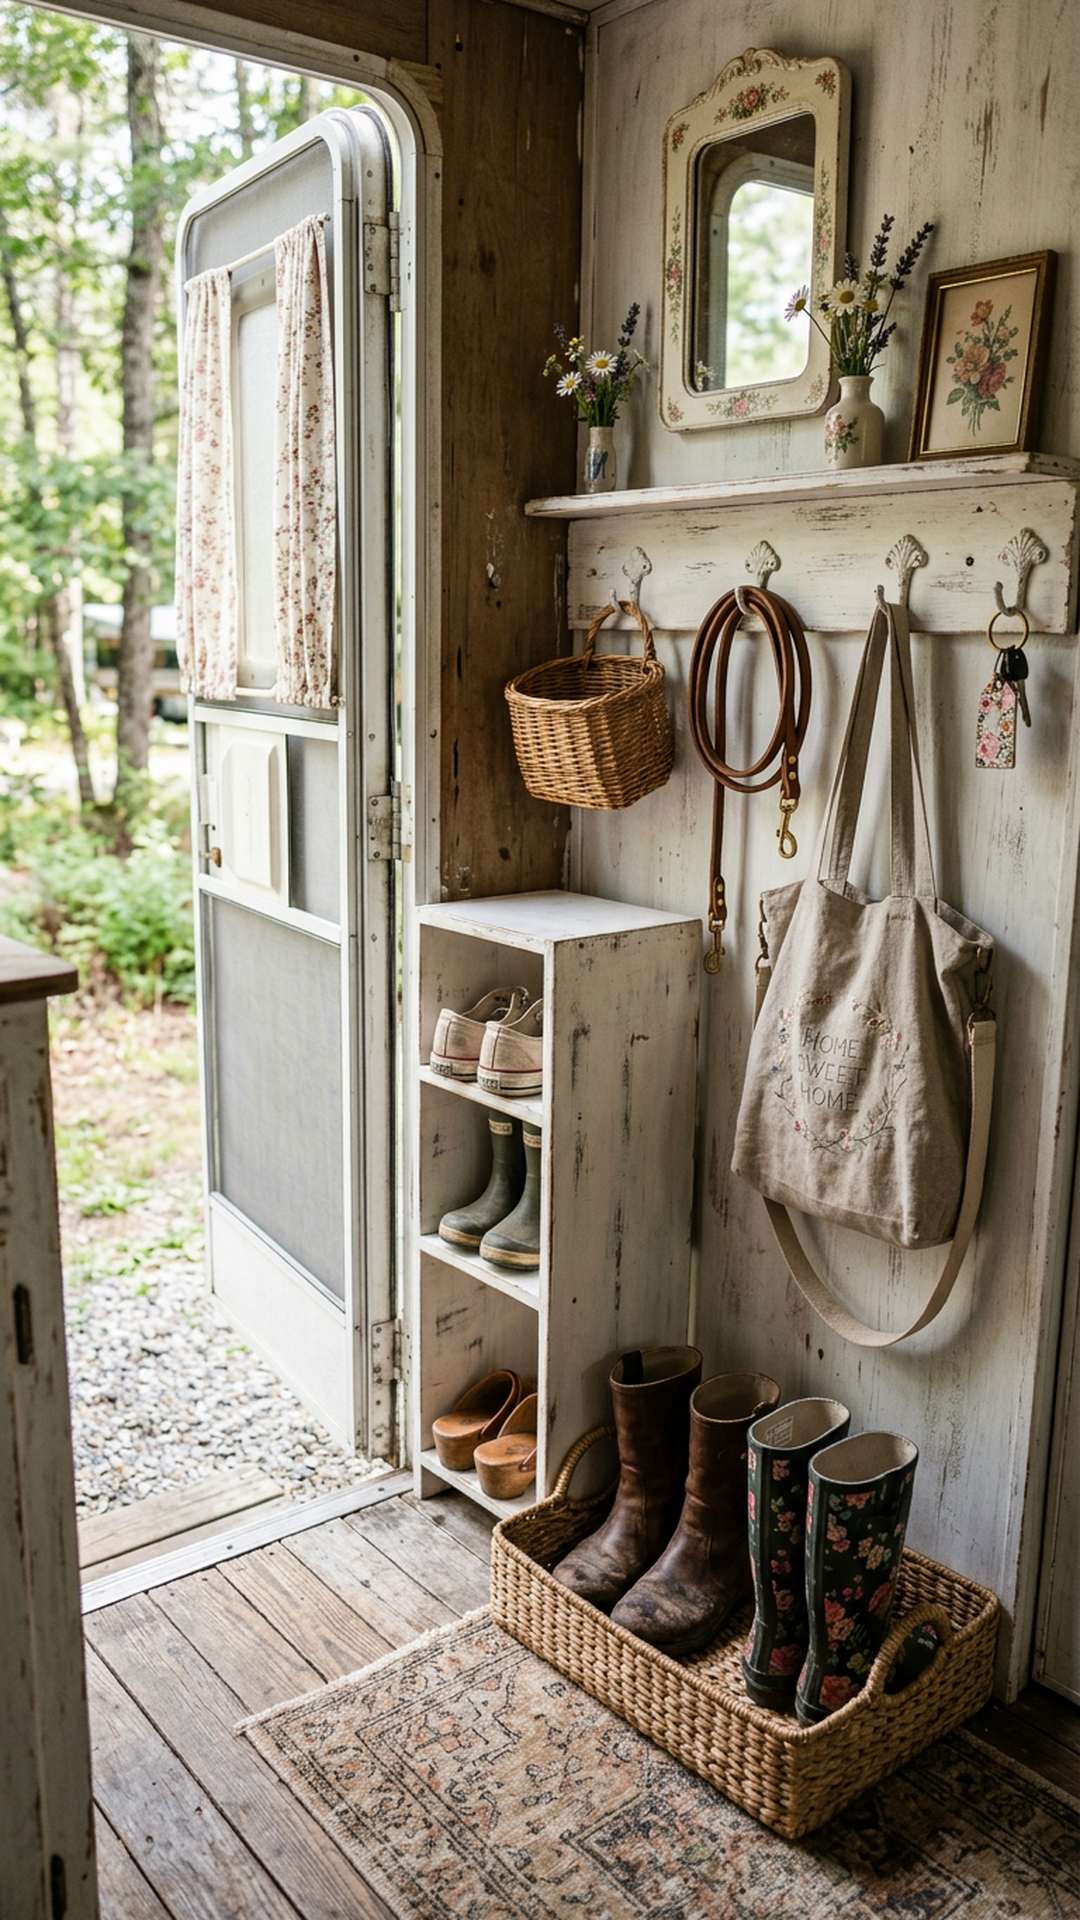
Shoes, leashes, umbrellas, and tote bags can make a camper entry feel messy in minutes. A narrow shoe rack and a few hooks create a mini mudroom that keeps dirty, damp, or bulky items contained right where they belong.
The image shows how even a tiny doorway can work harder with the right scale of furniture. Use a low rack, add a tray for muddy shoes, and keep only the pairs you wear most often near the entrance.
PRO TIP: Rotate seasonal footwear often so your entry storage never becomes a parking lot for pairs you are not using.
15. Unify Overhead Cabinets With Matching Fabric Bins
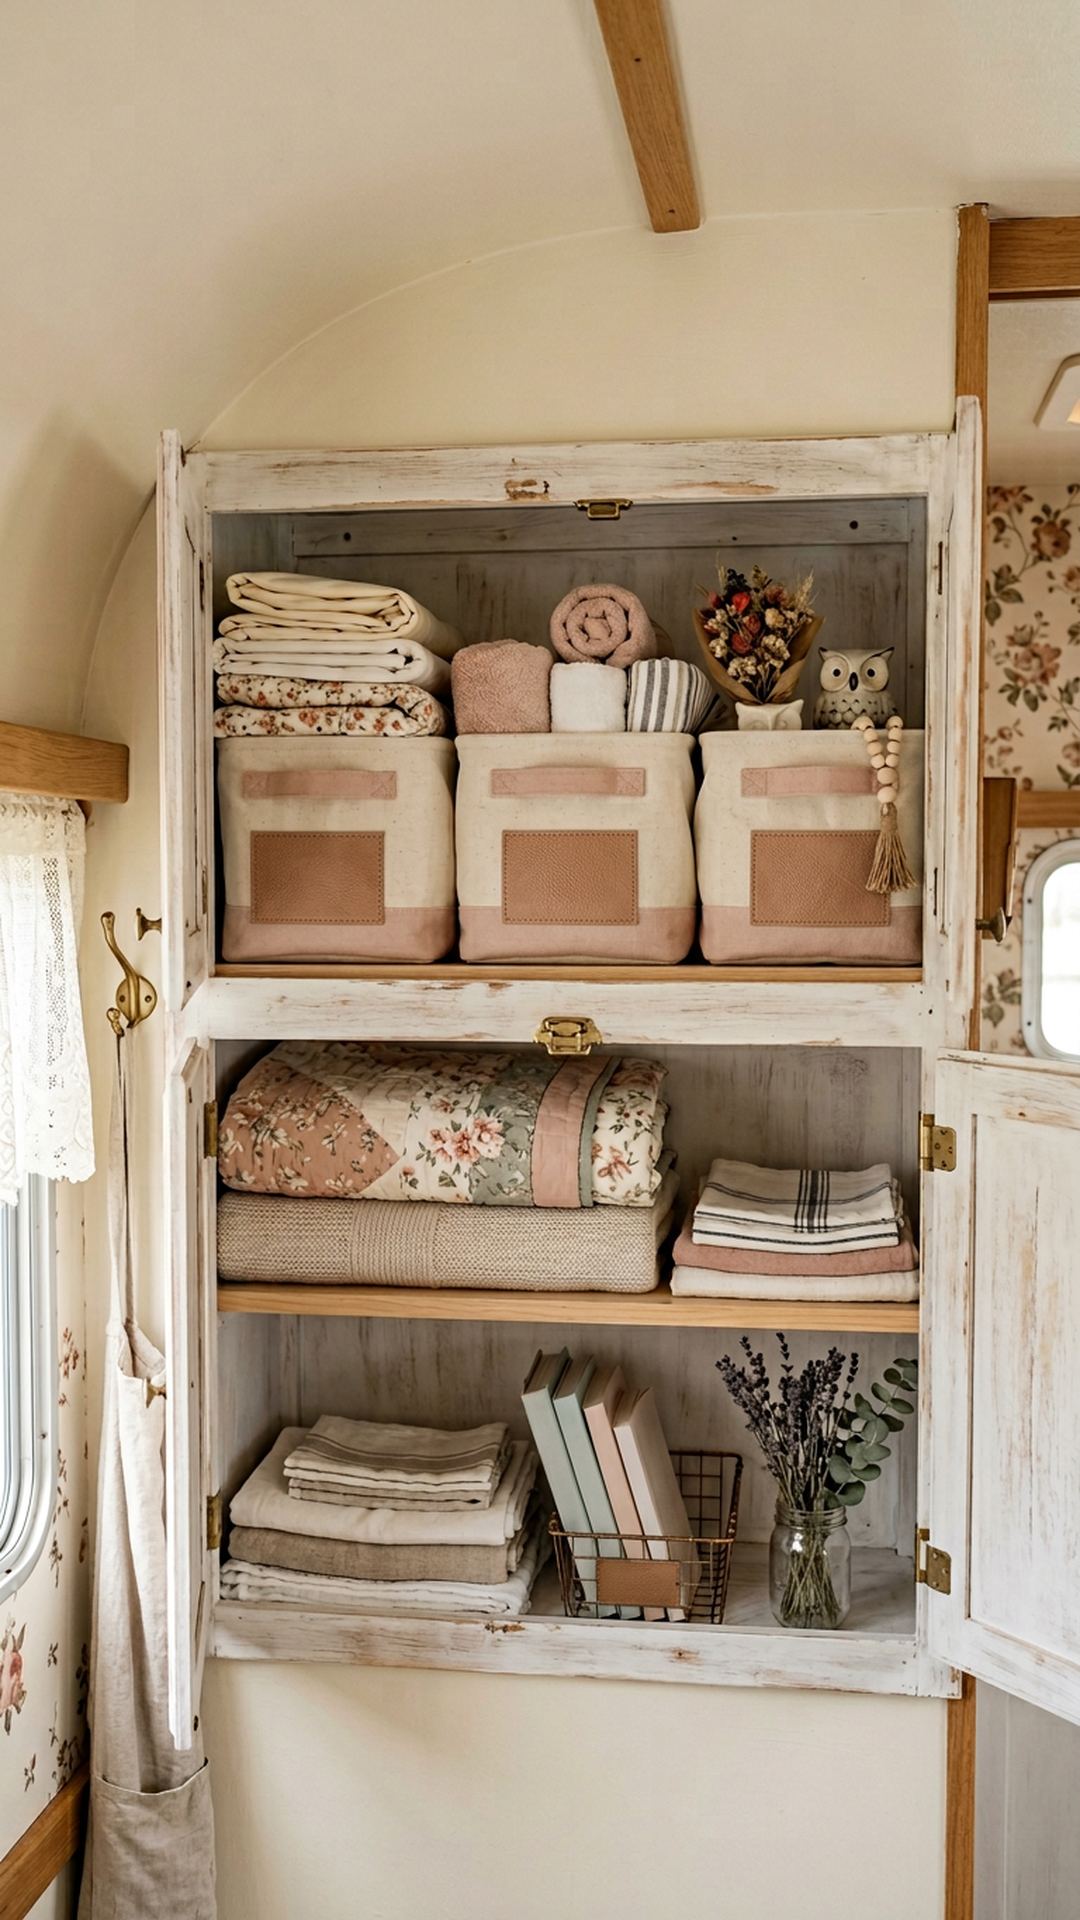
Overhead cabinets can become a hiding place for random clutter unless they are given structure. Matching fabric bins instantly divide that space into useful categories for linens, decor, games, paper goods, or seasonal extras.
This image feels polished because the bins create visual order even before the cabinet doors close. Choose soft-sided bins that fit the shelf depth, label them discreetly if needed, and group by category instead of stuffing wherever there is space.
PRO TIP: Leave one overhead bin labeled for “trip extras” so souvenirs, maps, and last-minute items do not take over your main storage zones.

