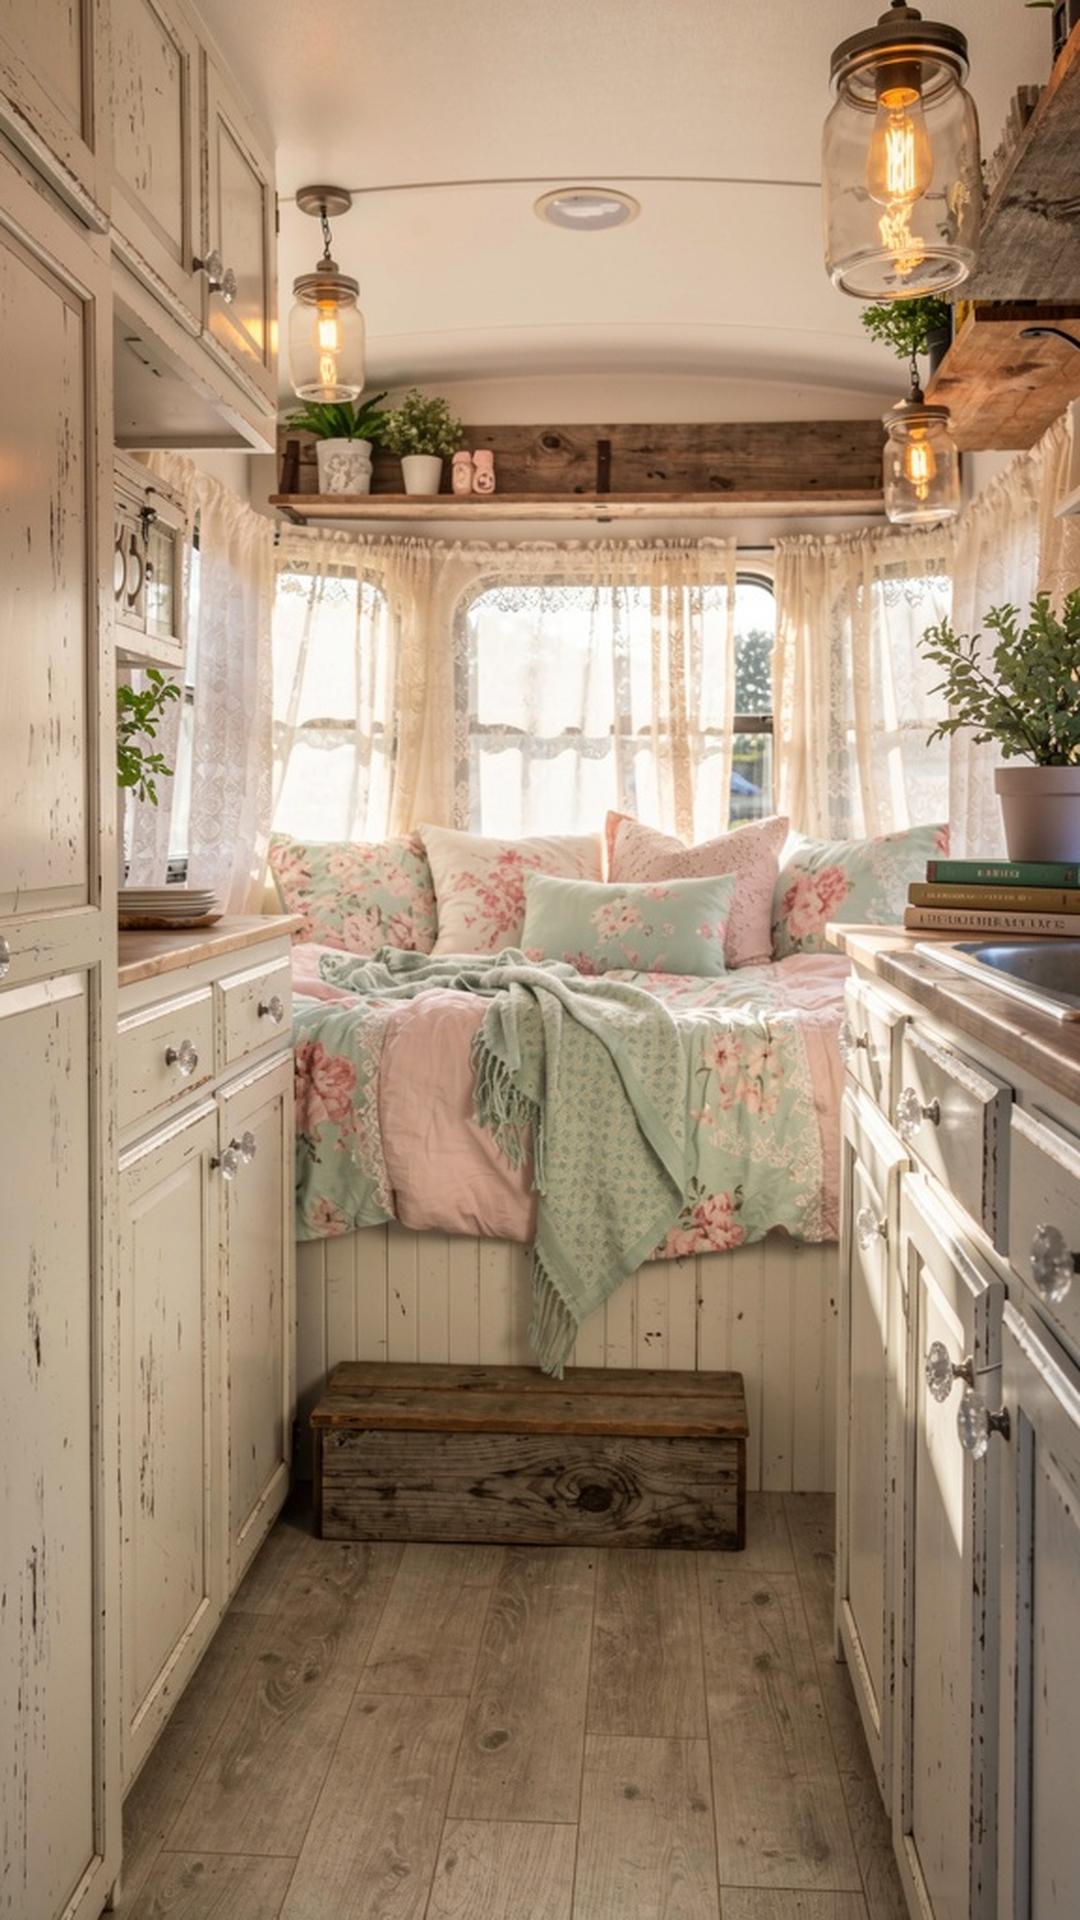
Living full-time in an RV doesn’t mean you have to sacrifice style or comfort! Shabby chic design is the perfect aesthetic for camper living because it combines vintage charm with practical, lived-in comfort. This romantic style embraces imperfections, celebrates repurposed finds, and creates a cozy haven on wheels.
Whether you’re renovating an older camper or updating your current rig, these shabby chic touches will transform your space into a dreamy mobile retreat. The beauty of this design approach is that it’s incredibly forgiving for small spaces and works wonderfully with the quirks and limitations of RV living. Plus, many shabby chic elements can be found affordably at thrift stores, flea markets, and yard sales, making it budget-friendly for full-timers. Let’s dive into 15 inspiring ways to bring that coveted shabby chic vibe into your camper!
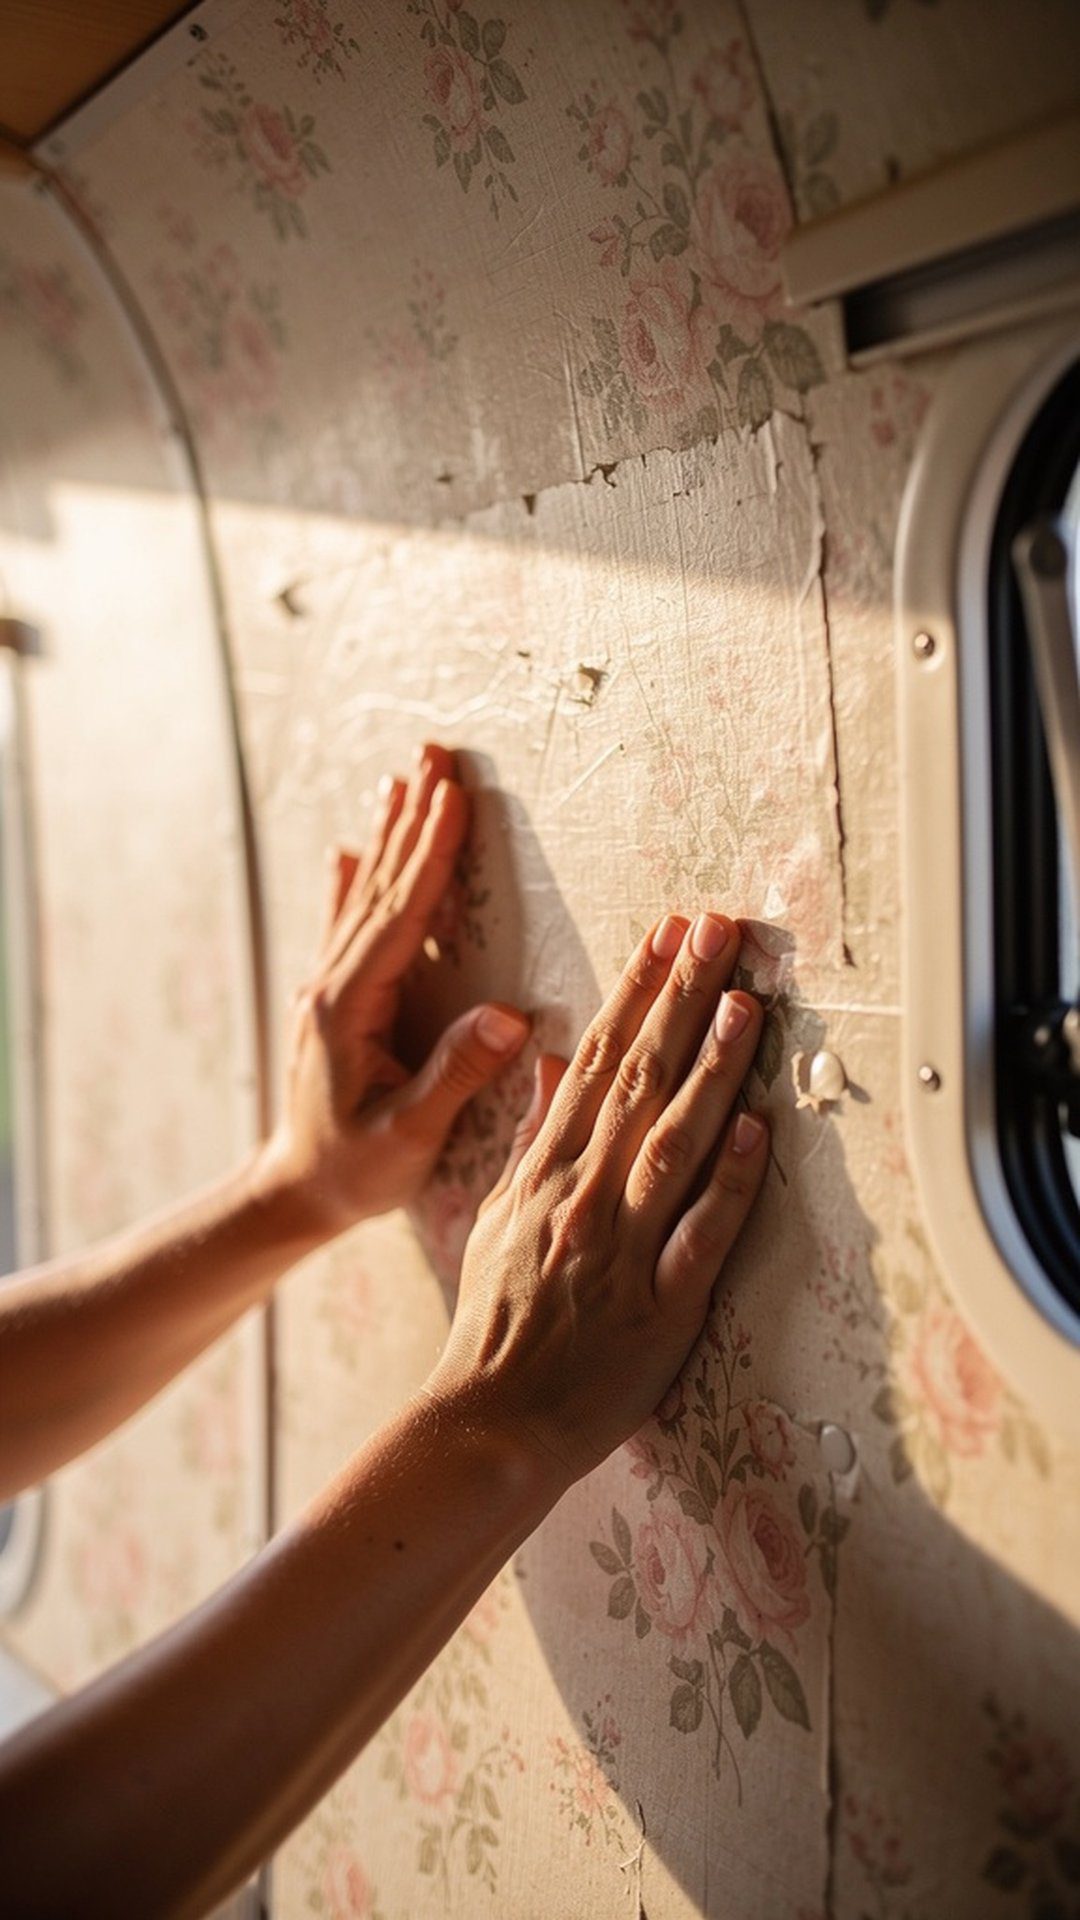
1. Install Vintage Floral Wallpaper
Would you like to save this article?
Nothing says shabby chic quite like delicate floral wallpaper in soft, muted tones. Installing vintage-inspired wallpaper is one of the fastest ways to completely transform your camper’s interior. Look for patterns featuring roses, peonies, or wildflowers in pastel pinks, creams, and sage greens. Peel-and-stick wallpaper options are perfect for RV living since they’re renter-friendly and easy to remove if you change your mind later. Focus on accent walls rather than papering the entire space to avoid overwhelming your small area.
The key to success with wallpaper in a camper is choosing lightweight, moisture-resistant varieties that can handle temperature fluctuations. Consider wallpapering just the area above your bed, a kitchen backsplash section, or the wall behind your dinette. This adds visual interest without making the space feel closed in. Prep your walls properly by cleaning them thoroughly and ensuring they’re smooth – any bumps will show through thin wallpaper.
PRO TIP: Order extra wallpaper beyond what you calculate you’ll need. Camper walls aren’t perfectly straight, and you’ll want extra for pattern matching and future repairs. Store the excess rolled up in a cool, dry spot so you can patch any areas that might peel or tear during your travels.
2. Paint Cabinets with Distressed White Finish
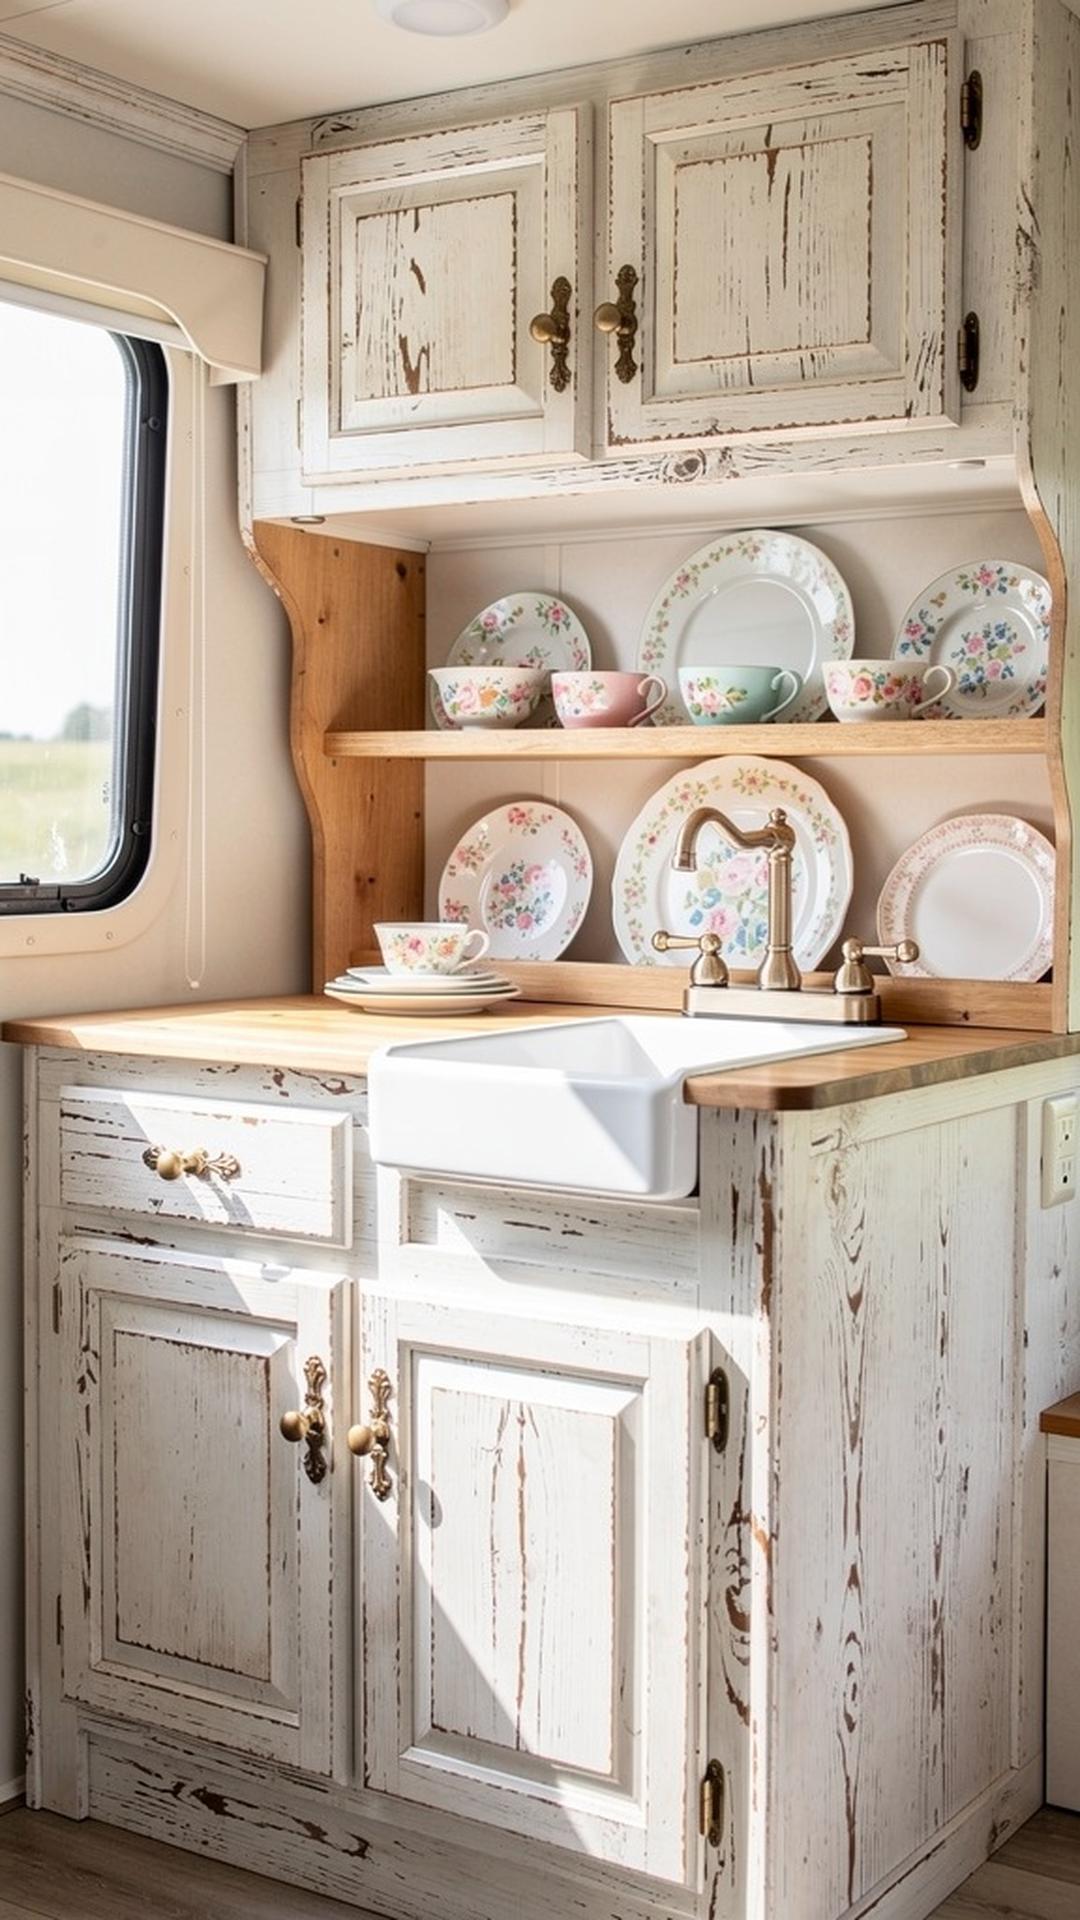
Dark wood cabinets can make a small camper feel cave-like and dated. Transforming them with a distressed white or cream paint finish instantly brightens your space while adding that perfectly imperfect shabby chic character. The distressing technique – where you lightly sand edges and corners after painting – creates an aged, vintage look that hides wear and tear beautifully. This is especially practical for full-time living where cabinets get constant use and inevitably show signs of life on the road.
Use a quality chalk paint or cabinet paint specifically designed for durability, and don’t skip the primer step. Clean and lightly sand your existing cabinets first for proper adhesion. After your final coat dries, use fine-grit sandpaper to gently distress edges, corners, and areas that would naturally wear over time. Focus on spots around handles, door edges, and raised panel details. Finish with a clear matte or satin sealer to protect your hard work from grease, moisture, and daily use.
PRO TIP: Replace your old cabinet hardware with vintage-inspired glass knobs, brass pulls, or ceramic handles to complete the transformation. These small details make a huge impact and can be found affordably at home improvement stores or online. Mix and match slightly different styles for an authentic collected-over-time shabby chic look.
3. Add Flowing Lace Curtains
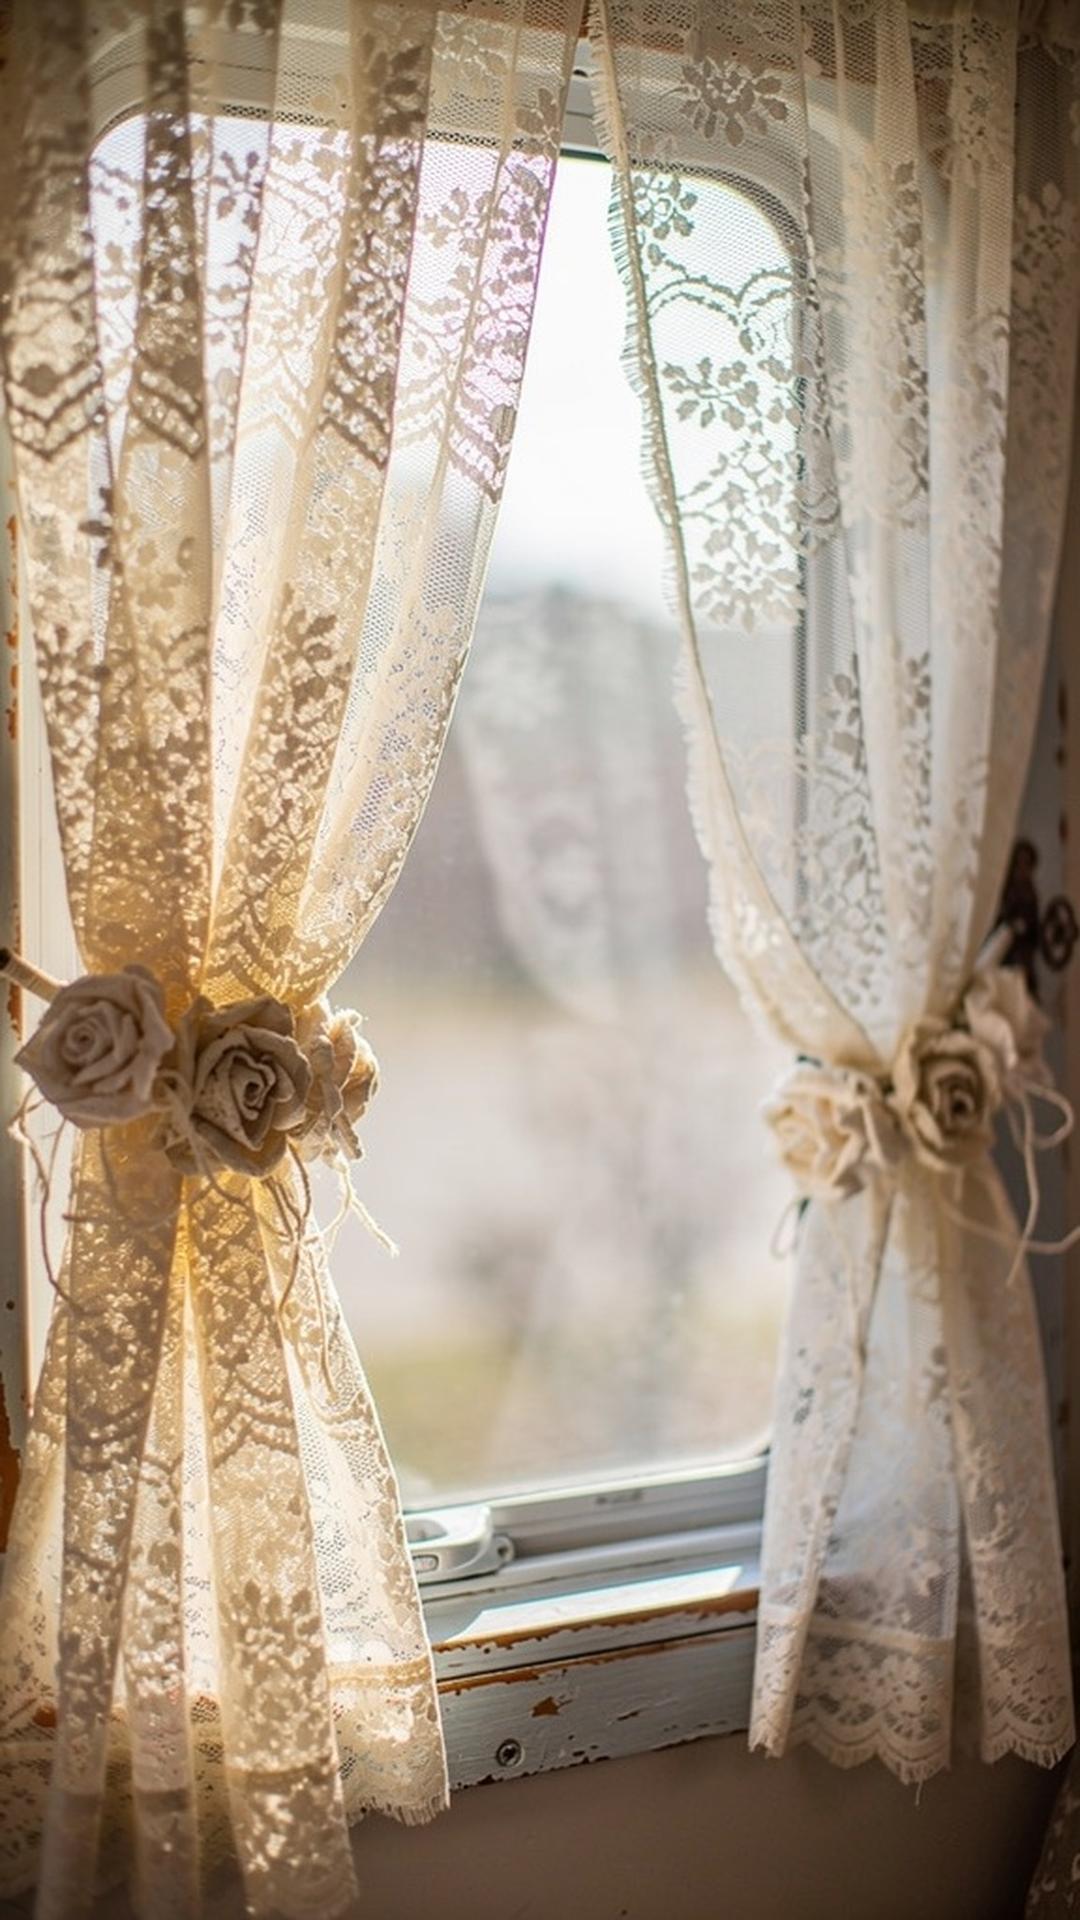
Swap out your heavy RV blinds or outdated curtains for romantic, flowing lace panels that filter light beautifully while maintaining privacy. Lace curtains in ivory, cream, or soft white instantly soften the angular lines of camper windows and create an ethereal, cottage-like atmosphere. The delicate patterns cast gorgeous shadows throughout your space during golden hour, adding to that dreamy shabby chic aesthetic. Plus, sheer lace allows natural light to flood your camper, making it feel more spacious and welcoming.
When selecting lace curtains for your RV, consider the weight and length carefully. You’ll want panels that aren’t so heavy they strain your mounting hardware, but substantial enough that they drape nicely and don’t blow around constantly. Measure your windows precisely and consider whether you want floor-length drama or practical café-style curtains that end at the windowsill. Don’t forget curtain tiebacks – fabric roses, vintage ribbon, or even repurposed jewelry chains work beautifully to hold panels open when you want maximum light.
PRO TIP: Layer your lace curtains with light-blocking roller shades or cellular blinds hidden behind them. This gives you the romantic aesthetic during the day while still providing privacy and insulation at night. The combination is especially useful for boondocking or staying in well-lit campgrounds where you need to block light for sleeping.
4. Incorporate Vintage Wooden Crates as Storage
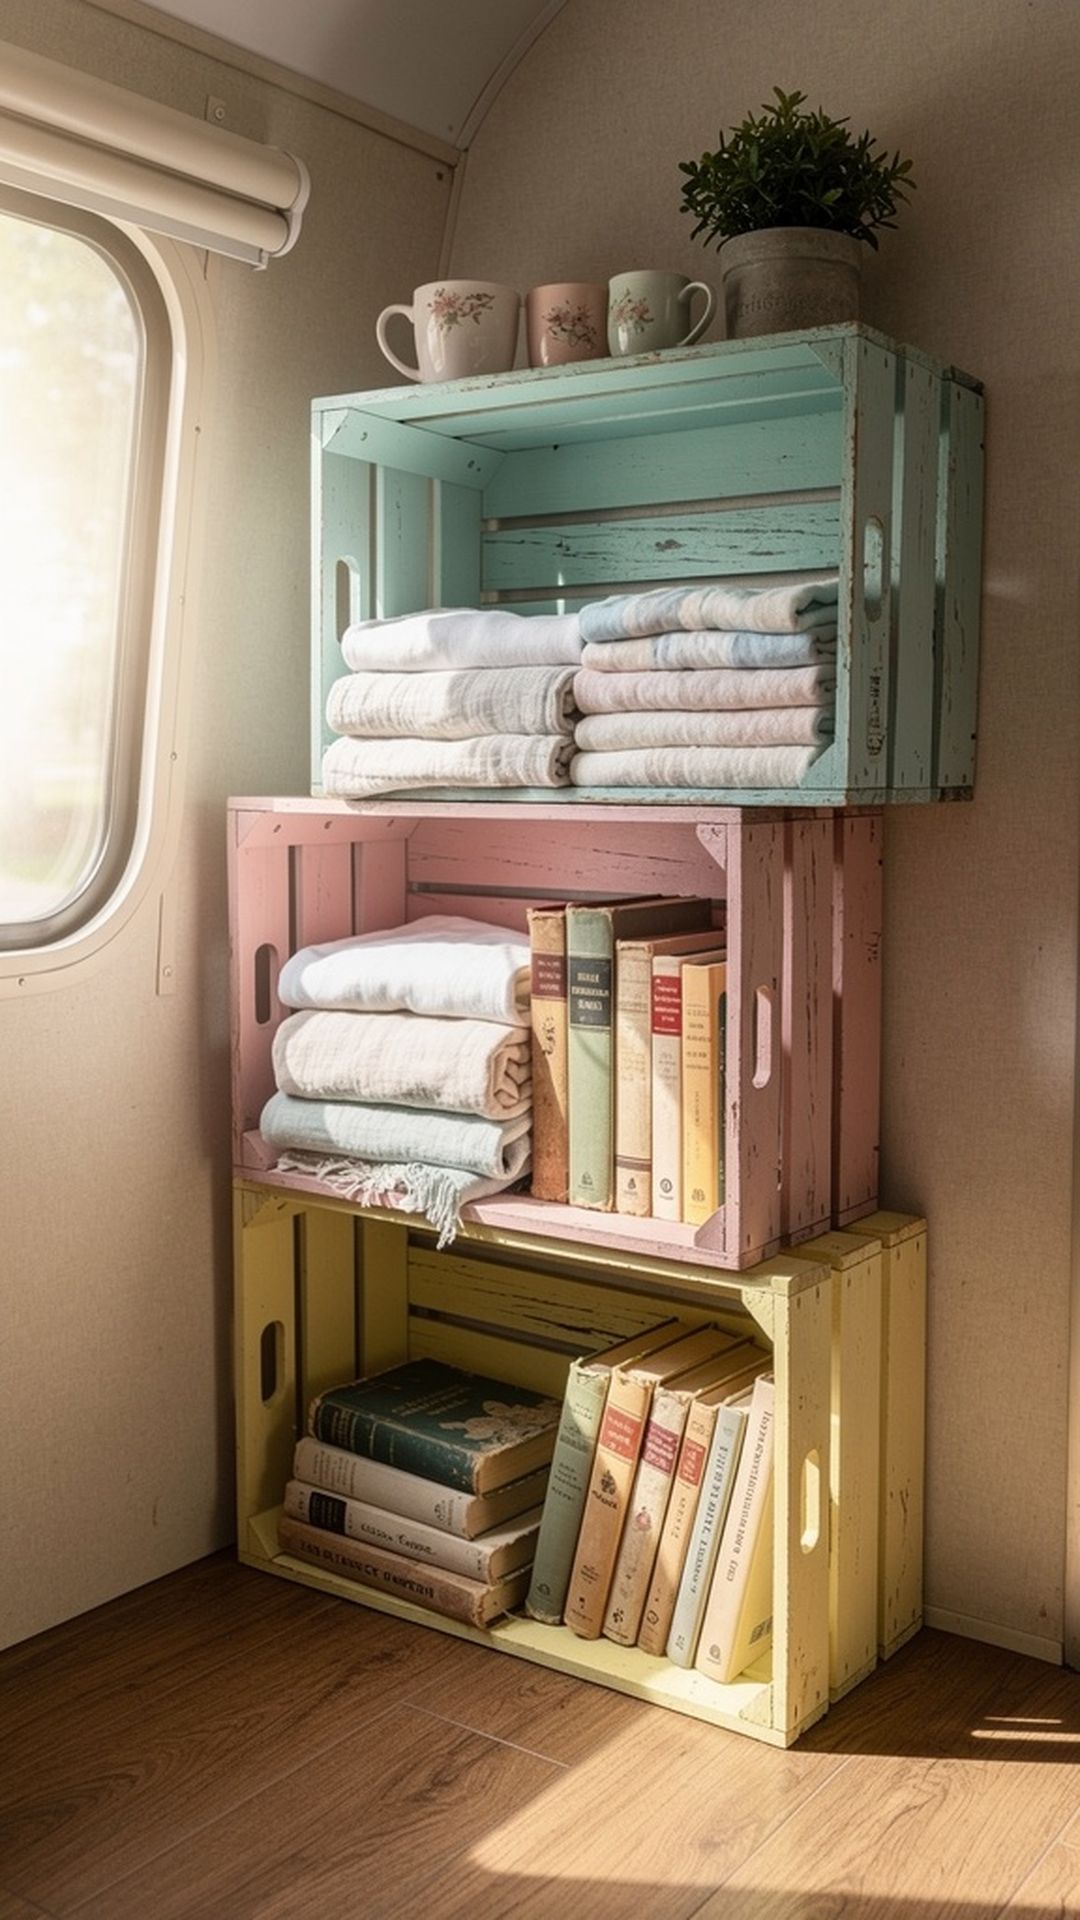
Old wooden crates and boxes are quintessential shabby chic storage solutions that add both function and character to your camper. Stack them to create custom shelving units, mount them on walls for open storage, or slide them under beds and benches for concealed organization. The weathered wood and original stamped logos or graphics add instant vintage charm while solving the eternal RV storage challenge. You can leave them natural, paint them in soft pastels, or give them a light whitewash for a beachier feel.
Hunt for authentic vintage crates at flea markets, antique stores, and online marketplaces – apple crates, milk crates, and old advertising boxes work wonderfully. Make sure they’re structurally sound if you’re stacking them or mounting them to walls, and reinforce corners with small brackets if needed. Line the insides with vintage fabric, wallpaper scraps, or kraft paper to protect delicate items and add an extra design layer. Use crates to corral everything from pantry items to craft supplies to shoes.
PRO TIP: Secure stacked or mounted crates properly for travel using L-brackets, bungee cords, or museum putty. The last thing you want is your beautiful display becoming dangerous projectiles when you hit a bump on the highway. Test your setup by giving it a good shake before your first trip to ensure everything stays in place.
5. Hang a Crystal Chandelier
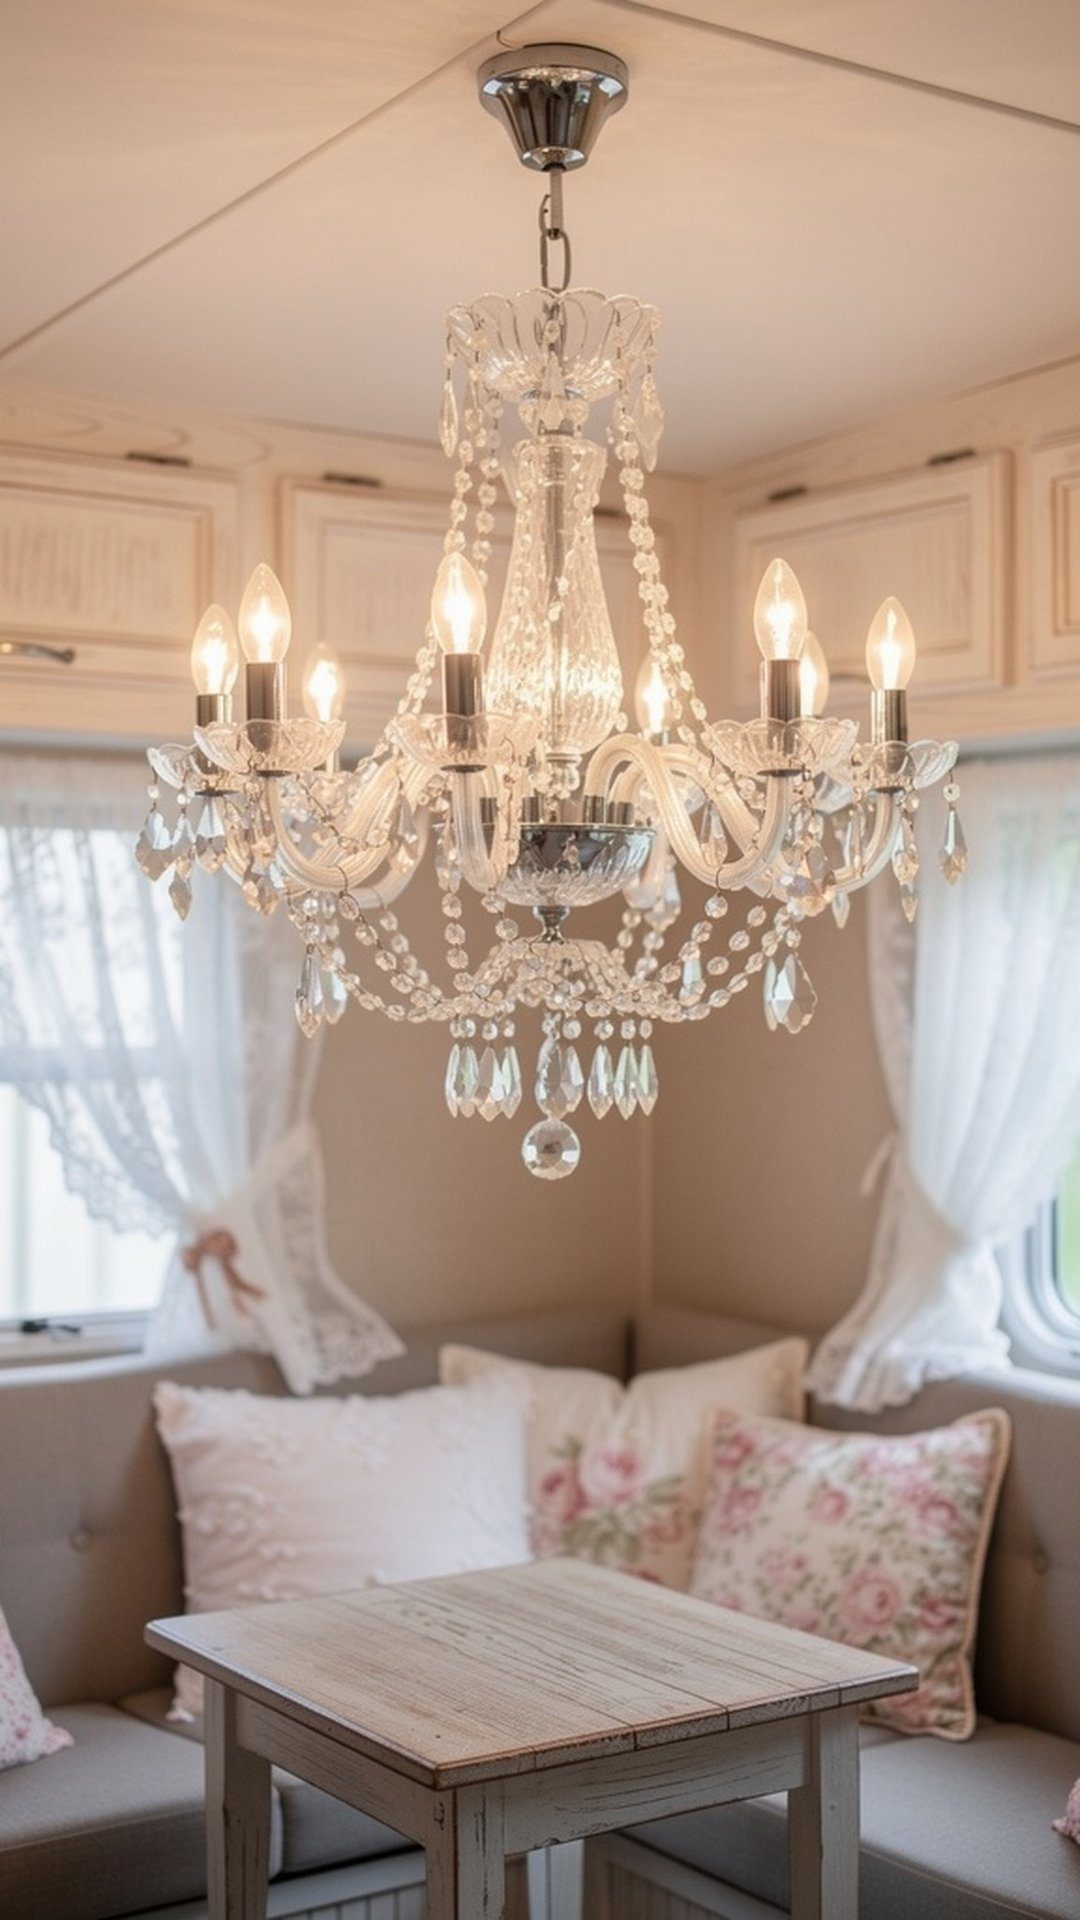
Nothing elevates shabby chic style quite like an elegant crystal chandelier, and yes, you absolutely can have one in your camper! This unexpected glamorous element creates a stunning focal point and reflects light beautifully throughout your space. Mini chandeliers designed for closets or powder rooms work perfectly in RVs, providing both ambient lighting and visual drama. The contrast between the rustic camper setting and the refined chandelier epitomizes the shabby chic aesthetic of mixing high and low elements.
Choose a lightweight chandelier specifically designed for ceiling mounting, and ensure your camper’s ceiling can support the weight – you may need to install additional blocking between ceiling joists. LED bulbs are essential to reduce heat and power consumption. Consider a chandelier with a dimmer function for romantic evenings or one that can be easily removed and packed securely for travel if you’re concerned about delicate crystals. Position it centrally over your dining area or in your bedroom for maximum impact.
PRO TIP: Clean your chandelier crystals regularly using a mix of equal parts water and white vinegar in a spray bottle. Dust and road grime can dull the sparkle quickly. For travel, wrap delicate crystal drops in bubble wrap or remove them entirely and store them safely in a padded container to prevent breakage on bumpy roads.
6. Create a Reclaimed Wood Accent Wall
A reclaimed wood accent wall adds rustic warmth and texture that grounds the softer elements of shabby chic design. The weathered patina and natural color variations of old barn wood, pallet wood, or reclaimed fencing create depth and interest in your small space. This feature wall becomes an instant focal point, perfect for the area behind your bed or along your dining banquette. The rough, authentic texture contrasts beautifully with soft linens, lace, and painted furniture for that perfect shabby chic balance.
Keep weight in mind when adding wood to your camper walls – look for thin planking or even wood-look peel-and-stick panels if weight is a concern. If using real reclaimed wood, clean it thoroughly, remove any nails or staples, and consider sealing it to prevent splinters and protect against moisture. Attach planks horizontally, vertically, or in a herringbone pattern directly to your camper walls using construction adhesive and small finishing nails. Don’t cover every wall – one accent wall provides drama without overwhelming your space or adding excessive weight.
PRO TIP: Before installing, let your reclaimed wood acclimate inside your camper for at least 48 hours. Wood expands and contracts with temperature and humidity changes, and acclimation helps minimize warping and gaps after installation. This step is especially important for full-time RVers who travel through different climates.
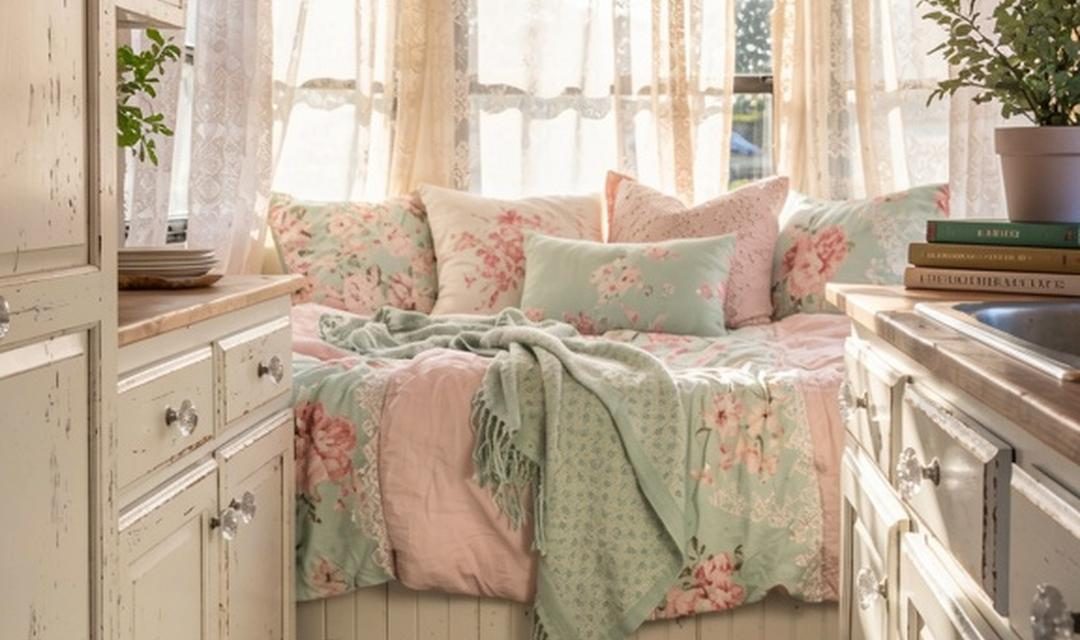
7. Layer Soft Pastel Bedding
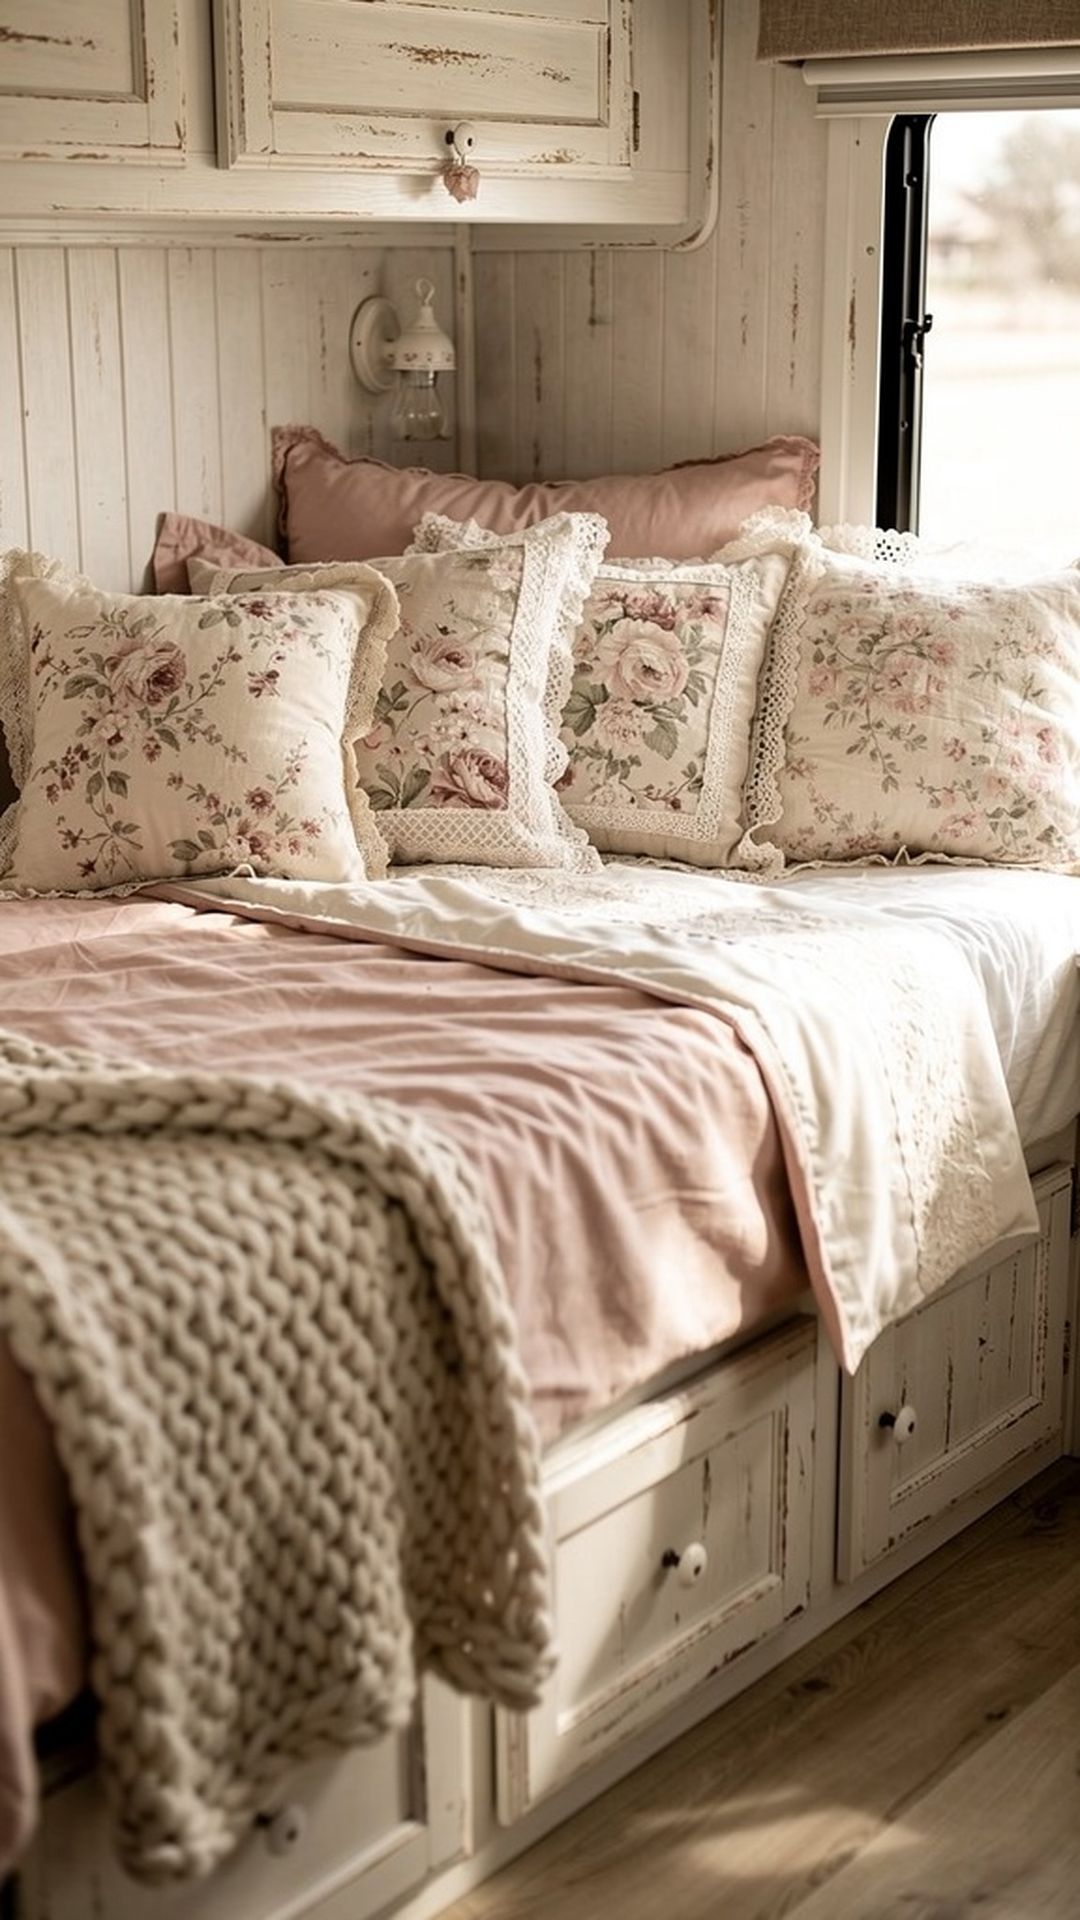
Your bed is likely the largest visual element in your camper, making it prime real estate for shabby chic styling. Layer soft bedding in pastel hues like blush pink, powder blue, mint green, and creamy ivory to create a cloud-like retreat. Mix textures by combining vintage floral quilts, chunky knit throws, linen duvets, and an abundance of throw pillows in complementary patterns. The key is creating a lush, inviting bed that looks as comfortable as it feels – essential when your camper is your permanent home.
Don’t shy away from mixing patterns in your bedding ensemble. Shabby chic style embraces a collected-over-time look, so floral prints, stripes, checks, and lace can all coexist harmoniously if they share a similar color palette. Include pillows of varying sizes and shapes, from European squares to lumbar pillows to small decorative cushions. Vintage pillowcases with crocheted edges or embroidered details add authentic character. Choose bedding that’s not just beautiful but also practical – machine washable fabrics are essential for full-time living.
PRO TIP: Secure your decorative pillows and throws during travel using a large mesh laundry bag or decorative basket stored in a cabinet or under the bed. This keeps your beautiful bedding from becoming a chaotic mess during transit and makes it quick to style your bed again when you arrive at your destination.
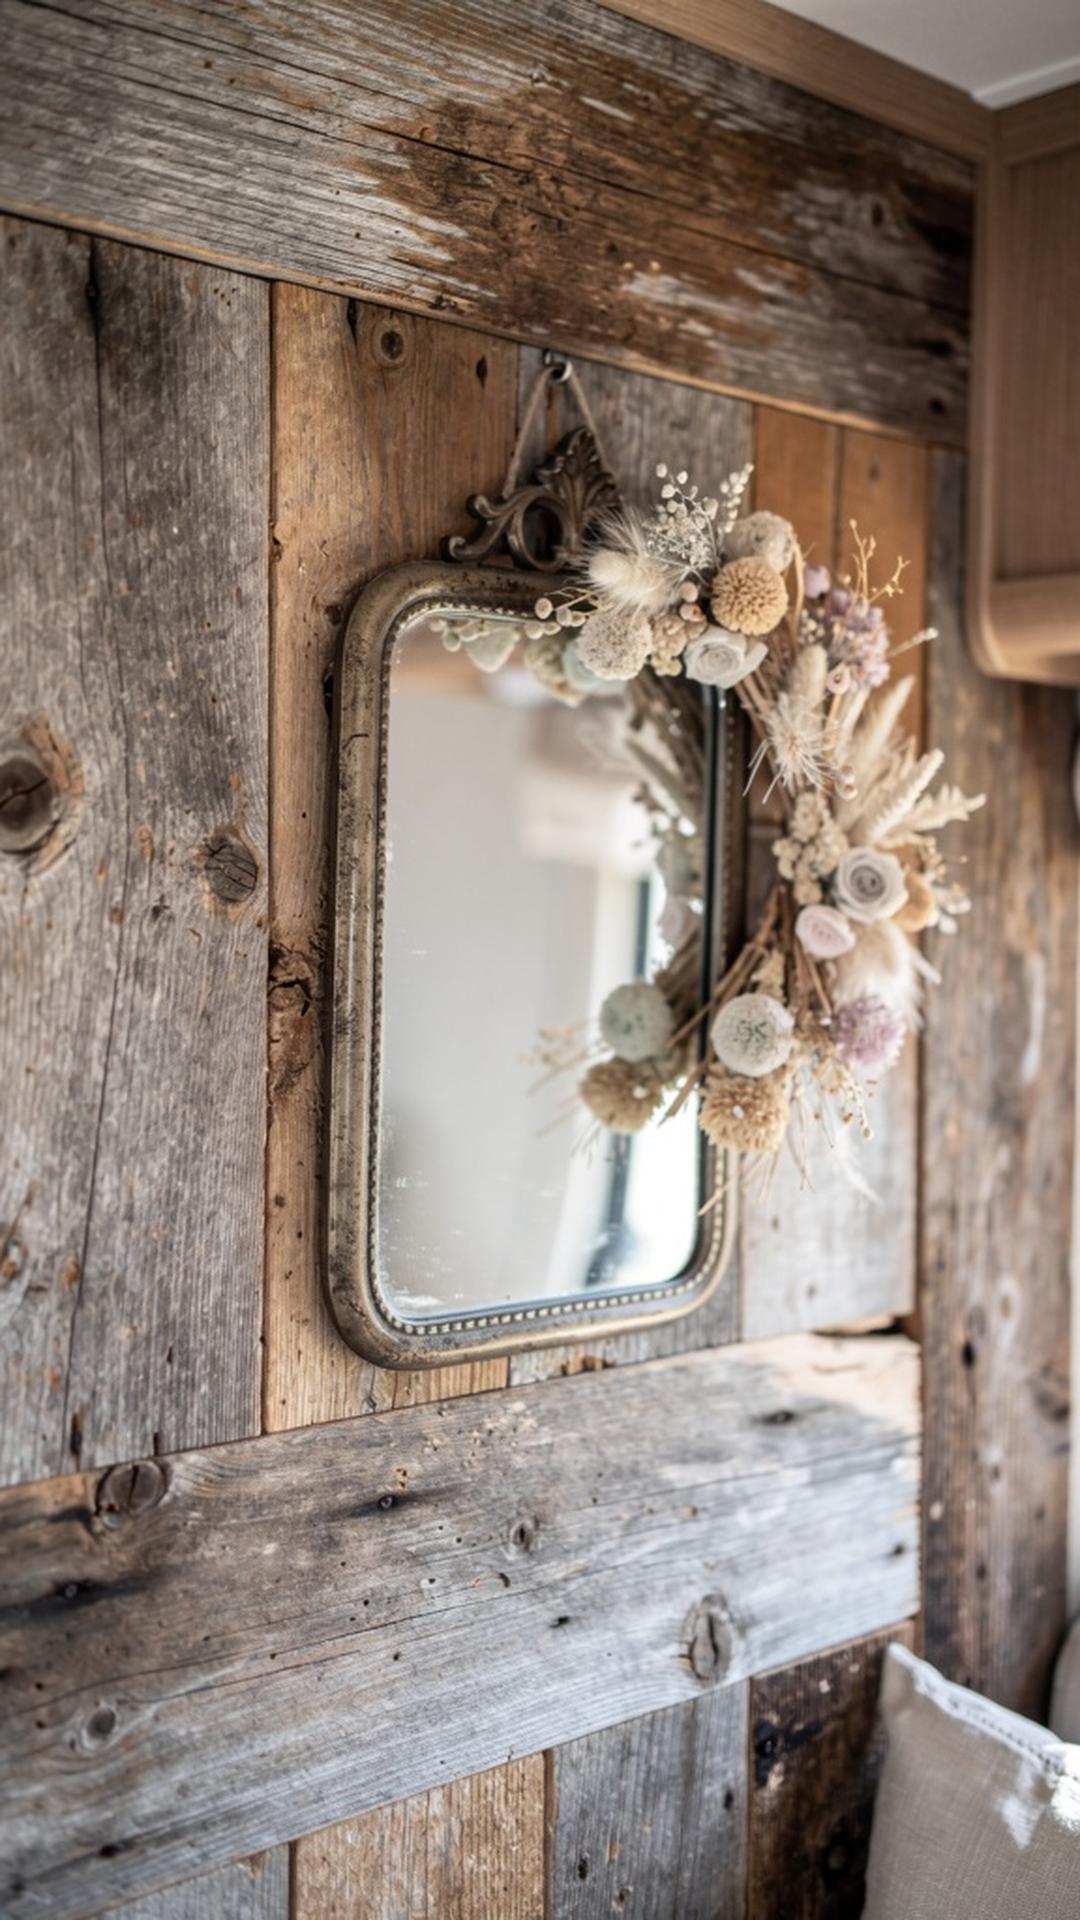
8. Display Vintage Mirrors
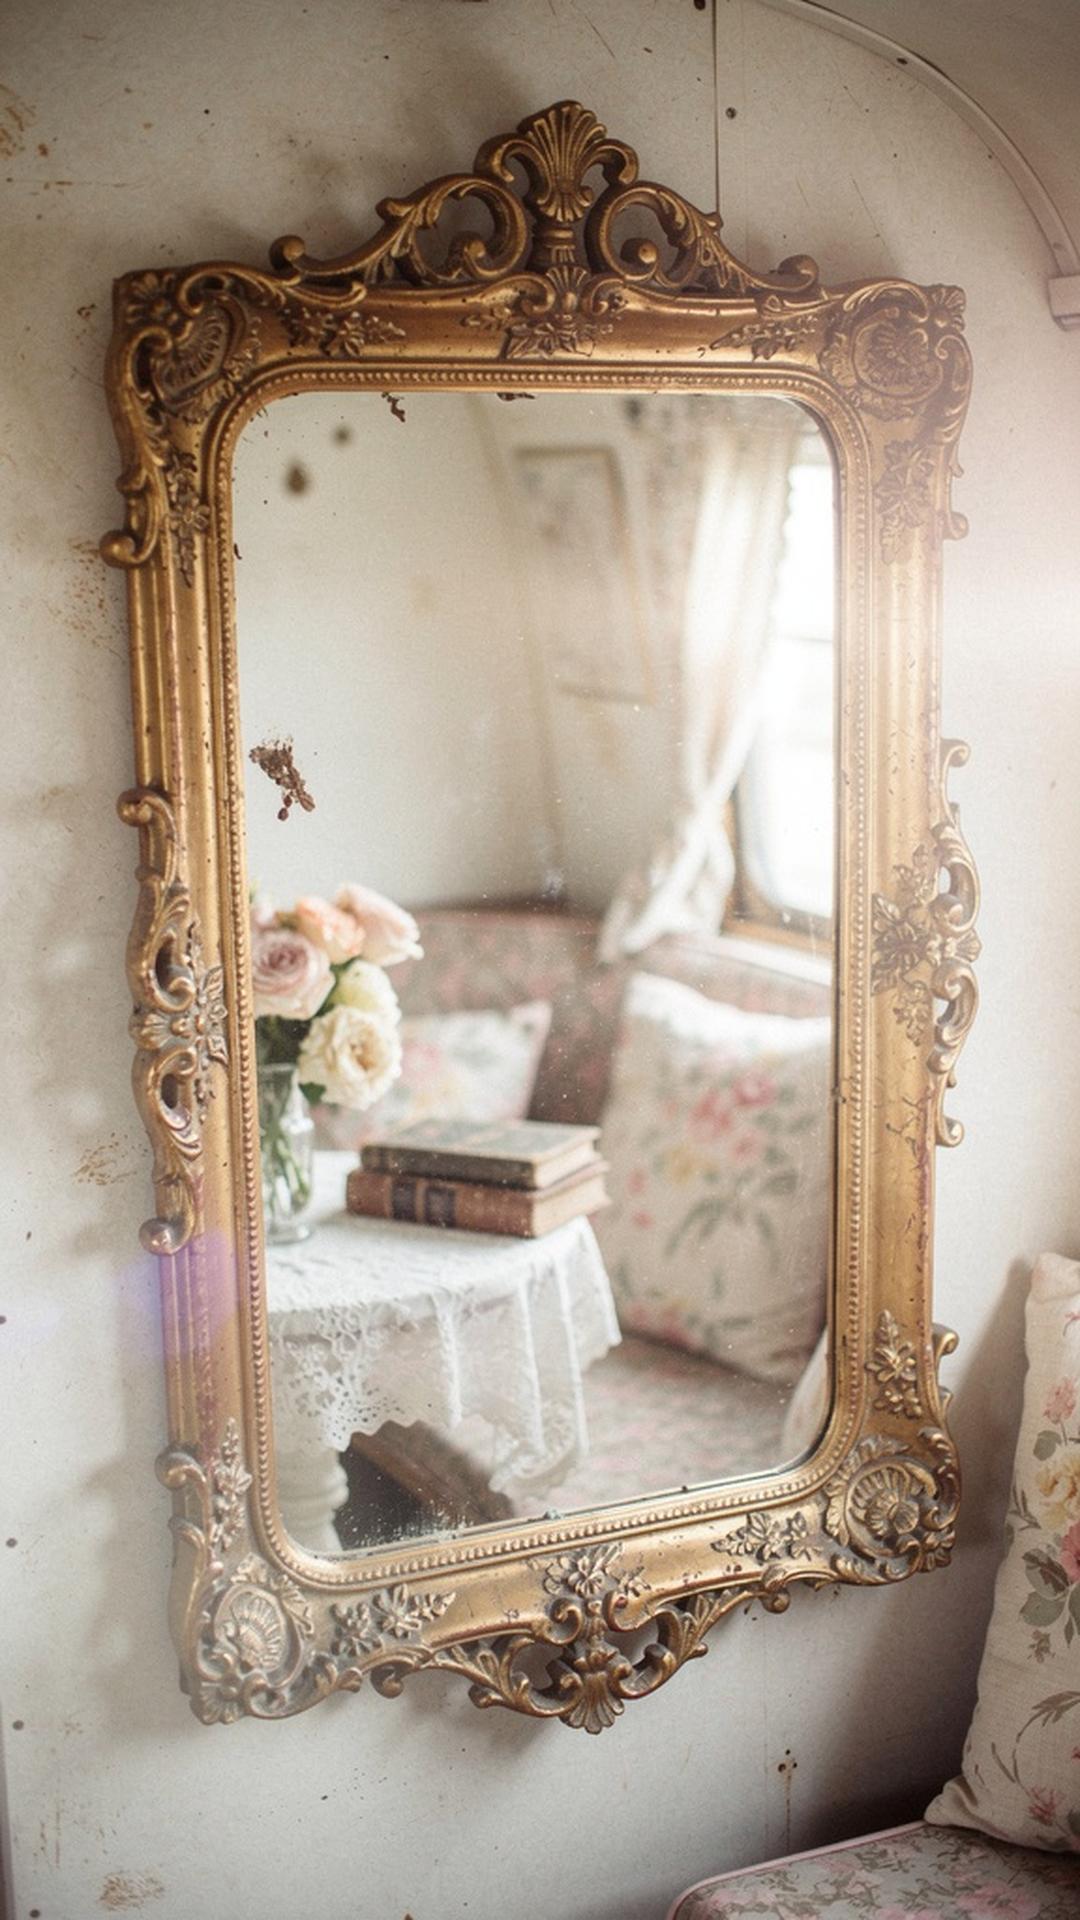
Ornate vintage mirrors with distressed frames are both functional and decorative, making them ideal for small camper spaces. Mirrors reflect light and create the illusion of more space – critical in an RV – while ornate gold, silver, or white frames add that romantic shabby chic detail. Hang them above consoles, on closet doors, or create a gallery wall of mismatched vintage mirrors in various sizes. The aged patina of the glass adds to the vintage charm, though you’ll want to ensure the reflection is still clear enough for practical use.
Shop for vintage mirrors at thrift stores, estate sales, and antique markets where you’ll find authentic pieces with character at reasonable prices. Look for frames that are solid and sturdy despite surface distressing – you want cosmetic age, not structural damage. If a mirror’s frame is the wrong color, you can easily paint and distress it yourself to match your palette. Secure mirrors properly for travel using appropriate wall anchors and mirror clips, and consider where you position them so they won’t reflect headlight glare at night or make your space feel disorienting.
PRO TIP: Place mirrors strategically across from windows to maximize natural light reflection throughout your camper. This simple trick can make your space feel significantly brighter and more open without adding any electrical load or changing your floor plan. Test placement before committing to hanging hardware.
9. Install Open Shelving with Vintage Dishes
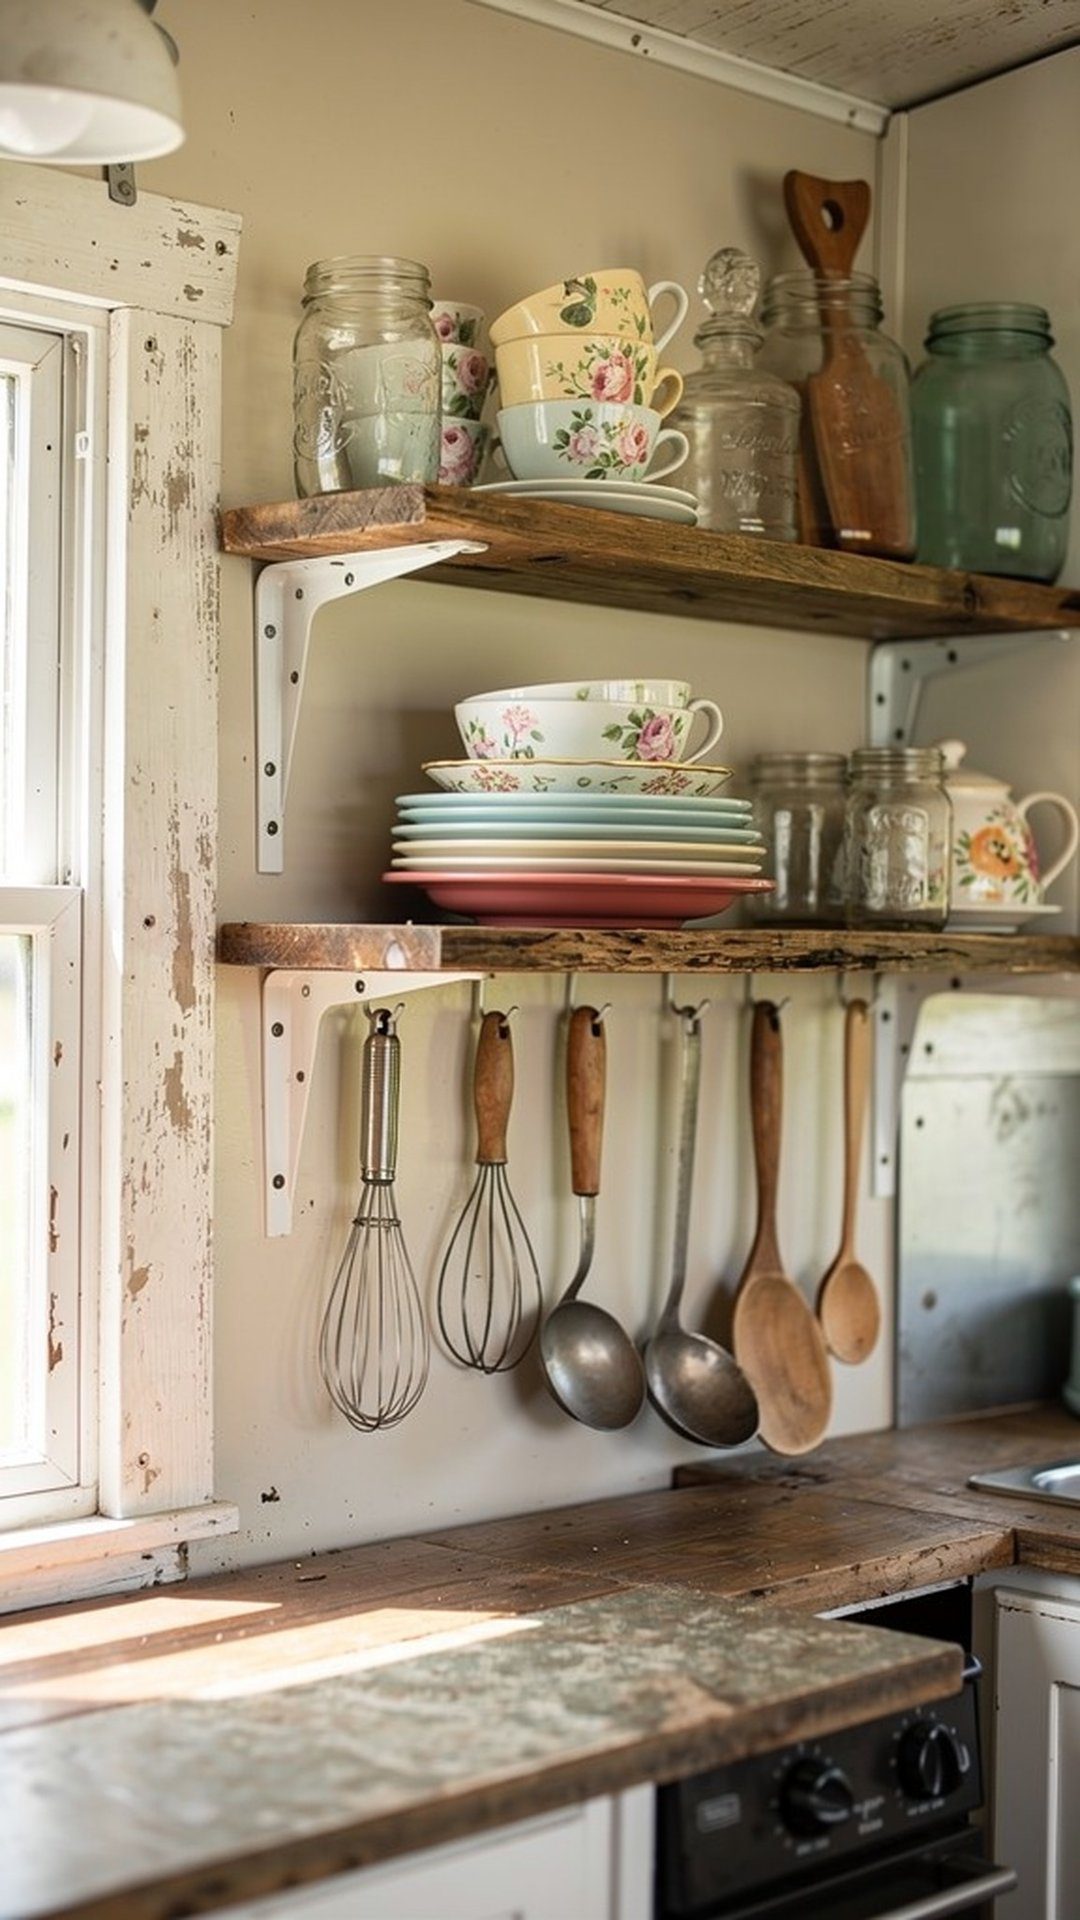
Replace some upper cabinets with open shelving to display your collection of mismatched vintage dishes, floral teacups, and antique serving pieces. This creates visual interest while keeping everyday items accessible – perfect for small camper kitchens where digging through deep cabinets is frustrating. The curated display becomes functional art, showcasing rose-patterned china, ironstone pitchers, and glass cake stands that reinforce your shabby chic theme. Open shelving also makes your space feel less closed-in compared to rows of solid cabinet doors.
Build your vintage dish collection slowly from thrift stores and estate sales, choosing pieces in a cohesive color story even if patterns vary. Stick to whites, creams, and pastels with floral or delicate patterns for shabby chic authenticity. Use shelf risers and small plate stands to create varying heights in your display, making it more visually interesting and allowing you to fit more pieces. Include a few unexpected elements like vintage cookbooks, mason jars with fresh flowers, or small potted herbs to break up the dishes and add life to your display.
PRO TIP: Use museum putty or non-slip shelf liner on your open shelving to prevent dishes from sliding and breaking during travel. You might also want to install a slim rod or decorative rail along the front edge of shelves to keep items from falling off on bumpy roads. Some full-timers prefer to keep breakables stored during transit and style shelves only when parked.
10. Incorporate Whitewashed Furniture
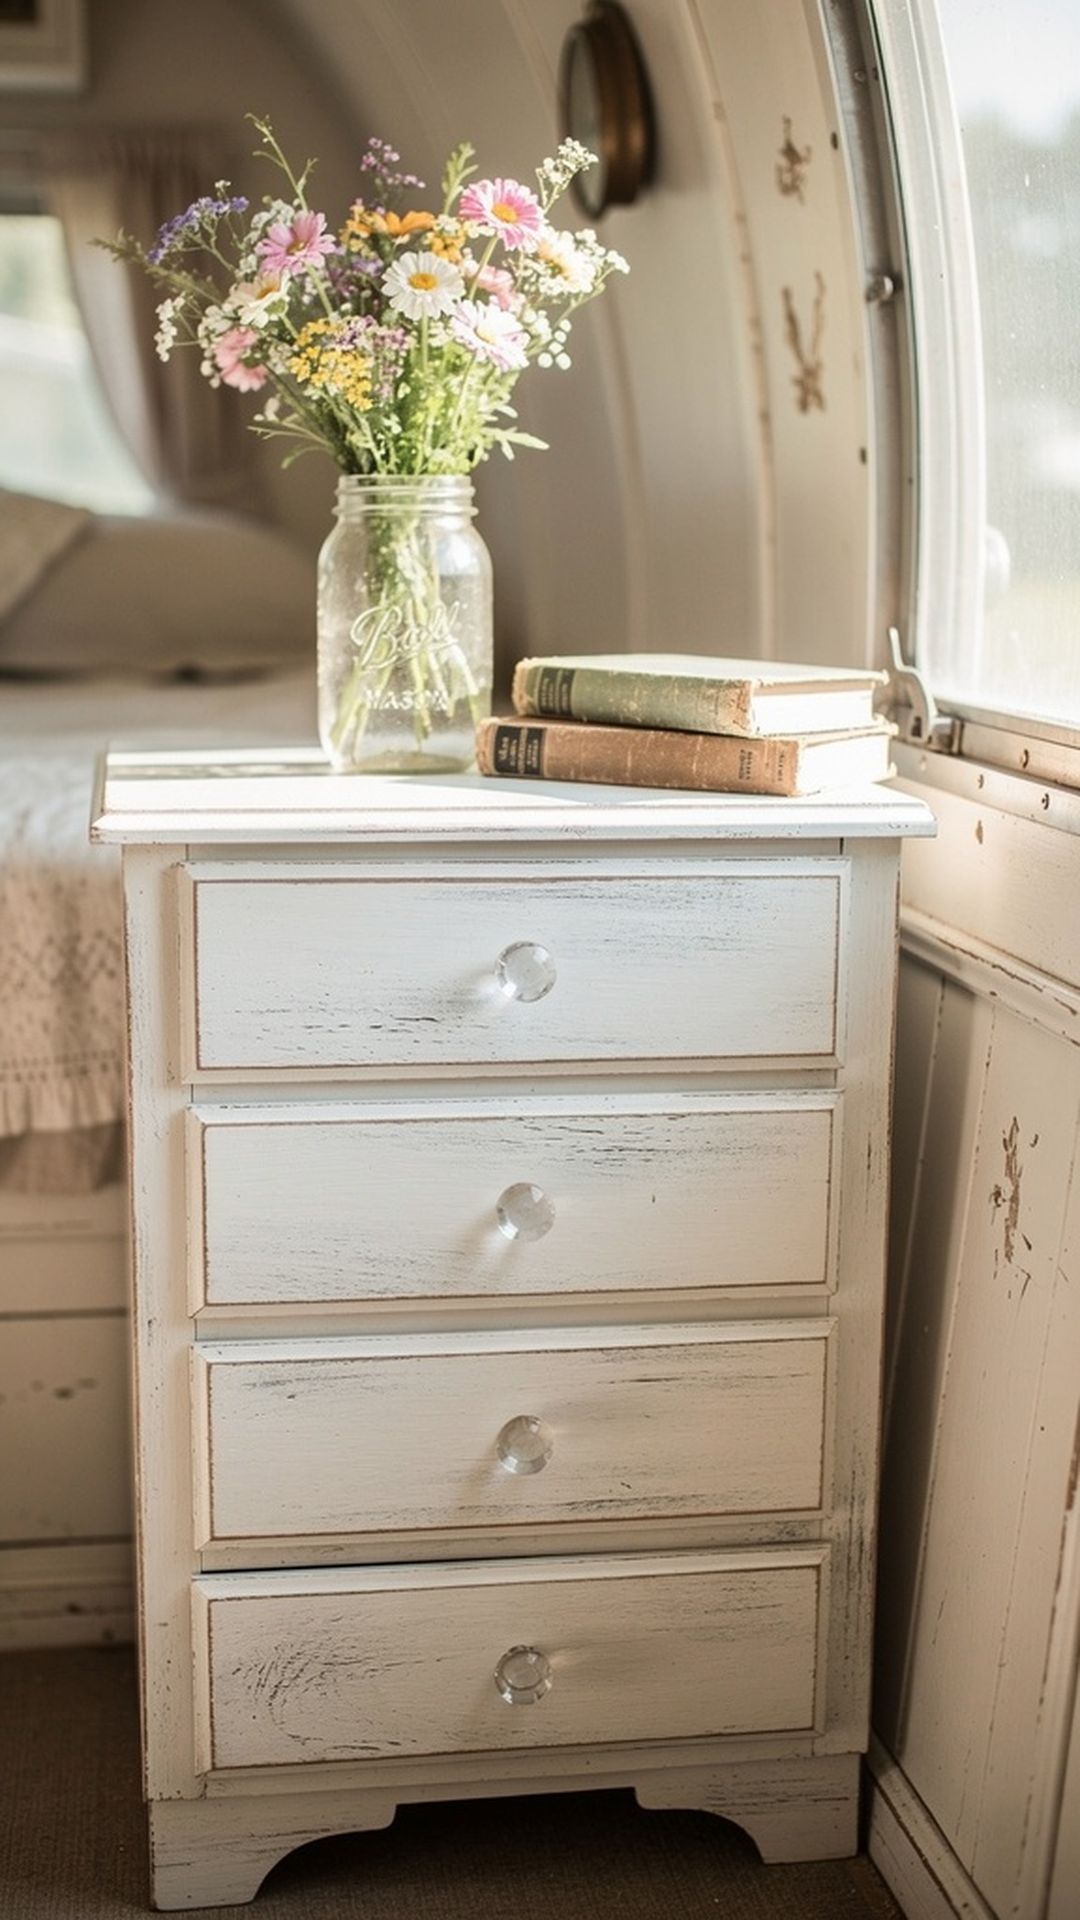
Whitewashed furniture strikes the perfect balance between rustic and refined in shabby chic spaces. The technique allows wood grain to show through a thin white stain or diluted paint, creating a beachy, aged appearance that feels light and airy. Whitewash existing wood furniture pieces in your camper, or bring in small accent pieces like a nightstand, plant stand, or storage bench with this finish. The pale, weathered look complements both the romantic florals and the rustic reclaimed wood elements in shabby chic design.
To whitewash furniture yourself, dilute white paint with water (about 1:1 ratio) or use a white stain product designed for the technique. Apply with a brush and immediately wipe with a clean rag, removing more or less of the wash depending on how much coverage you want. The beauty of whitewashing is its forgiving nature – you can always add more layers if you want more opacity, and the technique naturally hides imperfections. Apply to dressers, side tables, or even built-in RV furniture that’s currently stained dark.
PRO TIP: Always seal whitewashed furniture with a clear topcoat, especially in an RV where surfaces endure constant use and cleaning. A matte or satin polyurethane protects the finish without adding unwanted shine. Test your whitewash technique on a hidden spot or scrap wood first to ensure you like the coverage and effect before committing to visible surfaces.
11. Use a Vintage Ladder for Storage

A repurposed vintage ladder leaning against a wall or hung on its side becomes charming, space-saving storage in a shabby chic camper. Drape throw blankets over the rungs, hang dish towels in the kitchen, display trailing plants, or use S-hooks to hang baskets and accessories. The ladder adds vertical visual interest and utilizes often-wasted wall space efficiently. Paint it in distressed white, leave it naturally weathered, or try a soft sage or duck egg blue for a colorful accent piece.
Look for old wooden ladders at flea markets, architectural salvage stores, or even in your own garage or shed. Clean the ladder thoroughly and check for structural integrity – tighten any loose rungs and sand any rough or splintered areas. Decide whether you want it freestanding (leaning decoratively against a wall) or secured for safety during travel. You can install small brackets at the top to anchor it, or simply store it horizontally under a bed or in an exterior compartment during transit if it’s a portable decorative element you style only when parked.
PRO TIP: Customize your ladder’s functionality by adding small shelves between rungs using reclaimed wood pieces or installing decorative hooks on the uprights. This transforms it from simple display into highly functional storage that still maintains its charming vintage character. Just keep weight distribution in mind and don’t overload it.
12. Display Fresh Flowers in Mason Jars

Fresh flowers bring life, color, and natural beauty to any space, and they’re an essential element of shabby chic design. Display seasonal blooms in vintage mason jars, antique bottles, or mismatched white pitchers scattered throughout your camper. Even simple grocery store bouquets or wildflowers picked during hikes become special when arranged in charming containers on your dinette table, windowsills, or countertops. The organic element softens the space and connects your interior to the natural landscapes you’re exploring in your RV travels.
Choose flowers with a cottage garden feel – roses, peonies, hydrangeas, lavender, daisies, and baby’s breath all fit the shabby chic aesthetic perfectly. Don’t overthink arrangements; slightly messy, overstuffed bouquets look more authentic than precise florist designs. Change water frequently to keep flowers fresh longer, and position arrangements where they won’t tip over during travel or get too hot near windows. If fresh flowers aren’t practical for your lifestyle, high-quality silk flowers in similar styles can provide the look year-round without maintenance.
PRO TIP: Create a small flower-preserving station in your camper so you can dry blooms to enjoy long after they’re fresh. Hang small bouquets upside down in a dark, dry area or press individual flowers between heavy books. Dried flowers in vintage frames or arranged in small vases maintain that romantic shabby chic vibe indefinitely and travel much better than fresh stems.
13. Add Vintage Rugs for Warmth

Layering vintage-style rugs throughout your camper adds warmth, comfort, and visual softness that contrasts beautifully with hard RV flooring. Look for faded Persian-style rugs, floral needlepoint designs, or distressed area rugs in soft pinks, blues, and creams. Rugs define different living zones in your open floor plan, absorb sound, and make your space feel more home-like and less utilitarian. They also hide less-than-perfect flooring if you’re working with an older camper that needs cosmetic updates.
Choose thin, low-pile rugs that won’t create tripping hazards in narrow RV aisles and can be easily cleaned or shaken out. Machine-washable options are ideal for full-time living where spills and dirt are inevitable. Size rugs appropriately for your space – too large and they’ll bunch up or block slide-outs; too small and they’ll look awkward and slide around constantly. Use rug pads or double-sided carpet tape to keep them in place, especially in high-traffic areas and during travel.
PRO TIP: Roll up area rugs and secure them before traveling to prevent shifting and bunching that can interfere with slide-outs or create lumpy flooring when you arrive. Store them in a basement compartment or closet during transit. Some full-timers keep separate “travel day” small rugs in place and only lay out their decorative vintage rugs when parked for extended stays.
14. Create a Gallery Wall with Mismatched Frames
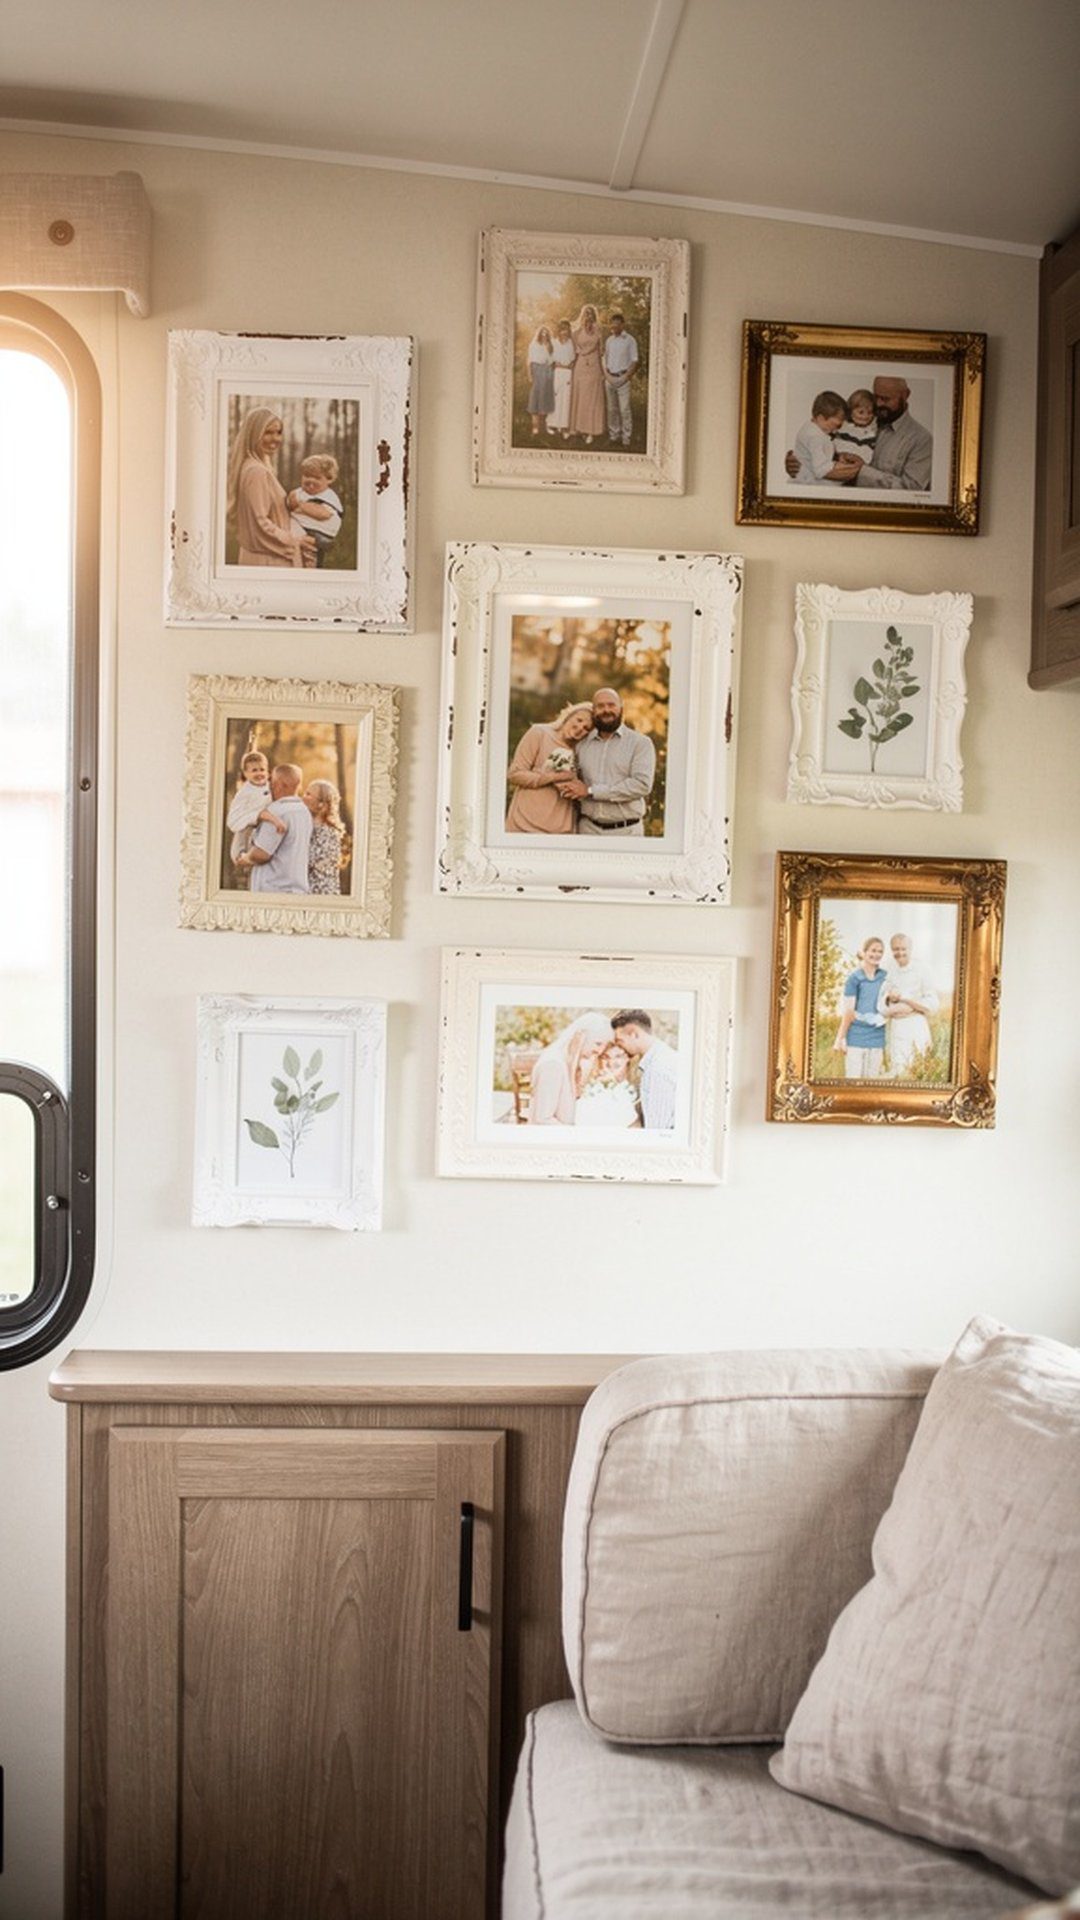
A gallery wall of mismatched vintage frames creates a personal, collected-over-time look that’s quintessentially shabby chic. Mix frame styles, sizes, and finishes – ornate gold with distressed white, oval with rectangular, thick with thin – to create an eclectic display that tells your story. Fill frames with family photos, vintage botanical prints, inspirational quotes, or artwork you’ve collected during your travels. This transforms a blank camper wall into a meaningful focal point that makes your RV feel like home.
Plan your gallery wall layout on the floor before hanging anything, playing with arrangements until you find one that feels balanced. Generally, keep 2-3 inches between frames and try to maintain relatively straight lines along the top, bottom, or sides even if the interior arrangement is organic. Use a variety of frame orientations (horizontal and vertical) and don’t be afraid to include three-dimensional objects like small mirrors, wooden letters, or shadow boxes in the mix. Vary the content as well – all photos can feel too uniform, while mixing photos with art and text creates more visual interest.
PRO TIP: Use Command strips or other removable hanging solutions for your gallery wall instead of drilling dozens of holes in your camper walls. This protects your RV’s integrity and allows you to easily change or rearrange your gallery without damage. For travel, you might want to secure frames with museum putty or take down the most fragile pieces and store them safely.
15. Embrace an All-White Color Palette
While pastels and florals are lovely accents, a predominantly white color palette forms the foundation of authentic shabby chic style and works especially well in small campers. White walls, cabinets, and larger furniture pieces make your space feel bigger, brighter, and more serene. This neutral backdrop allows your vintage finds, floral patterns, and natural wood tones to shine without competing for attention. An all-white base is also incredibly versatile, making it easy to change accent colors seasonally or as your taste evolves without major renovations.
Layer different white and cream tones throughout your space to add depth and prevent the look from feeling sterile or too uniform. Mix warm ivories with cool bright whites, and incorporate various textures – painted wood, linen fabrics, lace, weathered surfaces – all in similar neutral tones. The texture variation creates visual interest even within a monochromatic scheme. Add warmth with natural wood elements, and pops of color with flowers, throw pillows, and accessories that can be easily changed. The white palette also has practical benefits for full-time living: it reflects light, stays cooler in summer, and shows when things need cleaning.
PRO TIP: Choose paint finishes strategically within your white palette. Use flat or matte finishes on walls to hide imperfections, satin on cabinets for easy cleaning, and semi-gloss on trim and high-touch areas for durability. Keep a small container of your wall paint for touch-ups, which you’ll need more frequently in a moving home where walls get bumped and scuffed regularly.


