Transforming your vintage camper kitchen from drab to fab doesn’t have to break the bank or require professional help. Whether you’re restoring a classic Airstream, a charming Shasta, or a beloved Scotty, the kitchen is often the heart of your mobile home and deserves special attention. These creative redo ideas blend nostalgia with modern functionality, proving that small spaces can pack big style.
From clever storage solutions to eye-catching backsplashes, each update honors the retro charm while making your cooking space more practical for today’s adventures. Get ready to roll up your sleeves and give your vintage camper kitchen the makeover it deserves – your Pinterest boards are about to come to life!
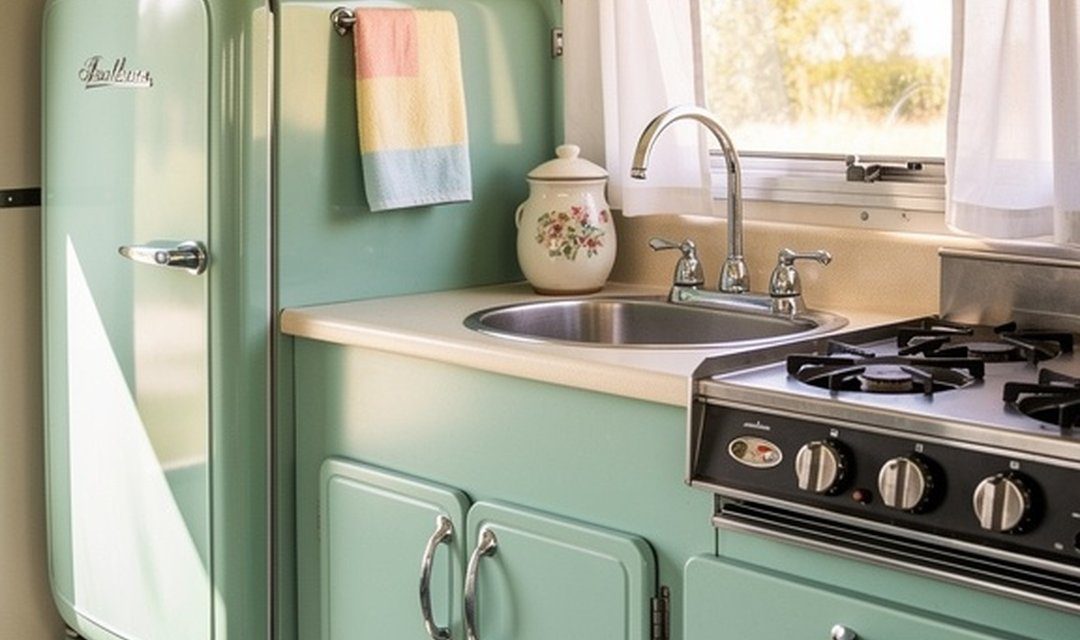
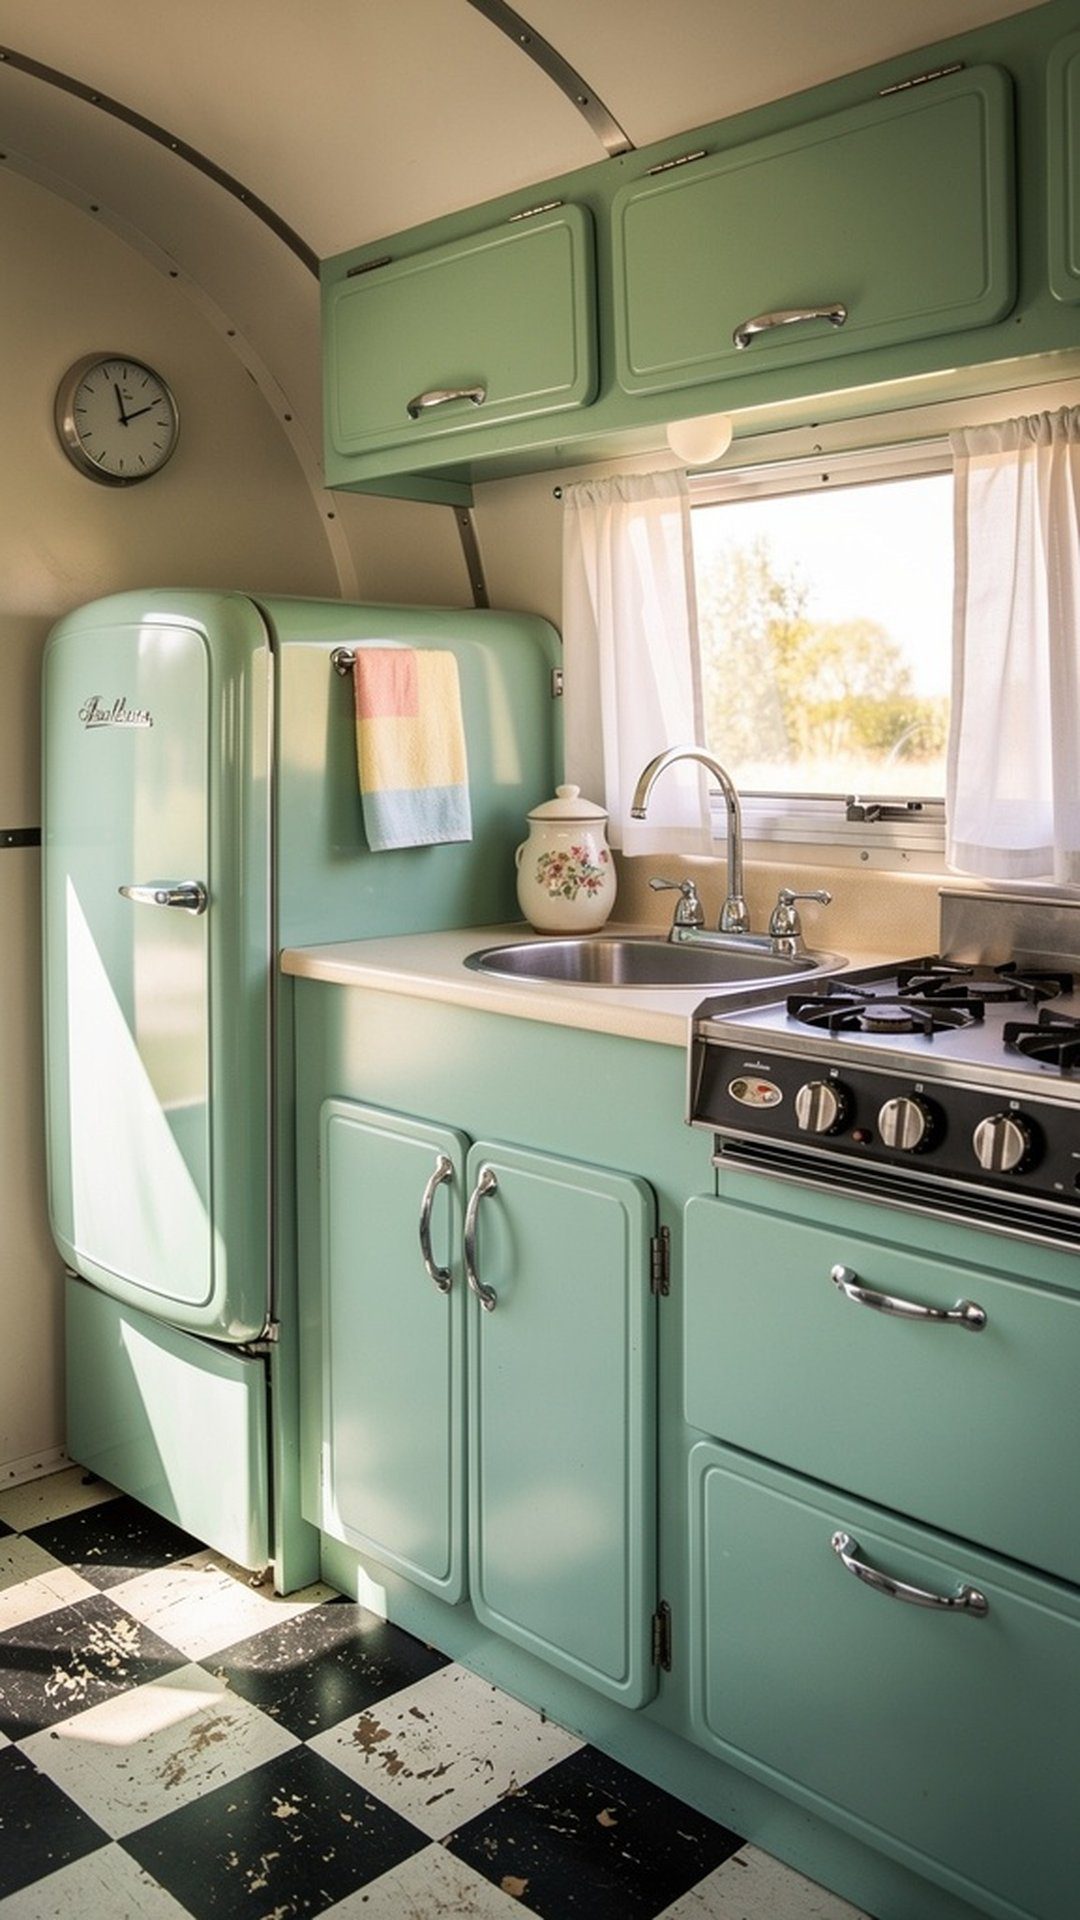
1. Retro-Colored Cabinet Refresh
Would you like to save this article?
Breathing new life into tired cabinets starts with choosing the perfect retro color palette. Mint green, butter yellow, or robin’s egg blue can instantly transport your vintage camper kitchen back to its golden era while giving it a fresh, clean appearance. These cheerful hues not only brighten up compact spaces but also create a cohesive design theme that flows throughout your camper. The key is selecting a high-quality paint specifically designed for cabinets that can withstand the humidity and temperature changes inherent in camper living.
Start by thoroughly cleaning and lightly sanding your cabinet surfaces to ensure proper paint adhesion. Remove all hardware and apply a bonding primer before painting with two to three thin coats of your chosen color. Chrome or brass hardware adds the perfect finishing touch to complement your newly painted cabinets. This affordable transformation typically takes just a weekend but delivers dramatic results that will have your Instagram followers swooning.
PRO TIP: Test your paint color on a small hidden area or cabinet door first, as colors can look different in the unique lighting conditions inside a camper. Consider the natural light from your windows and how artificial lighting affects the hue at night.
2. Subway Tile Backsplash
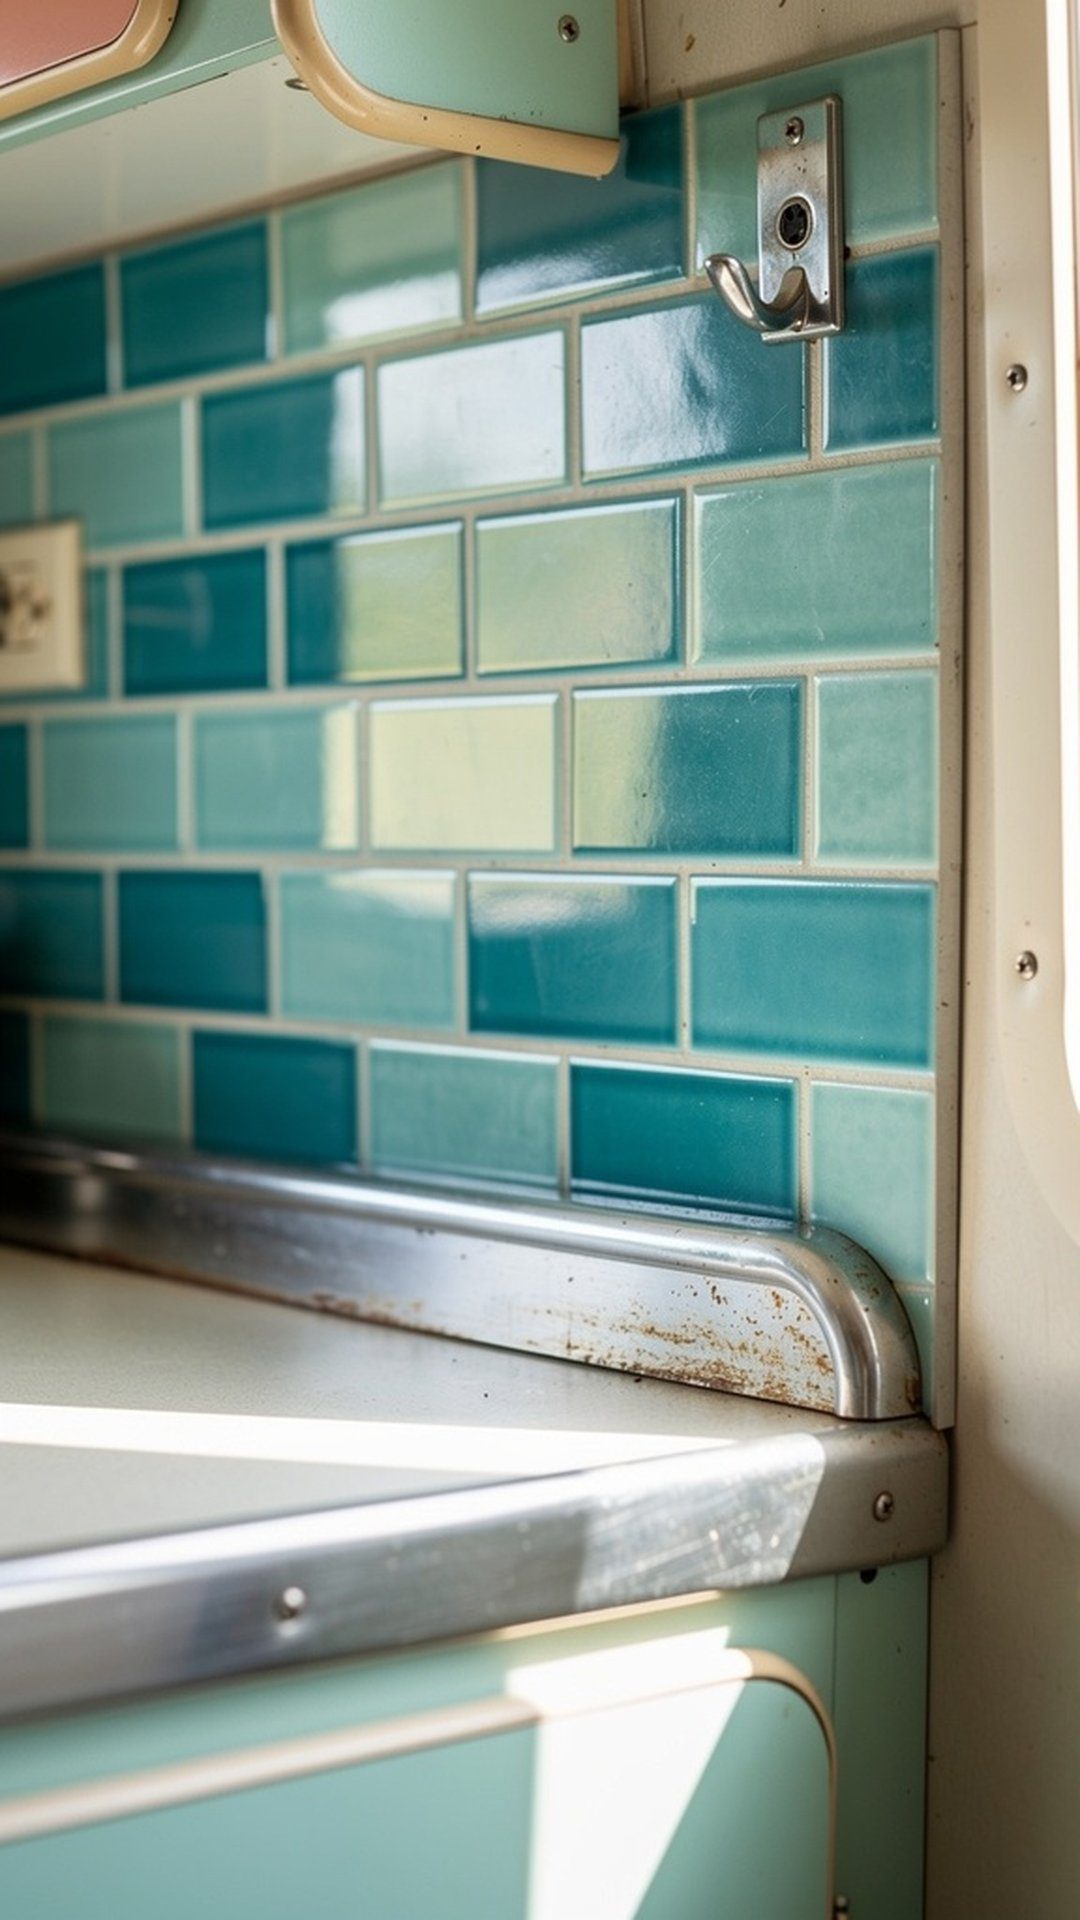
Adding a classic subway tile backsplash brings both practicality and visual appeal to your vintage camper kitchen. This timeless design protects your walls from cooking splatters while creating a focal point that draws the eye. Modern peel-and-stick options make installation incredibly DIY-friendly, requiring no special tools or messy grout work. Choose traditional white for a clean aesthetic, or opt for colored tiles in turquoise, coral, or seafoam to enhance your retro theme.
The beauty of subway tiles lies in their versatility and the various patterns you can create – from classic brick layout to herringbone or vertical stack. In a compact camper kitchen, a backsplash behind your stove and sink area can be completed in just a few hours. The reflective surface also helps bounce light around your space, making it feel larger and brighter than before.
PRO TIP: Measure your wall space carefully and purchase 10% extra tiles to account for cuts and future repairs. Peel-and-stick tiles work best on smooth, clean surfaces, so thoroughly prep your walls before installation for maximum adhesion.
3. Open Shelving Display
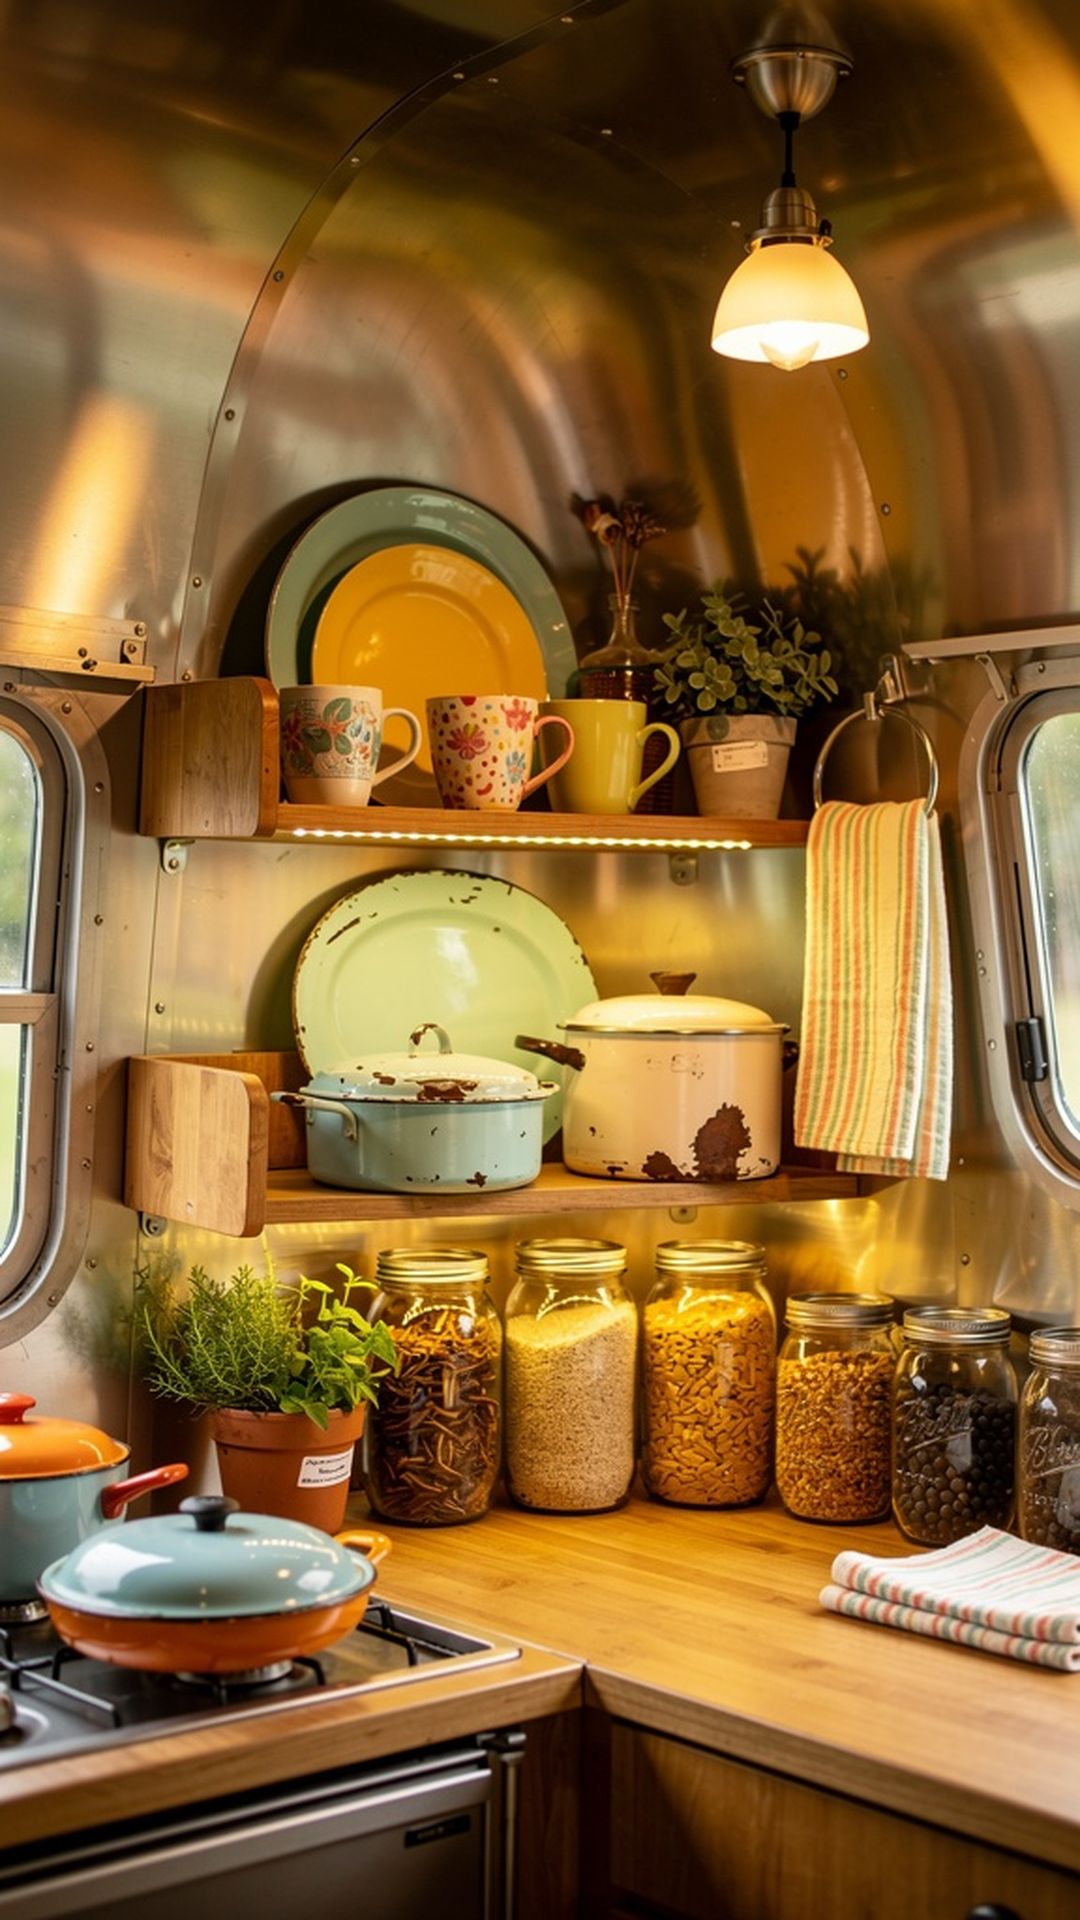
Replacing upper cabinets with open shelving creates an airy, spacious feel while showcasing your vintage dishware collection. This popular design trend works particularly well in campers where every visual trick to maximize space matters. Wooden floating shelves or metal brackets with reclaimed wood planks add character while keeping your most-used items within easy reach. The key is maintaining an organized, curated display that looks intentional rather than cluttered.
Open shelving forces you to be selective about what you display, which naturally leads to better organization. Arrange items by color or size for visual harmony, and include decorative elements like small plants or vintage tins alongside your functional pieces. This setup also makes it easier to grab what you need while cooking, improving the workflow in your compact kitchen.
PRO TIP: Secure shelves directly into studs or use appropriate anchors rated for your camper’s wall construction. Items will shift during travel, so use non-slip shelf liners and consider installing a small lip or rail along the front edge to prevent dishes from sliding off.
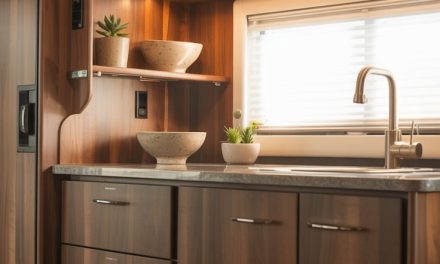
4. Butcher Block Countertops
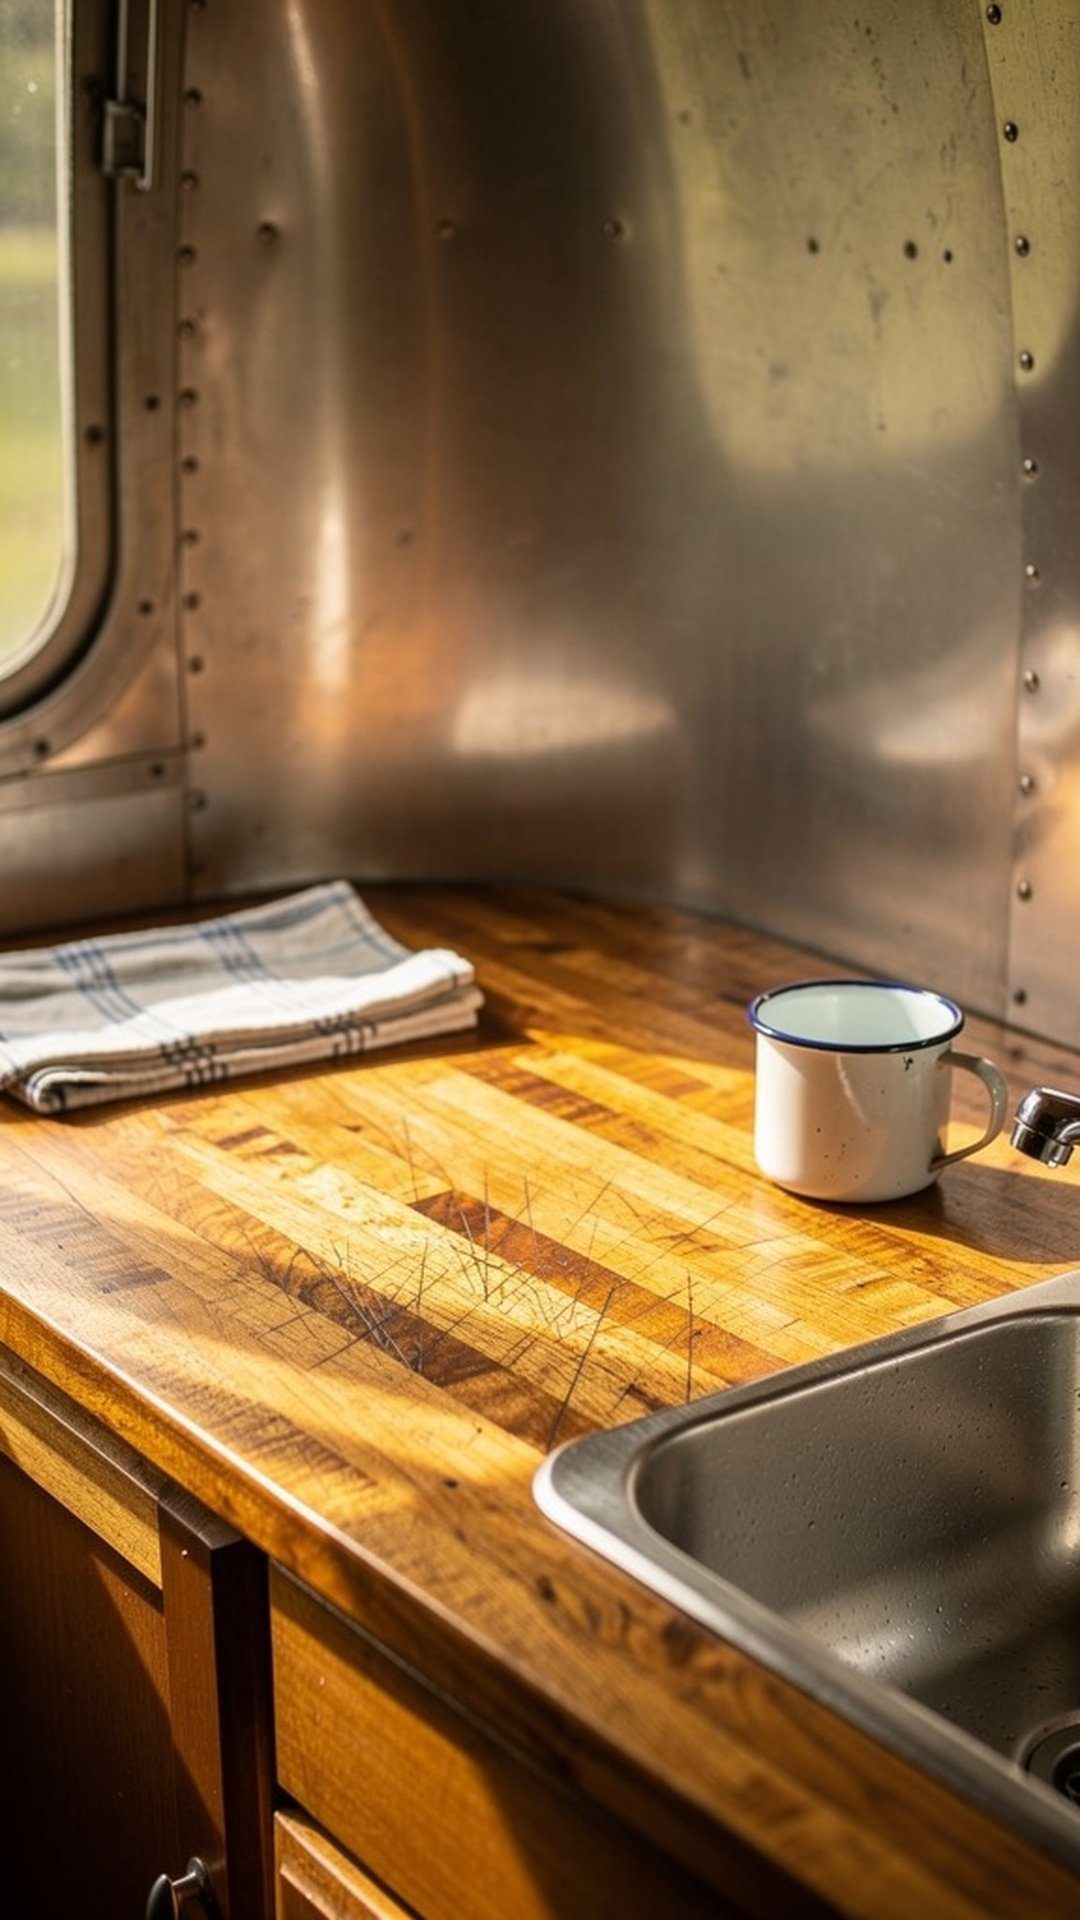
Swapping out old laminate for butcher block countertops brings warmth and natural beauty to your vintage camper kitchen. The honey-toned wood creates a welcoming contrast against painted cabinets and adds a touch of farmhouse charm to your space. Butcher block is surprisingly durable and can be sanded and refinished if it gets scratched or stained, making it a practical long-term investment for your camper renovation.
Installation is straightforward – most butcher block comes in standard widths that can be cut to fit your exact measurements. The natural antimicrobial properties of wood make it surprisingly hygienic for food prep, though regular maintenance with food-safe mineral oil is essential to protect against moisture damage. The tactile quality of real wood under your hands while preparing meals adds an element of sensory pleasure that synthetic materials simply can’t match.
PRO TIP: Seal your butcher block countertops with multiple coats of food-safe mineral oil followed by a beeswax-based conditioner. Reapply monthly for the first year, then every few months thereafter to prevent water damage and maintain that beautiful rich patina.
5. Gingham Curtain Charm
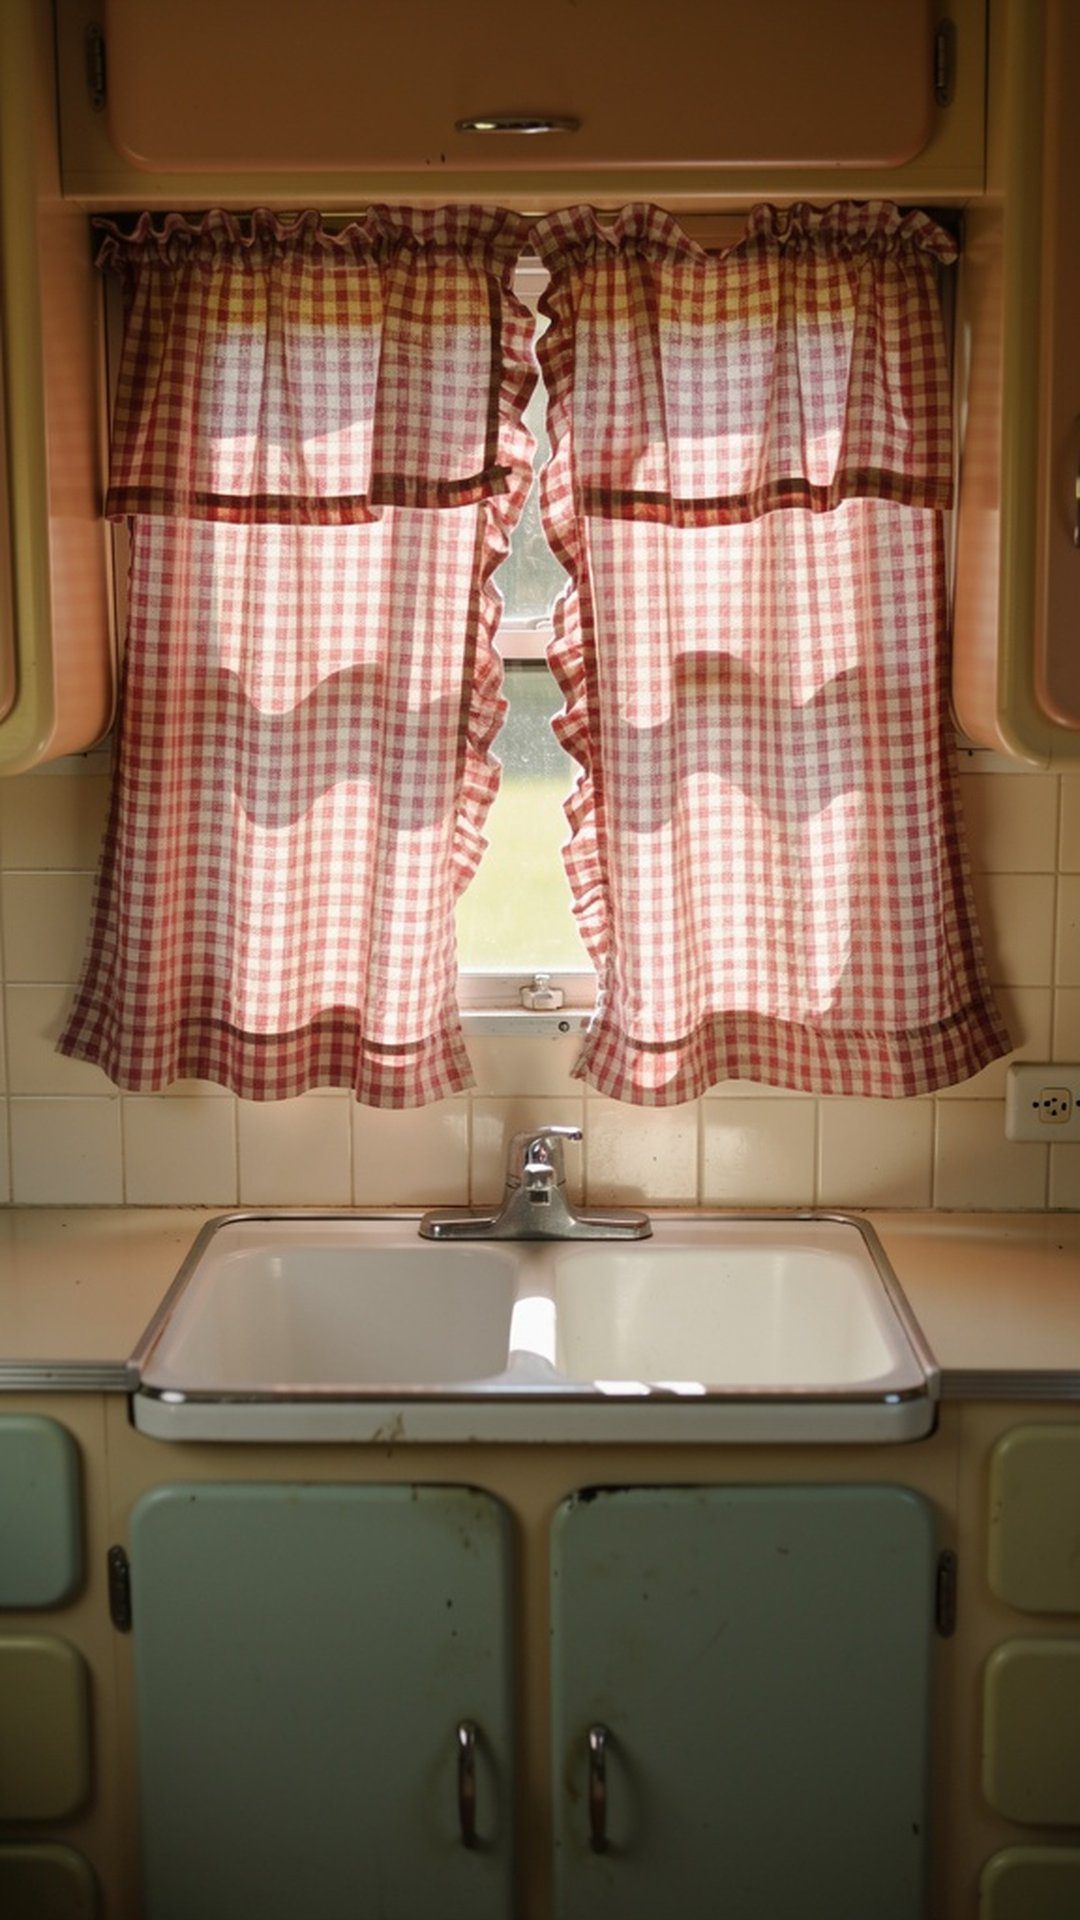
Nothing says vintage charm quite like gingham curtains framing your camper kitchen window. This classic checkered pattern in red and white, blue and white, or yellow and white instantly evokes nostalgic feelings of simpler times. Beyond aesthetics, curtains provide privacy and light control while softening the hard edges of your kitchen space. The fabric texture adds warmth that metal and laminate surfaces lack.
Creating custom curtains for your camper windows is an excellent beginner sewing project, or you can repurpose vintage tablecloths for an authentic touch. Café-style curtains that cover only the lower half of windows maintain privacy while allowing natural light to flood in from above. Consider coordinating your curtain pattern with other textile elements like seat cushions or table runners for a cohesive design scheme.
PRO TIP: Pre-wash your fabric before sewing to account for shrinkage, and use tension rods for easy removal and cleaning. In humid climates, treat fabric with a water-repellent spray to prevent mildew, especially near the sink area.
6. Peel-and-Stick Retro Wallpaper
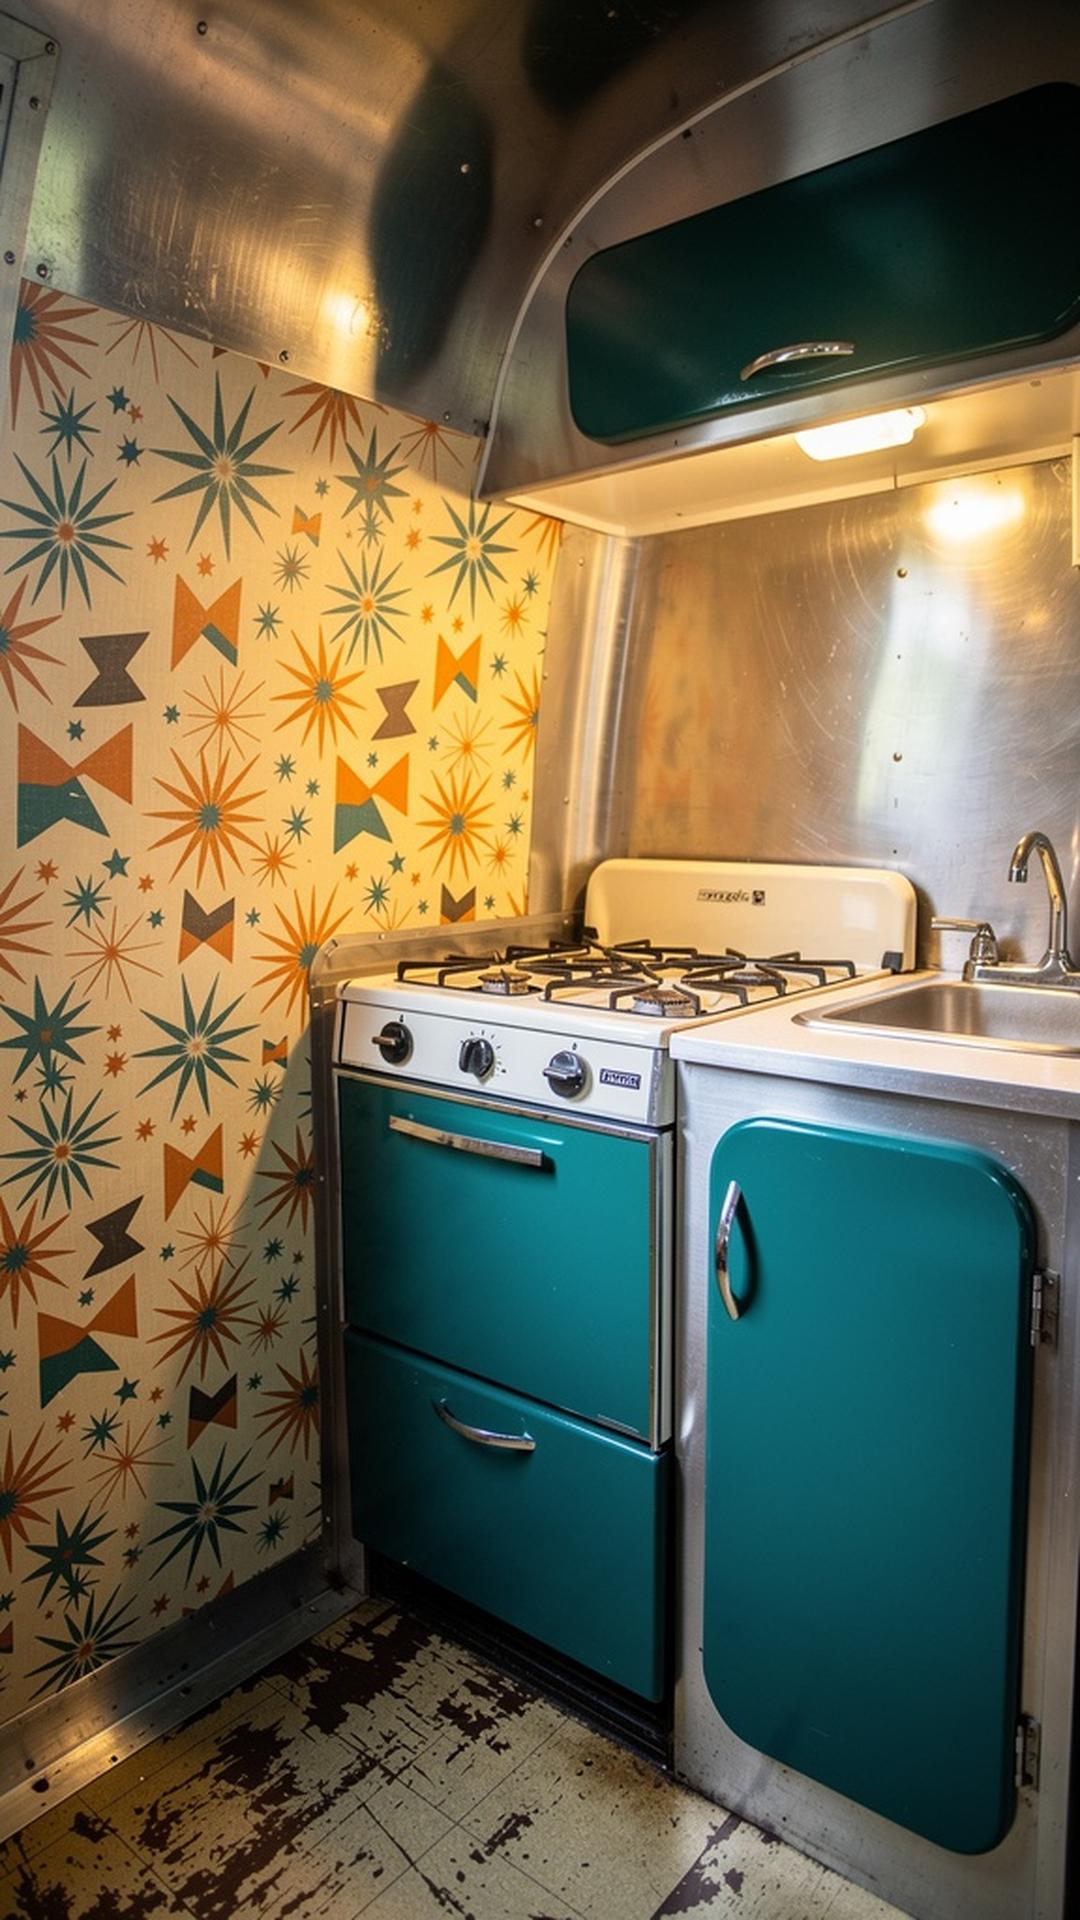
Transform plain walls with removable peel-and-stick wallpaper featuring authentic mid-century patterns. From atomic starbursts to boomerang prints, these bold designs add personality and period-appropriate style without permanent commitment. Modern removable wallpapers are specifically designed for renters and RV owners, peeling off cleanly without damaging surfaces underneath. This makes them perfect for camper renovations where you might want to change designs seasonally or update trends.
Application is surprisingly simple – clean surfaces, measure carefully, and smooth from top to bottom while eliminating air bubbles. One accent wall behind your dining area or along a long galley kitchen can dramatically change the entire feel of your space. The visual interest created by pattern draws the eye and can actually make small spaces feel more designed and intentional rather than cramped.
PRO TIP: Order samples before committing to a full roll, as patterns can look different at scale than in small swatches. Start with a small accent area rather than covering every wall – in tiny spaces, too much pattern can feel overwhelming.
7. Farmhouse Sink Upgrade
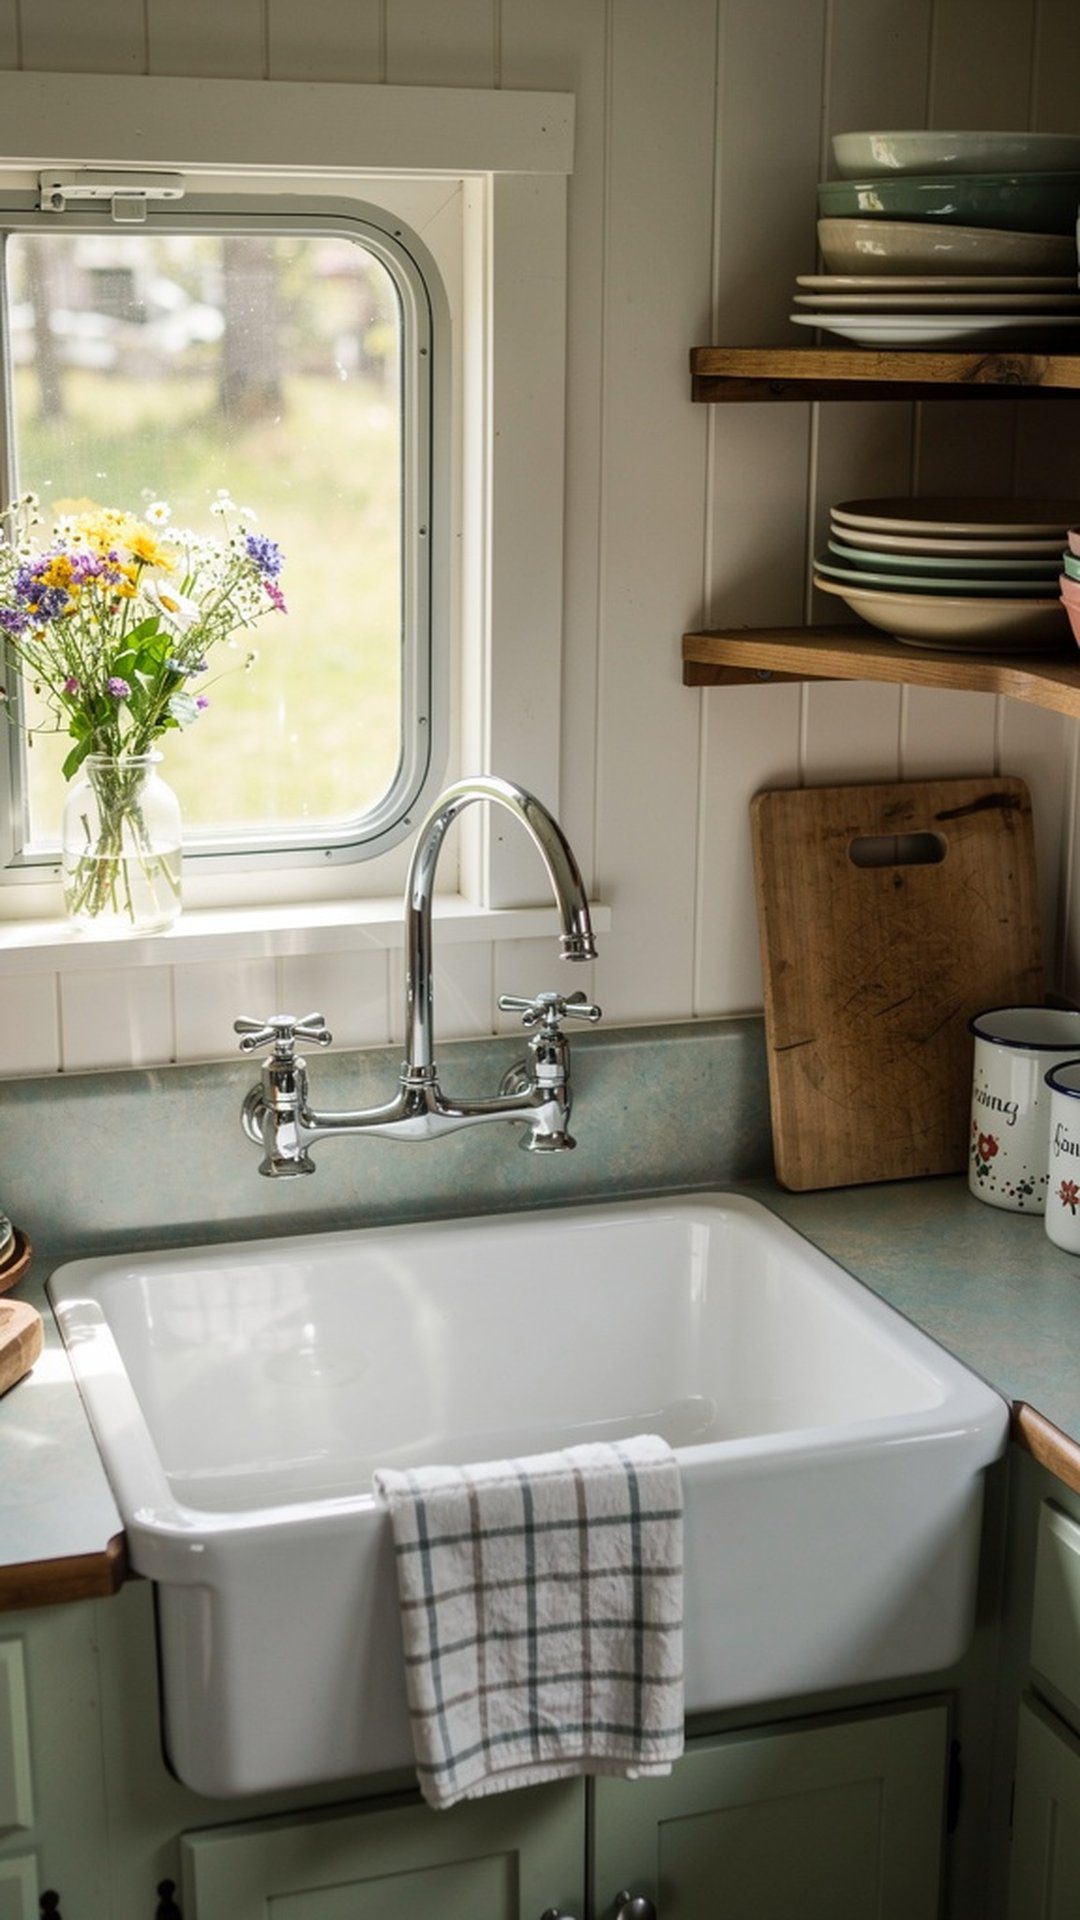
Replacing a standard RV sink with a deep farmhouse-style basin elevates both form and function in your vintage camper kitchen. The generous depth accommodates larger pots and pans while the apron-front design creates a striking focal point. White porcelain or fireclay options complement virtually any color scheme while maintaining that authentic vintage aesthetic. The practical benefits extend beyond looks – the extra depth means less splashing and more room for washing dishes.
While installation requires more effort than some other updates, the impact is substantial. You’ll need to modify your countertop and possibly adjust cabinet openings, but the result is a genuine upgrade that increases your camper’s value. Pair your new sink with a period-appropriate faucet in chrome or brushed nickel to complete the transformation. The combination of vintage styling and modern functionality represents the best of both worlds.
PRO TIP: Measure your existing sink and cabinet space carefully before purchasing, as farmhouse sinks come in various depths and widths. Consider a smaller 24-inch model specifically designed for compact spaces rather than standard 30-36 inch residential sizes.
8. Magnetic Storage Solutions
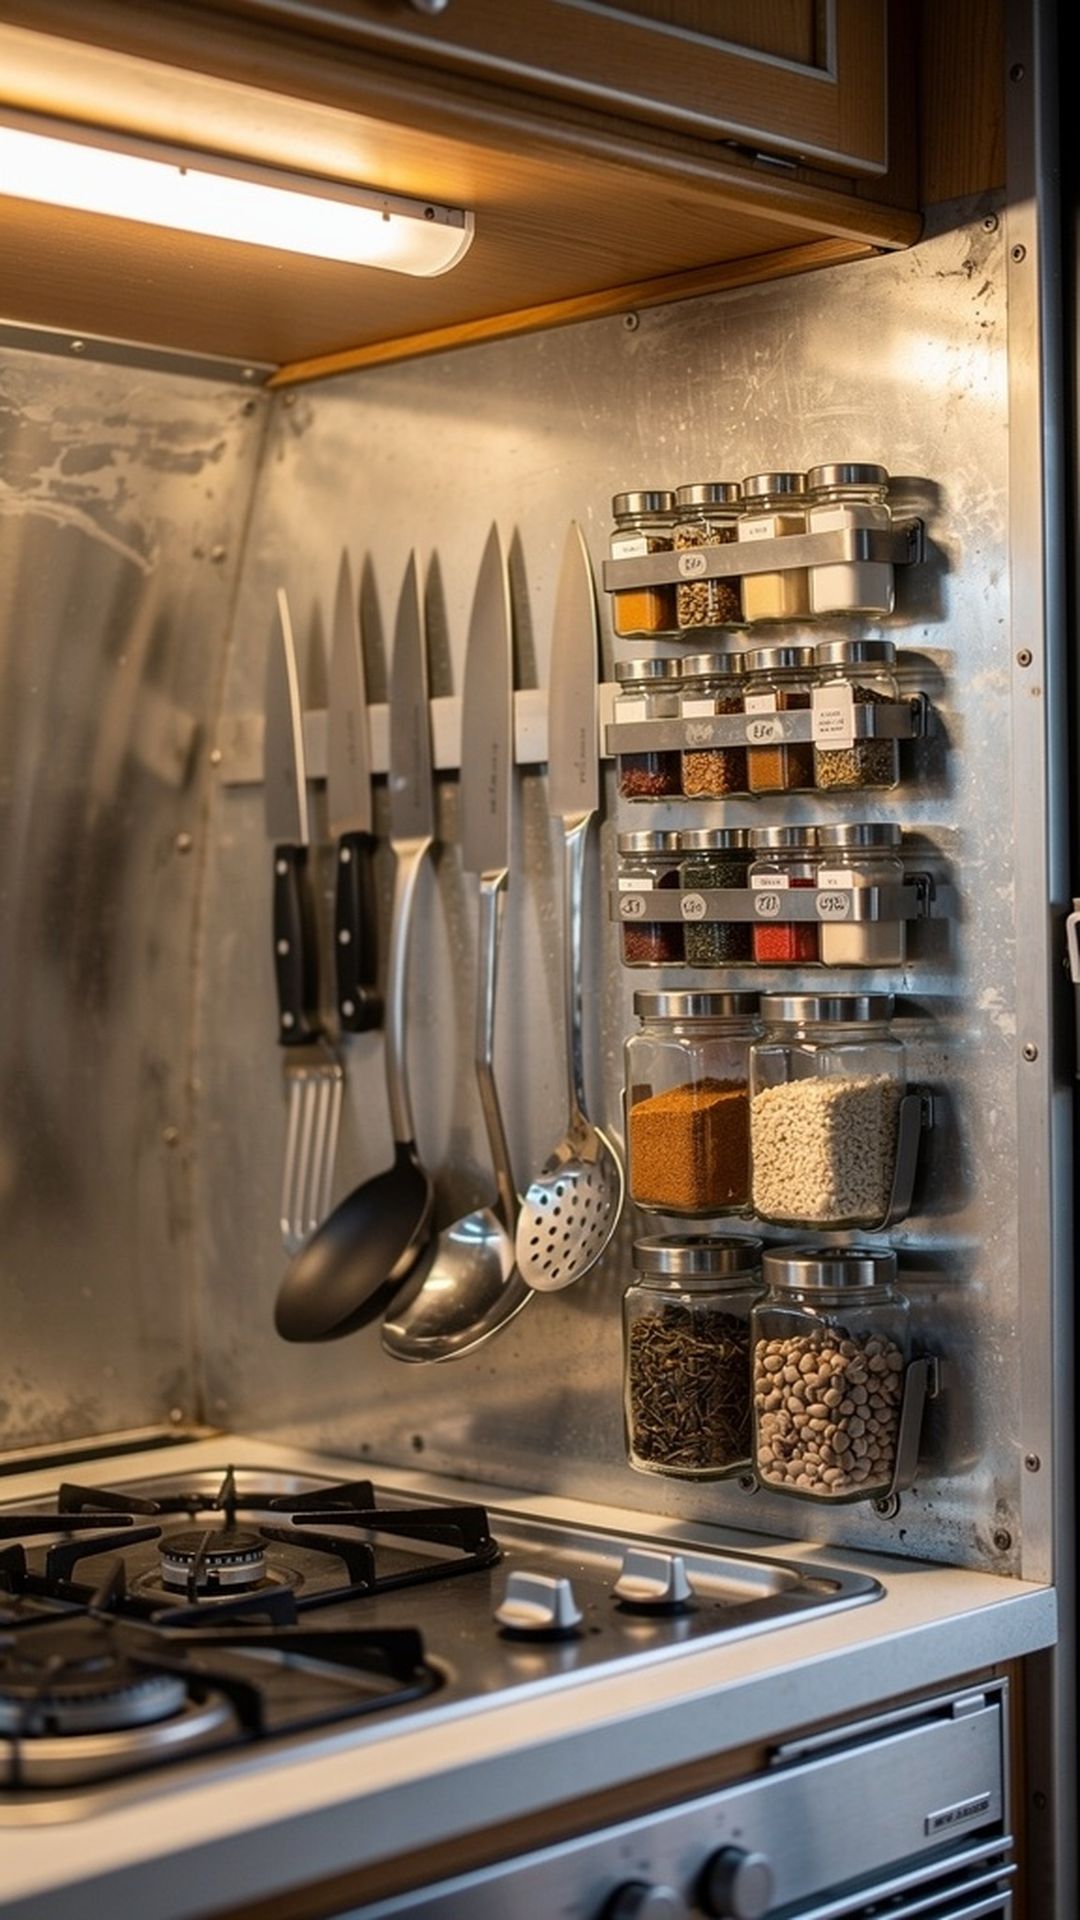
Maximize your vertical wall space with magnetic strips that keep knives, utensils, and spice jars organized and accessible. This clever storage solution works beautifully in vintage campers where cabinet space is premium real estate. Magnetic knife strips mount easily to walls or the side of cabinets, displaying your tools while keeping them safely secured during travel. Metal spice tins with magnets on the back create a functional display that’s both practical and visually appealing.
The beauty of magnetic storage lies in its flexibility – you can rearrange items as needed and everything stays visible rather than buried in drawers. This system also frees up valuable counter and drawer space for other essentials. Install strips at comfortable heights where you can easily reach while cooking, considering your workflow and most frequently used items.
PRO TIP: Choose heavy-duty magnetic strips rated for the weight of your items, and mount them securely into studs or with appropriate wall anchors. Label spice tins on the lid rather than the side so you can identify them when they’re attached to the wall.
9. Brass and Copper Fixtures
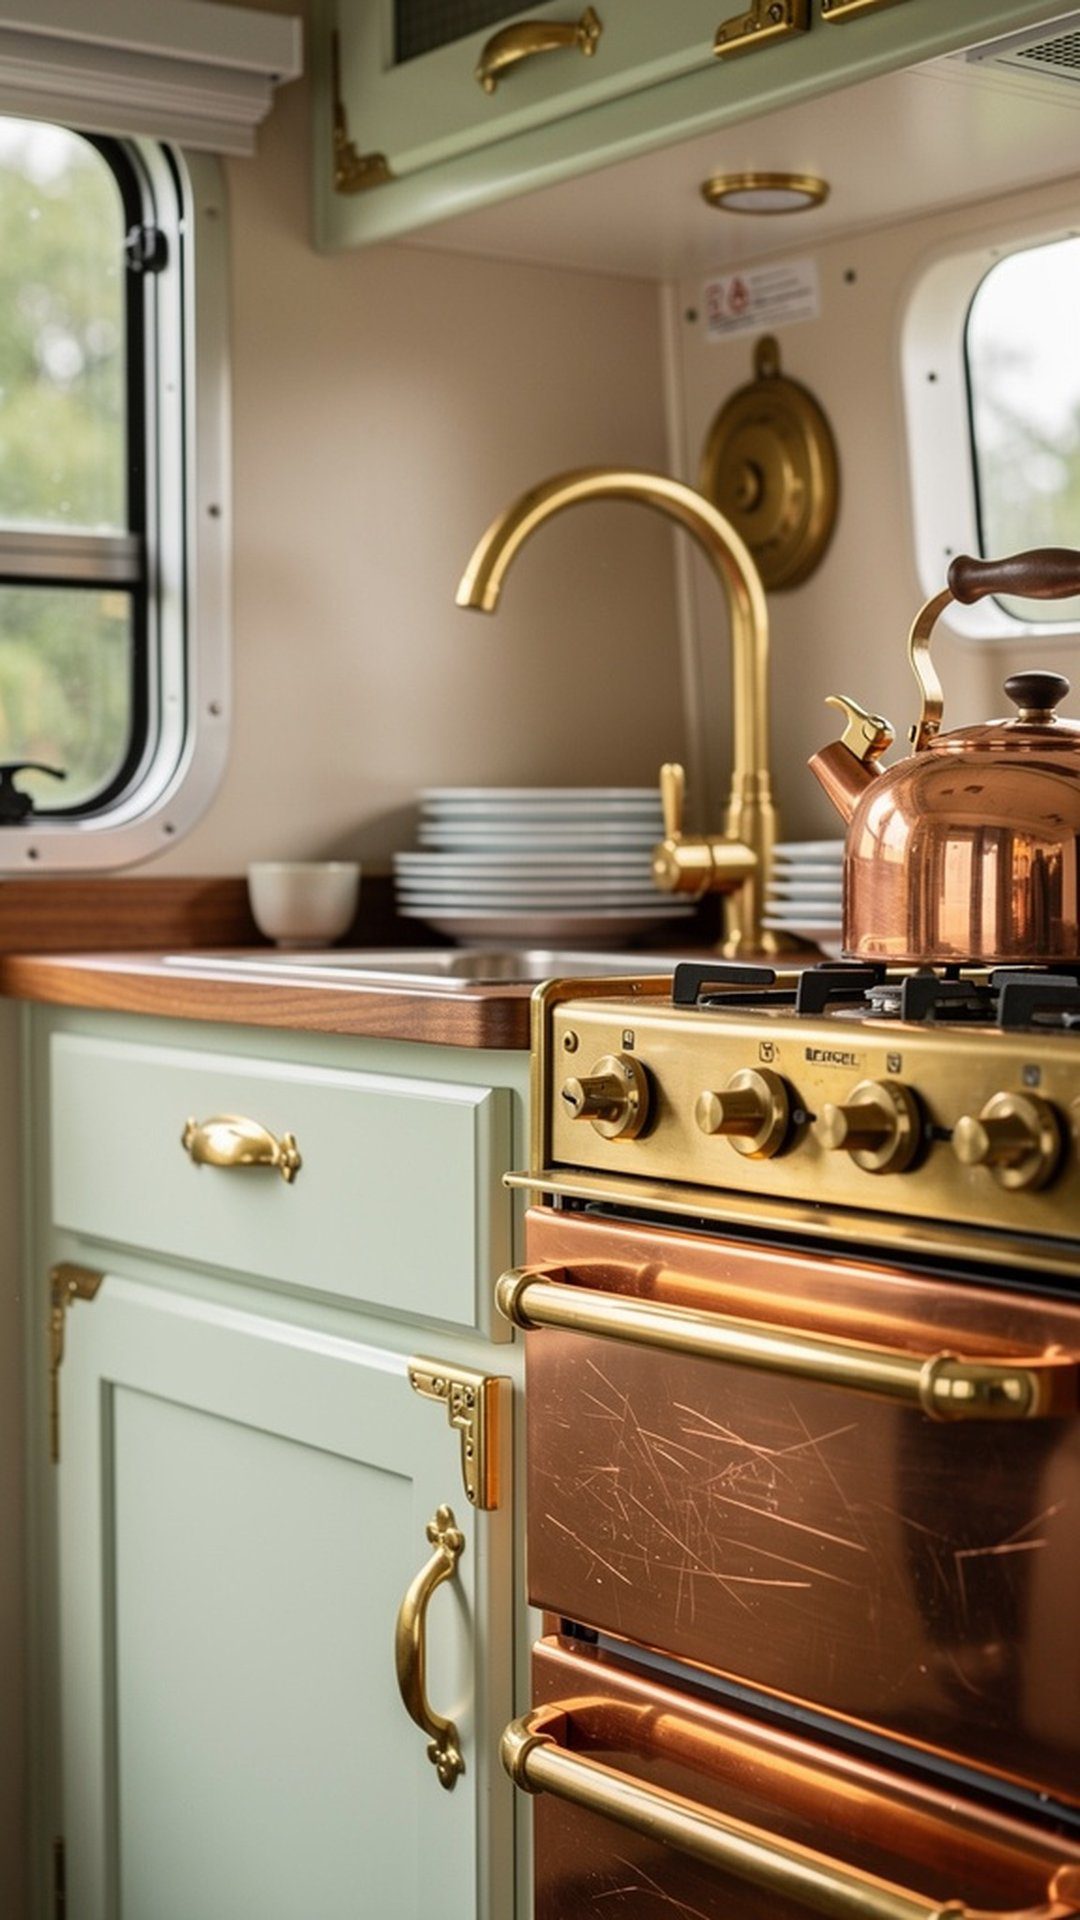
Upgrading to warm brass or copper fixtures instantly adds sophistication and vintage elegance to your camper kitchen. These metallic finishes were staples of mid-century design and bring that authentic period feel while coordinating beautifully with wood tones and retro colors. From faucets to cabinet pulls to light fixtures, consistent hardware creates visual cohesion that makes your space feel professionally designed. The warm glow of brass catches and reflects light, adding sparkle and interest throughout the day.
Modern brass and copper finishes come with protective coatings that resist tarnishing while maintaining that coveted vintage look. Mixing metals is perfectly acceptable in design today, so don’t feel pressured to replace everything at once – start with the most visible pieces like your faucet and cabinet hardware, then add accent pieces over time as budget allows.
PRO TIP: Choose unlacquered brass if you love the living finish that develops a patina over time, or opt for lacquered brass for a consistent shine that requires less maintenance. Clean brass and copper with gentle soap and water rather than harsh chemicals to preserve the finish.
10. Vintage Edison Bulb Lighting
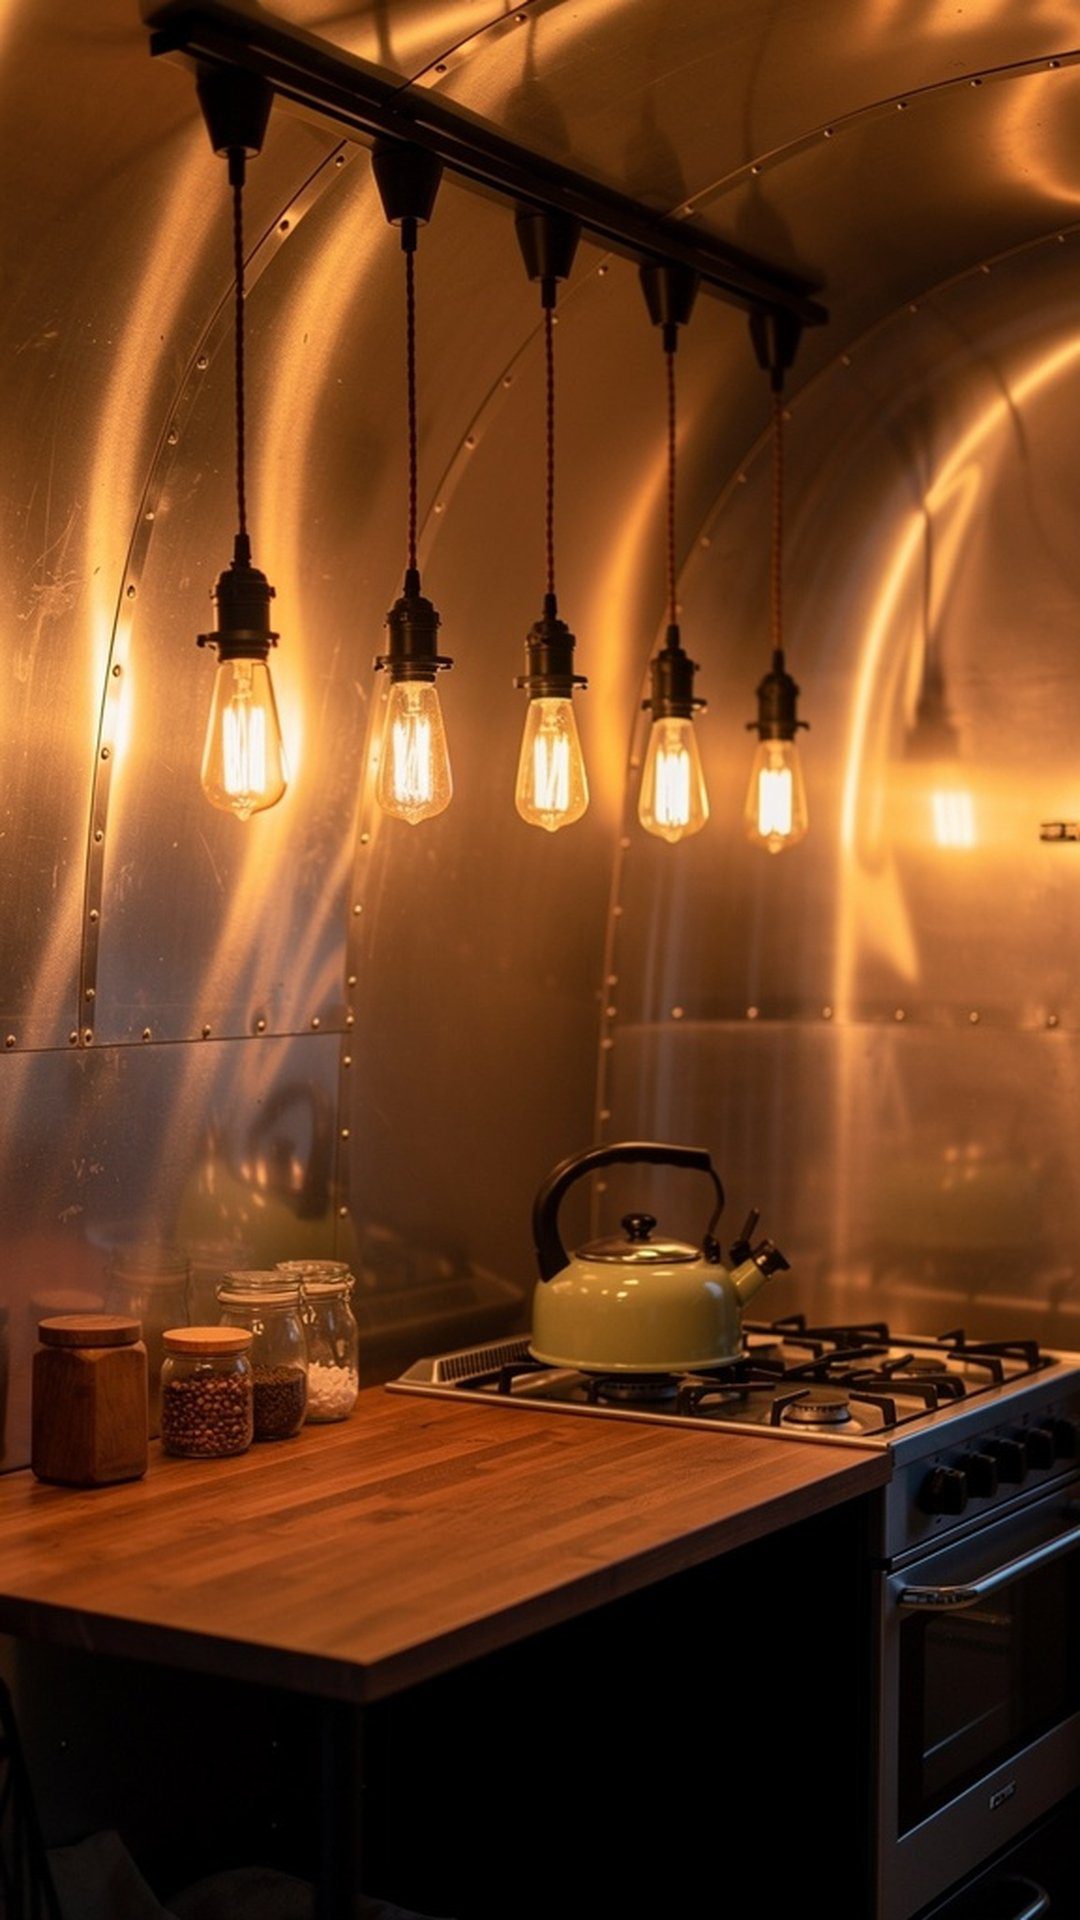
Replace standard lighting with Edison bulb fixtures to create warm, inviting ambiance in your vintage camper kitchen. These exposed-filament bulbs celebrate industrial design while providing functional task lighting over counters and dining areas. Pendant lights hung at varying heights add visual interest and help define different zones within your open floor plan. The warm amber glow creates cozy evening atmosphere that’s perfect for campground relaxation.
Edison bulbs now come in LED versions that consume far less power than traditional incandescent options – crucial for campers running on battery or limited electrical systems. Choose fixtures with adjustable cords or chains so you can customize the height for your ceiling clearance. The simple beauty of exposed bulbs means the fixtures themselves can be minimal, keeping the focus on the warm light they provide.
PRO TIP: Select warm-white LED Edison bulbs (2200-2700K color temperature) for the most authentic vintage glow. Install dimmer switches to control brightness for different times of day and occasions, extending battery life while creating atmosphere.
11. Classic Checkerboard Vinyl Flooring
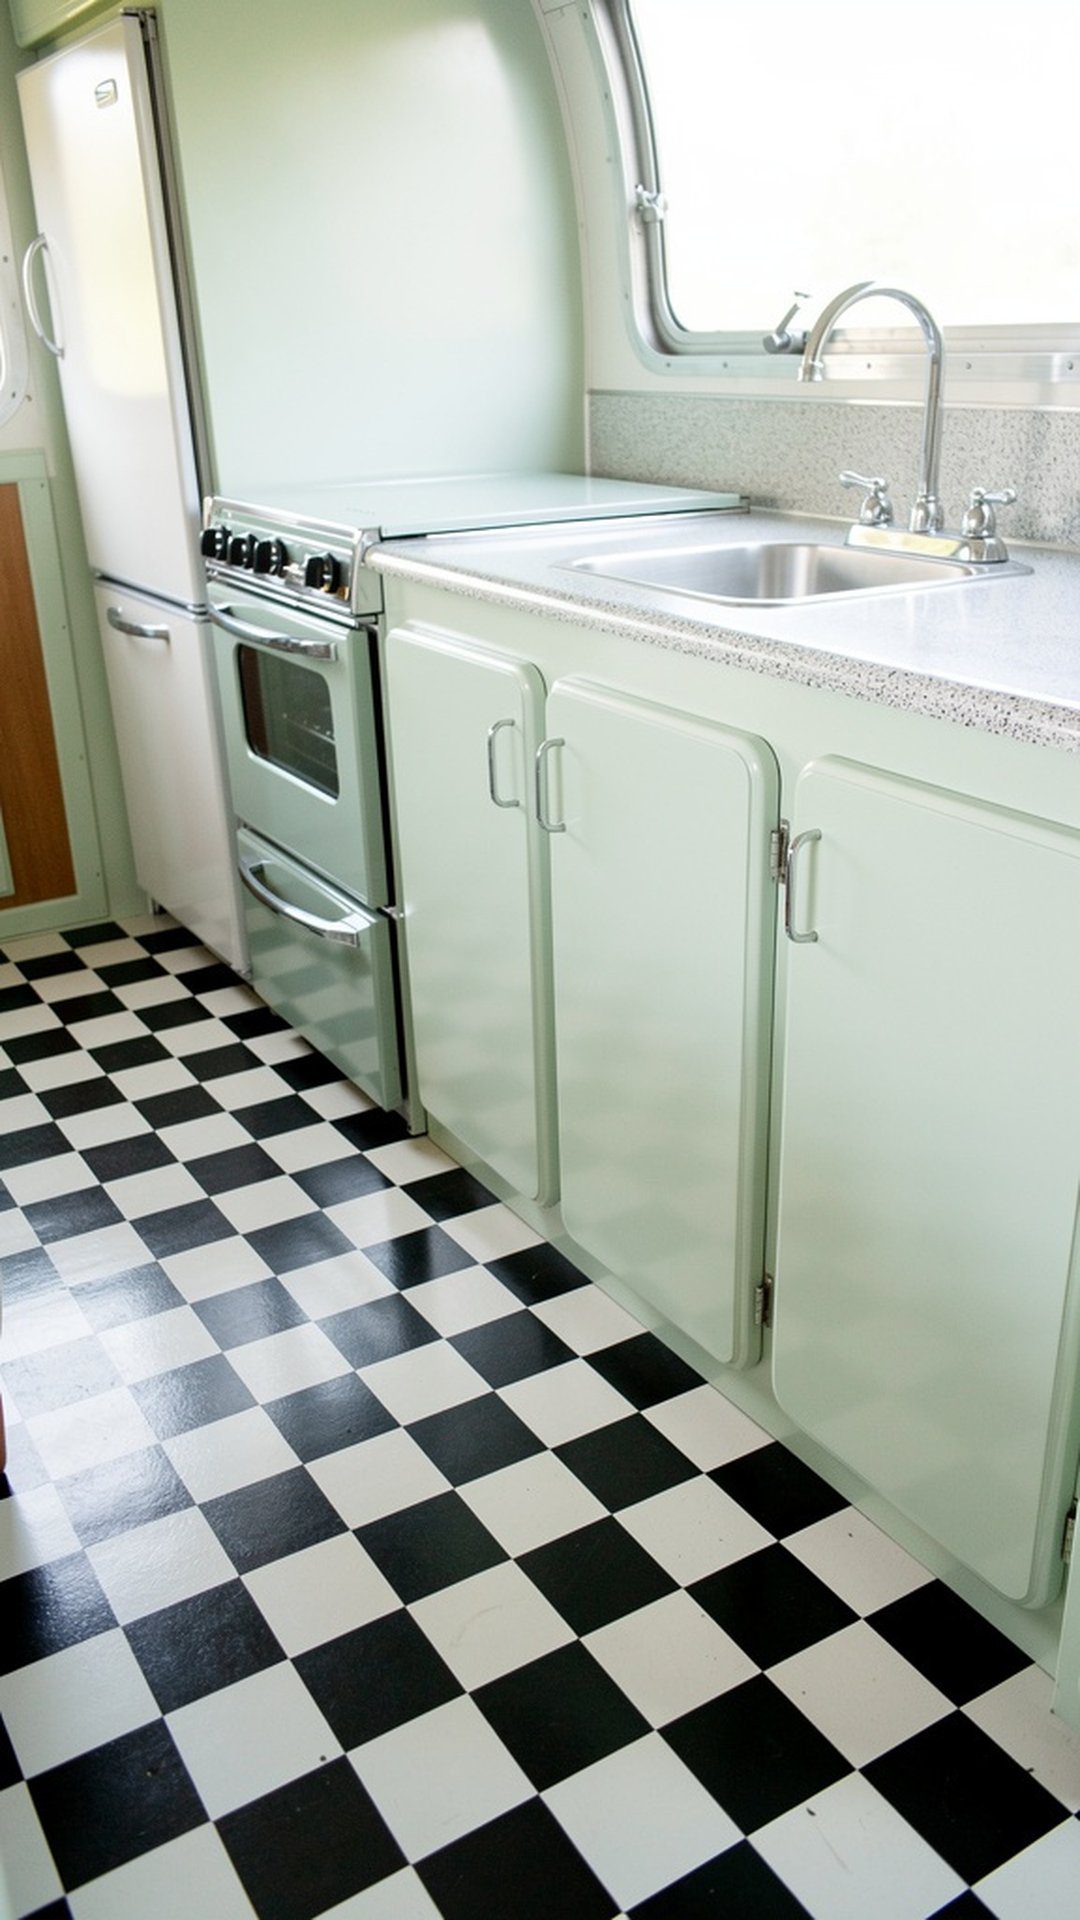
Nothing channels retro diner vibes quite like a black and white checkerboard floor in your vintage camper kitchen. This iconic pattern makes a bold statement while being surprisingly practical for hiding dirt and scuffs. Modern luxury vinyl tile installs easily over existing flooring, and many options feature peel-and-stick backing that makes them perfect for DIY installation. The geometric pattern adds visual interest without overwhelming your small space, and the contrast helps define your kitchen area from surrounding living zones.
Vinyl flooring designed for RVs withstands the unique stresses of mobile living – temperature fluctuations, moisture, and constant movement. The cushioned backing provides comfortable standing surface for extended cooking sessions, and the durable wear layer protects against scratches from pet claws and dropped utensils. Installation typically takes just a day, making this a weekend project with immediate impact.
PRO TIP: Acclimate vinyl tiles to your camper’s temperature for 48 hours before installation to prevent buckling. Start laying tiles from the center of your floor and work outward for the most balanced, professional-looking pattern.
12. Chalkboard Paint Accents
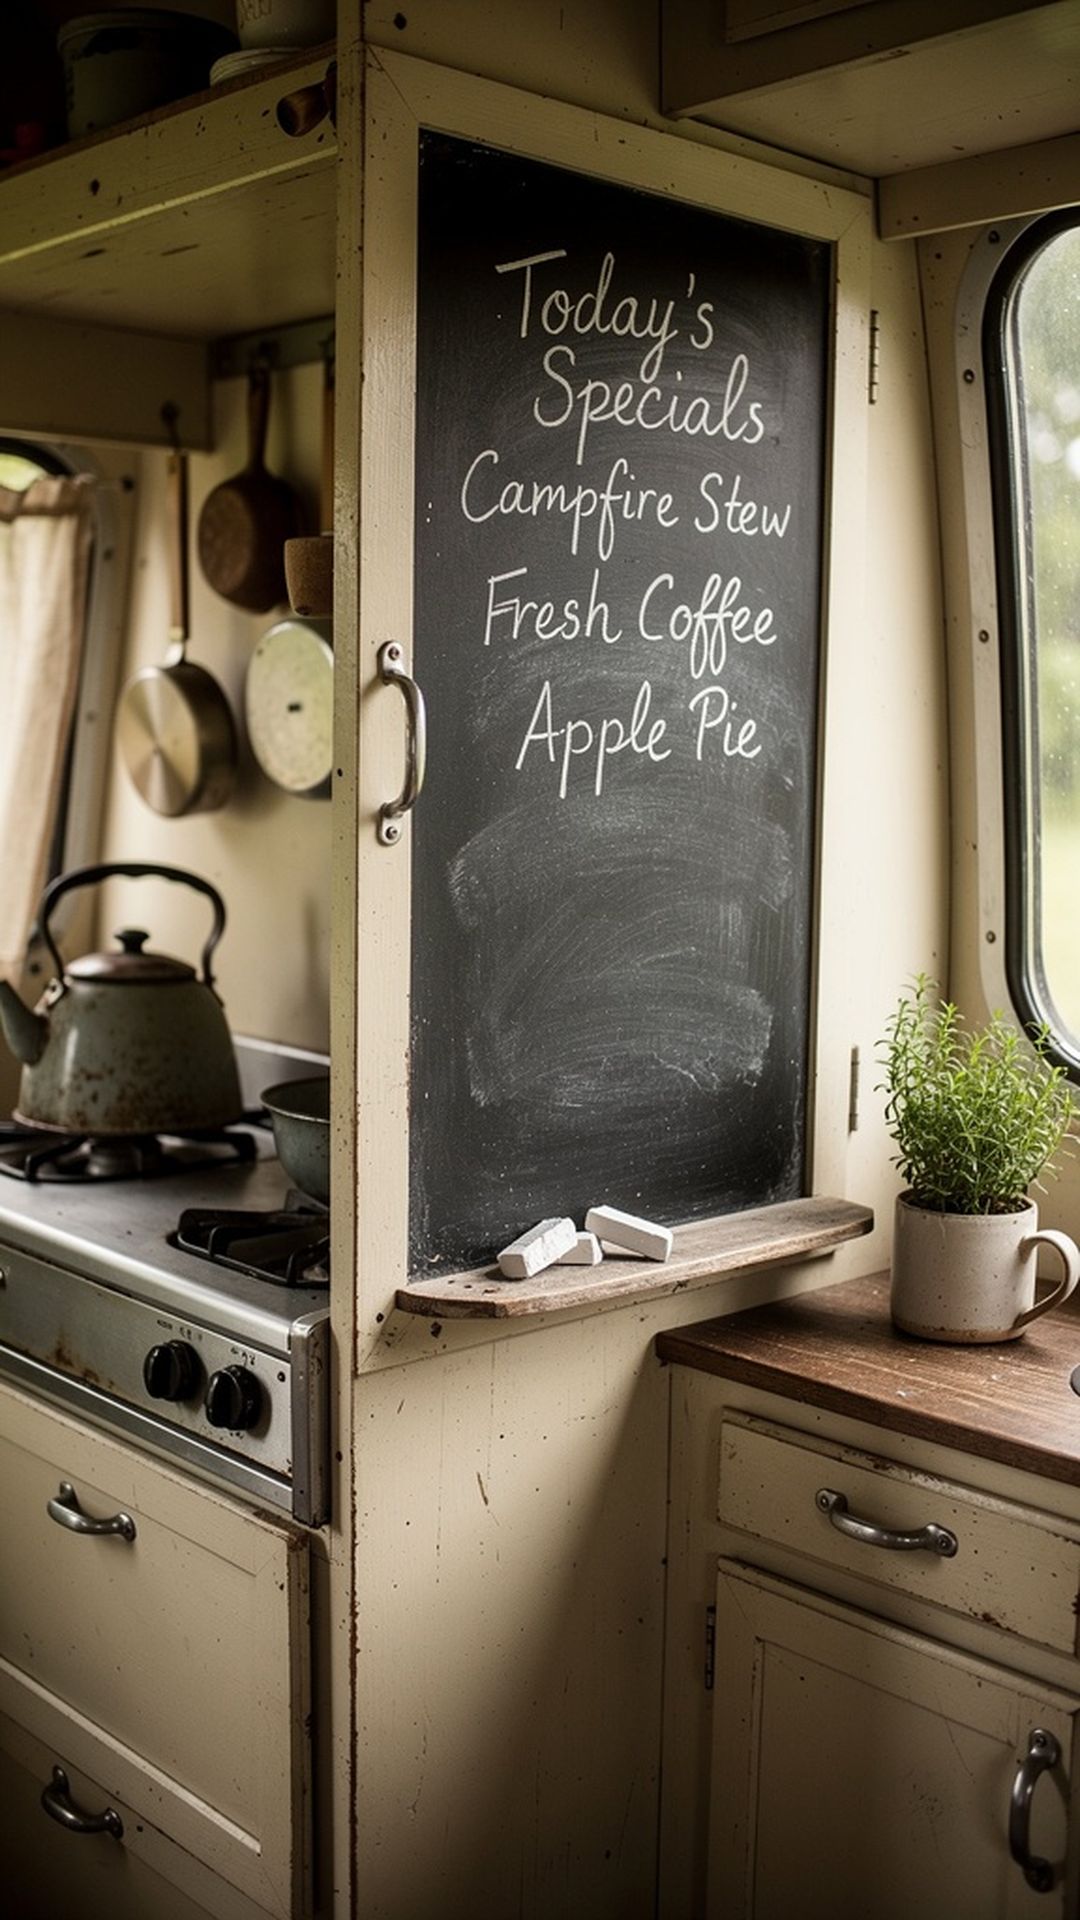
Transform a cabinet door, small wall section, or pantry interior with chalkboard paint for functional decoration. This versatile surface lets you jot down grocery lists, meal plans, or inspiring quotes that change with your mood. The matte black finish adds contemporary contrast against colorful cabinets while maintaining practical utility. Chalkboard sections work particularly well inside cabinet doors where you can track pantry inventory or tape recipes for easy reference while cooking.
Application is straightforward – clean the surface thoroughly, apply painter’s tape to protect surrounding areas, and brush on two to three coats of chalkboard paint. After curing for several days, season the surface by rubbing chalk over the entire area and wiping clean. This prevents permanent ghosting from your first writings. The casual, personal nature of chalkboard messages adds homey warmth to your camper kitchen.
PRO TIP: Use liquid chalk markers instead of traditional dusty chalk for brighter colors and cleaner removal that won’t leave residue throughout your camper. Keep a damp microfiber cloth handy for quick erasing and touching up your messages.
13. Hanging Pot Rack
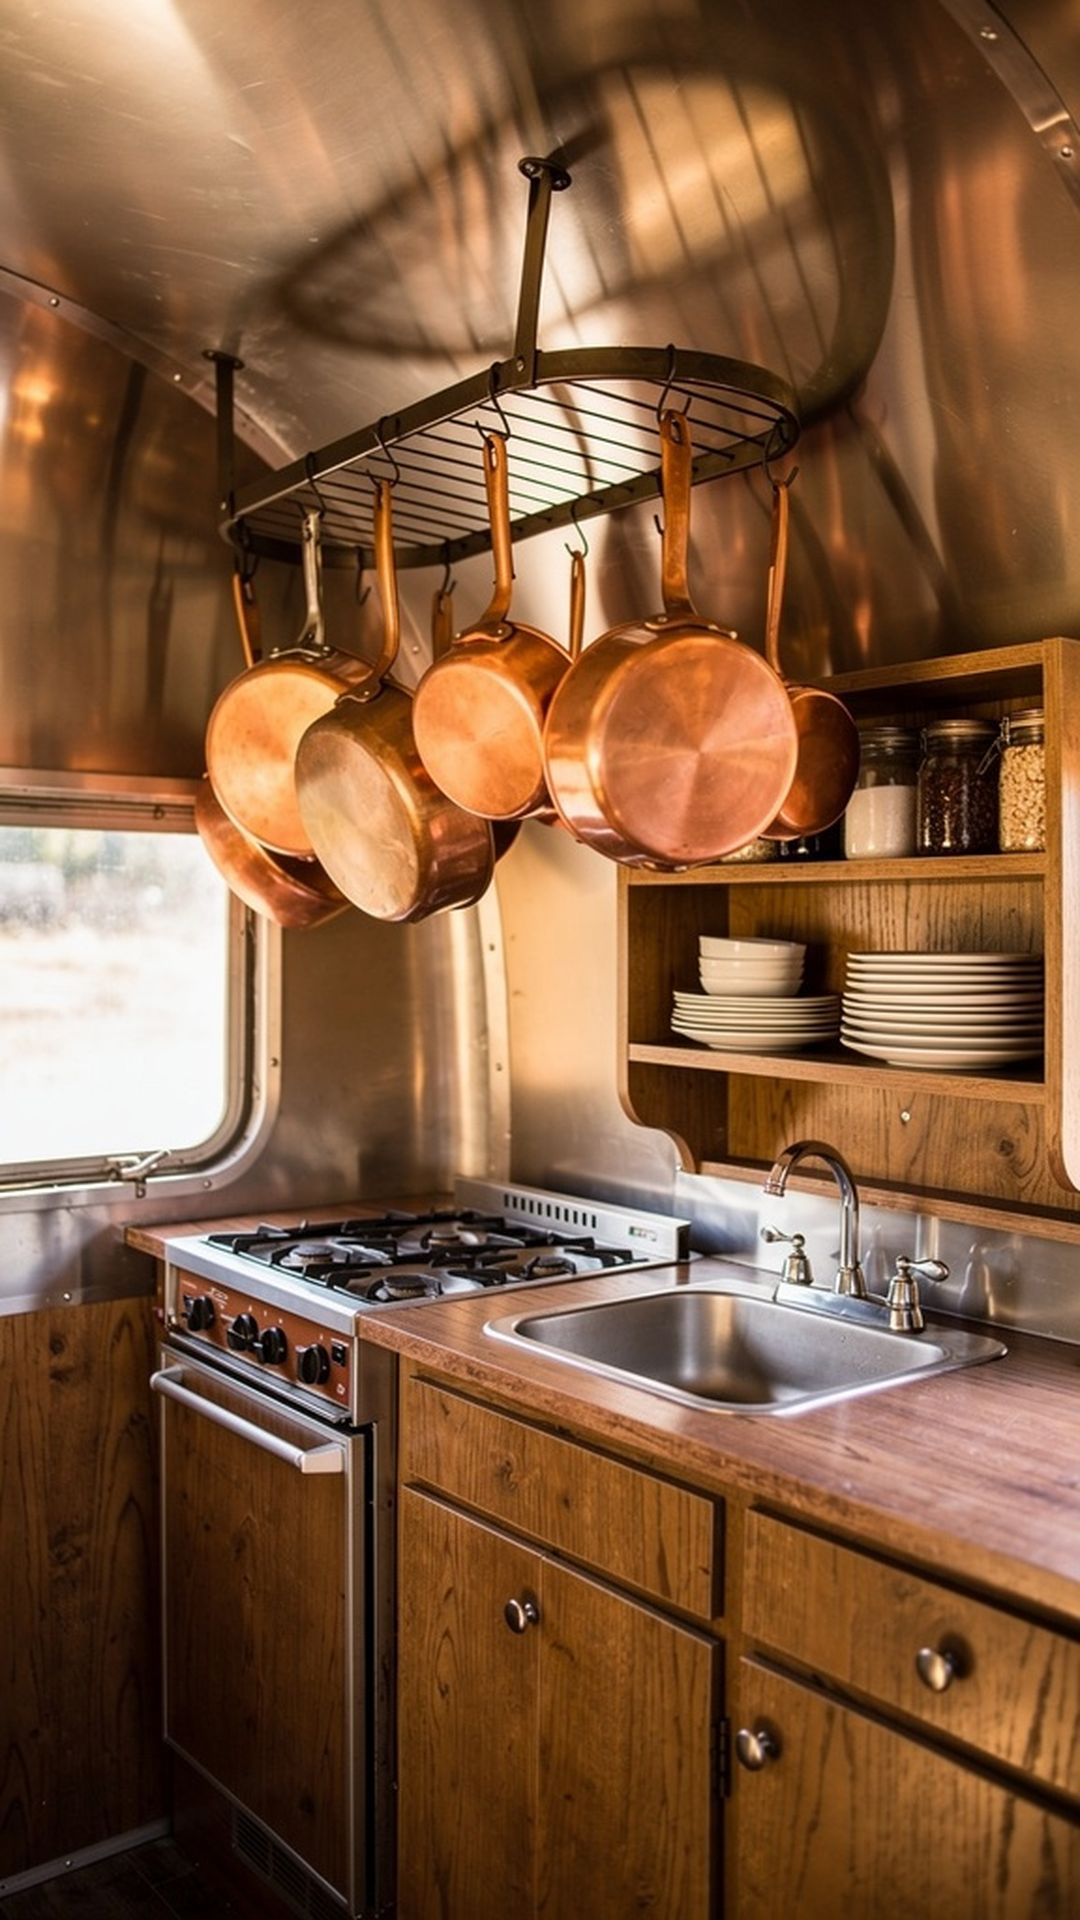
Install a ceiling-mounted or wall-hanging pot rack to display beautiful cookware while freeing up precious cabinet space. Copper and cast iron pieces become decorative elements when properly displayed, adding warmth and authenticity to your vintage kitchen aesthetic. S-hooks allow you to customize the arrangement and easily access the exact pan you need. This storage solution takes advantage of often-wasted vertical space near your ceiling while keeping heavy items secure during travel.
Choose a rack style that complements your overall design – rustic wood beam with hooks for farmhouse charm, sleek metal grid for industrial appeal, or curved wrought iron for traditional elegance. The functional art of displayed cookware makes your kitchen feel lived-in and loved rather than sterile or showroom-perfect. Just ensure items are firmly secured so they won’t swing or fall when you’re driving to your next destination.
PRO TIP: Install your pot rack into ceiling joists or solid mounting points with heavy-duty hardware rated for dynamic loads. Use rubber-coated hooks or add small pieces of grip liner to prevent pots from rattling against each other during travel.
14. Under-Cabinet LED Lighting
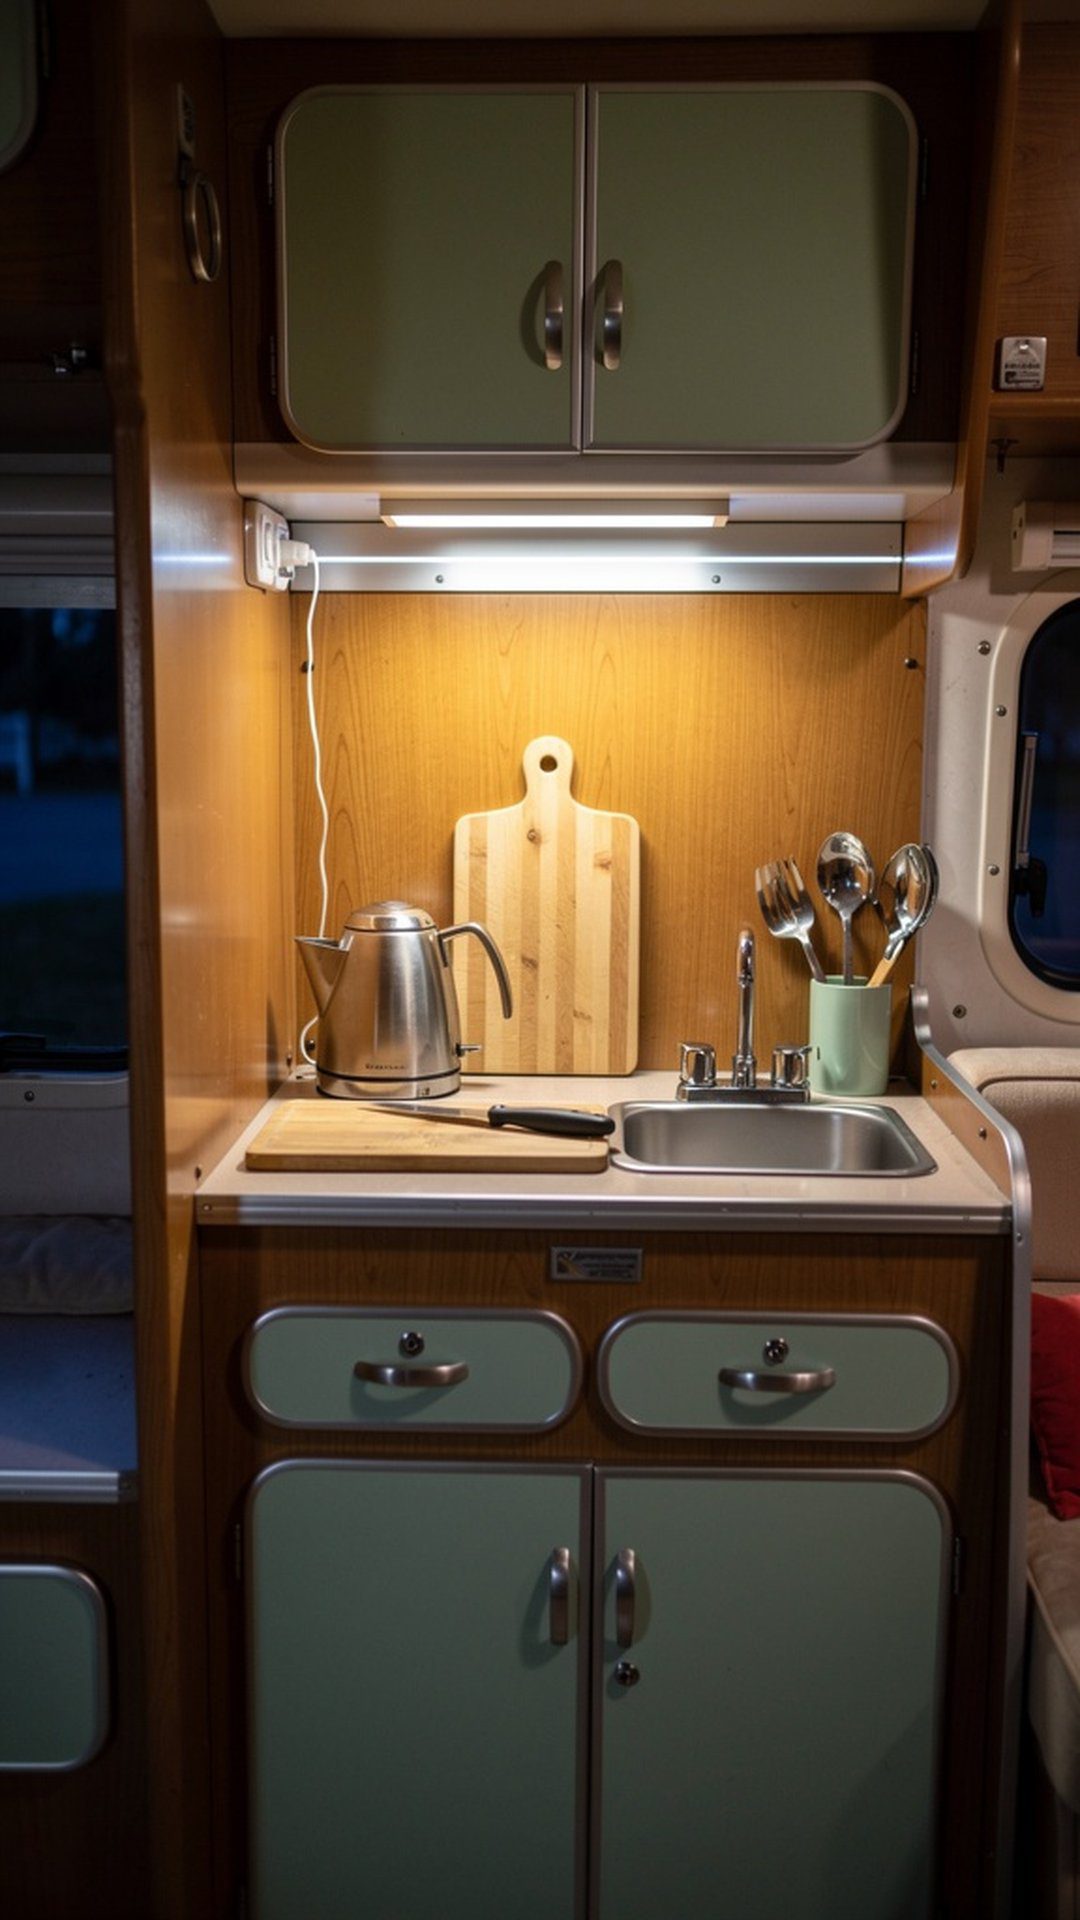
Illuminate your workspace with energy-efficient LED strip lighting mounted beneath upper cabinets. This practical upgrade eliminates shadows on countertops while creating a modern convenience that doesn’t compromise your vintage aesthetic. The bright, focused light makes food prep safer and more enjoyable, especially during evening cooking sessions. LED technology draws minimal power from your camper’s electrical system while lasting for years without bulb replacements.
Installation is surprisingly simple with adhesive-backed strips that stick directly to cabinet undersides. Choose warm white color temperature to maintain cozy ambiance, or opt for color-changing RGB strips that let you adjust mood lighting for different occasions. Many systems include dimmer controls and motion sensors for hands-free operation when your fingers are covered in flour or raw meat.
PRO TIP: Run wiring through cabinet interiors and down to a plug rather than leaving cords visible for the cleanest installation. Add a wireless remote control or smart switch so you can turn lights on before entering your camper at night.
15. Fold-Down Table Extension
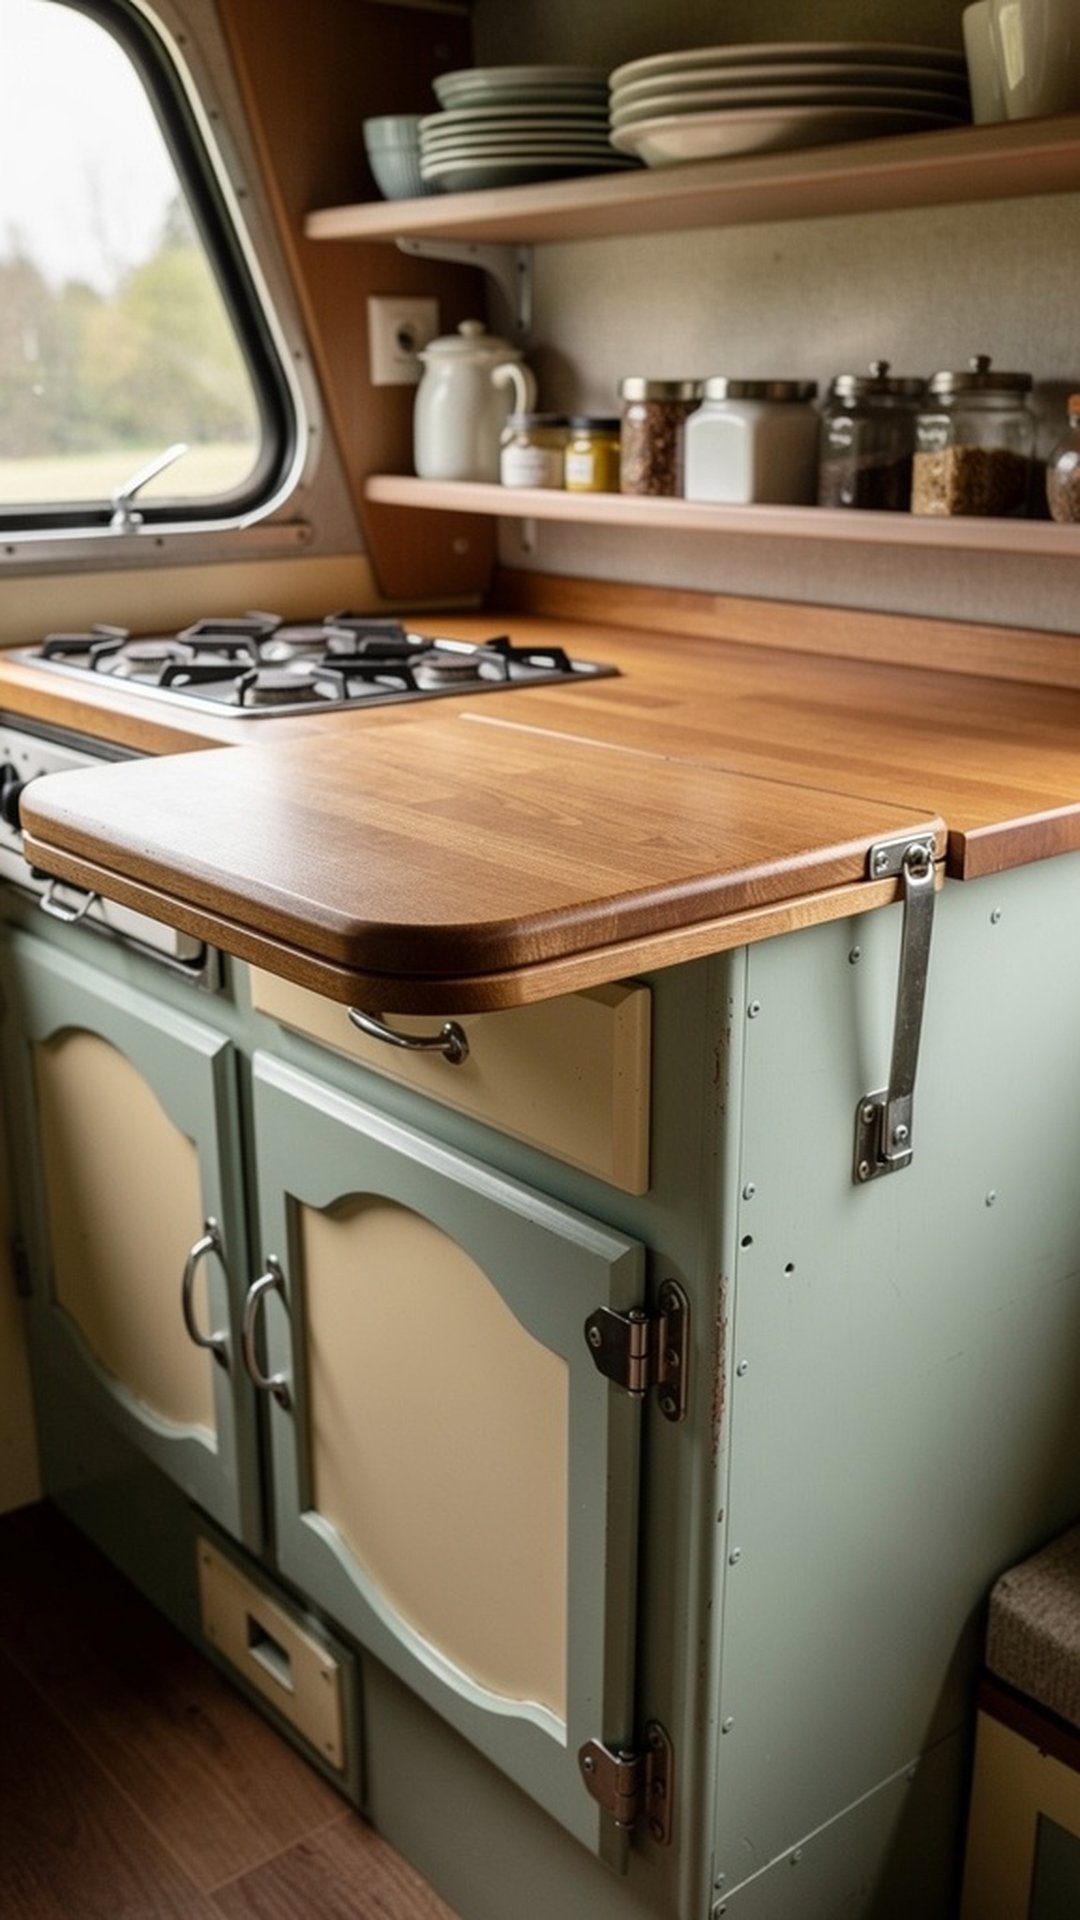
Maximize counter space with a custom fold-down table or cutting board that mounts to a wall or cabinet end. This ingenious space-saving solution provides extra work surface exactly when you need it, then tucks away to restore traffic flow through your compact kitchen. Heavy-duty hinges and a support bracket ensure stability while you’re chopping vegetables or rolling dough. The additional surface area transforms how you approach meal preparation in tight quarters.
Build your fold-down surface from butcher block, painted plywood, or even a repurposed vintage breadboard for authentic character. Size it to fit your specific space and needs – even a small 12×18 inch extension can make a significant difference in functionality. This DIY project requires basic carpentry skills and can typically be completed in an afternoon with satisfying results.
PRO TIP: Install a small latch or magnetic catch to hold the table firmly against the wall when folded up, preventing it from swinging open during travel. Finish wood surfaces with the same treatment as your countertops for a cohesive look and proper protection.
16. Two-Tone Cabinet Paint
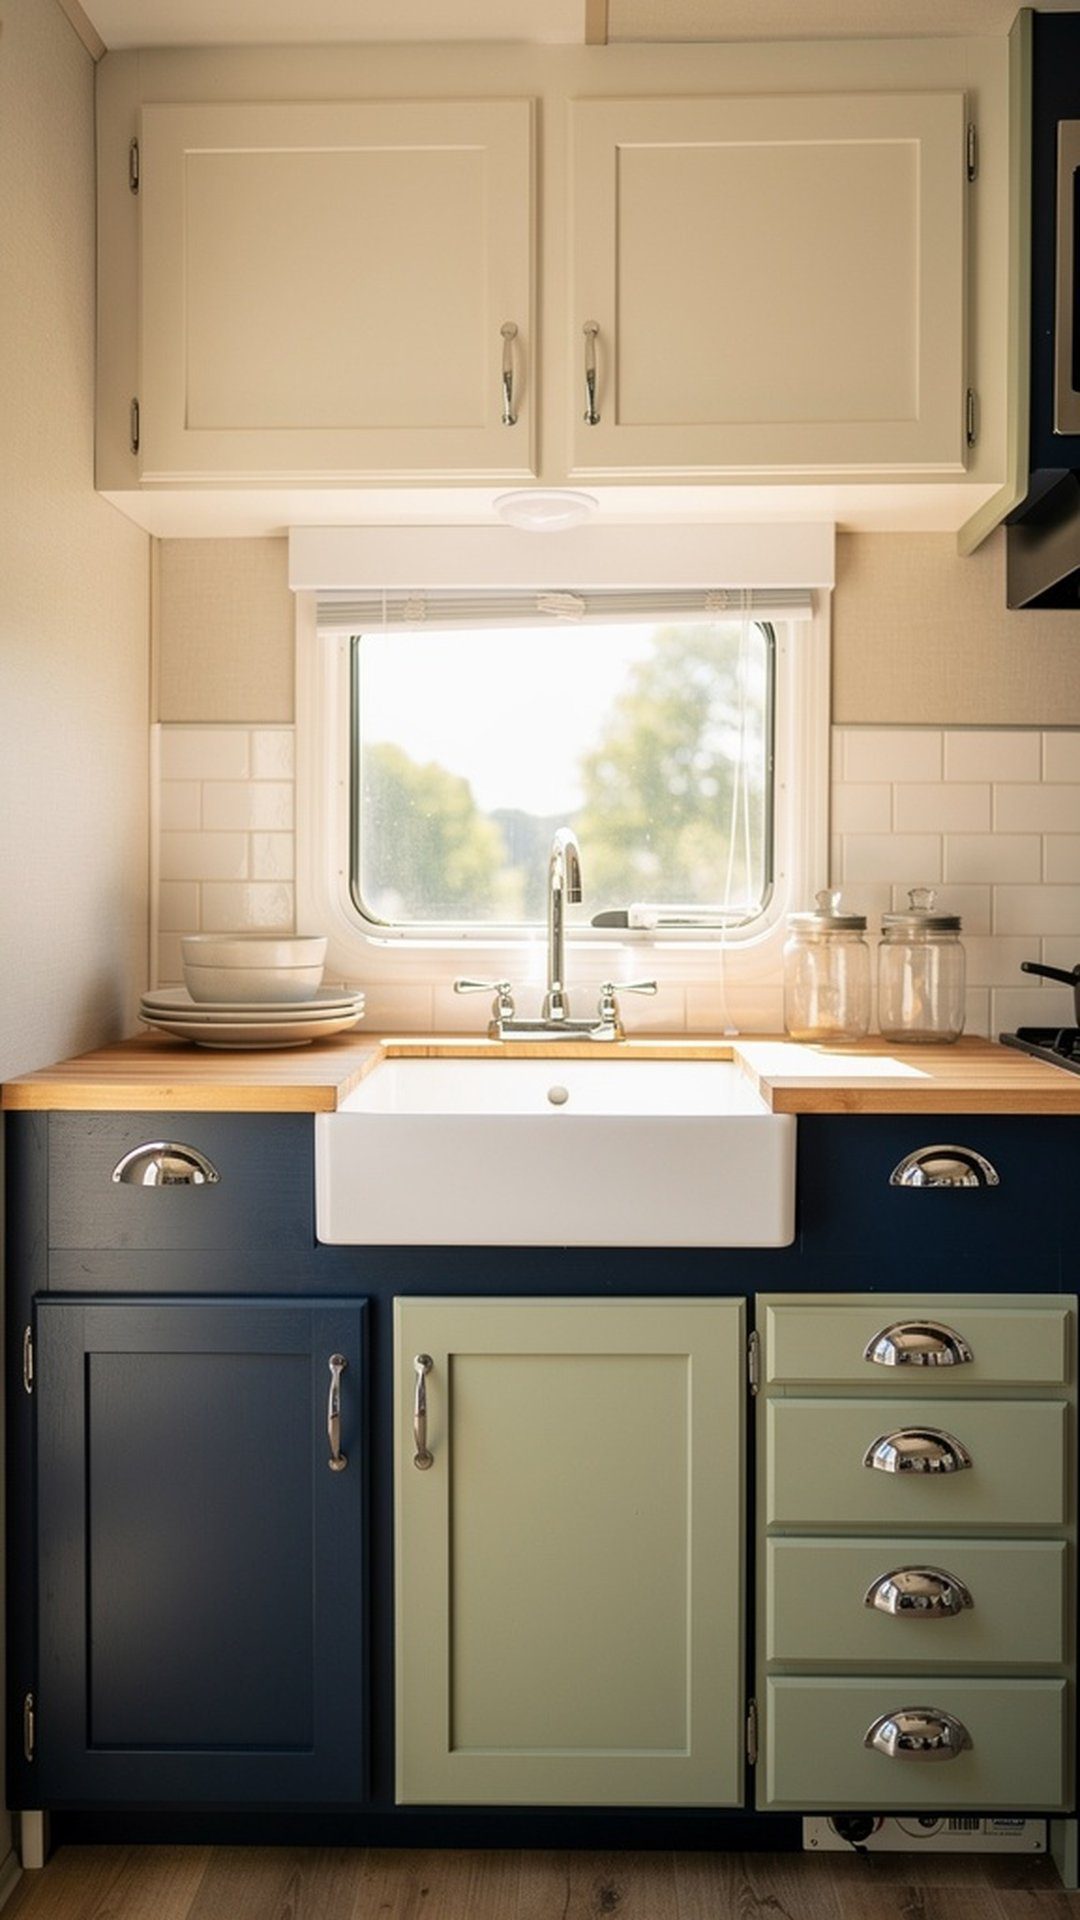
Create visual interest and modern sophistication with a two-tone cabinet paint scheme. This trending technique typically features lighter colors on upper cabinets to enhance ceiling height, paired with deeper, richer tones on lower cabinets for grounding. Popular combinations include cream white with navy blue, pale gray with forest green, or butter yellow with charcoal. The contrast adds depth and dimension to your kitchen while allowing you to incorporate multiple colors from your vintage inspiration palette.
Two-tone painting also provides practical benefits – darker lower cabinets hide scuffs and dirt better in high-traffic areas, while lighter uppers keep the space feeling open and airy. This approach works especially well in galley kitchens where cabinet runs along both walls. The horizontal division created by color change can actually make narrow spaces feel wider. Don’t forget to tie the look together with coordinating hardware that complements both colors.
PRO TIP: Use painter’s tape to create a crisp division line between colors, and remove the tape while paint is still slightly wet for the cleanest edge. Consider the golden ratio – roughly 60% lighter color (uppers) and 40% darker color (lowers) for most visually pleasing proportions.


