Choosing the right flooring for your vintage camper renovation is one of the most important decisions you’ll make during your restoration journey. The floor needs to withstand constant foot traffic, moisture from wet shoes and spills, temperature fluctuations, and the natural movement that comes with travel.
Beyond functionality, your flooring sets the tone for your entire interior design aesthetic. Whether you’re going for a rustic farmhouse vibe, a sleek modern look, or authentic vintage charm, the right floor can tie everything together beautifully. In this guide, we’ll walk you through six proven flooring options that strike the perfect balance between durability, style, and budget-friendliness. Each option has been tested by countless RV renovators and comes with its own unique set of benefits to help you create the camper of your dreams.
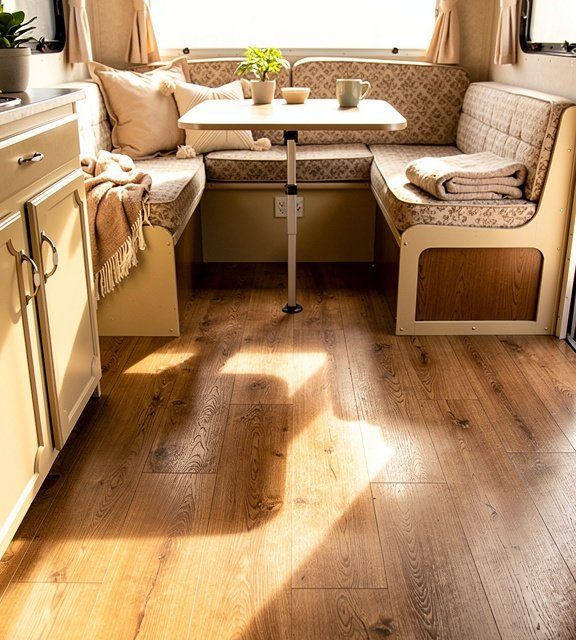
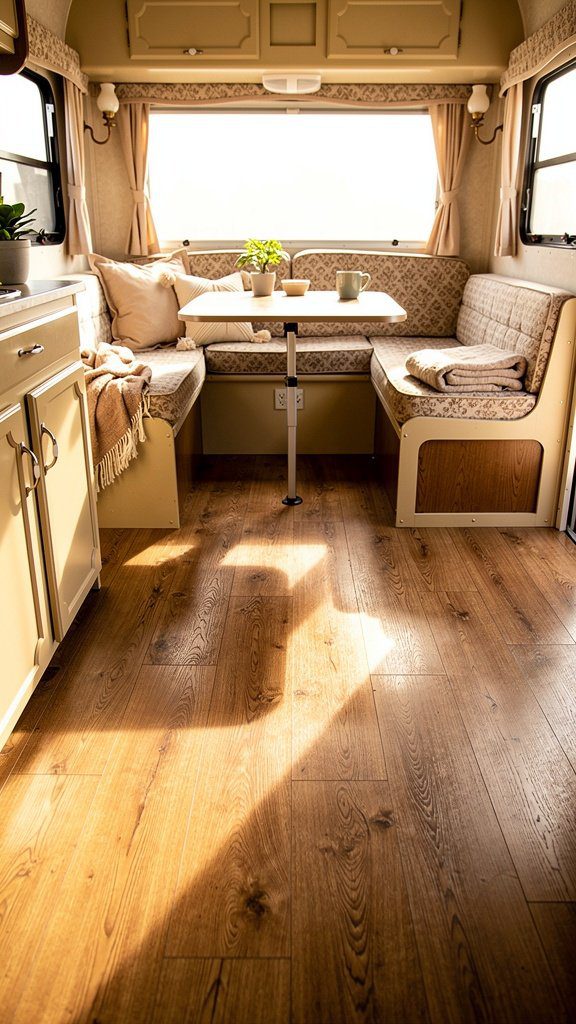
1. Luxury Vinyl Plank (LVP) Flooring
Would you like to save this article?
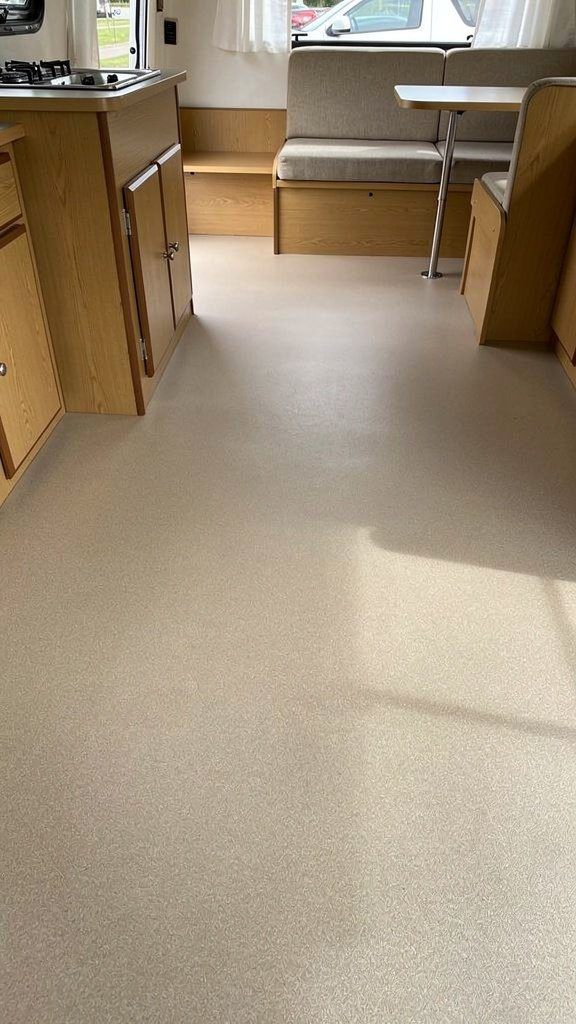
Luxury vinyl plank flooring has become the gold standard for vintage camper renovations, and for good reason. This flooring mimics the look of real hardwood with stunning realism, featuring authentic grain patterns and rich color variations that add warmth and character to your space. LVP is completely waterproof, making it ideal for handling wet boots, drink spills, and the humidity that naturally occurs in small living spaces. The planks are incredibly durable and resistant to scratches, dents, and fading, which means they’ll maintain their beautiful appearance even after years of use and travel.
Installation is straightforward with click-lock systems that don’t require glue or nails, making it a perfect DIY project. The planks are also flexible enough to handle the slight movements and vibrations that occur while driving. Many RV renovators appreciate that LVP can be installed directly over existing subfloors as long as they’re level and clean. The variety of wood tones available means you can easily match any design aesthetic, from light oak for a bright, airy feel to rich walnut for a more sophisticated ambiance.
PRO TIP: Choose LVP with a thickness of at least 5mm and an attached underlayment pad for better sound absorption and comfort underfoot. Look for products specifically rated for marine or RV use, as these are formulated to handle temperature extremes better than standard residential LVP. Always allow your planks to acclimate to your camper’s temperature for 48 hours before installation to prevent expansion or contraction issues later.
2. Peel and Stick Vinyl Tile
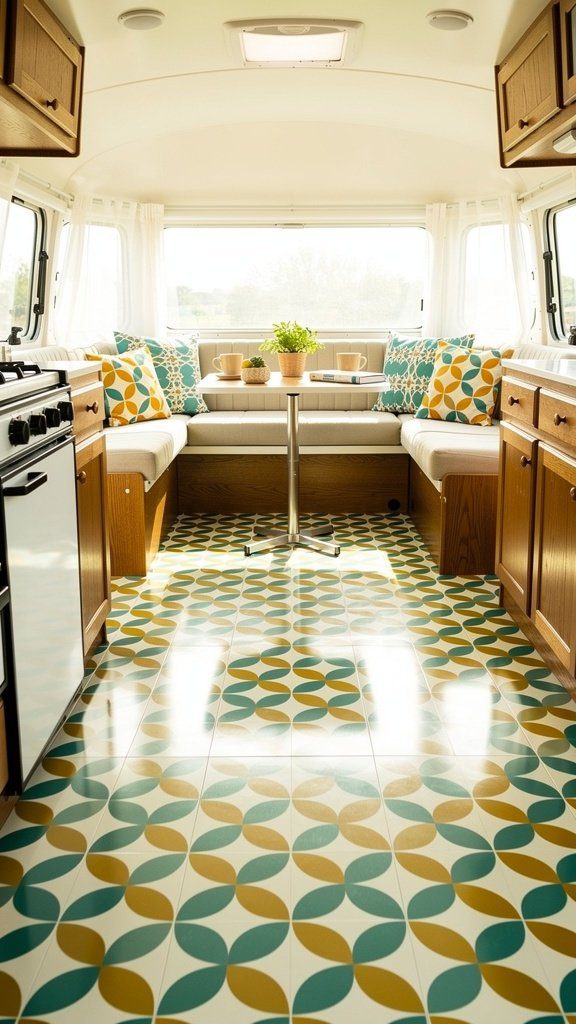
Peel and stick vinyl tiles offer one of the most budget-friendly and DIY-friendly flooring solutions for vintage campers. These self-adhesive tiles come in an incredible array of patterns, from classic checkerboard designs that evoke authentic vintage diner vibes to modern geometric patterns and realistic stone looks. The installation process couldn’t be simpler – just peel off the backing paper and press the tile firmly onto your clean, smooth subfloor. This makes it an excellent choice for first-time renovators or anyone working with a tight timeline.
The tiles are thin and lightweight, which is crucial for maintaining your camper’s overall weight capacity. They’re also water-resistant (though not completely waterproof like LVP), making them suitable for most camper applications. If a tile gets damaged, you can easily replace individual pieces without redoing the entire floor. Many vintage camper enthusiasts love using peel and stick tiles to create custom patterns and designs that showcase their personality and creativity.
PRO TIP: Proper surface preparation is absolutely critical for peel and stick tile success. Your subfloor must be completely smooth, clean, and dry – any bumps, dust, or moisture will cause tiles to lift over time. Consider applying a layer of thin plywood or underlayment to create the perfect smooth surface. Start your tile installation from the center of the room and work outward to ensure a balanced, professional-looking layout, and use a rolling pin or J-roller to firmly press down each tile to activate the adhesive.
3. Cork Flooring
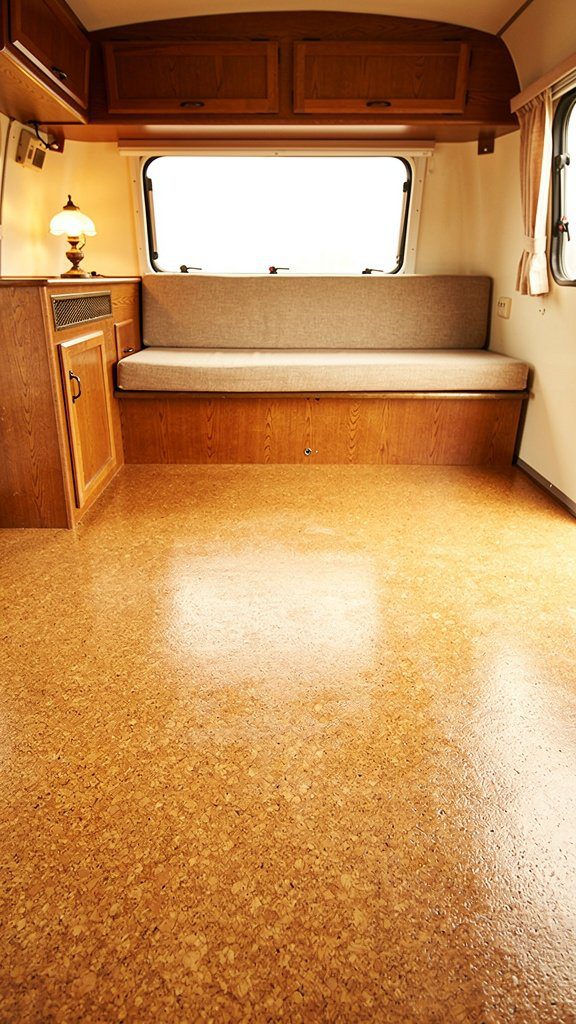
Cork flooring brings a unique combination of eco-friendliness, comfort, and natural beauty to your vintage camper renovation. Harvested from the bark of cork oak trees in a sustainable process that doesn’t harm the tree, cork is one of the most environmentally responsible flooring choices available. The material has a naturally warm, soft feel underfoot that’s especially appreciated during early morning coffee sessions or late-night stargazing. Cork’s cellular structure provides excellent insulation properties, keeping your camper warmer in winter and cooler in summer while also absorbing sound and reducing noise from footsteps.
Cork is naturally antimicrobial and resistant to mold and mildew, making it a healthy choice for small enclosed spaces. The material has a distinctive look with subtle variations in color and texture that create visual interest without overwhelming your design. Cork flooring comes in both tile and plank formats, with many options featuring click-lock installation systems similar to LVP. While cork itself is somewhat water-resistant, proper sealing is essential to protect it from moisture damage.
PRO TIP: Always seal cork flooring with multiple coats of high-quality polyurethane specifically designed for cork after installation. Apply at least three thin coats, allowing proper drying time between each application. This sealing process is crucial for protecting your cork from moisture and making it truly suitable for camper use. Plan to reseal your cork floor every 2-3 years to maintain its water resistance and durability, and immediately wipe up any standing water to prevent penetration.
4. Marine-Grade Vinyl Sheet Flooring
Marine-grade vinyl sheet flooring is specifically engineered to handle harsh conditions, making it an incredibly practical choice for vintage campers. This seamless flooring solution comes in wide rolls that can cover your entire floor without seams, eliminating gaps where water and debris can accumulate. Marine vinyl is completely waterproof, UV-resistant, and formulated to withstand temperature extremes, saltwater exposure, and constant humidity – conditions that regular vinyl simply can’t handle as effectively. The material is also highly resistant to mold, mildew, and bacterial growth.
Installation requires some skill and patience, as the sheet needs to be carefully cut to fit your camper’s exact dimensions and contours. However, once installed with proper marine-grade adhesive, you’ll have an incredibly durable, low-maintenance floor that can last for decades. Marine vinyl is available in various colors and patterns, from solid neutrals to wood grain and stone looks. The surface is easy to clean with just soap and water, and it provides excellent slip resistance even when wet.
PRO TIP: Let your vinyl sheet relax and flatten in a warm environment for 24-48 hours before installation. Cut your sheet slightly larger than needed, then trim to exact size after it’s positioned in the camper – vinyl can expand and contract with temperature changes. Use only marine-grade adhesive applied with a notched trowel for proper coverage, and pay special attention to edges and seams to prevent water from getting underneath. A heat gun can help soften the vinyl when working around corners and curves for a perfect fit.
5. Painted Plywood Flooring

Painted plywood flooring represents the ultimate budget-friendly option while offering endless creative possibilities for expressing your unique style. This approach involves installing high-quality plywood as your finished floor surface, then painting and sealing it with durable protective coatings. The beauty of painted plywood lies in its versatility – you can choose any color imaginable, create custom patterns, stencil designs, or even create the look of faux tiles or planks. Many vintage camper enthusiasts embrace the DIY nature of this option, creating truly one-of-a-kind floors that become conversation pieces.
The process is straightforward: install smooth plywood (at least 1/2 inch thick), fill any gaps or nail holes with wood filler, sand smooth, apply primer, add your paint design, and finish with multiple coats of durable polyurethane sealer. While this flooring requires more maintenance than vinyl options and may need touch-ups over time, it’s incredibly affordable and easy to refresh with a new coat of paint whenever you want to update your camper’s look. The painted surface is also surprisingly durable when properly sealed.
PRO TIP: Use high-quality exterior-grade plywood with a smooth surface (like birch or oak plywood) to minimize grain texture showing through your paint. Apply at least three coats of water-based polyurethane sealer, using a synthetic bristle brush to avoid bubbles and sanding lightly between coats with 220-grit sandpaper. For maximum durability, consider using porch and floor enamel paint instead of regular latex, as it’s specifically formulated to withstand foot traffic. Add a fresh top coat of sealer annually to maintain protection and keep your floor looking fresh.
6. Rubber Gym Flooring
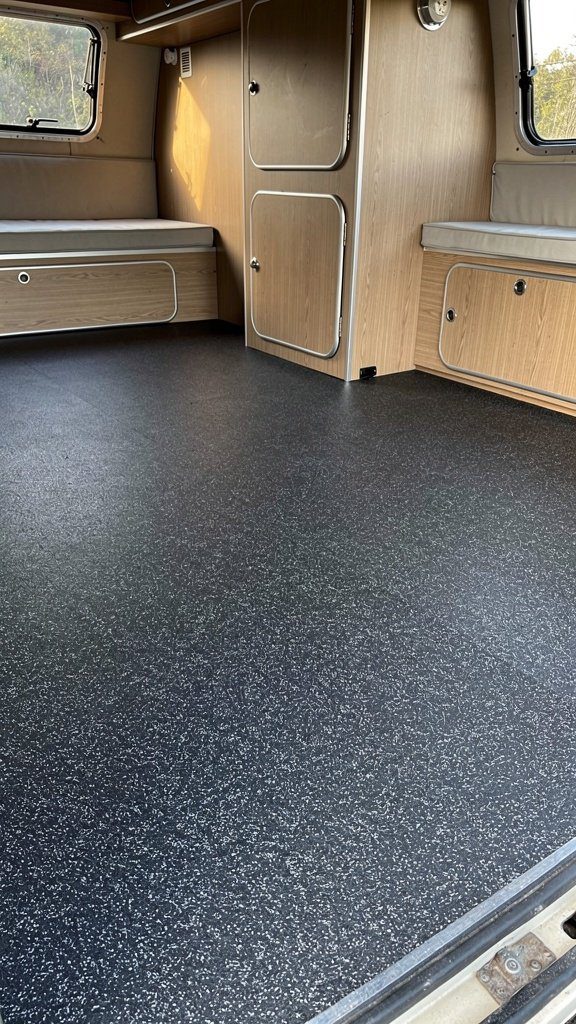
Rubber gym flooring brings industrial-strength durability to your vintage camper, making it perfect for adventurers who prioritize function over traditional aesthetics. This flooring option is virtually indestructible, able to handle heavy equipment, muddy boots, pet claws, and any abuse you can throw at it. The textured surface provides excellent slip resistance even when wet, which is ideal for campers that see a lot of outdoor activity and wet weather. Rubber flooring also provides superior cushioning and shock absorption, making it comfortable to stand on for extended periods and reducing fatigue during meal prep or morning routines.
Installation is incredibly simple – most rubber flooring comes in interlocking tiles or rolls that can be laid directly over existing subfloors without adhesive. The material is naturally water-resistant, easy to clean, and provides excellent sound dampening. While rubber flooring typically comes in basic black or gray colors, some manufacturers now offer more varied options. The industrial look can actually work very well in modern, minimalist camper designs or adventure-focused builds where ruggedness is celebrated. Rubber flooring is also one of the most affordable options per square foot.
PRO TIP: Choose rubber flooring tiles that are at least 8mm thick for optimal comfort and durability, and look for products made from virgin rubber rather than recycled materials for better longevity and less odor. Allow rubber flooring to off-gas in a ventilated area for several days before installation to minimize the initial rubber smell. To customize the appearance, consider painting the rubber with specialty flexible floor paint designed for rubber surfaces, or use colorful area rugs to soften the industrial look while still maintaining the practical benefits underneath.


