You’ll learn how to make your camper feel cozy and timeless with simple, shabby chic table ideas that suit small spaces. These tips show easy ways to mix vintage finds, soft pastels, and homemade touches so your meals feel special without extra fuss.
Would you like to save this article?
You can use everyday items in new ways to set a charming table that fits your camper’s style and size. The ideas focus on small-scale pieces, easy DIYs, and ways to create a warm mood so your meals look thoughtful and inviting.
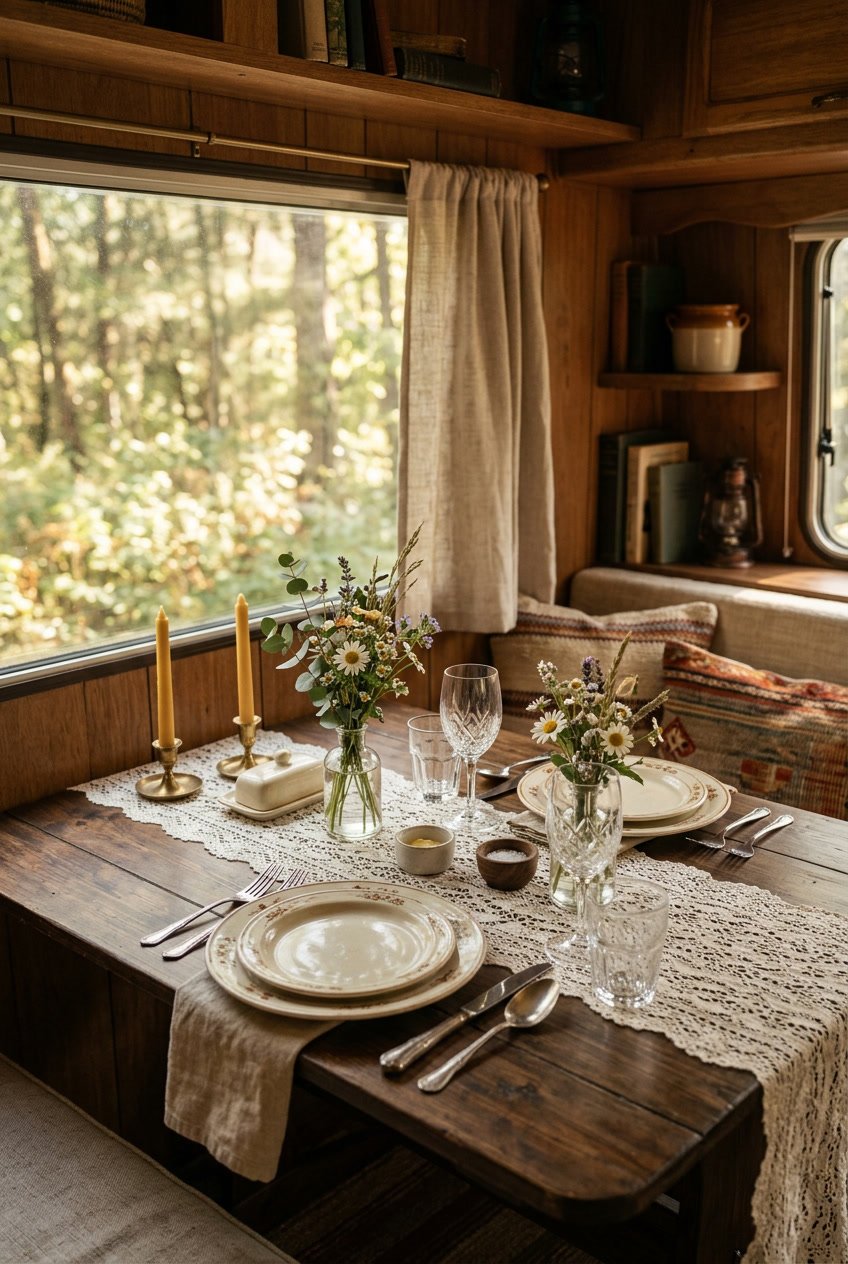
1) Mix vintage floral plates with plain white linens
Pair bright floral plates with simple white napkins and a plain tablecloth. The contrast makes the patterns stand out and keeps your table from feeling busy.
Use soft, worn linens to keep the shabby chic look. White fabrics balance the color and give your camper a calm, cozy feel.
Place a floral plate on top of a plain charger or a woven mat for texture. You can layer plates of different sizes to add depth without clutter.
Put small, fresh flowers in a low jar to echo the plates. Keep centerpieces low so conversation stays easy.
PRO TIP
Mix one patterned plate with two plain ones for each place setting. This keeps things pretty but still simple.
2) Use mason jars as rustic water glasses
Mason jars bring a cozy, simple charm to your camper table. They feel homey and fit the shabby chic look without much effort.
You can use plain jars or add twine, lace, or a small tag for names. Those little touches make each place feel personal and warm.
Jars are sturdy and easy to wash, which helps on the road. They stack well for storage, too, saving space in tight cabinets.
PRO TIP
Put a slice of lemon or a sprig of mint in each jar to add color and freshen the drink. Use lids with holes if you want to keep bugs out while keeping the rustic feel.
3) Add lace table runners for a delicate touch
A lace runner softens your camper table and adds a vintage feel. You can layer it over a plain cloth or place it on bare wood for contrast.
Choose a lightweight lace so it won’t slip or bunch during travel. Pick neutral colors like white, cream, or soft pastels to keep the look airy and calm.
PRO TIP
Cut a runner slightly shorter than the table so it won’t catch on drawers or seat edges. Secure it with small clips or non-slip pads to keep it in place while you drive.
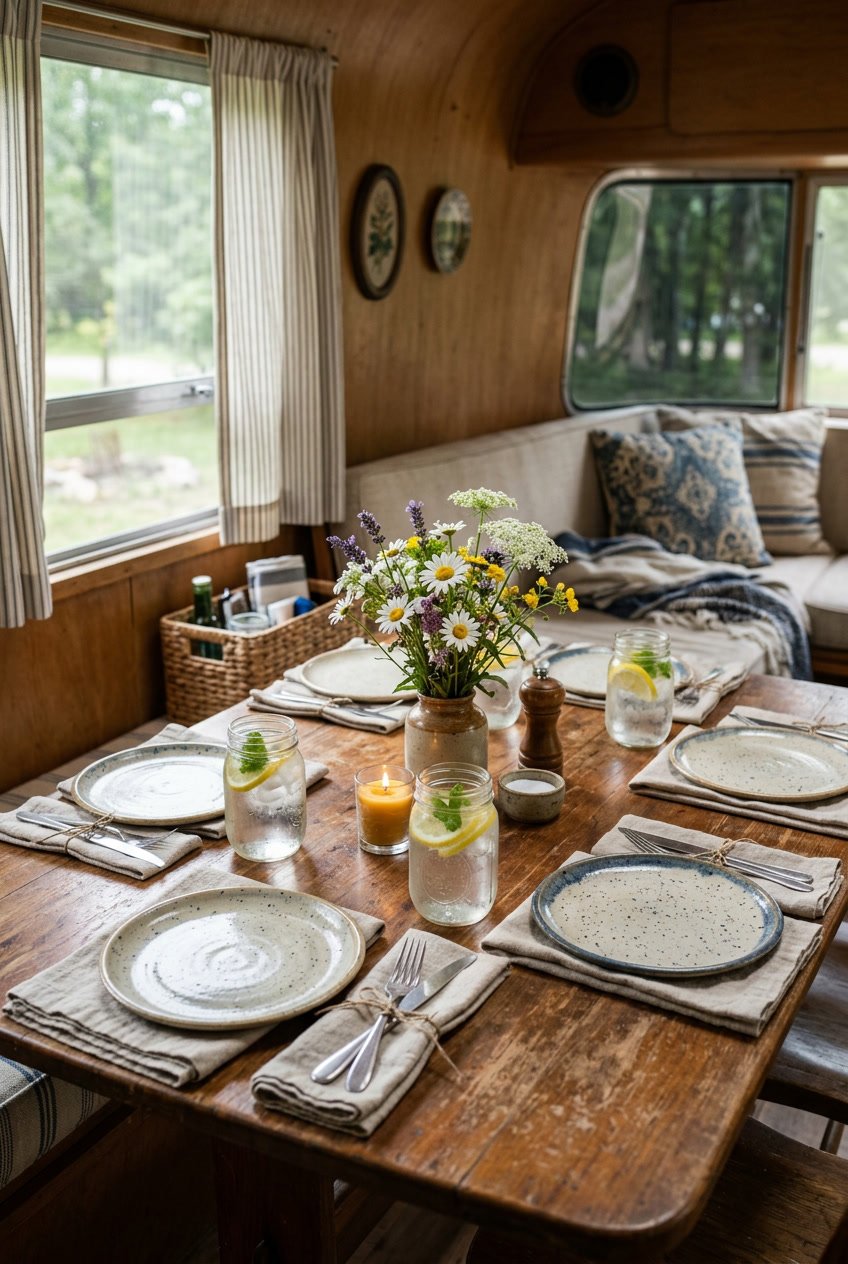
4) Incorporate wildflowers in small tin cans
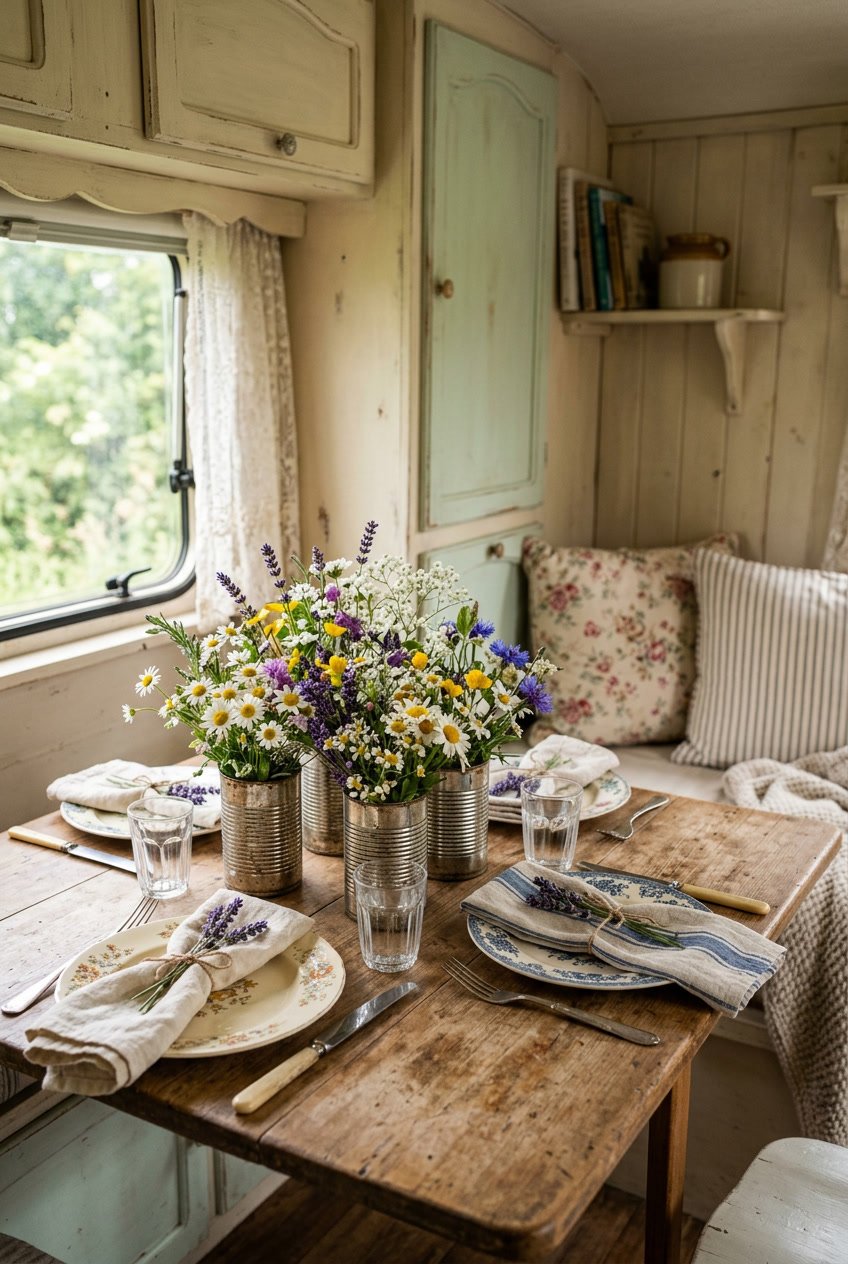
Place small tin cans down the center of your camper table for a simple, relaxed look. Use a mix of nearby wildflowers for color and a fresh, natural feel.
Keep stems short so flowers sit low and don’t block conversation. Fill cans with a bit of water and a few pebbles to stabilize stems.
Paint or wrap the cans with lace, twine, or soft pastels to match your shabby chic style. You can leave some plain for an honest, rustic touch.
PRO TIP
Choose flowers that last a few days and swap water daily to keep them fresh. Group cans in odd numbers for a casual, pleasing arrangement.
5) Place pastel ceramic napkin rings at each setting
Pastel ceramic napkin rings add a gentle, vintage look to your camper table. You can match them to your linens or pick soft contrasting shades for a playful touch.
They sit nicely on folded cloth napkins or wrapped around simple paper ones. The ceramic weight keeps napkins from blowing away when windows are open.
Use a mix of shapes like roses, hearts, or plain rings for a collected feel. Place one at each setting so every guest feels the table is thought through.
PRO TIP
Tie a thin ribbon or twine through the ring to hold a small name tag. This makes seating easy and adds a personal, cozy detail.
6) Use distressed wooden trays as chargers
You can use distressed wooden trays as chargers to add texture and charm to your camper table. They give each place a defined space and protect your surface from spills and heat.
Pick trays with worn paint or natural knots for a vintage look. Keep them light enough to move easily, since space is small and you may need to clear the table quickly.
Layer a simple napkin and plate on top to keep the setting tidy. You can swap trays to match seasons or moods without changing the whole setup.
PRO TIP
Choose trays with a shallow rim so plates sit steady but still feel open. A thin coat of food-safe finish makes them easier to clean without losing the shabby look.
7) Tie silverware with twine and sprigs of lavender
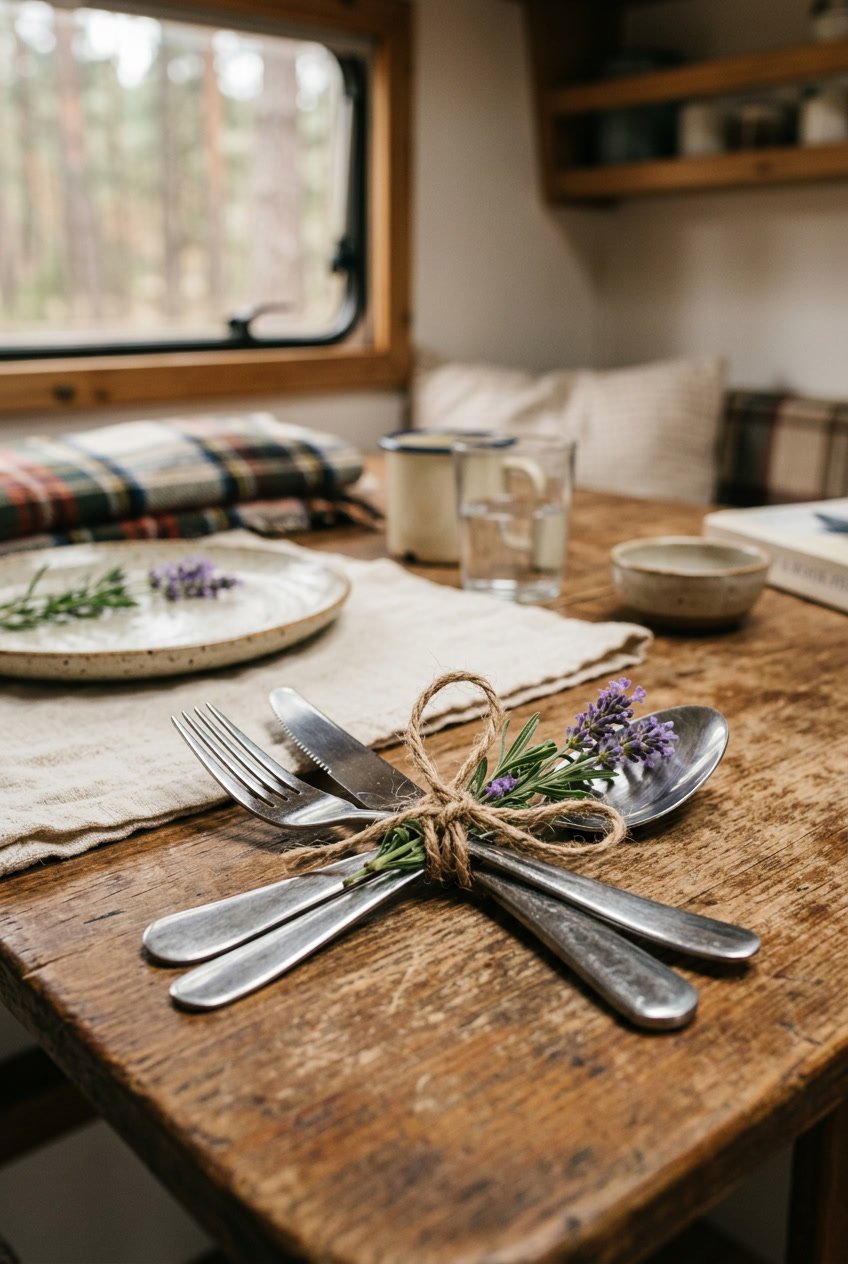
Wrap a simple piece of twine around your knife, fork, and spoon to keep them neat. The twine adds a rustic feel that matches shabby chic campers.
Tuck a small sprig of lavender under the knot for color and scent. Lavender dries well and holds its shape, so it looks nice and lasts through the meal.
Use natural twine in neutral tones to keep the look soft and calm. You can vary the length of the lavender sprigs to make each place setting feel unique.
PRO TIP
Cut lavender stems short so they don’t get in the way while eating. Tie the knot tight enough to stay put, but loose enough to remove easily.
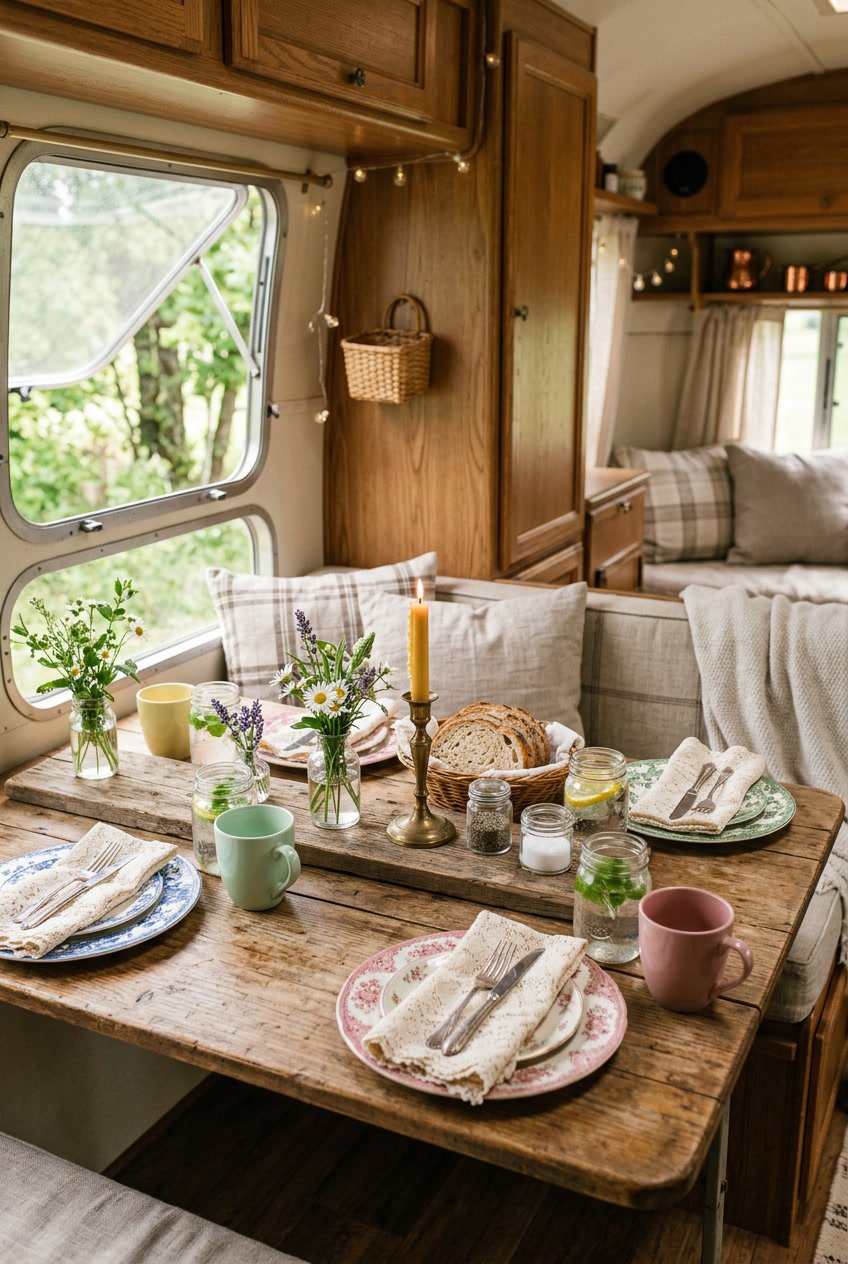
8) Display antique candle holders with taper candles

Place a few antique candle holders down the center of your table to add warm charm. Mix heights and metals so the display feels collected, not matched.
Use taper candles for a slim, classic look. They burn longer and give softer light than thick candles.
Keep safety in mind. Set holders on a heatproof tray and watch for drafts when you’re on the move.
PRO TIP
To prevent wax drips, anchor the taper in a small bit of melted wax or a candle adhesive. You can also pair tapers with small tea lights in glass for extra light without crowding the table.
9) Scatter pearl garlands around centerpiece
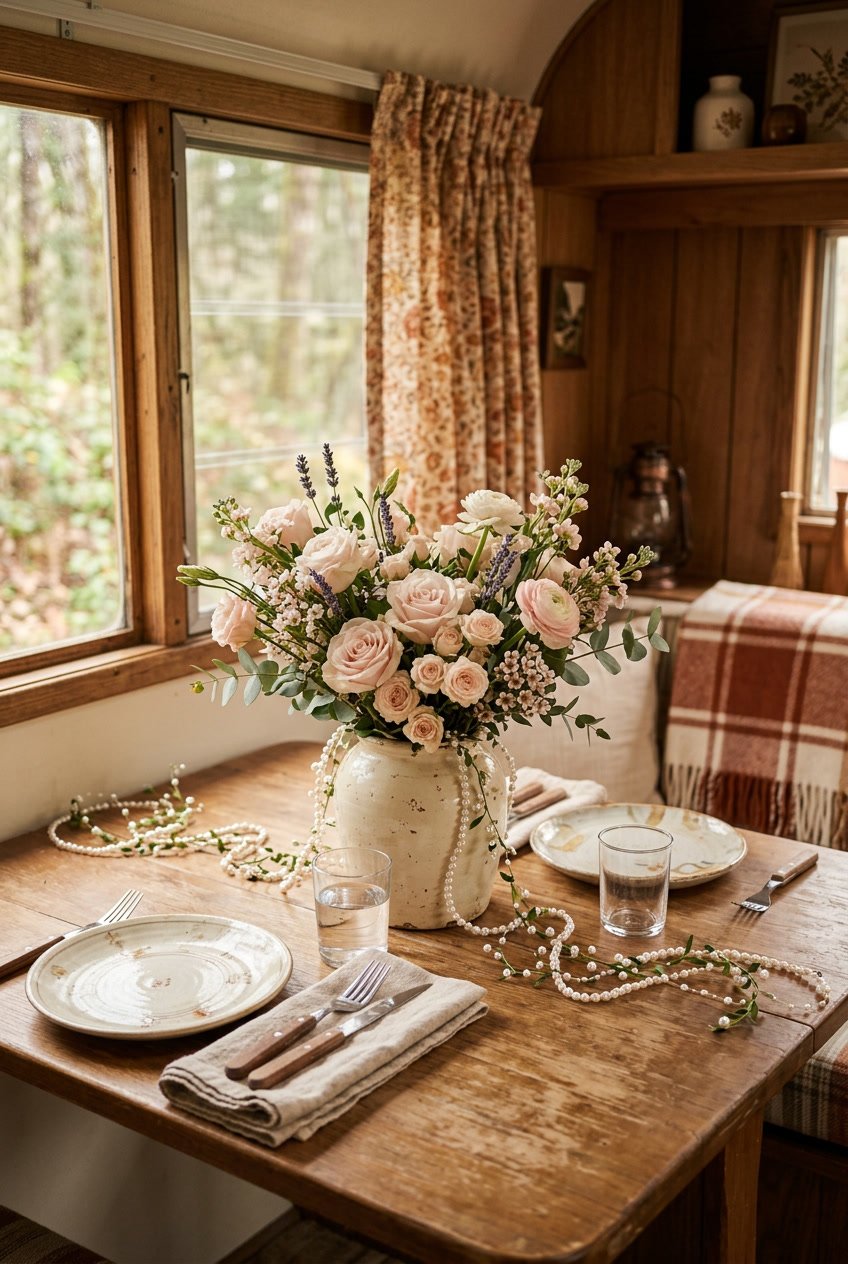
Pearl garlands bring a soft, vintage look that fits shabby chic. Drape them loosely around your centerpiece to add shimmer without looking fussy.
Mix lengths and loops to create depth. Let some pearls spill toward the edge of the table for a relaxed, romantic feel.
Use them with flowers, candles, or a simple bowl of fruit. The pearls help tie different elements together and make the whole setting feel more polished.
PRO TIP
Tuck short strands into crevices or around candle bases so they stay in place. Choose faux pearls for easy cleaning and worry-free travel.
10) Use gingham cloth napkins in soft pink or blue
Gingham napkins add a sweet, cozy touch to your camper table. You can fold them simply or tie them with twine for a relaxed look.
Choose soft pink or blue to keep the mood light and fresh. These colors pair well with white dishes and weathered wood surfaces.
Cloth napkins feel nicer than paper and cut down on waste. They also soak up spills better, which helps when space is tight.
PRO TIP
Mix patterns gently: try a gingham napkin with a tiny floral plate. Keep most items neutral so the napkins stay the main accent.
11) Set out mismatched antique teacups for drinks
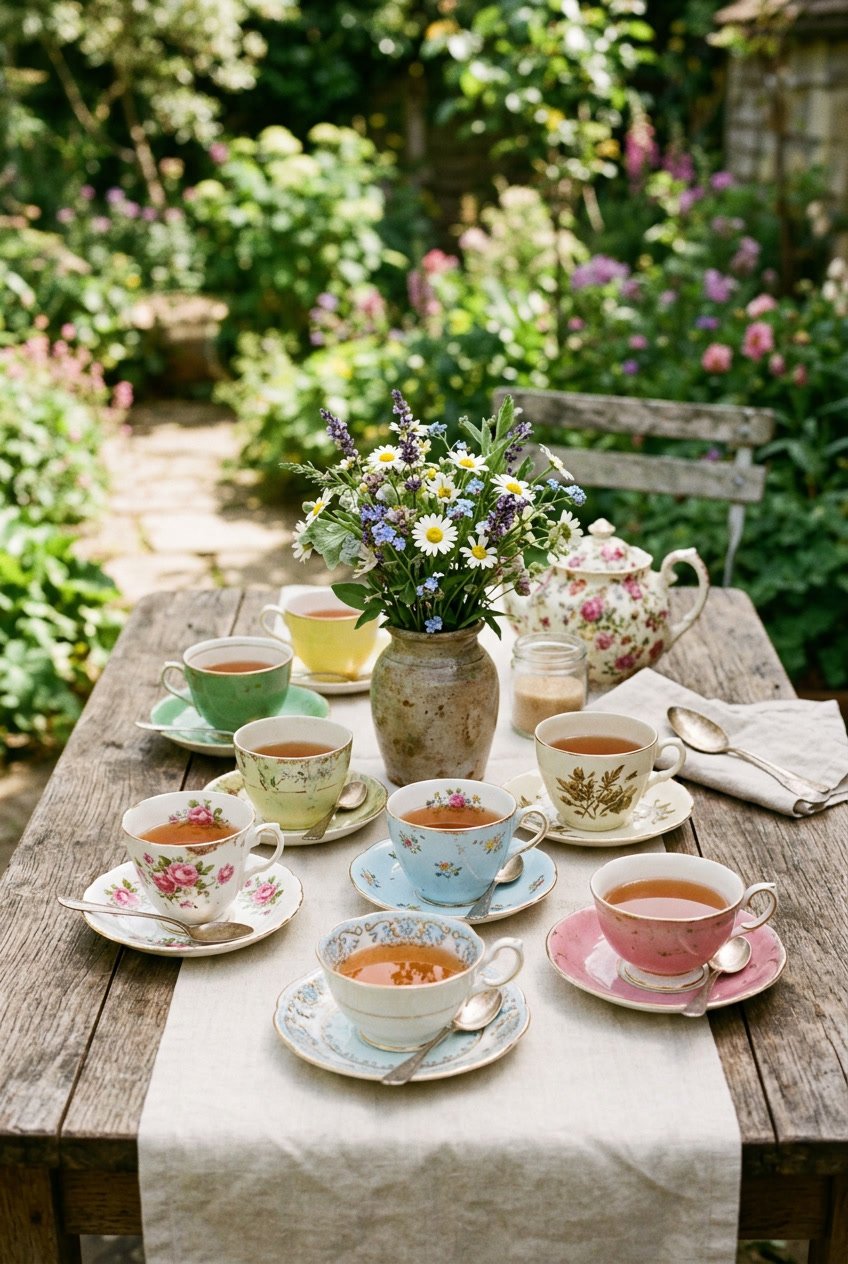
Using mismatched antique teacups adds charm and a lived-in feel to your table. You can mix floral patterns, soft colors, and different shapes for a cozy, vintage look.
Place teacups on saucers or small plates to catch drips. Group a few together as a centerpiece, or set one at each place for a thoughtful touch.
Use them for tea, coffee, or small cocktails. They make cold drinks feel delicate and warm drinks taste special.
PRO TIP
Fill teacups with a small paper napkin before pouring to steady them on uneven surfaces. This helps prevent spills when your camper moves.
12) Add chalkboard place cards with guests’ names
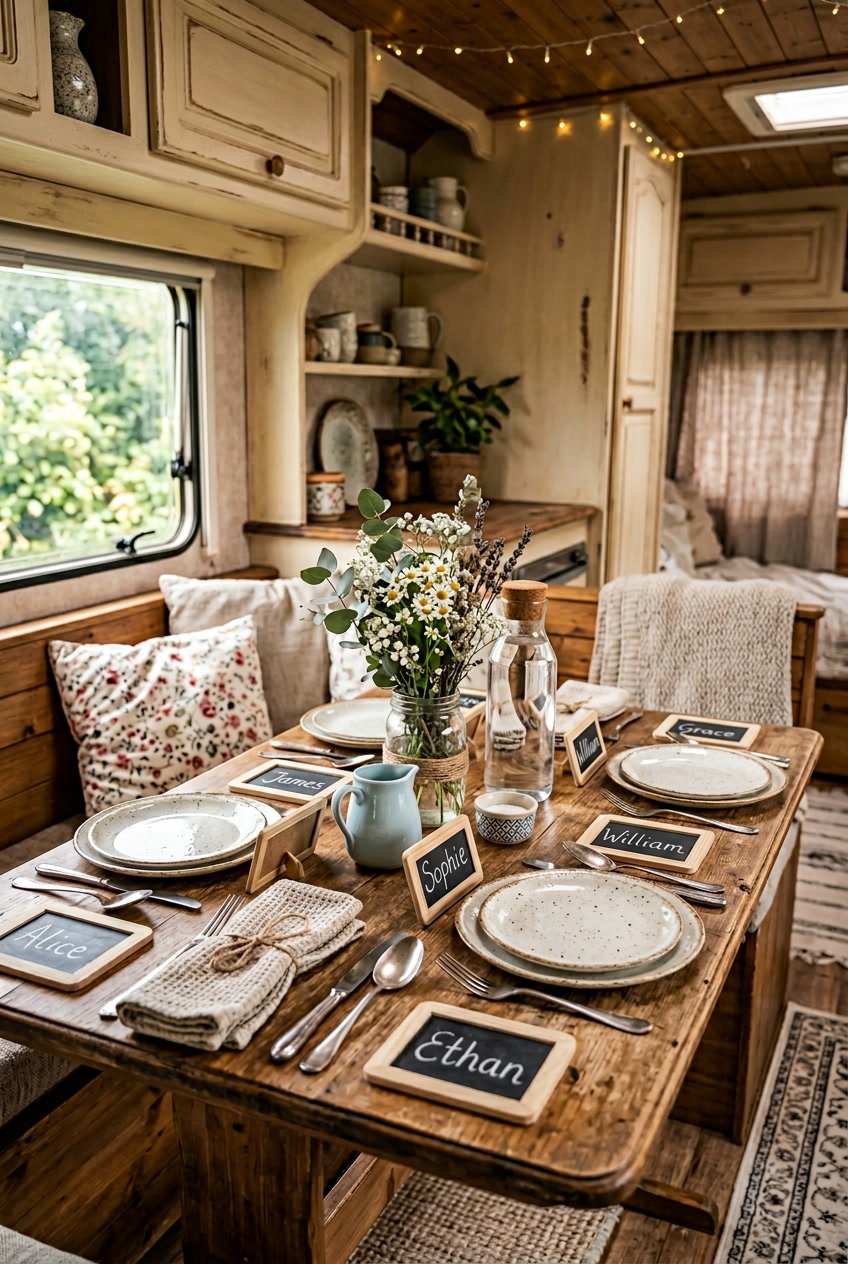
Chalkboard place cards add a cozy, handmade touch to your camper table. You can write each guest’s name in white chalk or use a chalk marker for a neater look.
Small frames, wooden stakes, or clipped mini-boards work well in tight spaces. They stay flat or stand up depending on the shape you choose.
Place them on napkins, plates, or tied to mason jars for easy swaps. They help guests find their seat and make the meal feel more special.
PRO TIP
Keep a small eraser and extra chalk handy so you can change names quickly. Use different handwriting styles or tiny drawings to match your shabby chic vibe.
13) Include a stack of old books as a base for centerpiece
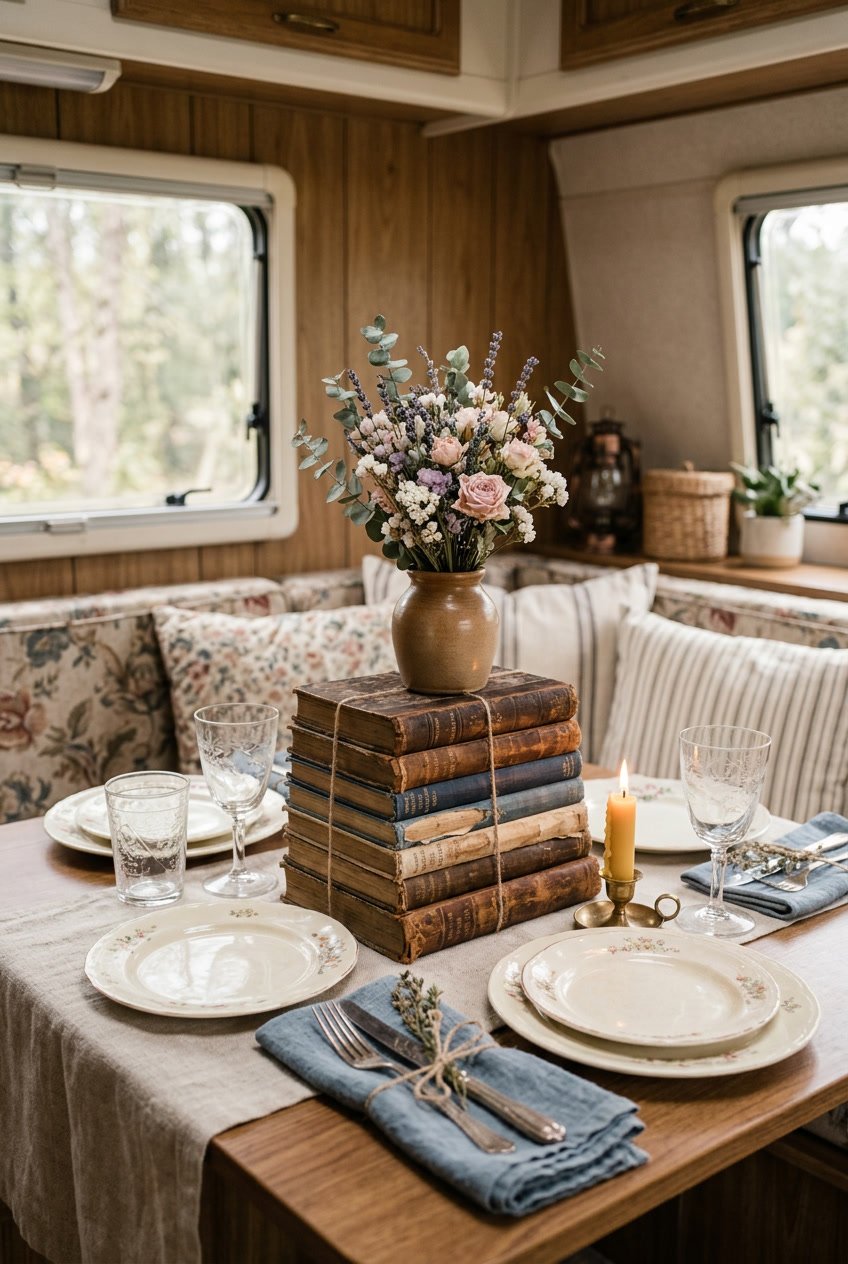
Place a small stack of old books in the center of your table to add height and charm. You can use mismatched covers and worn pages for a cozy, lived-in look.
Set a small vase, candle, or jar on top of the books to make the arrangement stable and attractive. The books lift the focal piece so it’s easier to see and appreciate.
Tie a ribbon or wrap twine around the stack for a neat finish. If you worry about stains, lay a small plate or coaster on top before adding anything wet.
PRO TIP
Choose books with flat spines and similar widths for a steady base. Swap titles seasonally to keep your table feeling fresh.
14) Use enamelware bowls for serving sides
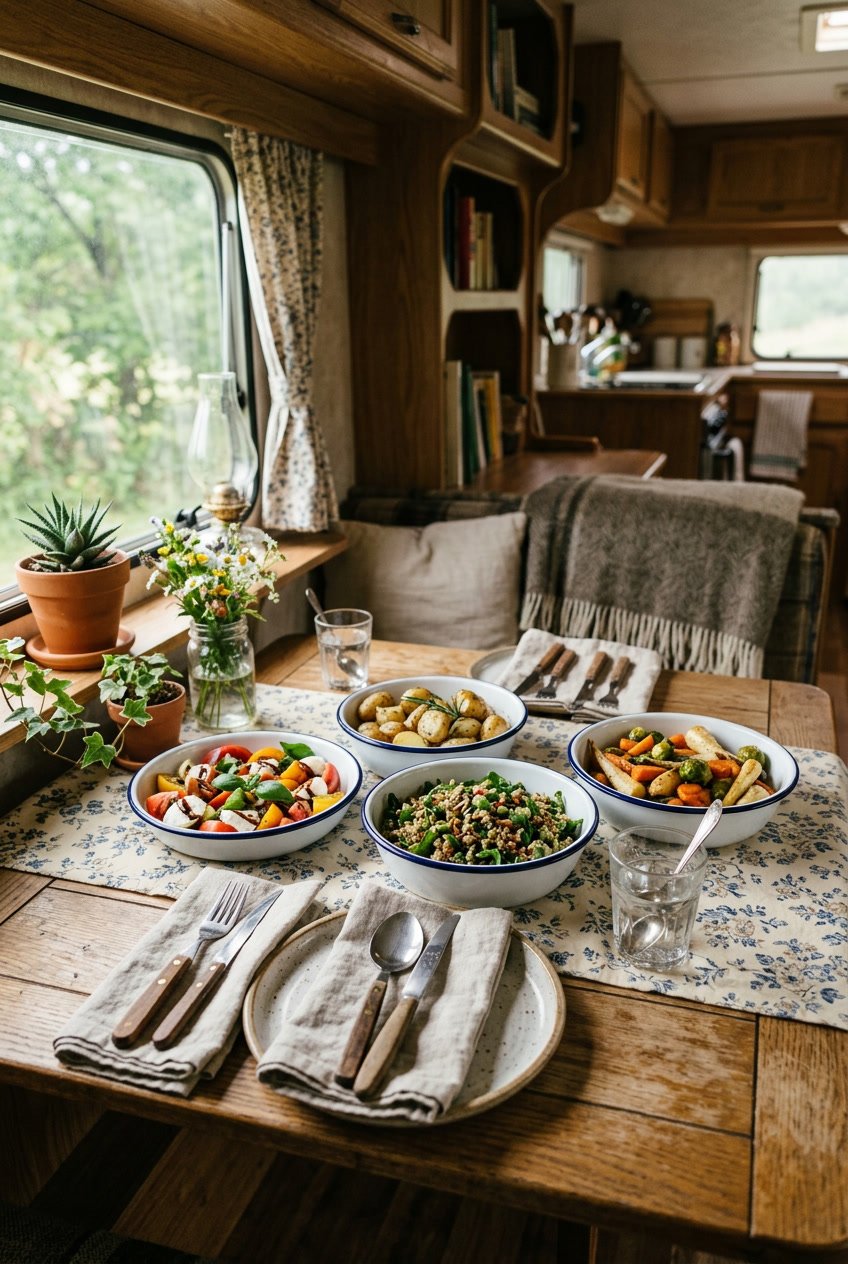
Enamelware bowls fit the shabby chic camper look. They feel cozy and simple, and they hold sides like salads, beans, and fruit well.
You can mix colors and chips for a lived-in feel. The slight wear gives charm without looking messy.
Enamel is light and easy to carry, so you can pass bowls around a small table. It cleans up quickly, which helps when space and water are limited.
PRO TIP
Stack a few different sizes to save space when packing. Line bowls with a small napkin to protect delicate foods and add a soft touch.
15) Hang fairy lights overhead for cozy ambiance
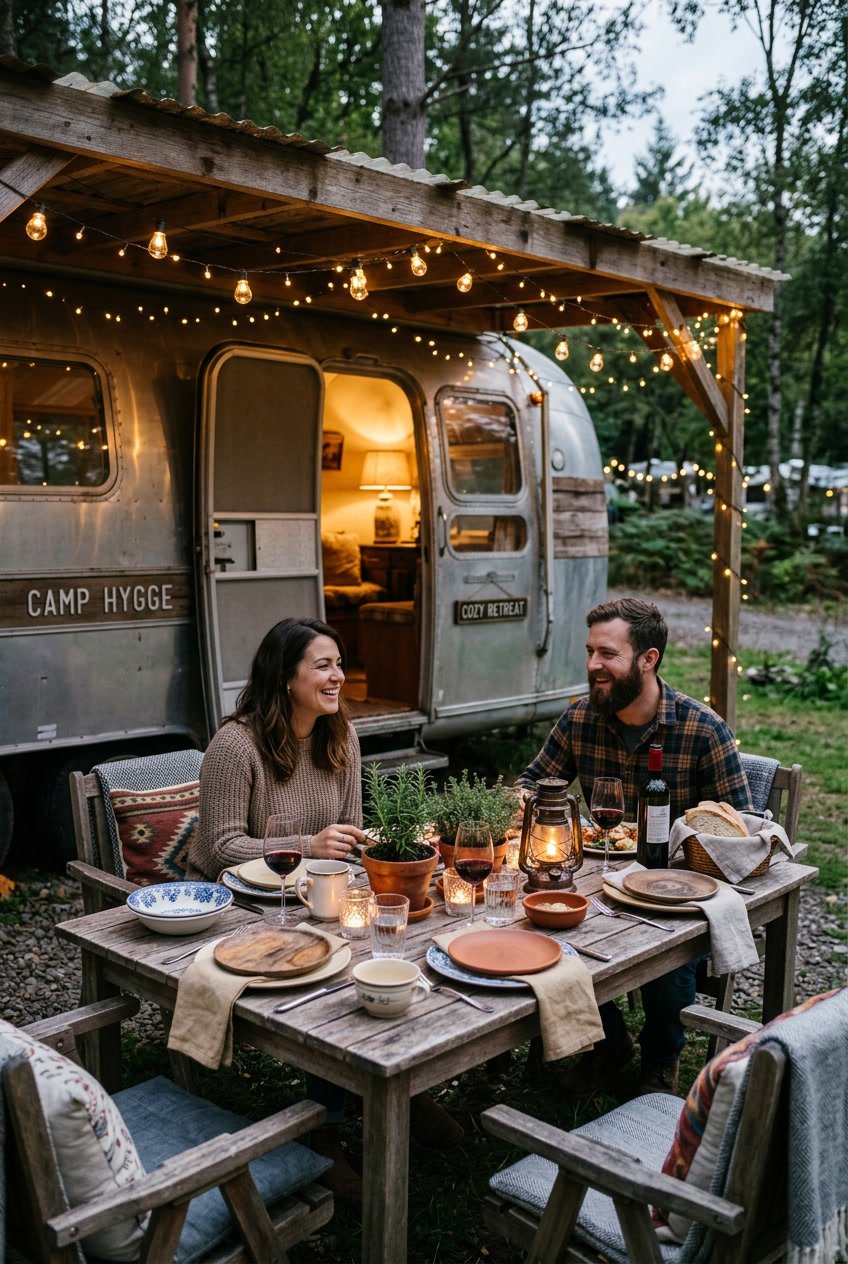
String fairy lights across the ceiling to make your camper feel warm and inviting. Soft light helps guests relax and makes meals feel special without harsh glare.
Drape lights along beams, curtain rods, or around storage cabinets. Use adhesive hooks or small clips so you can remove them without damage.
Choose warm white bulbs for a gentle glow. Battery-operated strands work well if you don’t want to run cords to an outlet.
PRO TIP
Twine lights through faux greenery or paper lanterns for added texture. Turn lights on a dimmer or timer to set the mood before dinner.
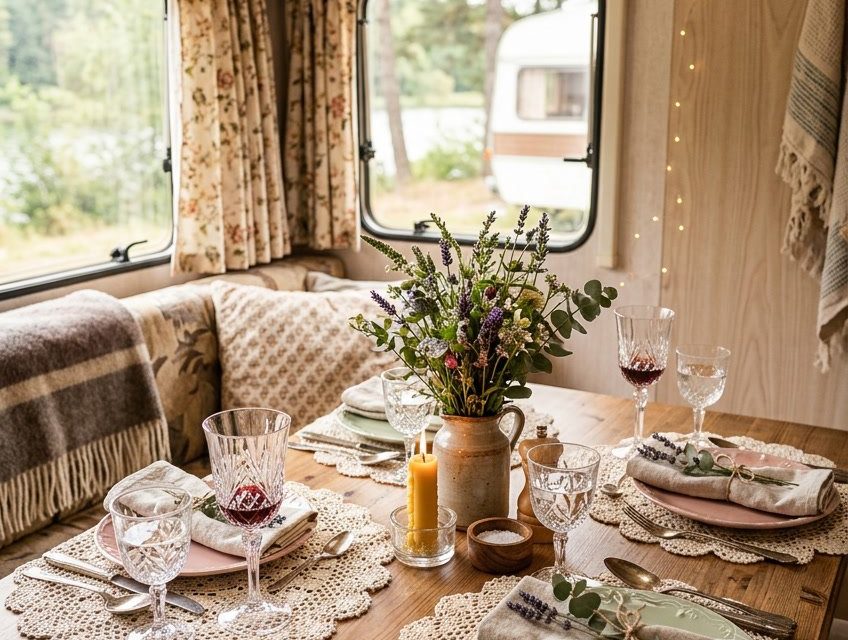
16) Add crocheted doilies under glassware
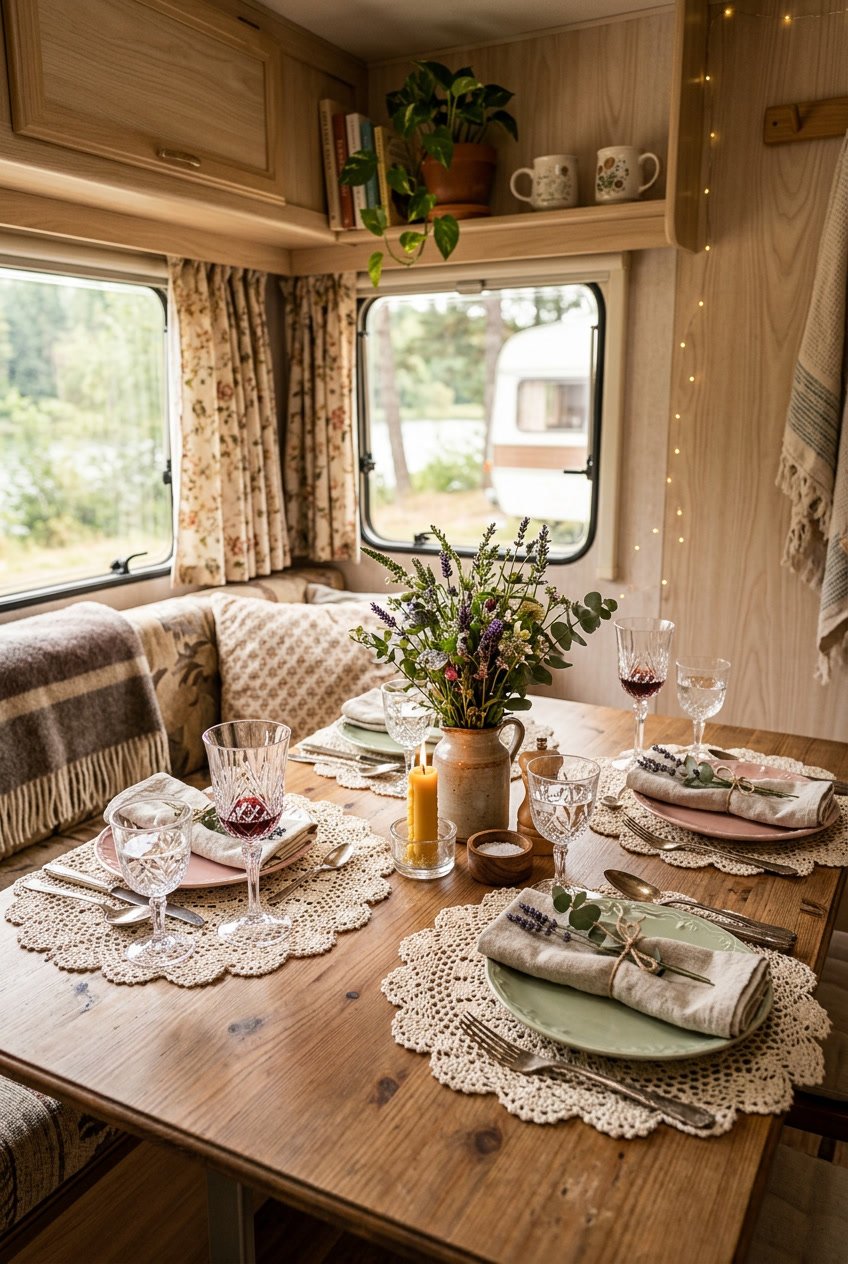
Placing crocheted doilies under glasses brings a soft, vintage feel to your camper table. You get charm and a bit of protection for your tabletop at the same time.
Choose small, round doilies that fit under wine glasses, tumblers, or mason jars. Mix patterns and colors for a collected look, or keep them all the same for a neat, cottage vibe.
Wash doilies gently and lay them flat to dry so they stay crisp. Replace any that stain or lose shape to keep your setting looking fresh.
PRO TIP
Use stiffened doilies if you want them to hold shape better under heavier glasses.


