A tiny crack in roof sealant costs about the same as a fast-food lunch to fix. Ignore it for one camping season, and it can turn into a full roof replacement costing $3,000 to $8,000 or more.[1][7][12] That gap between a small fix and a giant bill is exactly why this guide exists. Today’s article covers 4 “Expensive” RV Repairs You Can Do for Under $20, the exact tools to use, and how to know when a job is too big for a weekend fix.
Many RV owners assume that anything wrong with their rig means a trip to the shop and a scary invoice. But shop labor now runs about $150 to $225 an hour, and many mobile techs charge around $150 just to look at the problem before they even start fixing it.[6][10][11] The truth is, a surprising number of “big” RV problems start out small, and they can be handled with items from a hardware store for less than the cost of a tank of gas.
This friendly guide breaks down four repair categories that scare RV owners the most, shows the cheap materials that fix them, and explains why doing these small jobs early can save thousands of dollars down the road.[3][8][15]
Key Takeaways
- 🛠️ 4 “Expensive” RV Repairs You Can Do for Under $20 include roof/window leaks, plumbing leaks, tank sensor/toilet seal issues, and rattling doors or cabinets.
- 💰 Shop diagnostic fees alone often run around $150, while the DIY materials for these fixes usually cost less than $20 total.[6][10]
- 🏠 A full RV roof replacement can cost $3,000 to $8,000+, but simple sealant and tape applied early can help prevent that giant bill.[1][7][12]
- 🚿 Cheap items like self-fusing silicone tape, epoxy putty, and baking soda work as stopgaps for plumbing leaks and clogs.[2][11][12]
- 🧰 Building a small “under $20 kit” now can save owners hundreds or even thousands of dollars later.[3][8][9]
Why RV Repairs Feel So Expensive in the First Place
RV repairs feel painful for one simple reason: shop rates are high, and RV parts are often specialty items. Full roof replacement typically runs $3,000 to $8,000 or more depending on size and material.[1][7][12] A slide-out mechanism replacement can cost $1,500 to $4,000 or more.[1][7][12] Even something small can trigger a big bill once labor is added in, since shop labor commonly ranges from $150 to $225 per hour.[1][4][7]
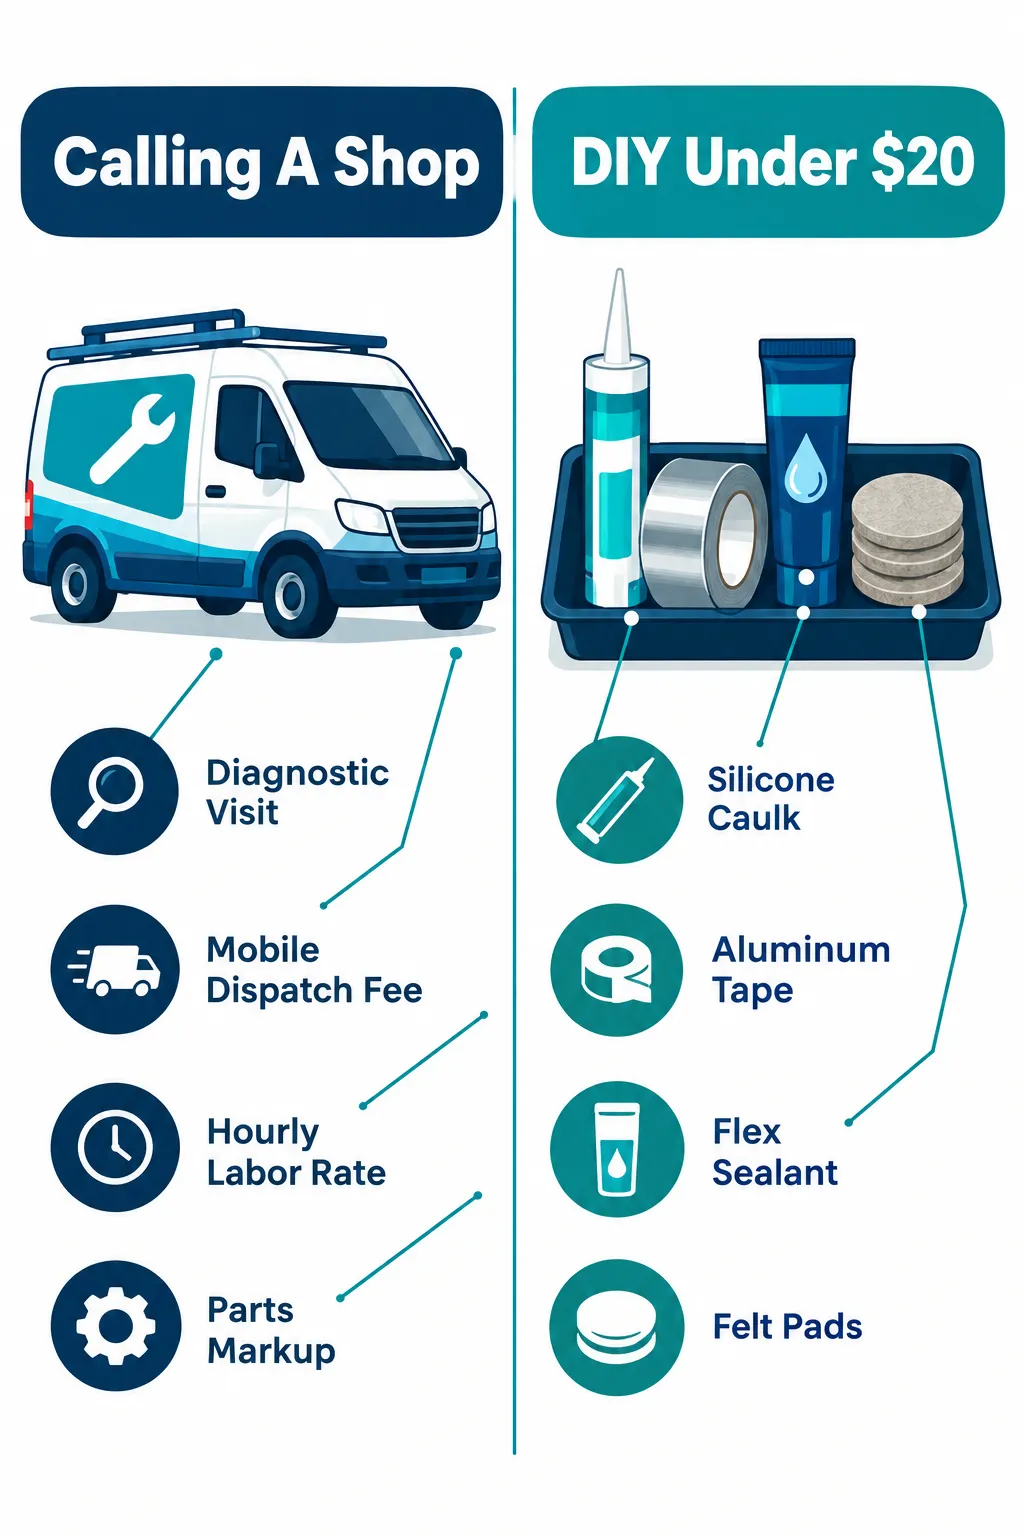
On top of hourly labor, many shops and mobile techs charge a flat fee just to show up. Mobile dispatch fees average around $75, and diagnostic or “look at it” visits often start near $150.[6][10] Tank cleaning services like hydro-jetting can start at $150 on their own.[10][11] That means an owner could pay $150 or more just to have someone confirm what is wrong, before a single part is replaced.
Here is the surprising part: many of the materials that fix these same problems cost less than $20 at a hardware store.[2][3][15] Clear silicone caulk, aluminum tape, spray sealant, and felt pads are common examples. The cost difference is not because DIY fixes are lower quality, it’s because a huge chunk of the shop bill covers labor, overhead, and travel, not the actual materials.[6][9][10]
“The biggest RV repair bills usually start as the smallest problems.” That single idea is the whole reason this guide exists.
Understanding this gap is the key to saving money as an RV owner. Learning to spot small issues early, and having a few cheap supplies on hand, turns “emergency repair” situations into “five-minute fix” situations.[8][9][12]
4 “Expensive” RV Repairs You Can Do for Under $20
Below are the four repair categories RV owners fear the most, along with the low-cost fix for each one. These are not permanent replacements for major structural work, but they are proven ways to stop damage, avoid shop visits, and buy time until a bigger repair is truly needed.[2][3][15]
1. Roof, Window, and Siding Leaks
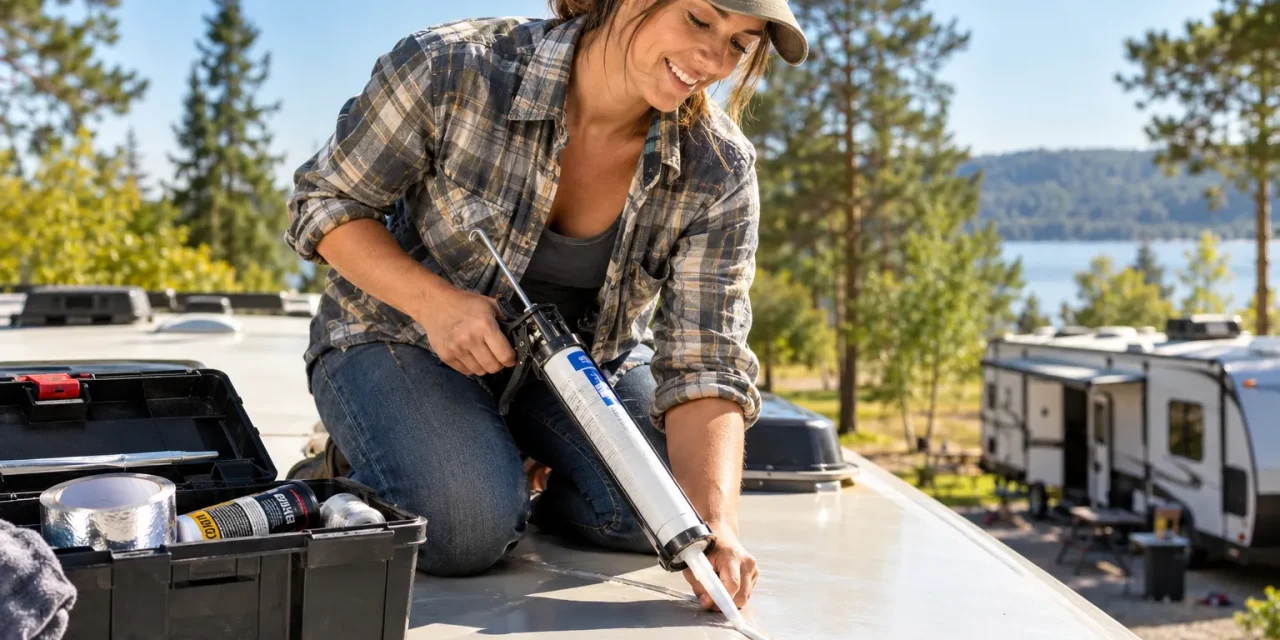
Water leaks are the scariest word in the RV world, and for good reason. A neglected roof leak can lead to soft floors, moldy walls, and eventually a full roof replacement costing thousands of dollars.[1][7][12] But most leaks start as a tiny gap in the sealant around a vent, skylight, or window trim, and that gap can be closed for less than $20.[2][15]
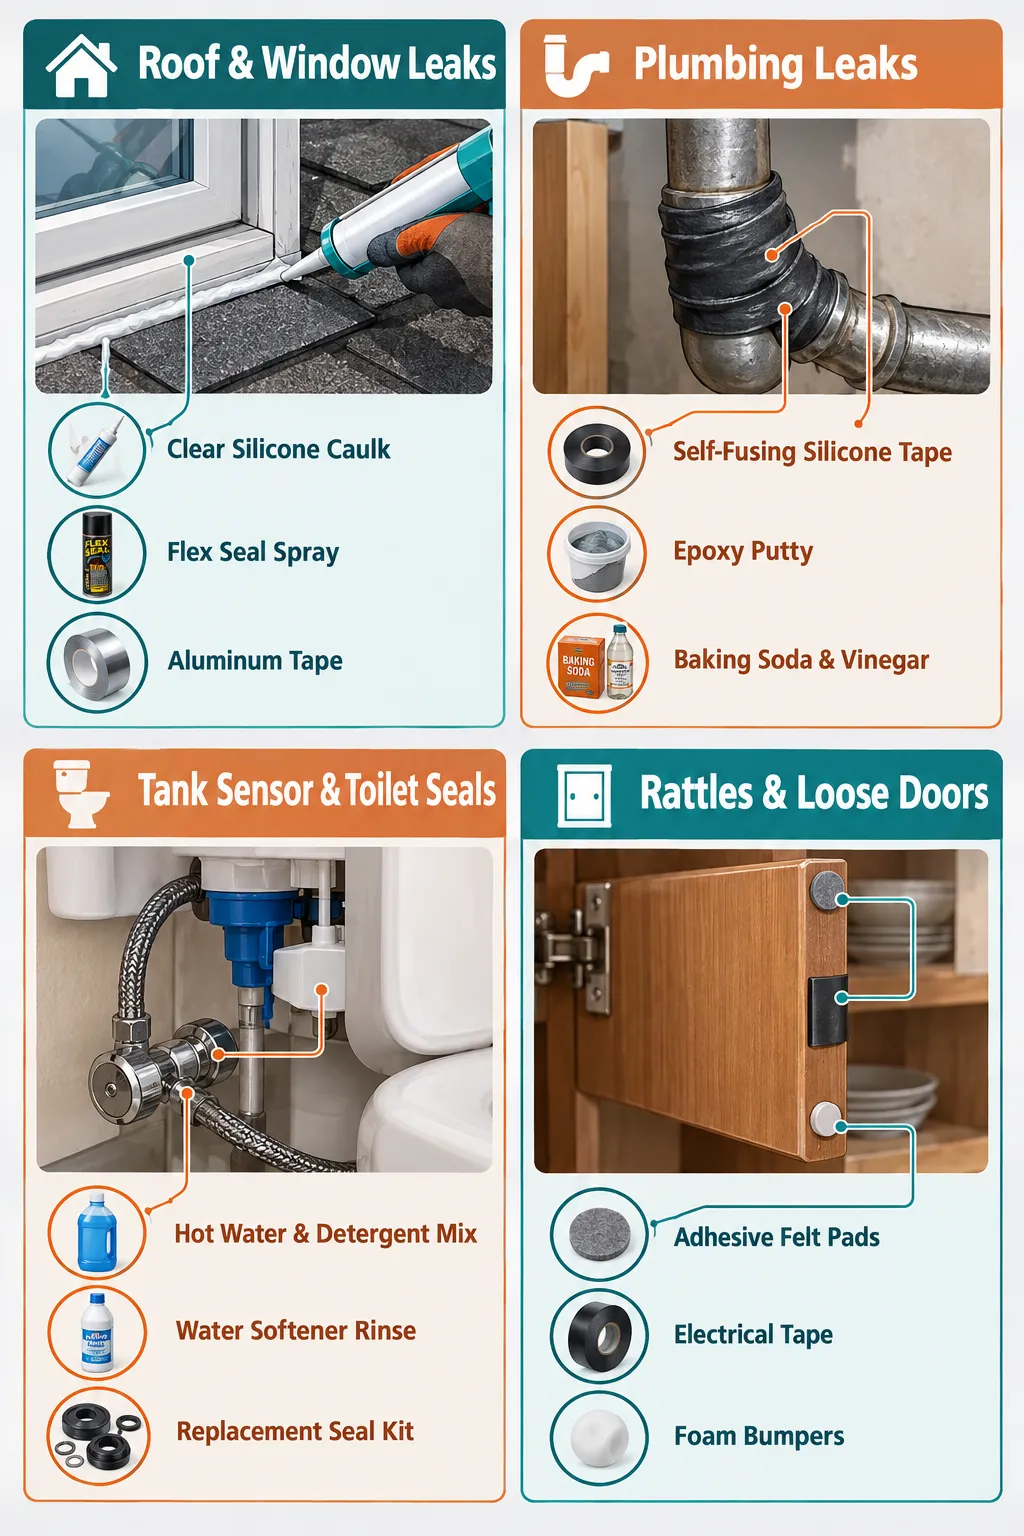
What to use:
| Tool | What It Fixes | Typical Cost |
|---|---|---|
| Clear silicone caulk | Small gaps around vents, trim, windows | Under $10 |
| Flex Seal spray | Larger cracks or seams on the roof | Under $20 |
| Aluminum tape | Quick patch on siding or roof seams | Under $10 |
To use these tools, first clean and dry the area completely. Water and dirt stop sealant from sticking. Apply a thin, even line of caulk or a light coat of spray sealant, then smooth it with a gloved finger or small tool. For a quick emergency patch, aluminum tape works well because it sticks to almost any RV surface and holds up in rain.[2][15]
Doing this small job every few months is one of the easiest ways to avoid the roof and window repairs that cost the most.[7][12] A five-minute check with a flashlight, looking for cracked or peeling sealant, is often all it takes to catch a problem before it grows.
2. Plumbing Leaks and Minor Pipe Damage
Plumbing problems are another classic “expensive” RV repair. A cracked pipe fitting or a slow drip under the sink might not look serious, but calling a plumber or mobile tech to fix it can easily cost more than $150 for the visit alone.[11][12] Left alone, small leaks cause water damage to floors and walls, which turns into a much bigger bill.[2][12]
The good news is that many plumbing leaks can be stopped, at least temporarily, with items that cost less than $20.[2][11]
What to use:
- Self-fusing silicone tape, wraps tightly around a leaking joint or cracked pipe and seals itself with no glue mess.
- Epoxy putty, kneaded by hand and pressed onto a crack or hole; it hardens in minutes and holds under water pressure.
- Baking soda and vinegar, poured down a slow drain to break up minor clogs before they turn into backups.
To apply self-fusing tape, stretch it slightly as it’s wrapped around the pipe, overlapping each layer. The tape bonds to itself and forms a tight seal. Epoxy putty works well on small cracks in rigid pipes; just follow the mixing directions on the package and give it time to cure before using the water system again.[2][11]
These are not meant to replace a full pipe repair forever. But they buy time, stop water damage, and often mean an owner does not need an emergency service call at all.[11][12]
3. Waste Tank Sensor and Toilet Seal Problems
Few things frustrate RV owners more than a waste tank sensor that always reads “full,” even right after dumping the tank. Many owners assume this means an expensive sensor replacement. In many cases, the sensor is not broken at all, it is just coated in buildup.[3]
A simple cleaning treatment often restores accurate readings for around $10 to $15 per treatment, which is far cheaper than replacing the sensor.[3]
What to use:
- Hot water, several gallons, as hot as the tank system allows
- Dish detergent, a few tablespoons to break down grease and waste film
- Water softener, helps loosen mineral buildup on the sensor
Mix these together, pour the mixture into the tank through the toilet, and let it sit for a few hours before driving or moving the RV so it sloshes around and cleans the sensor pads. This same cleaning approach also helps reduce toilet odor problems that owners sometimes mistake for a bigger plumbing issue.[3]
Toilet blade or ball seals are another item many owners think requires a full toilet replacement. In reality, most RV toilets are built so the seal can be replaced on its own using an inexpensive part, without swapping the whole unit.[3][13] This single swap can solve leaking or a toilet that will not hold water, for a fraction of the cost of a new toilet.
4. Rattles, Squeaks, and Loose Doors or Cabinets
Rattling cabinets and squeaky doors are not dangerous, but they are one of the most common reasons owners call a shop, since the noise is annoying enough to want it gone fast.[15] A technician’s minimum diagnostic charge for a “quick fix” like this can easily be $150 or more, especially with a mobile visit fee added on.[6][10]
The fix is almost always something small: worn-out padding, a loose latch, or a gap where two surfaces bump together while driving.
What to use:
- Self-adhesive felt pads, stuck to cabinet edges, drawer corners, and door frames to stop rattling contact points
- Electrical tape, wrapped or layered to fill small gaps and quiet loose parts
- Foam weatherstrip, pressed into gaps around windows and cabinet doors for extra cushioning
Felt pads typically cost under $10 for a large sheet that can be cut into dozens of small pieces.[15] Simply peel, stick, and test the door or cabinet by opening and closing it a few times. This tiny fix often solves a noise that has bothered an owner for months, all without a single tool beyond scissors.
How to Build Your Under-$20 RV Repair Kit
Now that the four biggest fixes are covered, it helps to have the materials ready before they’re needed. A small kit kept in a cabinet or storage bay means these fixes can happen in minutes instead of becoming a weekend project.
A simple under-$20-per-item RV repair kit includes:
- Clear silicone caulk and a small caulking tool
- A roll of aluminum tape
- Self-fusing silicone tape
- A stick of epoxy putty
- Dish detergent and water softener (for tank sensor cleaning)
- A sheet of self-adhesive felt pads
- A roll of electrical tape
- Flex Seal spray for larger cracks
Most of these items are sold at hardware stores, auto parts stores, or RV supply shops for well under $20 each.[2][3][15] Keeping them stocked means a leak, rattle, or clog can often be handled the same day it’s noticed, rather than waiting for an appointment.
Many RV budgeting guides recommend setting aside a separate repair fund of about $2,000 to $5,000 for major issues like roof replacement or slide-out repair.[8][9][12] Learning these small DIY skills does not replace that fund, but it does reduce how often owners need to dip into it, since many small problems get solved before they grow into big ones.[8][9]
A few other cheap habits worth adding to a maintenance routine:
- Adding mesh to roof fan covers to keep debris and pests out
- Using zip ties and plastic bags to protect outdoor electrical connections from rain
- Stuffing a towel or foam plug into cable and hose access points to block moisture
These small, inexpensive steps are widely recommended because they prevent moisture damage and component failure that would otherwise lead to costly repairs later.[3][8][15]
When to Stop DIY and Call a Pro
Not every RV problem belongs on this list, and it’s important to know the difference between a quick fix and a job that truly needs a professional. The four repairs above work well as early fixes and stopgaps, they stop small problems from becoming disasters, but they are not permanent replacements for major components.[2][3][11]
Call a professional when:
- Water has already soaked into the roof decking or wall framing, not just the surface
- A slide-out mechanism grinds, sticks, or will not move at all
- The air conditioner, furnace, or refrigerator stops working completely
- Plumbing leaks return quickly even after a tape or putty repair
- There is visible mold, soft flooring, or sagging in the roof or walls
Full roof replacement, slide-out mechanism repair, and major appliance work involve specialized skills and tools that go beyond a $20 fix.[1][4][7] Trying to force a DIY solution on these bigger jobs can sometimes make the repair more expensive later, since mistakes may need to be undone by a professional anyway.
The smart approach is simple: use the sub-$20 fixes for small, early-stage problems, and save the repair fund for the big-ticket items that genuinely need a shop.[8][9][12] This balance is what keeps RV ownership affordable over the long run.
Conclusion
RV ownership does not have to mean constant fear of the next repair bill. As shown throughout this guide to 4 “Expensive” RV Repairs You Can Do for Under $20, many of the scariest-sounding problems, roof leaks, plumbing drips, tank sensor errors, and rattling doors, can be handled with a few cheap items and a little patience.
The next steps are simple: build a small repair kit using the items listed above, do a quick roof and seal check every few months, and keep the hot-water tank sensor treatment on hand for those annoying false “full” readings. Catching problems early, with materials that cost less than $20, is one of the easiest ways to protect an RV and a wallet at the same time.[3][8][12]
Start small, stay consistent, and save the big repair fund for the truly big jobs. That one habit alone can turn years of RV ownership from stressful into simple.
References
[1] rvrepaircost – https://rvrepaircost.com/
[2] 7 Alternative Repair Solutions For Common Rv Issues – https://www.habitatista.com/29903/7-alternative-repair-solutions-for-common-rv-issues/
[3] Diy Rv Hacks That Save You Thousands – https://www.gadgetreview.com/diy-rv-hacks-that-save-you-thousands
[4] Most Common Rv Repairs Cost – https://www.jalopnik.com/2082018/most-common-rv-repairs-cost/
[5] Rv Maintenance 10 Ways To Save Money In Rv Repairs – https://www.reddit.com/r/GoRVing/comments/72m8pi/rv_maintenance_10_ways_to_save_money_in_rv_repairs/
[6] Pricing – https://www.robthervguy.com/pricing
[7] Rv Repair Cost – https://hudson-automotive.com/rv-repair-cost/
[8] Rv Maintenance Costs What Youll Really Spend – https://ogrvs.com/rv-maintenance-costs-what-youll-really-spend/
[9] Reducing Your Rv Repair Cost Budget – https://www.fulltimefamilies.com/reducing-your-rv-repair-cost-budget/
[10] rvfix – https://www.rvfix.com/