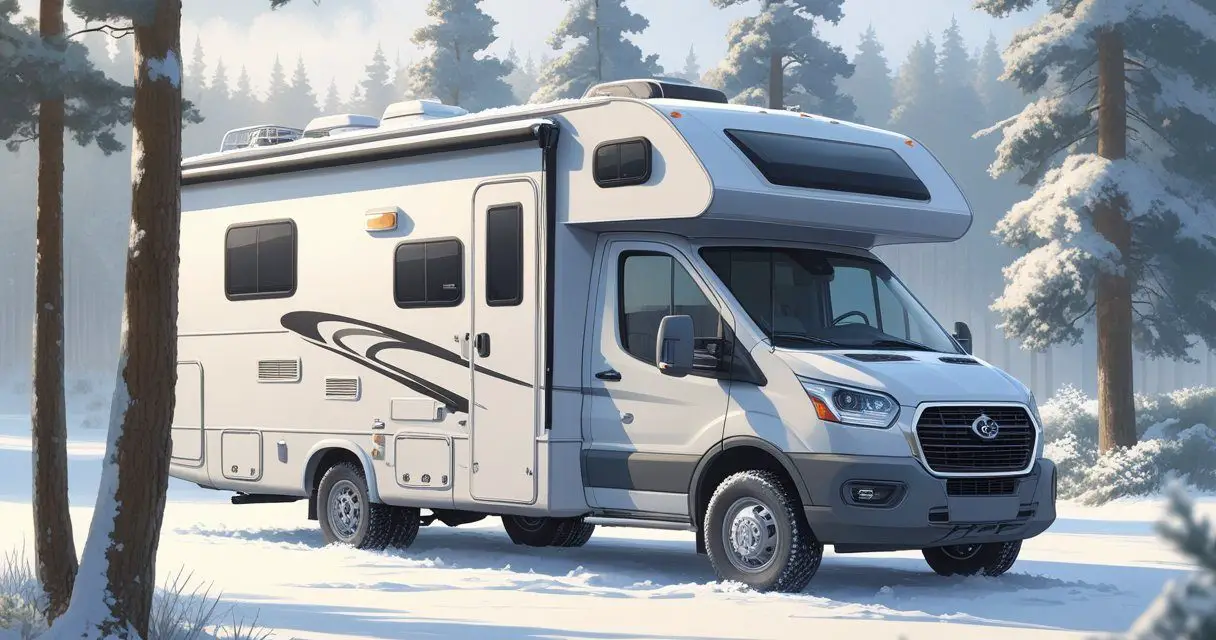
Winter RV camping comes with its challenges, especially keeping your rig warm and preventing frozen pipes. RV AirSkirts offer a potential solution to these cold-weather woes. These inflatable tubes create a barrier around the bottom of your RV, blocking wind and keeping warmth where you want it—inside your home on wheels.
Many RVers wonder if these products actually deliver on their promises. After a full winter season of testing in both Kentucky’s below-zero temperatures and Georgia’s milder climate, the results are in from the video below.
Would you like to save this article?
While they definitely help maintain warmer floors and protect plumbing, there are some practical considerations about storage, weight, and durability that might influence your decision about whether they’re worth the investment for your particular camping style.
Key Takeaways
- RV AirSkirts effectively keep floors warmer and help prevent pipe freezing during winter camping.
- The inflatable tubes are easy to install but can be difficult to pack away and store due to their bulk and weight.
- Despite some durability concerns with punctures, they stay in place during high winds and could be worth considering for extended cold-weather stays.
What Are RV AirSkirts?
RV AirSkirts are inflatable tubes designed to wrap around the bottom of your RV. They create a barrier that blocks wind from getting underneath your vehicle during cold weather. Unlike traditional hard skirting, these inflatable options offer portability and flexibility for RVers who move frequently.
Design and Basics
RV AirSkirts consist of air-filled tubes that come in different sizes (typically 4-foot, 6-foot, and 8-foot sections). You position these tubes around the entire perimeter of your RV, creating a seal between the ground and your vehicle’s undercarriage.
The tubes are made from durable material, though they can be punctured if placed on rough surfaces. They come with:
- A specialized pump for inflation/deflation
- Storage bags (which are quite bulky)
- Various lengths to fit different RV sizes
For taller fifth wheels, you might need “high clearance” versions, which tend to cost more than standard models for lower-profile RVs.
How AirSkirts Work
AirSkirts create a thermal barrier by blocking cold air from flowing underneath your RV. This simple approach has several benefits:
- Temperature regulation: Keeps floors warmer inside your RV
- Pipe protection: Helps prevent freezing of exposed plumbing
- Energy efficiency: Reduces propane usage for heating
The tubes respond to temperature changes throughout the day. When it’s warm, the air inside expands and increases pressure. During cold weather, the air contracts, sometimes requiring a quick top-off inflation.
Installation time: About 45 minutes for a complete setup
Despite their lightweight appearance, these tubes stand up remarkably well to harsh weather. Even in tornado-warning conditions, properly installed AirSkirts stay firmly in place.
Comparing AirSkirts to Traditional Skirting
| Feature | AirSkirts | Traditional Foam/Vinyl Skirting |
|---|---|---|
| Setup time | 30-45 minutes | Several hours |
| Portability | Portable but bulky | Less portable |
| Storage | Large bags (can weigh ~100 lbs) | Requires large storage space |
| Adaptability | Works on any surface | May not work everywhere |
| Durability | Can puncture | Weather-resistant but can tear |
| Weight | Heavy | Often lighter |
AirSkirts shine in situations where traditional skirting isn’t practical:
- Campgrounds that don’t allow permanent skirting
- When you’re staying somewhere for weeks rather than months
- Concrete pads where attaching traditional skirting is difficult
The modular design lets you configure them around any RV shape, which is a big advantage over rigid skirting options. However, they’re not perfect – they can be challenging to pack away (taking up to 2 hours), and the weight might be an issue if you’re close to your vehicle’s weight limits.
Putting Them To The Test
Braving Kentucky’s Winter Extremes
You might wonder if those inflatable RV skirting tubes really work when temperatures drop below zero. In the video, during January in Kentucky, these AirSkirts faced a serious challenge with subzero temperatures, heavy snow, and ice. The results?
Not a single frozen pipe issue! Even with concerns about exposed low-point drains that stick out from under the RV, everything stayed functioning properly. The heated underbelly combined with the AirSkirts provided excellent protection against the harsh winter elements.
However, durability proved problematic. Three skirting tubes developed holes where they contacted the concrete pad. Finding these punctures wasn’t simple – it required reinflating them, spraying with soapy water, and watching for tiny bubbles to appear.
Taking Your AirSkirts on the Road
Setting up your AirSkirts is surprisingly quick. While the company claims a 30-minute installation, you’ll probably need about 45 minutes to get everything properly adjusted. The inflation process is straightforward with the included pump.
Packing them away? That’s a different story. Here’s what you’ll face:
- Deflation: Easy with the reverse function on the pump
- Folding: Takes about 2 hours to properly fold for storage
- Weight: Nearly 100 pounds per storage bag
- Bulk: Requires significant truck space for transport
The high-clearance models for fifth wheels are particularly expensive compared to versions for lower-profile RVs. During use, you’ll need to monitor air pressure as temperatures change – warmer days cause expansion while cold nights lead to contraction.
What Others Think About AirSkirts
Your AirSkirts will definitely get neighbors talking! At a Georgia campground, fellow RVers constantly asked about them. The campground manager even took photos to share with friends, including website information. They’re particularly appealing for people who:
- Can’t install traditional foam board skirting
- Need a portable solution
- Stay in places with restrictions on permanent skirting
During a severe storm with tornado warnings in Georgia, the AirSkirts proved incredibly stable. Despite evacuating for safety, the skirting remained perfectly in place through high winds – an impressive performance that adds to their practical value.
Benefits of RV Insulation Tubes
Keeping Your Floors Cozy
RV insulation tubes really work at keeping your floors warmer during cold weather! When placed around the bottom of your RV, these air-filled tubes block cold winds from blowing underneath your vehicle. This creates a pocket of still air that acts as insulation, helping maintain warmer temperatures inside. During freezing January temperatures in Kentucky, the difference was noticeable – no more icy-cold floors in the morning!
Protecting Your Water System
One huge advantage is how these tubes help prevent frozen pipes. Even with temperatures dropping below zero and heavy snow in Kentucky, there were zero issues with frozen pipes while using the insulation tubes. This is especially important for exposed parts like lowpoint drains that stick out from underneath the RV, which are typically vulnerable to freezing. Your bathroom plumbing stays safe even in harsh winter conditions!
Simple to Set Up
You’ll appreciate how quickly these tubes can be installed. The setup process is straightforward:
- Unpack the tubes
- Inflate them using the included pump
- Position them around your RV’s perimeter
While the instructions claim a 30-minute installation, a more realistic timeframe is about 45 minutes to get everything properly positioned and adjusted. Still, that’s much faster than installing traditional skirting options!
Weather-Resistant Performance
These tubes stay put even during severe weather! During a tornado-level storm in Georgia that was bad enough to require evacuation, the tubes remained firmly in place. Not a single tube budged despite the powerful winds. This stability gives you peace of mind when you’re facing rough weather conditions in your RV.
Adaptable and Travel-Ready
The modular design makes these tubes versatile for different situations. If you’re staying somewhere that doesn’t allow permanent skirting or foam board installation, these tubes are a perfect alternative. They’re especially useful for:
- Short-term stays
- Campgrounds with restrictions
- Different RV shapes and sizes
- Locations where permanent skirting isn’t practical
Their adaptability also makes them a conversation starter – other RVers will definitely be curious about your setup!
Drawbacks of RV Air Skirting
Easy to Get Holes
These inflatable skirting tubes can puncture surprisingly easily. Even when placed on smooth concrete pads, the tubes can develop holes from normal friction. Finding these holes isn’t simple either – you’ll need to reinflate the tubes, spray them with soapy water, and watch for tiny bubbles appearing. This troubleshooting process is time-consuming and frustrating, especially in freezing winter conditions when you most need your skirting intact.
Difficult to Store
While setting up RV air skirting might take less than an hour, packing everything away is another story. Getting all the air out is simple enough with the included pump, but folding these tubes properly to fit back in their storage bags can take two hours or more. You’ll likely need to sort them by size (8-foot sections in one bag, 6-foot and 4-foot sections in another) just to make them fit at all.
Too Big and Heavy
The storage bags for these air tubes are extremely bulky and heavy. Each fully packed bag can weigh around 100 pounds, which is a serious consideration if you’re already near your RV’s weight limits. The bags are also awkwardly sized – they’ll take up significant space in your truck or storage compartments. For traveling, you’ll need to carefully plan where these large bags will fit.
Expensive Investment
The price tag for RV air skirting is substantial, especially for fifth wheels with high clearance. Lower-profile RVs like travel trailers or Class B motorhomes might have less expensive options, but the complete system represents a significant investment either way. When factoring in the potential need for repairs due to punctures, the cost becomes even more important to consider.
Air Pressure Problems
Temperature changes cause predictable but annoying pressure fluctuations in your air skirting. When the weather warms up, the air inside expands, potentially making the tubes too tight. During cold snaps, they lose pressure and may need reinflation. This means you’ll need to monitor and adjust the air pressure regularly – adding another maintenance task to your winter camping routine.
How to Care for Your RV Inflatable Skirting
Fixing Holes When They Happen
Punctures can be a frustrating part of using inflatable RV skirting. If you find your skirting deflating, you’ll need to find and patch the hole. Here’s how to do it:
- Finding the hole: The bottom side that touches the ground is most likely to get damaged, especially on concrete pads. Keep a repair kit handy during winter months, as fixing holes quickly will maintain your heat barrier.
Dealing with Air Pressure Shifts
Your inflatable skirting will naturally expand and contract with temperature changes. This is normal but requires some attention:
- When temperatures rise: The air inside expands, making the skirting tighter. You may need to release some air.
- When temperatures drop: The air contracts, making the skirting looser. You’ll likely need to add more air.
Check your skirting’s firmness every few days, especially after big temperature swings. The good news? Even in strong winds and storms, properly inflated skirting stays firmly in place.
Storage and Setup Tips
Setup process:
- Allow about 45 minutes for complete installation
- Use the pump that comes with your skirting
- Space tubes evenly around your RV’s perimeter
Storage challenges:
- Deflate using the reverse function on your pump
- Fold systematically – try rolling from one end
- Group similar sizes together (8-footers in one bag, smaller sizes in another)
Remember that these systems are bulky and heavy (bags can weigh nearly 100 pounds each). Consider where you’ll store them when traveling, as they take up significant space in a truck bed or storage compartment.
The tradeoff for their bulk is a warmer floor and better protection for your pipes during freezing temperatures. For seasonal setups where you’ll stay put for months, the initial setup time is worth it.
Do Air Skirts Really Work for Your RV?
Are They Worth Your Money?
After a full winter season of testing Air Skirts on the RV through freezing Kentucky temperatures and chilly Georgia nights, the host in the video can share some honest thoughts about these inflatable RV skirting tubes.
The price tag is steep, especially for high-clearance fifth wheels. Before spending your hard-earned cash, think about whether the benefits justify the cost for your situation.
While they absolutely do work to keep floors warmer and prevent pipes from freezing (I survived below-zero temps without a single frozen pipe!), there are some significant drawbacks to consider:
- Durability issues: Three tubes developed holes within just two weeks
- Very heavy: Each bag weighs nearly 100 pounds
- Bulky to transport: Takes up major storage space
- Time-consuming to pack up: About 2 hours to deflate and fold properly
When These Make Sense for You
Air Skirts might be right for you if:
- You camp in truly cold weather regularly
- You can’t use traditional foam board skirting due to campground rules
- You have space to store the bulky bags
- Storage weight isn’t a concern for your rig
- You’ll stay put for longer periods in cold weather
They’re super easy to inflate and install (about 45 minutes), and they stay firmly in place even during severe storms with high winds. The modular design lets you customize the setup for your specific RV.
If you move frequently or are tight on storage space and weight capacity, you might want to consider other winterizing options instead. For seasonal setups where you’ll stay in one spot for months, they can be a good solution despite the drawbacks.


