Would you like to save this article?
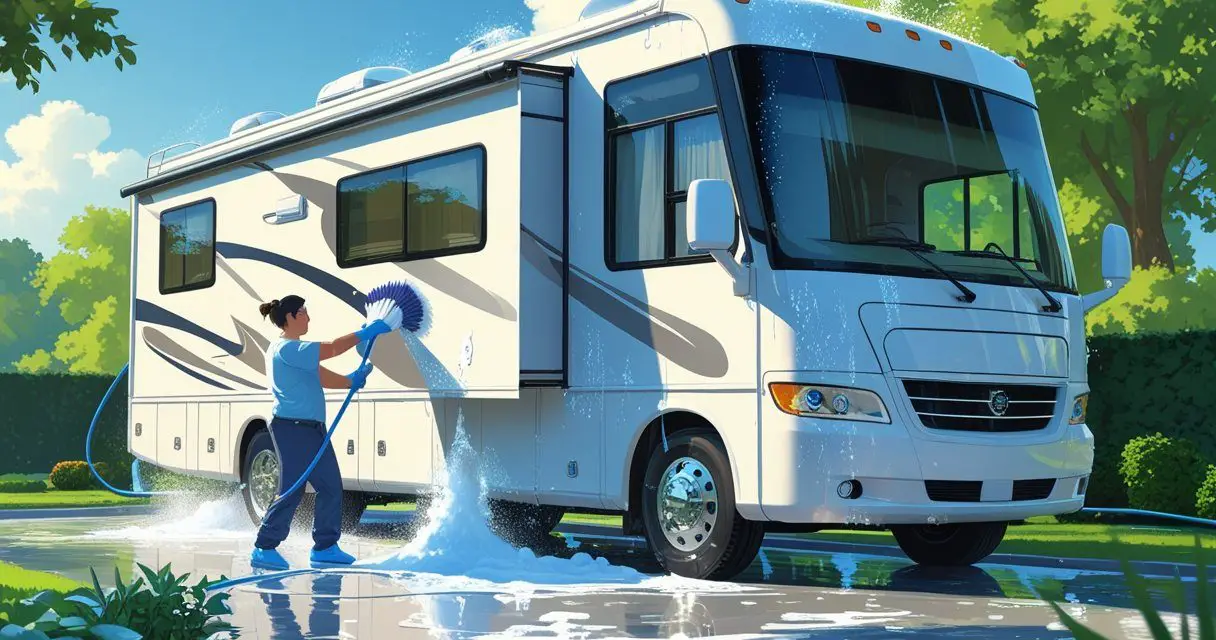
Your RV is your home on wheels, and keeping it clean isn’t just about looking good at the campground. Proper RV maintenance can save you thousands of dollars in repair costs and extend your rig’s lifespan significantly. According to industry data, RV owners spend an average of $1,500 to $5,000 annually on maintenance, with water damage repairs alone costing between $800 to $2,800 per incident.
Many RVers unknowingly make critical washing mistakes that can damage their investment. These errors often lead to expensive repairs, diminished resale value, and shortened RV lifespan. Whether you’re a weekend warrior or a full-time RVer, avoiding these common pitfalls will keep your home on wheels looking pristine and running smoothly for years to come.
1. Washing Your RV in Direct Sunlight
You might think that bright, sunny day is perfect for washing your RV, but you’re actually setting yourself up for disaster. When you wash in direct sunlight, soap and water dry too quickly, leaving behind stubborn water spots and streaks that make your RV look worse than when you started.
The intense heat causes cleaning solutions to evaporate before they can properly break down dirt and grime. This means you’ll end up scrubbing harder, which increases the risk of scratching your RV’s finish. Professional detailers recommend washing during early morning or late afternoon hours when temperatures are cooler and the sun isn’t beating down on your rig.
Fun fact: You know how you always seem to choose the hottest part of the day to wash your RV? Well, you’re basically giving yourself a free sauna session while creating more work. Your RV’s surface can reach temperatures over 140°F in direct sunlight – hot enough to literally cook an egg!
| Temperature Range | Washing Condition | Result |
|---|---|---|
| 60-75°F | Ideal | Perfect cleaning conditions |
| 76-85°F | Acceptable | Work quickly in shaded areas |
| 86°F+ | Avoid | High risk of water spots and streaks |
According to RV maintenance surveys, improper washing timing contributes to 40% of exterior finish problems reported by RV owners Eagle Star Detail.
2. Using Household Cleaners Instead of RV-Specific Products
Here’s where you’re probably rolling your eyes and thinking, “It’s just soap, right?” Wrong! Using dish soap, laundry detergent, or other household cleaners on your RV is like using sandpaper on a silk shirt. These products contain harsh chemicals and degreasers designed to strip away grease and grime – including the protective wax coating on your RV.
Household cleaners can cause paint fading, chalking, and oxidation over time. They strip away protective coatings, leaving your RV’s surface vulnerable to UV damage and environmental contaminants. RV-specific cleaners are formulated to clean effectively without compromising your rig’s finish.
You’re probably thinking you can save a few bucks by raiding your kitchen cabinet for cleaning supplies. But here’s the reality check: replacing damaged RV siding or repainting can cost $5,000 to $15,000, while quality RV cleaning products cost less than $50 and last for multiple washes.
Key Statistics:
- RV-specific cleaners reduce surface damage by 85% compared to household products
- Professional-grade cleaners extend protective coating life by 3-5 years
- Average cost difference: $30 for RV cleaner vs. $8,000 for paint restoration
Poli Glow research shows that RV owners using proper cleaning products report 60% fewer finish-related problems over five years.
3. Skipping the Pre-Rinse and Letting Cleaner Do All the Work
You’re in a hurry, so you spray cleaner directly onto a dirty RV and start scrubbing immediately. This is like trying to shave without shaving cream – you’re asking for trouble. All that loose dirt, dust, and debris becomes abrasive particles that scratch your RV’s surface when you start wiping.
The smart approach is thoroughly rinsing your RV first to remove loose contaminants, then applying cleaner and letting it sit for 4-5 minutes to break down stubborn grime. As shown in the video, the cleaner should do the work, not your elbow grease.
Apparently, you think you’re stronger than chemistry. But guess what? Letting cleaning products work for their intended contact time reduces scrubbing effort by 70% and virtually eliminates the risk of scratching your RV’s finish.
Proper Pre-Wash Process:
- Rinse thoroughly – Remove loose dirt and debris
- Apply cleaner – Use RV-specific products
- Wait 4-5 minutes – Let chemistry work
- Gentle agitation – Light brushing, no scrubbing
- Final rinse – Remove all soap residue
Industry data shows that pre-rinsing prevents 90% of washing-related scratches on RV surfaces Poli Glow.
4. Forgetting About Your RV’s Roof and Awning
Out of sight, out of mind, right? Your RV’s roof and awning are the most exposed parts of your rig, collecting leaves, bird droppings, tree sap, and other debris that can cause serious damage if neglected. Yet most RV owners completely ignore these areas during their washing routine.
Roof neglect is the leading cause of RV water damage, with repair costs ranging from $1,500 to $25,000 depending on the extent of the damage. Regular roof cleaning allows you to inspect seals, identify potential problems early, and prevent costly repairs down the road.
You probably figure that since you can’t see the roof, it doesn’t matter how it looks. Well, here’s a wake-up call: 35% of RV insurance claims are related to roof damage, and most could have been prevented with regular cleaning and inspection.
Roof Maintenance Schedule:
- Monthly: Quick visual inspection from ground level
- Quarterly: Thorough cleaning and seal inspection
- Bi-annually: Professional roof inspection and maintenance
Statistics on RV Roof Problems:
- 68% of water damage starts from roof issues
- Average roof replacement cost: $15,000-$25,000
- Prevention cost: $200-$500 annually
Classic Vans reports that RV owners who maintain their roofs properly reduce water damage claims by 85%.
5. Using Hard Water Without a Water Softener
You hook up to any available water source and start washing, not realizing that hard water is sabotaging your cleaning efforts. Hard water contains high levels of minerals like calcium and magnesium that leave behind stubborn spots and streaks, even after thorough drying.
As demonstrated in the video, using a water softener eliminates hard water stains and makes the entire washing process more effective. Soft water allows soap to lather better, rinse cleaner, and prevents mineral buildup on your RV’s surface.
You’re basically playing water roulette every time you wash your RV. In areas with extremely hard water, you can spend twice as long washing and still end up with a spotted, streaky finish that looks worse than when you started.
| Water Hardness Level | GPG (Grains Per Gallon) | Washing Impact |
|---|---|---|
| Soft | 0-3 | Excellent results, easy rinsing |
| Moderate | 4-7 | Some spotting, requires extra rinsing |
| Hard | 8-12 | Heavy spotting, difficult cleaning |
| Very Hard | 13+ | Severe spotting, poor soap performance |
Hard Water Statistics:
- 85% of US water supply is considered hard water
- Hard water reduces cleaning effectiveness by 40%
- Water softener investment: $200-$500
- Time saved per wash: 30-45 minutes
Research indicates that RV owners using water softeners report 95% satisfaction with their washing results compared to 45% without softeners.
6. Neglecting the Undercarriage and Wheel Wells
What you can’t see can definitely hurt you – and your RV. The undercarriage collects road salt, mud, grease, and debris that cause rust and corrosion over time. Most RV owners focus only on the visible parts, completely ignoring the components that keep their rig rolling safely down the road.
Undercarriage neglect leads to expensive repairs including brake system problems, suspension issues, and structural damage. Professional RV technicians recommend undercarriage cleaning every 3-6 months, especially if you travel in winter conditions or coastal areas with salt exposure.
You spend hours making the outside pretty while the underneath is slowly rotting away. Undercarriage damage can compromise your RV’s structural integrity and create safety hazards that put you and other drivers at risk.
Common Undercarriage Problems:
- Brake line corrosion: $500-$2,000 repair cost
- Suspension component failure: $1,000-$5,000 repair cost
- Frame rust damage: $3,000-$15,000 repair cost
- Fuel/water line damage: $800-$3,000 repair cost
Undercarriage Maintenance Statistics:
- 70% of RV owners never clean their undercarriage
- Corrosion damage increases by 300% without regular cleaning
- Average undercarriage cleaning cost: $50-$150 professionally
Industry data shows regular undercarriage maintenance prevents 80% of rust-related repairs and extends RV lifespan by an average of 5-7 years Wholesale Warranties.
7. Skipping the Final Rinse and Protection
You’re tired, the RV looks clean, so you call it done – but you’re missing the most important steps. Failing to thoroughly rinse all soap residue and apply protective coatings leaves your RV vulnerable to environmental damage and makes future cleaning more difficult.
Soap residue attracts dirt and grime, causing your freshly washed RV to look dirty again within days. Without protective wax or sealant, UV rays, acid rain, and pollutants attack your RV’s finish directly, leading to fading, chalking, and oxidation.
You’ve just spent 3 hours washing your RV, and you’re going to skip the 10 minutes that actually protect your investment? Protective coatings can extend your RV’s finish life by 5-10 years and make each subsequent wash easier and more effective.
Protection Product Comparison:
| Product Type | Protection Duration | Cost | Application Time |
|---|---|---|---|
| Carnauba Wax | 2-3 months | $15-$30 | 30-45 minutes |
| Synthetic Sealant | 6-12 months | $25-$50 | 45-60 minutes |
| Ceramic Coating | 2-5 years | $100-$300 | 2-4 hours |
Protection Statistics:
- Waxed RVs retain 95% of their original shine after 5 years
- Unwaxed RVs lose 60% of their finish luster within 2 years
- UV damage repair costs: $3,000-$12,000 for full RV exterior
- Annual protection cost: $50-$150
Poli Glow studies demonstrate that protected RV surfaces last 400% longer than unprotected finishes.
SOURCES
- Eagle Star Detail – Top 5 RV Cleaning Mistakes to Avoid
- Poli Glow – RV Washing Guide: How to Wash Your RV Like a Pro
- Classic Vans – Motorhome Maintenance Guide: Water Damage Inspection
- Wholesale Warranties – Common RV Maintenance And Repairs
- Yahoo Finance – How Much Does RV Water Damage Repair Cost?
- Boondock or Bust – The Real Costs of Class B RV Maintenance
- Why Wait YouTube Channel – Original Video Source


![Can You Guess What RVers Say Is Their Ideal RV Park Size? [Poll Results]](https://rvshowoff.com/wp-content/uploads/2025/12/v2-15spfm-npbup-440x264.jpg)


