Shiplap is a popular way to add charm and character to your shabby chic camper. It brings a cozy, rustic feel that can make your camper feel more like home. You can use shiplap in many different ways to create a warm and inviting space without much effort.
This article will show you 25 simple ways to add shiplap into your camper’s design, helping you make it look beautiful and unique. Whether you want to cover walls, create shelves, or add decorative touches, shiplap offers many options to fit your style and space.
When choosing shiplap, consider the color and texture that will best match your shabby chic theme. Light, whitewashed, or distressed finishes often work well and keep the look soft and welcoming.
1) Use whitewashed shiplap on camper walls for a bright shabby chic vibe
Would you like to save this article?
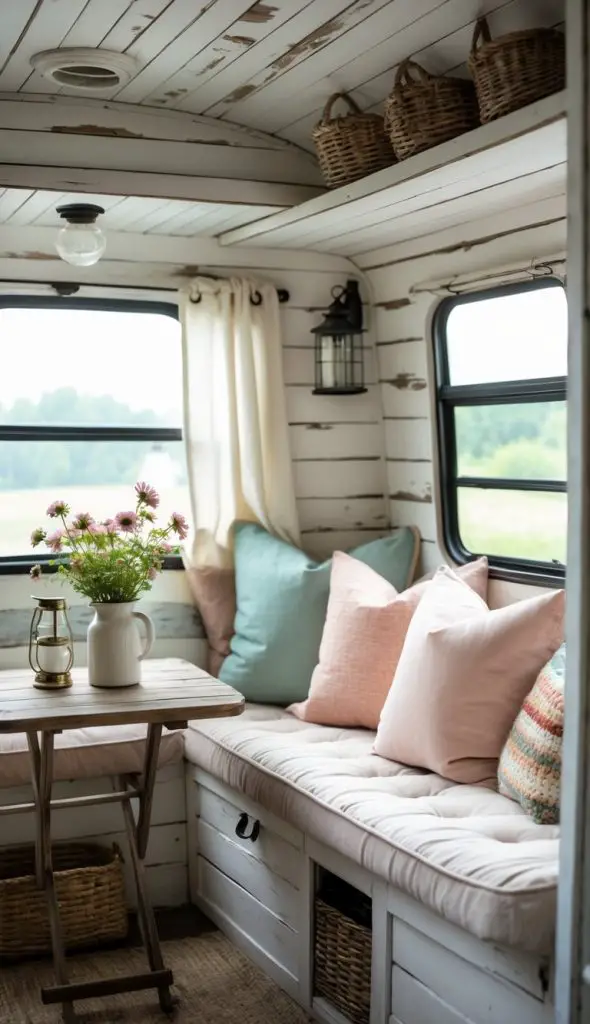
Whitewashed shiplap works great on camper walls. It gives your space a light and airy feel. The soft white color brightens up small areas, making your camper feel bigger.
Shiplap adds texture too. The horizontal lines create a cozy, vintage look. It fits perfectly with the shabby chic style you want.
PRO TIP
Use a sanding block after whitewashing. This helps create a worn, rustic look. It makes the shiplap look naturally aged, adding charm to your camper walls.
2) Install reclaimed wood shiplap for rustic charm
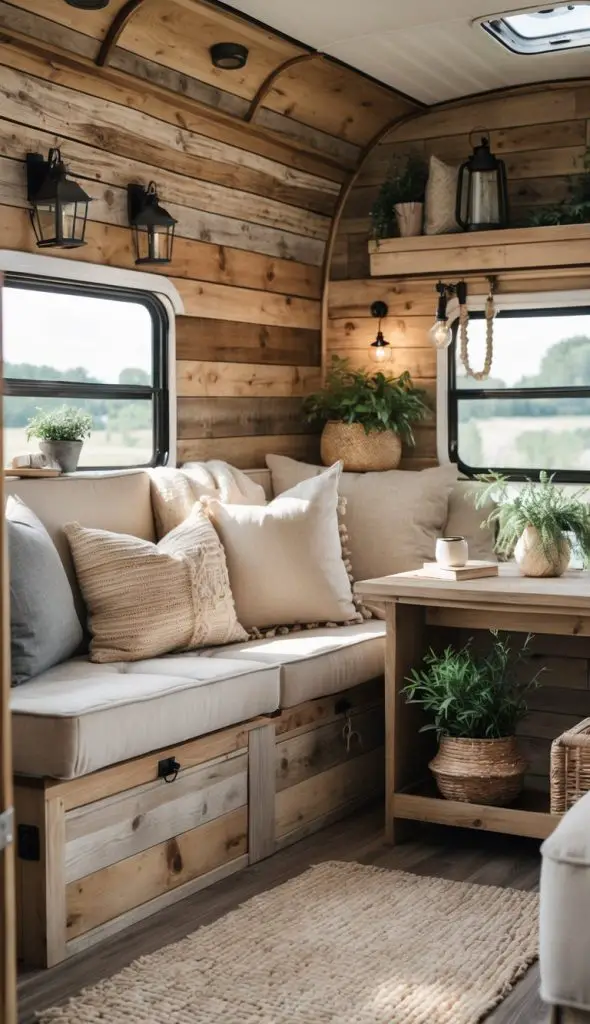
Using reclaimed wood shiplap adds a warm, lived-in feel to your camper. The natural wear and texture bring character that new wood can’t match.
You can find reclaimed wood at salvage yards or online stores. Look for pieces that are clean and free of pests.
Before installing, sand the wood lightly to avoid splinters. Seal it with a clear coat to protect against moisture but keep the rustic look.
PRO TIP
Mix different widths and tones of reclaimed wood for a more organic, unique style. This makes your shabby chic camper feel cozy and one of a kind.
3) Create a shiplap headboard behind the bed
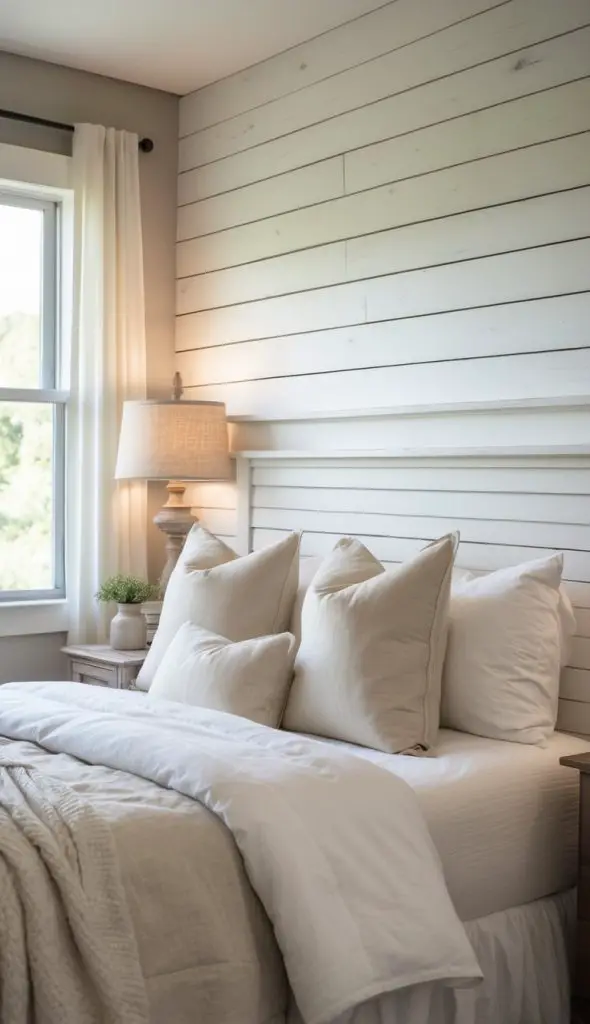
Adding a shiplap headboard behind your bed can give your camper a cozy, vintage feel. You can use white or light pastel shiplap to keep the shabby chic style soft and inviting. Plus, it’s a simple way to add texture without taking up space.
You can cut the shiplap boards to fit the width of your bed. Attach them directly to the wall or use a frame if you want it to stand out more. It makes the bed area a nice focal point in your camper.
PRO TIP
Use chalk paint or whitewash the shiplap for a weathered look. Light sanding after painting can also create that perfect worn effect you want for shabby chic. This technique adds character without needing much effort.
4) Incorporate shiplap shelves for decorative storage
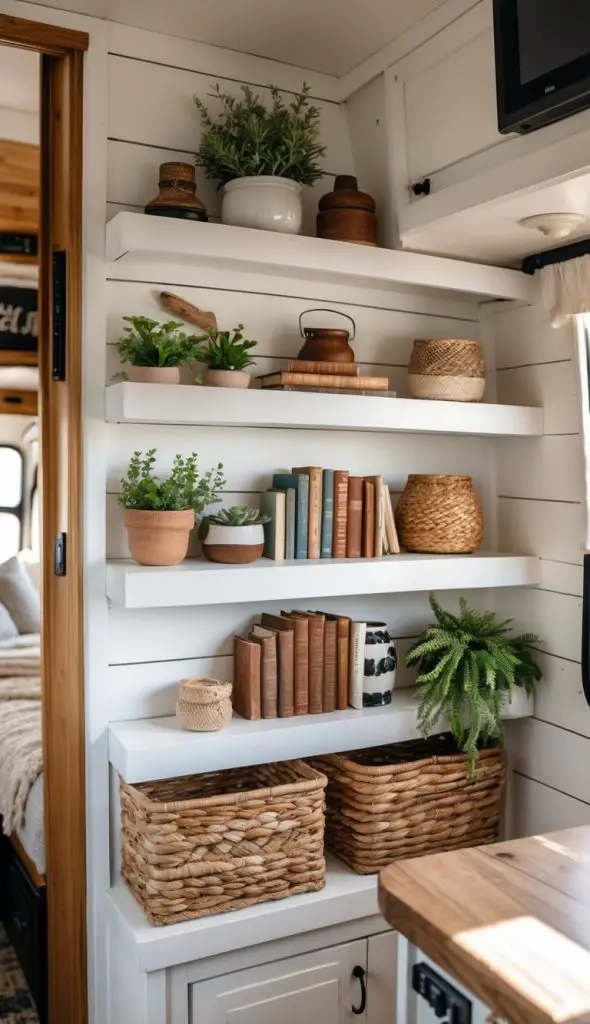
Adding shiplap shelves in your camper helps keep things tidy and adds charm. You can use them to hold small plants, books, or your favorite travel souvenirs. Shelves made from shiplap match the shabby chic look perfectly.
These shelves can be placed on any empty wall. They don’t take up floor space, making your camper feel bigger. Plus, they create a nice spot to show off things that make your camper feel like home.
PRO TIP
Paint your shiplap shelves in soft, faded colors. This keeps the shabby chic style going. You can also lightly sand the edges for a worn look that fits the cozy vibe.
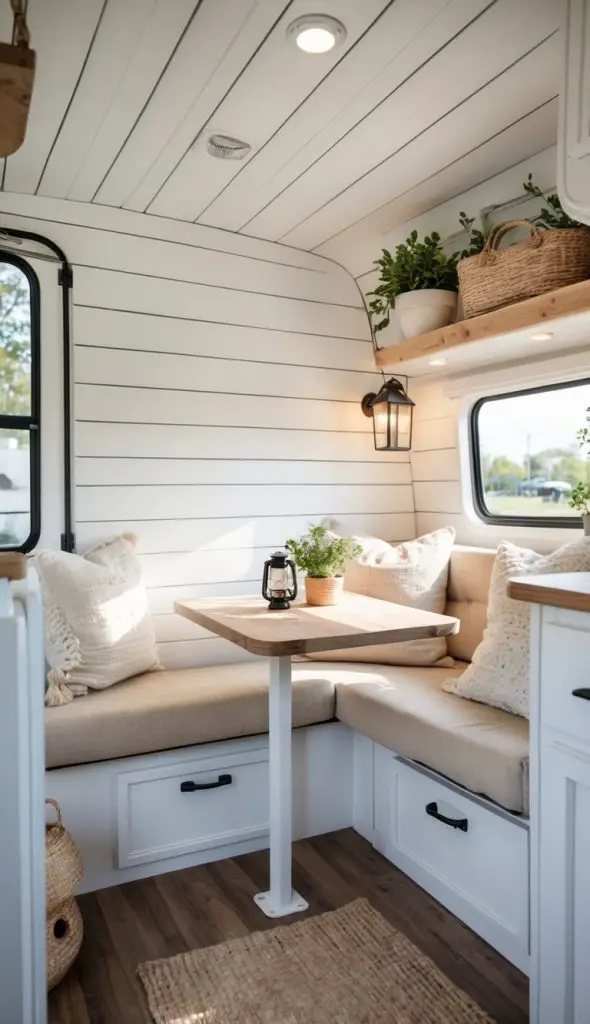
5) Use shiplap ceiling panels to enhance coziness
Adding shiplap panels to your camper’s ceiling can make the space feel warmer and more inviting. The wood texture creates a soft, rustic look that fits perfectly with shabby chic style.
Using lighter shades of shiplap can brighten up the camper while still giving it that cozy charm. You can even paint it white or a soft pastel to match your decor.
PRO TIP
Choose tongue-and-groove shiplap panels for easy installation on curved or sloped camper ceilings. This helps the panels fit tightly without gaps, keeping the space looking neat and finished.
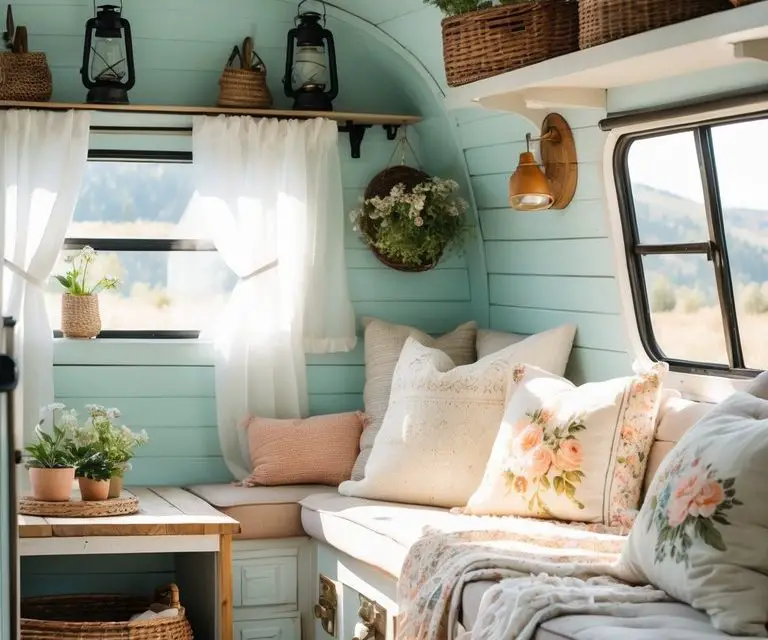
6) Paint shiplap in pastel tones like mint or blush pink

Choosing pastel tones like mint or blush pink can brighten up your camper in a soft, gentle way. These colors add a fresh look without being too bold or overpowering.
Pastels work really well with shabby chic style because they keep things light and cozy.
You can paint an entire wall or just a few shiplap boards to create a fun accent. Either way, it helps your camper feel welcoming and cheerful.
PRO TIP
Use chalk paint for a matte finish that fits the shabby chic vibe. It dries quickly and needs little sanding. You can also lightly sand the edges after painting to give your shiplap that worn, vintage look.
7) Frame windows with shiplap trim

Framing your camper windows with shiplap trim adds a cozy, rustic feel. You can use narrow shiplap boards around the edges to highlight the windows. This draws attention to them and fits well with the shabby chic style.
Cut the shiplap strips to fit just inside the window frame. You can paint or whitewash the boards to match your camper’s walls. This gives your windows a neat, polished look.
PRO TIP
Use a fine nail gun or strong glue to keep the trim secure. This helps it hold up well during travel and keeps the trim tight to the frame. It’s a small step that makes a big difference in durability.
8) Make a shiplap serving counter for a vintage feel
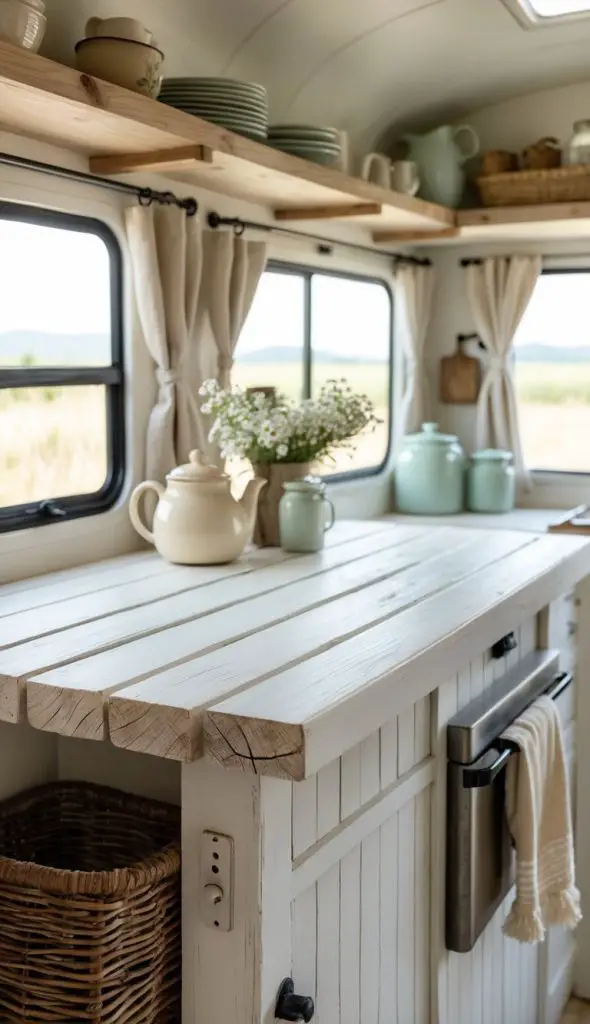
Using shiplap to create a serving counter adds charm to your shabby chic camper. The wood gives a smooth, clean look that fits right in with vintage style. You can paint it white or soft pastels to match your camper’s colors.
A sturdy counter also makes your space more useful. It’s perfect for serving snacks or drinks outside. Plus, it can double as extra storage when you add shelves underneath.
PRO TIP
Seal the shiplap with a clear, water-resistant finish. This keeps it safe from spills and weather. You want your counter to last, even if you spend a lot of time outdoors.
9) Add shiplap around the entrance door
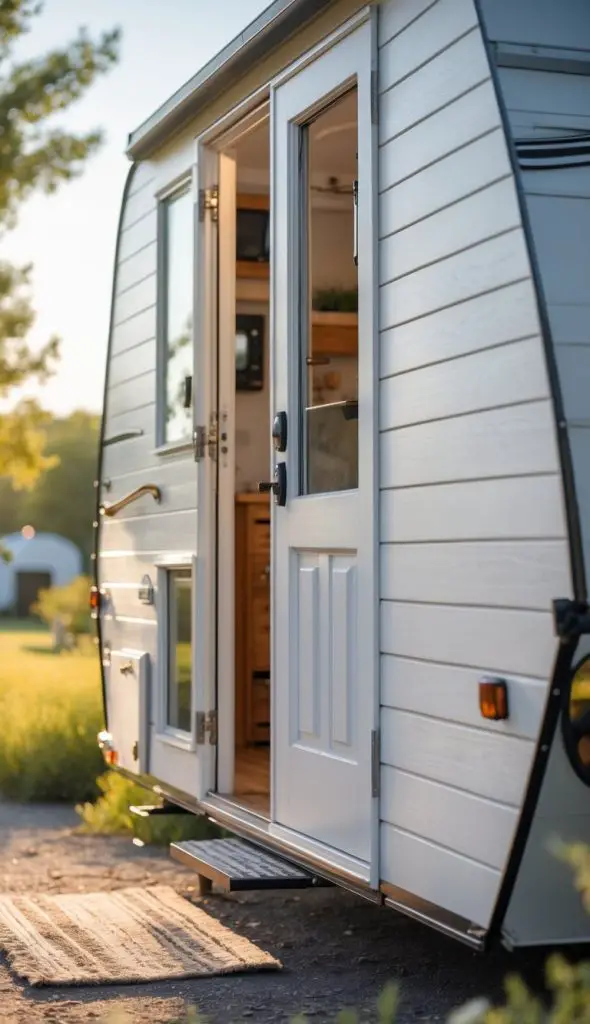
Adding shiplap around your camper’s entrance door gives it a warm and inviting look. It frames the door nicely and adds texture that fits the shabby chic style. You can paint the shiplap in soft pastels or white to keep the look light and fresh.
Make sure to measure carefully before installing the boards. You want the shiplap to fit snugly and line up well with the door frame. This small detail makes a big difference.
PRO TIP
Use lightweight shiplap or faux shiplap to keep the camper’s weight down. This makes it easier to travel without adding too much extra load. Plus, it’s easier to work with when you’re installing it yourself.
10) Line kitchen backsplash with beadboard-style shiplap
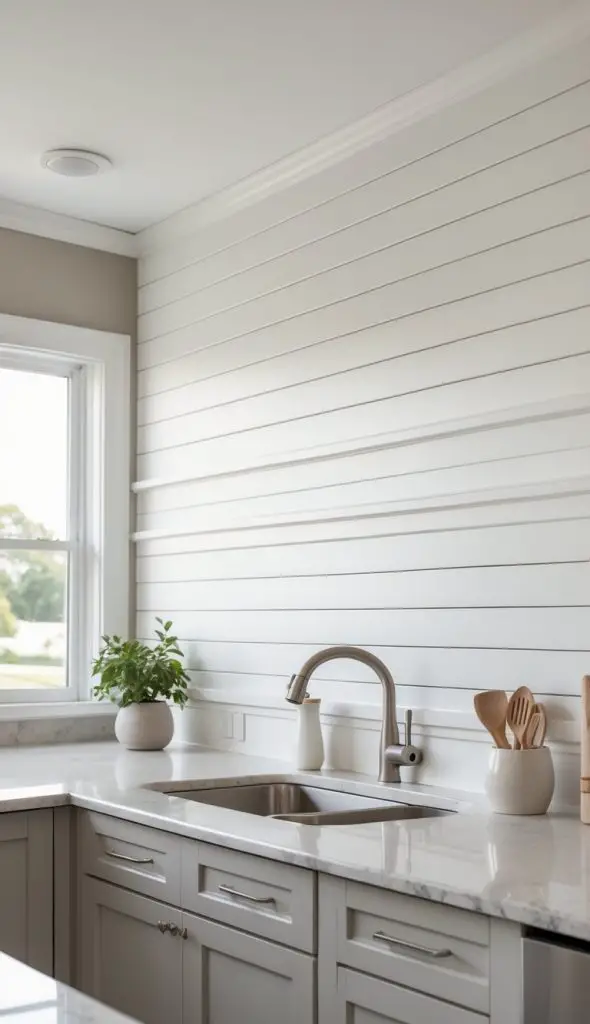
Using beadboard-style shiplap for your kitchen backsplash adds texture without being too bold. It creates a soft, cottage feel that fits well with shabby chic design. The grooves in beadboard give your camper kitchen more character and charm.
This type of shiplap is easy to clean, making it practical for kitchen walls. You can paint it in soft colors like white or pastel shades to keep your space bright and cozy. It also protects your walls from splashes and spills.
PRO TIP
Choose beadboard-style shiplap with a smooth finish. This makes wiping down easier after cooking. Also, use waterproof paint to keep it looking fresh for a long time.
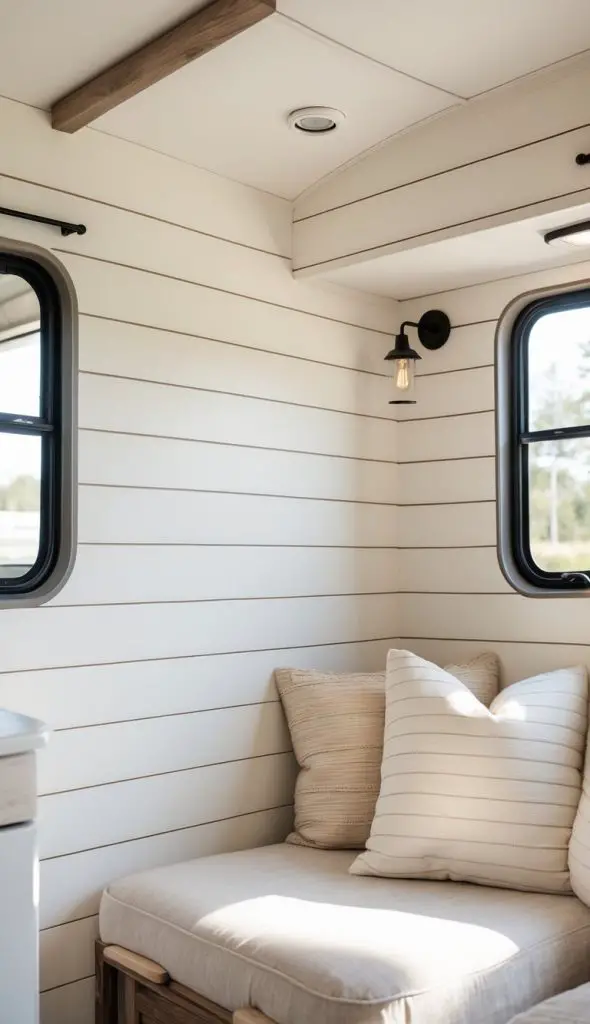
11) Use horizontal shiplap to make the space feel wider
When you install shiplap boards horizontally, it creates the illusion of a wider space. This trick works great in a small camper where every inch counts. Your eyes naturally follow the long lines, making the walls seem to stretch out.
You can paint the shiplap a light color to add even more openness. Light colors help reflect light, which also makes the room feel bigger.
PRO TIP
Try to keep the lines even and consistent. If the boards are uneven, it can break the effect. Smooth, clean horizontal lines will help your camper feel roomy and cozy at the same time.
12) Combine shiplap with floral wallpaper accents
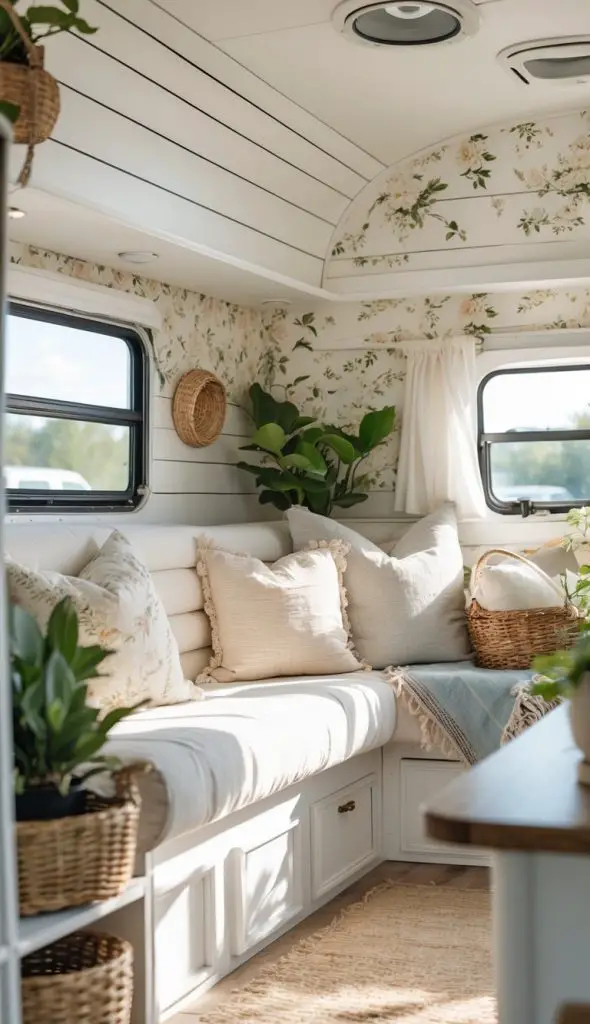
Using shiplap with floral wallpaper can give your camper a soft, cozy look. You can put the shiplap on the walls and add floral wallpaper as a border or accent wall. This mix creates a nice balance between rustic and charming.
Try picking light colors for the wallpaper. Soft pinks, greens, or blues work well to keep the shabby chic vibe.
PRO TIP
Use removable wallpaper if you rent or change your style often. That way, you can update your camper without damage. It’s easy to switch out and keeps your shiplap looking fresh.
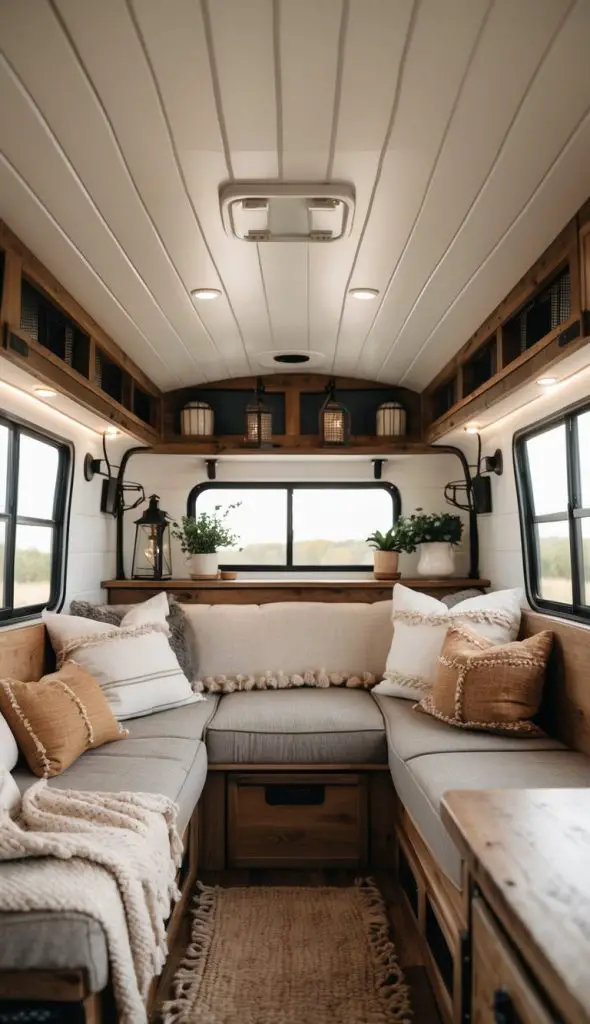
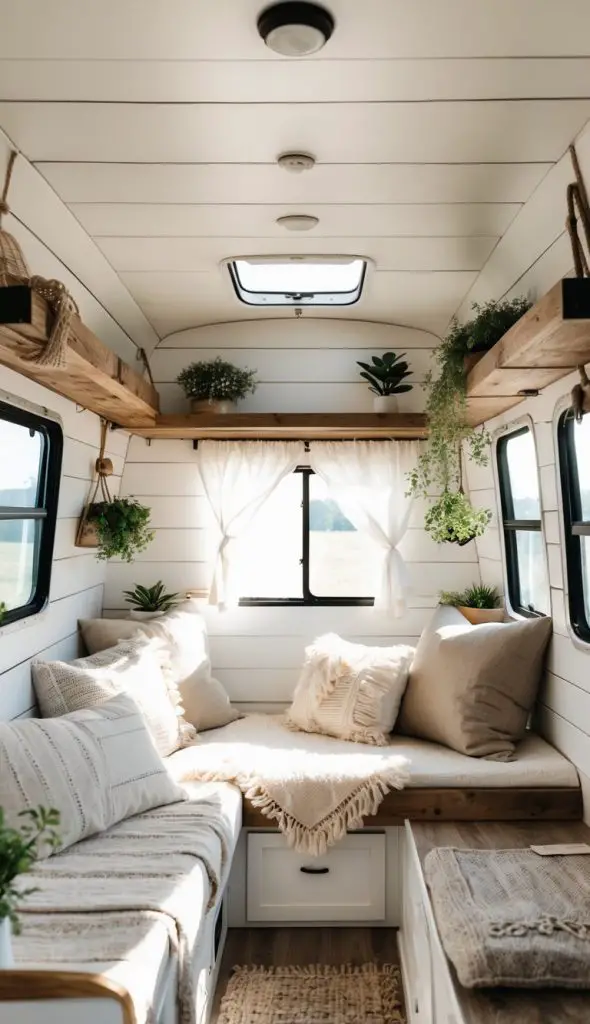
13) Create a shiplap feature wall behind the seating area
A shiplap feature wall adds character to your camper’s seating space. It gives the area a cozy, relaxed feel that matches shabby chic style.
You can paint the shiplap in soft colors like white, cream, or pastel tones. These shades brighten the space and keep it light and airy.
Adding some shelves or hooks on the shiplap wall helps you organize small items. This keeps things tidy while looking charming.
PRO TIP
Try distressing the paint slightly on the shiplap for an extra vintage look. It will make your feature wall feel more worn and lived-in, which fits shabby chic perfectly.
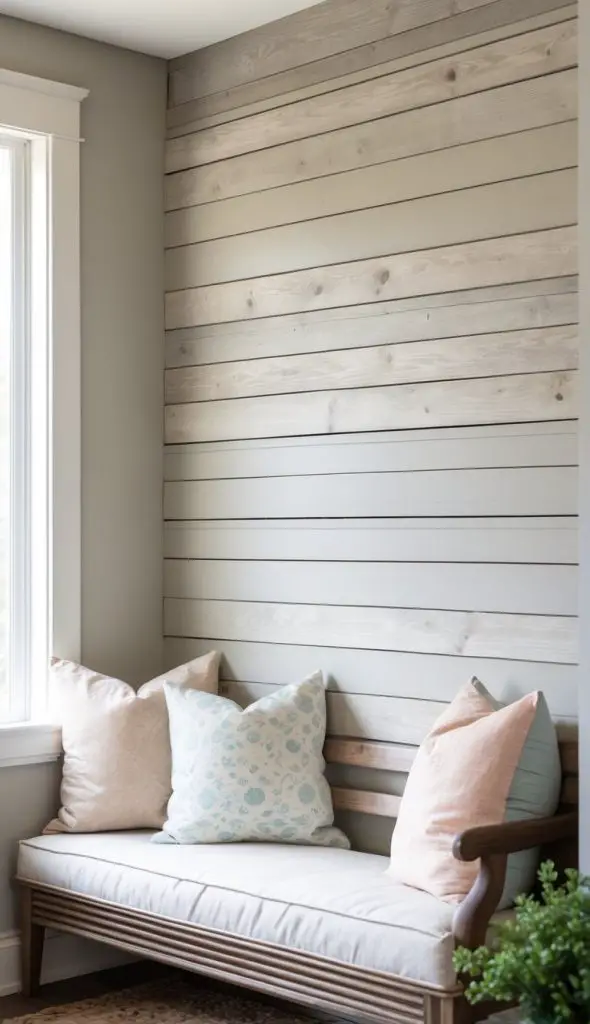
14) Use distressed shiplap for authentic shabby chic style
Distressed shiplap adds a worn, vintage look to your camper. It helps bring out the charm and cozy feel you want in shabby chic decor. You can buy pre-distressed boards or create your own by sanding and painting.
Using this style, your walls will look like they have a history. The rough edges and chipped paint give a unique character that smooth surfaces can’t match.
PRO TIP
Try white or soft pastel colors for your distressed shiplap. These shades work best with shabby chic and keep your camper bright and inviting. Light sanding after painting can help achieve the perfect weathered effect.
15) Add shiplap on cupboard doors for texture
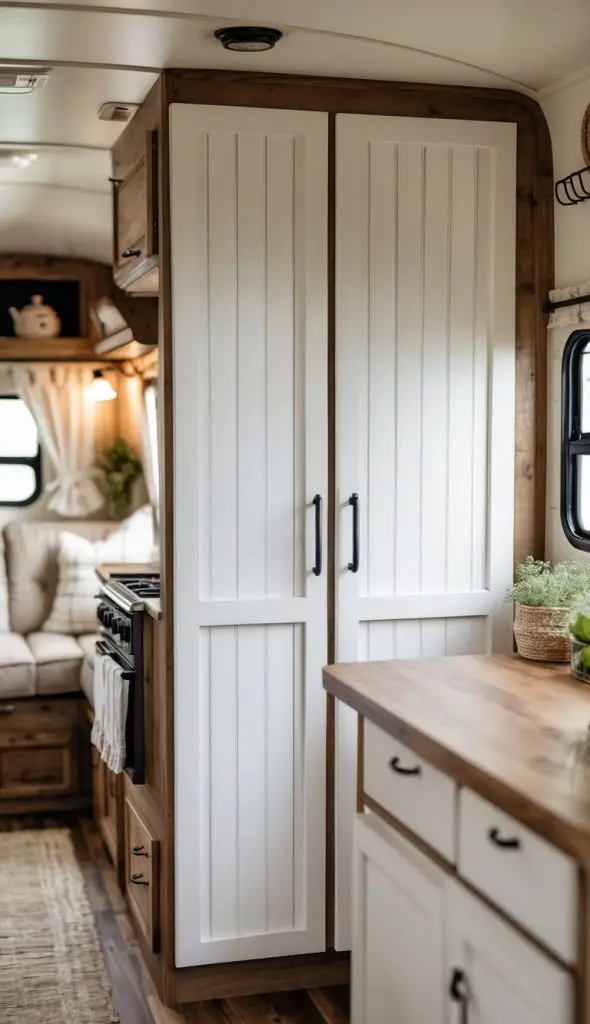
Adding shiplap to your cupboard doors can give your camper a fresh, cozy feel. It adds a nice texture that breaks up flat surfaces and makes the space look more interesting.
You can choose narrow or wide shiplap boards depending on your style. Paint them white or a soft pastel for that shabby chic charm.
Make sure to sand the edges smooth so the doors still open and close easily. This update is simple but makes a big difference in the look of your camper’s interior.
PRO TIP
Use lightweight wood or shiplap panels to keep your cupboard doors from getting too heavy. This helps avoid any stress on the hinges while still adding style.
16) Build open cubby storage with shiplap backing
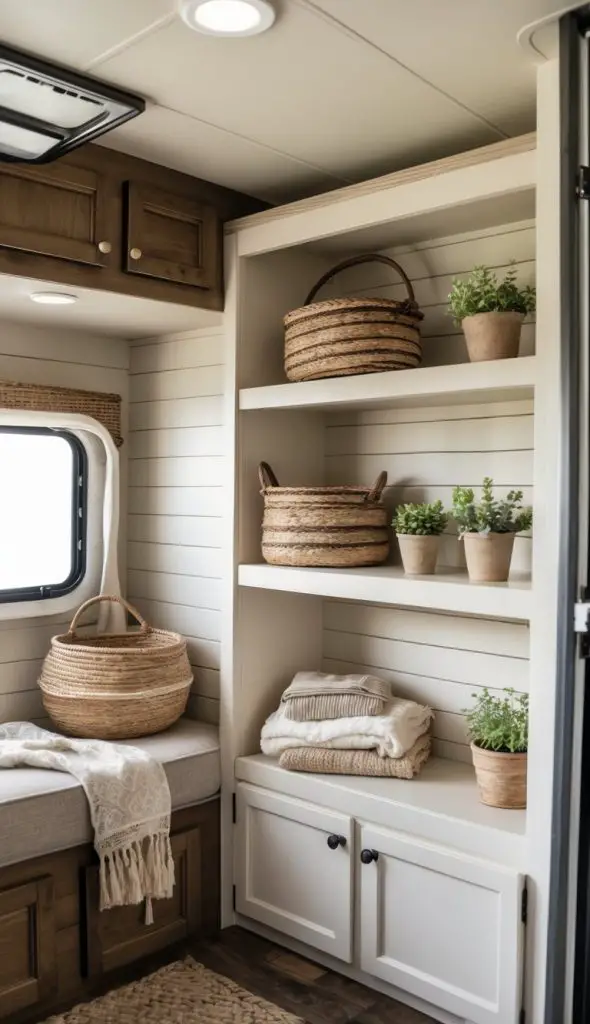
Open cubby storage is perfect for a shabby chic camper. You can build cubbies on your walls or under benches. Adding shiplap as the backing gives the space a clean, cozy look.
The texture of shiplap adds charm and depth. It makes your cubbies feel like a special part of your camper’s style.
Use cubbies to store books, blankets, or small plants. This keeps things organized but still easy to reach. You’ll get functional storage with a pretty finish.
PRO TIP
Paint the shiplap a soft white or pastel color. It brightens up the space and fits well with the shabby chic theme. You can also distress the paint lightly for a vintage feel.
17) Paint shiplap in chalk paint for a matte finish
Using chalk paint on your shiplap gives it a soft, matte look. This finish works well with shabby chic style because it feels natural and worn-in. You don’t need much prep, which makes it easy to update your camper’s walls quickly.
Chalk paint also sticks well to wood, so it covers old stains or scratches nicely. You can choose light colors like white, cream, or pastel shades to keep the space bright and cozy.
PRO TIP
Lightly sanding the painted shiplap after it dries adds a distressed look. This small step makes your camper feel even more charming and vintage. Use fine sandpaper to avoid damage, and focus on edges and corners for the best effect.
18) Use shiplap panels for camper bathroom walls
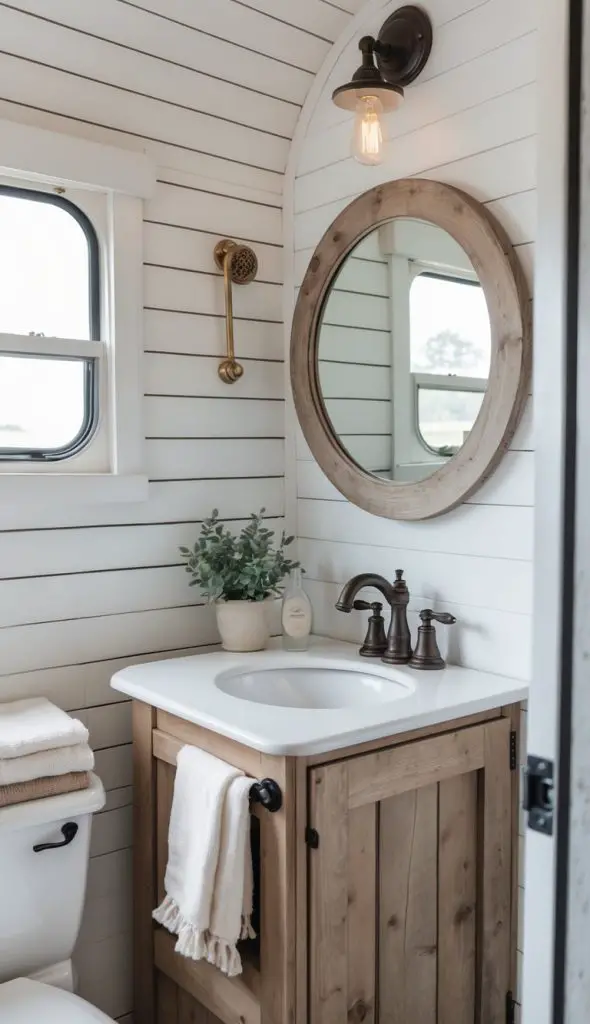
Using shiplap panels in your camper bathroom adds a cozy, rustic feel. The simple lines of shiplap create a clean, classic look. It is also easy to install, making it a practical choice for small spaces.
You can paint the shiplap white or a soft pastel to keep the shabby chic vibe. The panels help protect your walls from water and wear, which is important in a bathroom.
PRO TIP
Choose moisture-resistant shiplap or seal the panels with waterproof paint. This will keep the wood safe from humidity and make cleaning easier. It also helps prevent warping and mold.
19) Install shiplap above the camper bunks
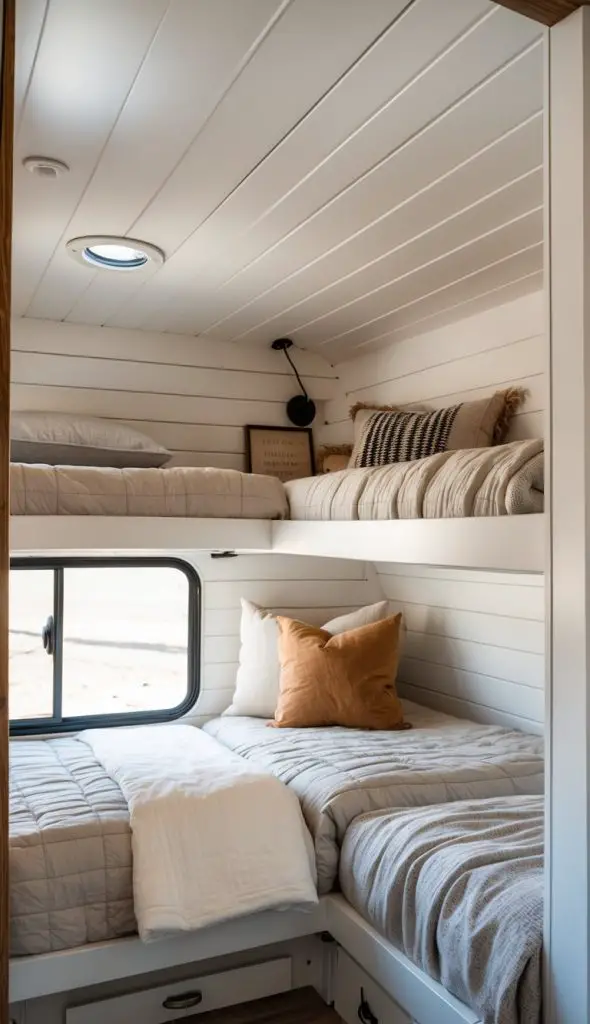
Adding shiplap above your camper bunks gives the space a cozy, finished look. It breaks up plain walls and adds texture without taking up space.
You can choose white or light colors to keep it bright and airy. This works well with shabby chic themes. Make sure to cut the boards to fit neatly above each bunk.
Use lightweight materials so you don’t add too much weight. Secure the shiplap with small nails or adhesive made for campers. This will keep everything safe and sturdy while on the move.
PRO TIP
Try adding small shelves or hooks on the shiplap for storage. It’s handy for books or nighttime essentials. This keeps your bunk area cute and practical at the same time.
20) Create a shiplap fold-down table
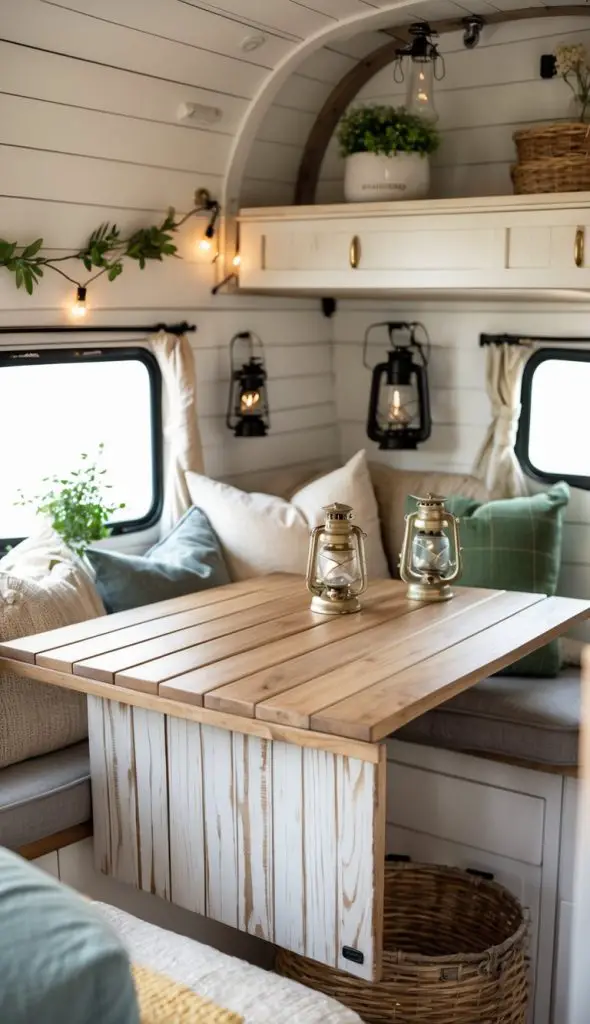
A fold-down table made from shiplap boards is a smart way to save space in your camper. You can mount it to the wall and fold it up when you don’t need it. This keeps your camper open and clutter-free.
Use thin shiplap planks for the table surface to keep it light but sturdy. You can paint or whitewash it to match your shabby chic style. It’s perfect for eating, working, or just relaxing.
Attach sturdy hinges to make folding and unfolding easy. Add a simple latch or hook to hold the table up when folded. This small addition can make a big difference in your camper’s function.
PRO TIP
Sand the edges smooth and seal the wood to prevent splinters. It also makes cleaning easier, which is great for camper life!
21) Use shiplap around mirrors for a farmhouse touch
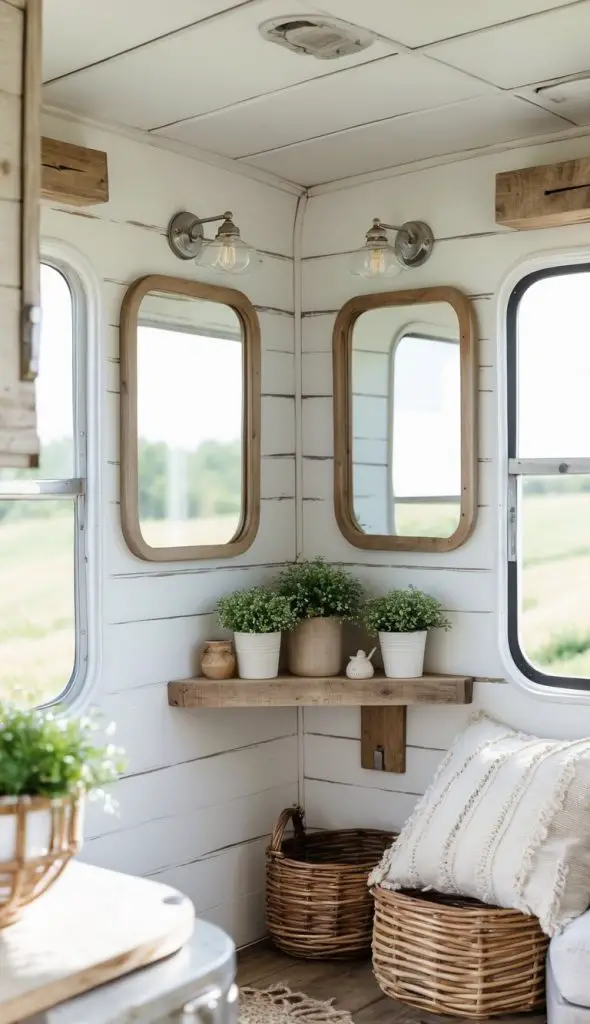
Adding shiplap around your mirrors can give your camper a cozy farmhouse feel. It works well as a frame and adds texture to plain walls.
You can choose to paint the shiplap white or leave it natural for a more rustic look. Either way, it helps highlight your mirrors nicely.
Using shiplap this way can also make small spaces feel brighter and bigger. It reflects light and adds a clean, simple style to your camper.
PRO TIP
Use narrow shiplap boards for a delicate look around small mirrors. A light sanding before painting will make the wood smoother and avoid splinters.
22) Place shiplap in vertical orientation for height illusion

Using shiplap boards vertically can make the walls of your camper feel taller. This simple change adds a fresh look without much effort.
Vertical shiplap draws the eye upward, giving the impression of more height. It works well in small spaces where you want to open things up.
You can paint your shiplap in light colors to enhance the effect. Whites, soft grays, or pastels fit nicely with shabby chic style.
PRO TIP
For an even stronger height illusion, extend the vertical shiplap all the way to the ceiling. This creates a seamless, elongated look that makes your camper feel more spacious.
23) Attach hooks on shiplap to hang vintage kitchenware
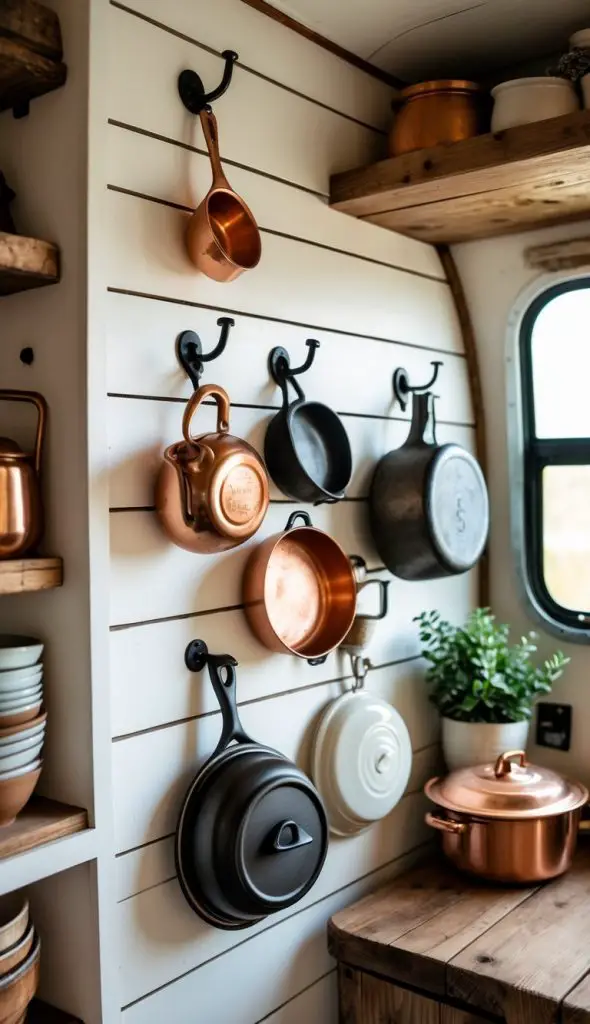
Using hooks on your shiplap walls is a great way to show off your vintage kitchenware. You can hang old pots, pans, or kettles. This keeps things organized and adds charm to your camper’s kitchen.
You don’t need fancy tools. Just choose sturdy hooks and screw them into the shiplap. Space them out so items hang neatly and look balanced.
PRO TIP
Pick hooks with a rustic or worn finish to match the shabby chic vibe. This small detail makes your kitchenware blend perfectly with your camper’s style.
24) Paint shiplap in soft gray for neutral backdrop
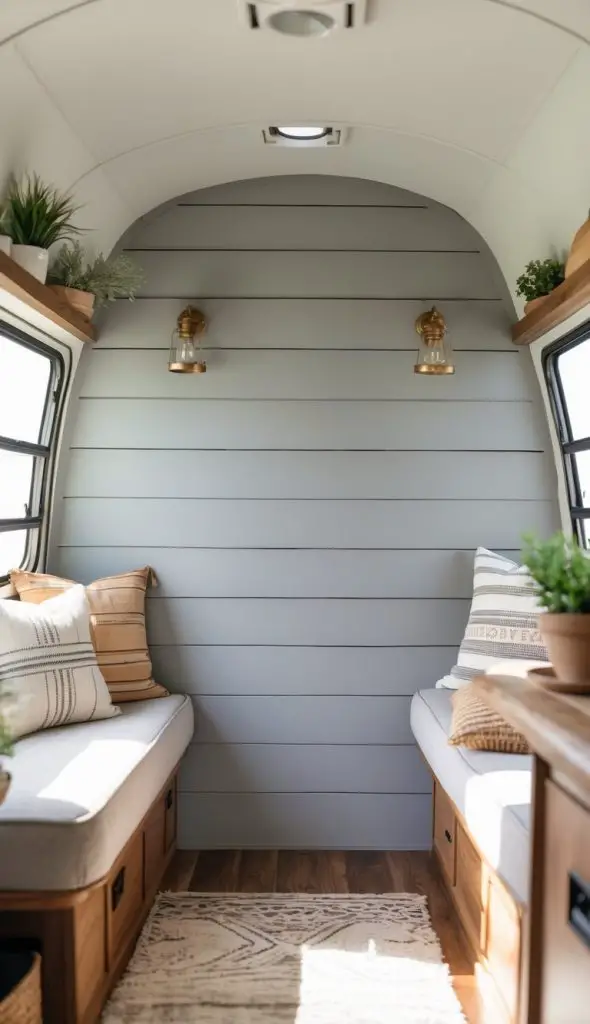
Painting your shiplap in soft gray gives your camper a calm, neutral base. This color works well with many shabby chic decorations. It lets your vintage finds and pastel accents stand out.
Soft gray also helps brighten the space without being too bold. It hides dirt better than white, which is great for campers. You’ll get a fresh look that feels cozy and simple.
PRO TIP
Choose a matte or eggshell finish for your paint. It reduces glare and adds a smooth texture. Try testing a small area first to see how the gray looks with your lighting. This can help you pick the perfect tone for your camper.
25) Use shiplap to frame old camper windows
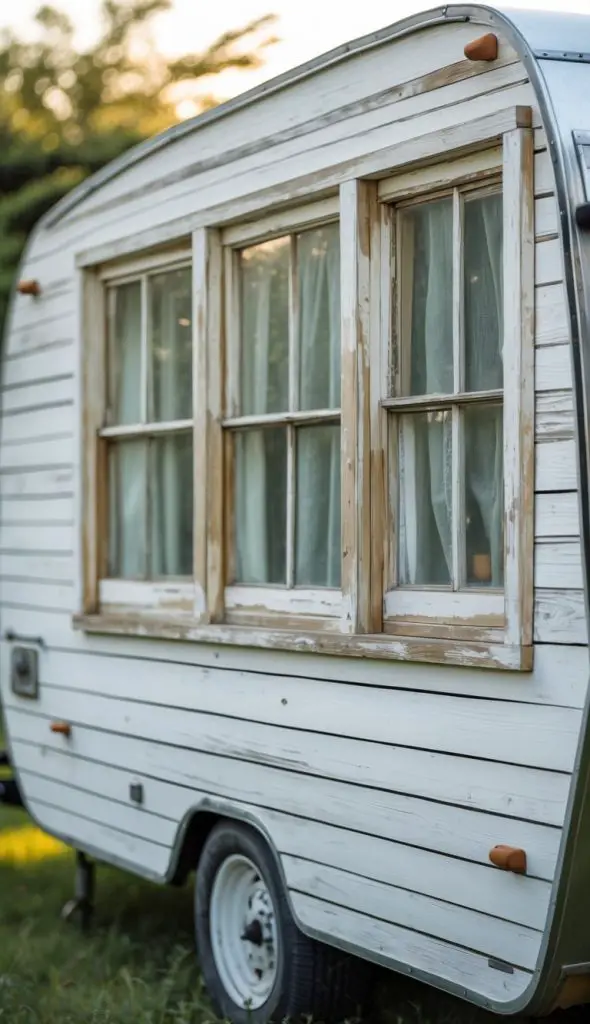
Framing your old camper windows with shiplap can give them an instant fresh look. It adds a neat, simple border that fits perfectly with the shabby chic style. You can use light colors or whitewash the shiplap for a soft, vintage feel.
Make sure to measure your windows carefully before cutting the wood. This helps make the frame look clean and well-fitted. Nail or glue the shiplap pieces around the window edges for a secure hold.
PRO TIP
Sand the shiplap edges to avoid splinters. You can also add a little distressing with sandpaper for that worn, cozy charm. This small touch makes your camper feel even more welcoming.


