A single tube of caulk costs less than a campground shower token. Yet that tiny tube can stop the exact kind of leak that turns a $30,000 travel trailer into a moldy, delaminated mess. Roof and seam leaks are one of the top reasons RV owners end up with expensive insurance claims, so the cheap caulking trick that stops leaks instantly isn’t just a fun hack, it might be the single most valuable five minutes an RV owner spends all year.
This trick isn’t complicated. It isn’t expensive. And it works on nearly every rig, from a pop-up camper to a diesel pusher. RV Showoff breaks down exactly how it works, why it works, and how to do it right the first time.
What Is The Cheap Caulking Trick That Stops Leaks Instantly?
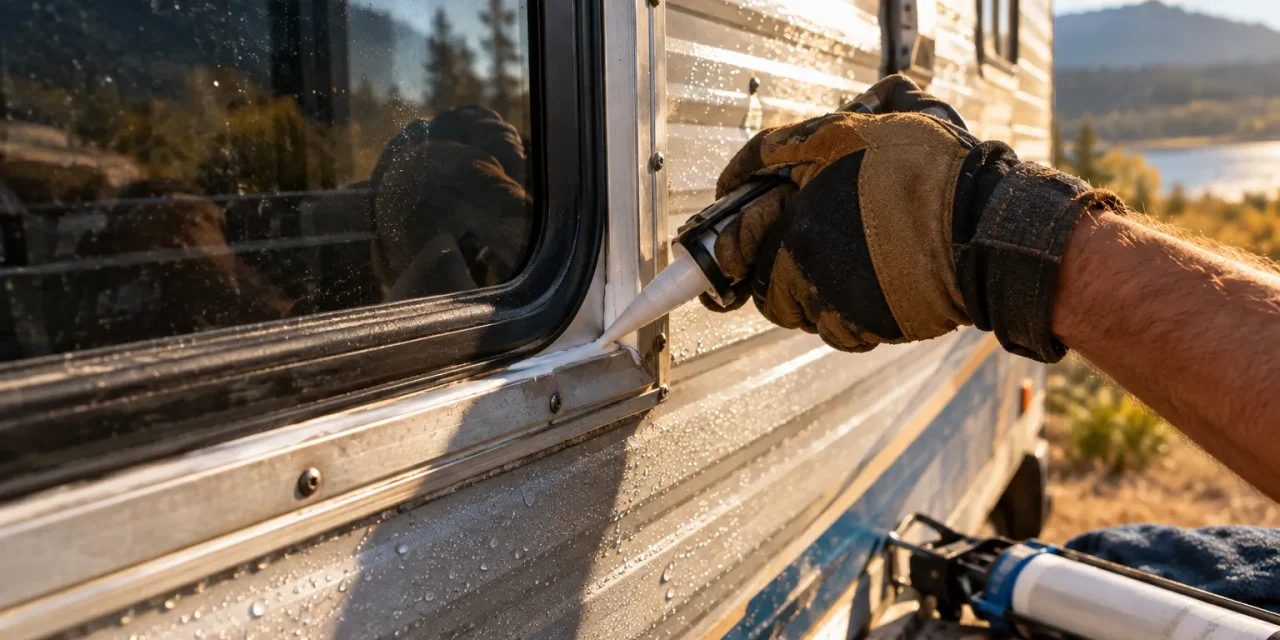
At its core, the cheap caulking trick that stops leaks instantly is simple: clean the gap, cut the tube tip correctly, run one smooth bead of caulk, and press it flat before it skins over. That’s it. No fancy tools. No special training. Just a $6 tube of sealant and a few minutes of careful work.
Utility companies and energy experts have promoted this exact method for years as one of the cheapest ways to stop drafts and water intrusion in houses. RVs are basically houses on wheels, and they flex, bounce, and vibrate down the highway far more than a stationary home does. That constant movement is exactly why small gaps open up around RV windows, doors, marker lights, and roof seams, and why this trick matters so much for RV owners specifically.
The “instant” part comes from how caulk skins. Once applied and smoothed, most caulks form a protective skin within minutes. That skin is often enough to block wind-driven rain almost right away, even though the caulk underneath is still soft. Full cure, the point where the caulk is rock solid, usually takes about 24 hours.
Why RVs Leak More Than Houses (And Why This Matters)
Houses sit still. RVs do not. Every mile down the highway flexes the frame, rattles the windows, and stresses every seam on the roof and walls. Over time, this constant motion breaks down old caulk lines, opening tiny cracks that let in water long before an owner ever notices a stain on the ceiling.
That’s why RV maintenance guides constantly point back to seals and seams. Small issues, left alone, become some of the biggest problems that could ruin an RV trip, think soft flooring, moldy walls, or a musty smell that never seems to go away.
Common leak points on an RV include:
- Roof seams and vent covers
- Window and door frames
- Slide-out toppers and seals
- Marker lights and antenna mounts
- Where the front cap meets the body
Every one of these spots is a joint, a place where two materials meet. And joints are exactly where the cheap caulking trick that stops leaks instantly does its best work.
“A leak the size of a pencil tip can soak an entire wall cavity before anyone ever sees a stain.”
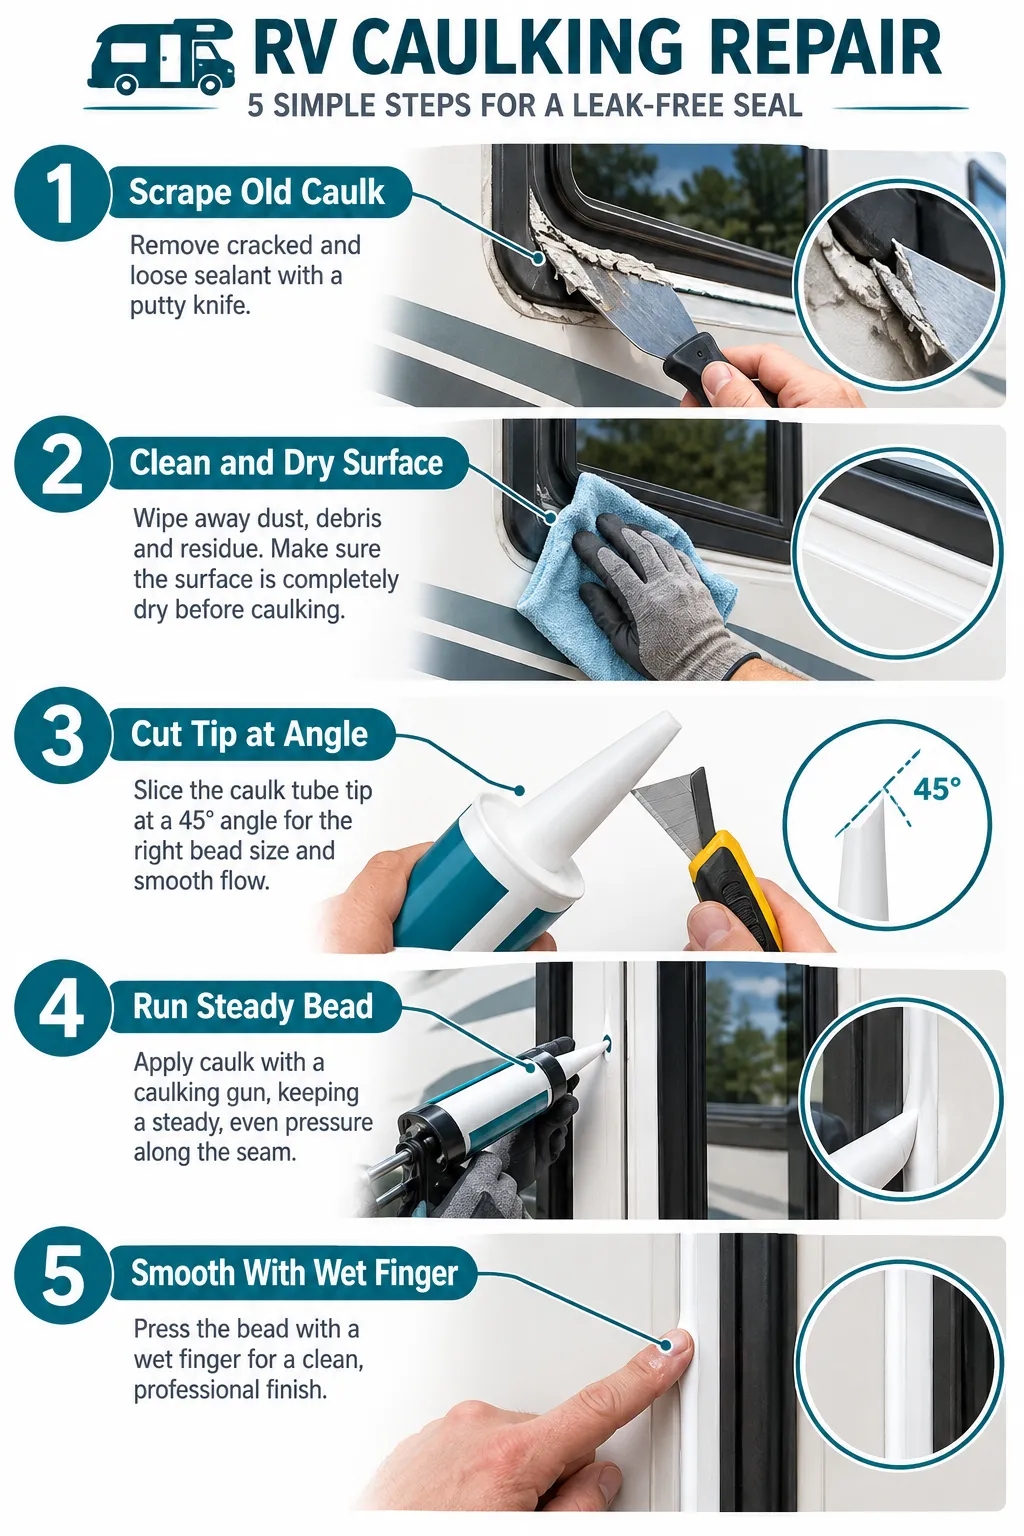
The Cheap Caulking Trick That Stops Leaks Instantly: Step-by-Step
Here’s the exact process, adapted from proven home-repair methods and tailored for RV surfaces like aluminum siding, fiberglass, and rubber roofing.
Step 1: Scrape Out the Old Caulk
Old caulk that’s cracked, peeling, or shrinking has to go. Use a plastic putty knife or a dedicated caulk removal tool to gently pry it loose. Metal blades can scratch fiberglass, so stick with plastic when possible.
Step 2: Clean and Dry the Surface Completely
This step gets skipped more than any other, and it’s the number one reason caulking jobs fail. Wipe the area with rubbing alcohol or a mild cleaner, then let it dry fully. Caulk will not bond to dirt, dust, or moisture, and a bead that doesn’t bond is a bead that will peel right back off in a few weeks.
Step 3: Apply Painter’s Tape for Clean Lines
This isn’t required, but it makes the job look professional and keeps caulk off surfaces where it doesn’t belong. Run a strip of painter’s tape on each side of the gap, leaving just enough space to work.
Step 4: Cut the Tube Tip to Match the Gap
This is the part most people get wrong. A tiny gap needs a tiny opening. For a gap around 1/4 inch, cut the tip to roughly 3/16 inch. Starting small and testing the bead is smarter than cutting too wide and wasting caulk, or making a sloppy mess.
Step 5: Run One Continuous Bead at a 45-Degree Angle
Hold the caulking gun at a 45-degree angle to the seam and squeeze with steady pressure while moving in one smooth motion. Stopping and starting creates weak spots and air pockets, the exact breaks that let water sneak back in.
Step 6: Smooth It Immediately
Wet a finger (or use a caulk smoothing tool) and run it along the bead right after applying it. This presses the caulk into the gap, removes air bubbles, and creates that instant, continuous seal that stops leaks on contact.
Step 7: Pull the Tape and Let It Cure
Remove the painter’s tape while the caulk is still slightly wet for the cleanest line. Then leave it alone. Most caulks are safe from light rain within an hour or two, but full cure, strong enough for heavy storms, takes about 24 hours.
Owners upgrading their entry areas anyway might want to pair this fix with a broader refresh. Check out these easy RV upgrades that make a huge difference for ideas that go beyond just sealing gaps.
Best Caulk Types for RV Leaks
Not all caulk is created equal, and using the wrong type is one of the fastest ways to waste money. Here’s a simple breakdown:
| Caulk Type | Best Use on an RV | Flexes With Movement? |
|---|---|---|
| Self-leveling sealant | Horizontal roof seams | Yes |
| Non-sag sealant | Vertical walls, windows | Yes |
| Silicone caulk | Around glass, metal trim | Yes |
| Butyl tape/putty | Vent covers, roof penetrations | Very flexible |
| Acrylic latex caulk | Small interior gaps only | Limited |
Because RVs flex constantly on the road, sealants with high flexibility (self-leveling and non-sag rubberized formulas) almost always outperform basic acrylic caulk, which can crack after a season or two of driving.
Common Mistakes That Ruin The Cheap Caulking Trick That Stops Leaks Instantly
Even a cheap, simple trick can fail if a few key details get ignored. Here are the mistakes that show up again and again:
- Skipping surface prep. Caulking over dirt or old sealant guarantees a short-lived fix.
- Applying caulk to a wet surface. Moisture blocks proper adhesion.
- Cutting the tip too big. This wastes caulk and creates a sloppy, uneven bead.
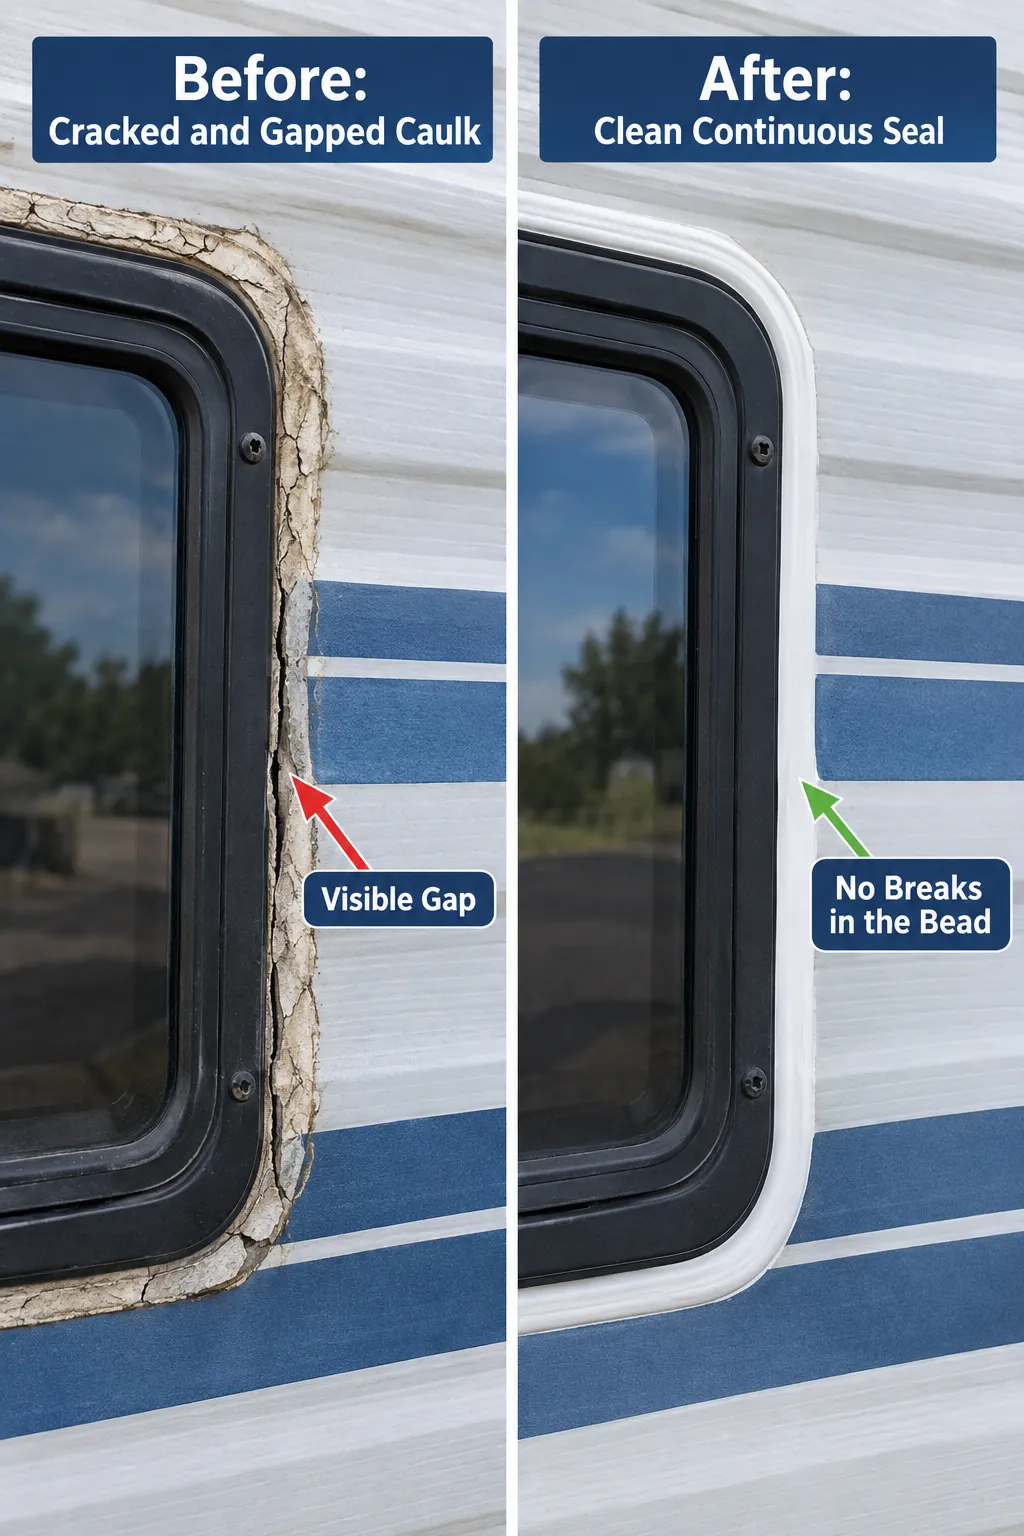
- Stopping mid-bead. Breaks in the line are the easiest path for water to sneak back in.
- Skipping the smoothing step. An unsmoothed bead often has air gaps hiding underneath.
- Painting too soon. Caulk needs its full cure time, usually 24 hours, before paint goes on.
- Using the wrong caulk for moving joints. Rigid caulk on a flexing seam will crack fast.
Rushing any one of these steps can undo the whole point of the trick. Slow down, and the fix truly can be instant and long-lasting.
Where to Use This Trick Around the RV
The cheap caulking trick that stops leaks instantly isn’t just for the roof. It works anywhere two materials meet and a small gap has formed.
Good spots to check every season:
- Entry door frame, a huge source of both air and water leaks. If the door itself feels drafty or worn, it might be time to look at RV front door upgrades that make a huge impact.
- Window frames, check every corner, since corners crack first.
- Roof vents and antenna bases, these take direct sun and rain exposure year-round.
- Slide-out seals, a leaking slide can quietly soak the flooring underneath before anyone notices.
- Utility penetrations, where water lines, cables, or vents pass through the exterior wall.
Owners who take pride in how their rig looks and feels when guests arrive should also consider how leaks quietly damage first impressions. A soft, water-stained step or a musty entryway undercuts even the nicest RV entryway that makes a great first impression. A five-minute caulking check protects both the structure and the curb appeal.
When Caulk Alone Isn’t Enough
Caulk is a hero for small, non-moving gaps. It is not a miracle fix for everything. For wider gaps, generally anything over about 1/4 inch, caulk alone tends to sag, shrink, or crack. In those cases, a foam backer rod pressed into the gap first, then covered with caulk, creates a much stronger and longer-lasting seal.
For moving parts, like a door that opens and closes or an operable window, caulk should be paired with weatherstripping rather than used by itself. Caulk seals the still, fixed seams; weatherstripping handles the parts that move.
And if a leak has already caused soft spots, delamination, or a spongy floor, caulking is only a stop-gap. At that point, it’s time for a deeper repair, and possibly a hard look at whether the RV’s overall condition is contributing to bigger frustrations. Chronic leaks are one of the most common things that make RV owners quit the lifestyle altogether, so catching small leaks early really can save the whole RV experience.
How Often Should RV Owners Check Their Caulk?
Most seasoned RVers recommend a caulking inspection at least twice a year, once before the main travel season and once before winter storage. Rigs that see rough roads, high mileage, or extreme weather may need a check every few months.
A simple seasonal habit:
- Spring: Full inspection after winter storage, checking for cracked or shrunk caulk.
- Before a big trip: Quick walk-around focusing on roof seams and door frames.
- Fall: Reapply caulk to any seams that saw a summer of sun exposure.
- After any hailstorm or rough road: Check roof vents and antenna mounts for stress cracks.
Pairing this habit with other routine maintenance, like the tips in this guide on leveling an RV the right way, keeps the whole rig in better shape without adding much time to a regular maintenance routine.
Frequently Asked Questions
Does caulk really stop a leak instantly?
Once a bead skins over, usually within 30 minutes to a couple of hours depending on humidity and temperature, it can block light rain and drafts almost right away. Full strength and full waterproofing come after about 24 hours of cure time.
What’s the cheapest caulk that still works well?
A basic self-leveling or non-sag RV-rated sealant usually costs between $6 and $12 per tube and covers a surprising amount of seam length, making it one of the most affordable maintenance fixes available.
Can this trick fix a roof leak, or only windows and doors?
It works on both, as long as the gap is small and the caulk type matches the material. Wider roof cracks or torn membrane need a patch kit or professional repair in addition to caulk.
How long does caulk actually last on an RV?
Depending on sun exposure and how much the RV travels, most RV sealants last one to three years before they need a fresh application.
Is silicone caulk better than regular caulk for RVs?
Silicone flexes well and resists moisture, making it a strong choice for windows and metal trim. However, it can be harder to paint over, so it’s not ideal for every spot.
Conclusion
The cheap caulking trick that stops leaks instantly proves that some of the best RV fixes don’t need a big toolbox or a big budget. A clean surface, a properly cut tip, one steady bead, and a quick smoothing pass can stop drafts and water intrusion before they ever become a real problem.
The next step is simple: grab a tube of quality sealant, walk around the rig, and check every window, door, vent, and seam. Fix the small cracks now, and skip the expensive repair bill later. A few minutes with a caulk gun today can protect thousands of dollars in RV value down the road, and that’s a trade every RV owner should be happy to make.