Transforming your camper kitchen doesn’t have to be expensive or complicated, and a shiplap backsplash is one of the most impactful upgrades you can make. This classic design element brings warmth, texture, and a touch of farmhouse charm to even the smallest RV kitchen space.
Whether you’re looking to cover dated wallpaper, protect your walls from cooking splashes, or simply refresh your mobile home’s aesthetic, shiplap offers a lightweight and installation-friendly solution perfect for life on the road.
The beauty of shiplap lies in its versatility—you can paint it any color, install it horizontally or vertically, and even combine it with other materials for a custom look. In this guide, we’ll explore 15 creative shiplap backsplash ideas that will inspire you to give your camper kitchen the upgrade it deserves, all while keeping weight and budget in mind.
1. Classic White Horizontal Shiplap
Would you like to save this article?
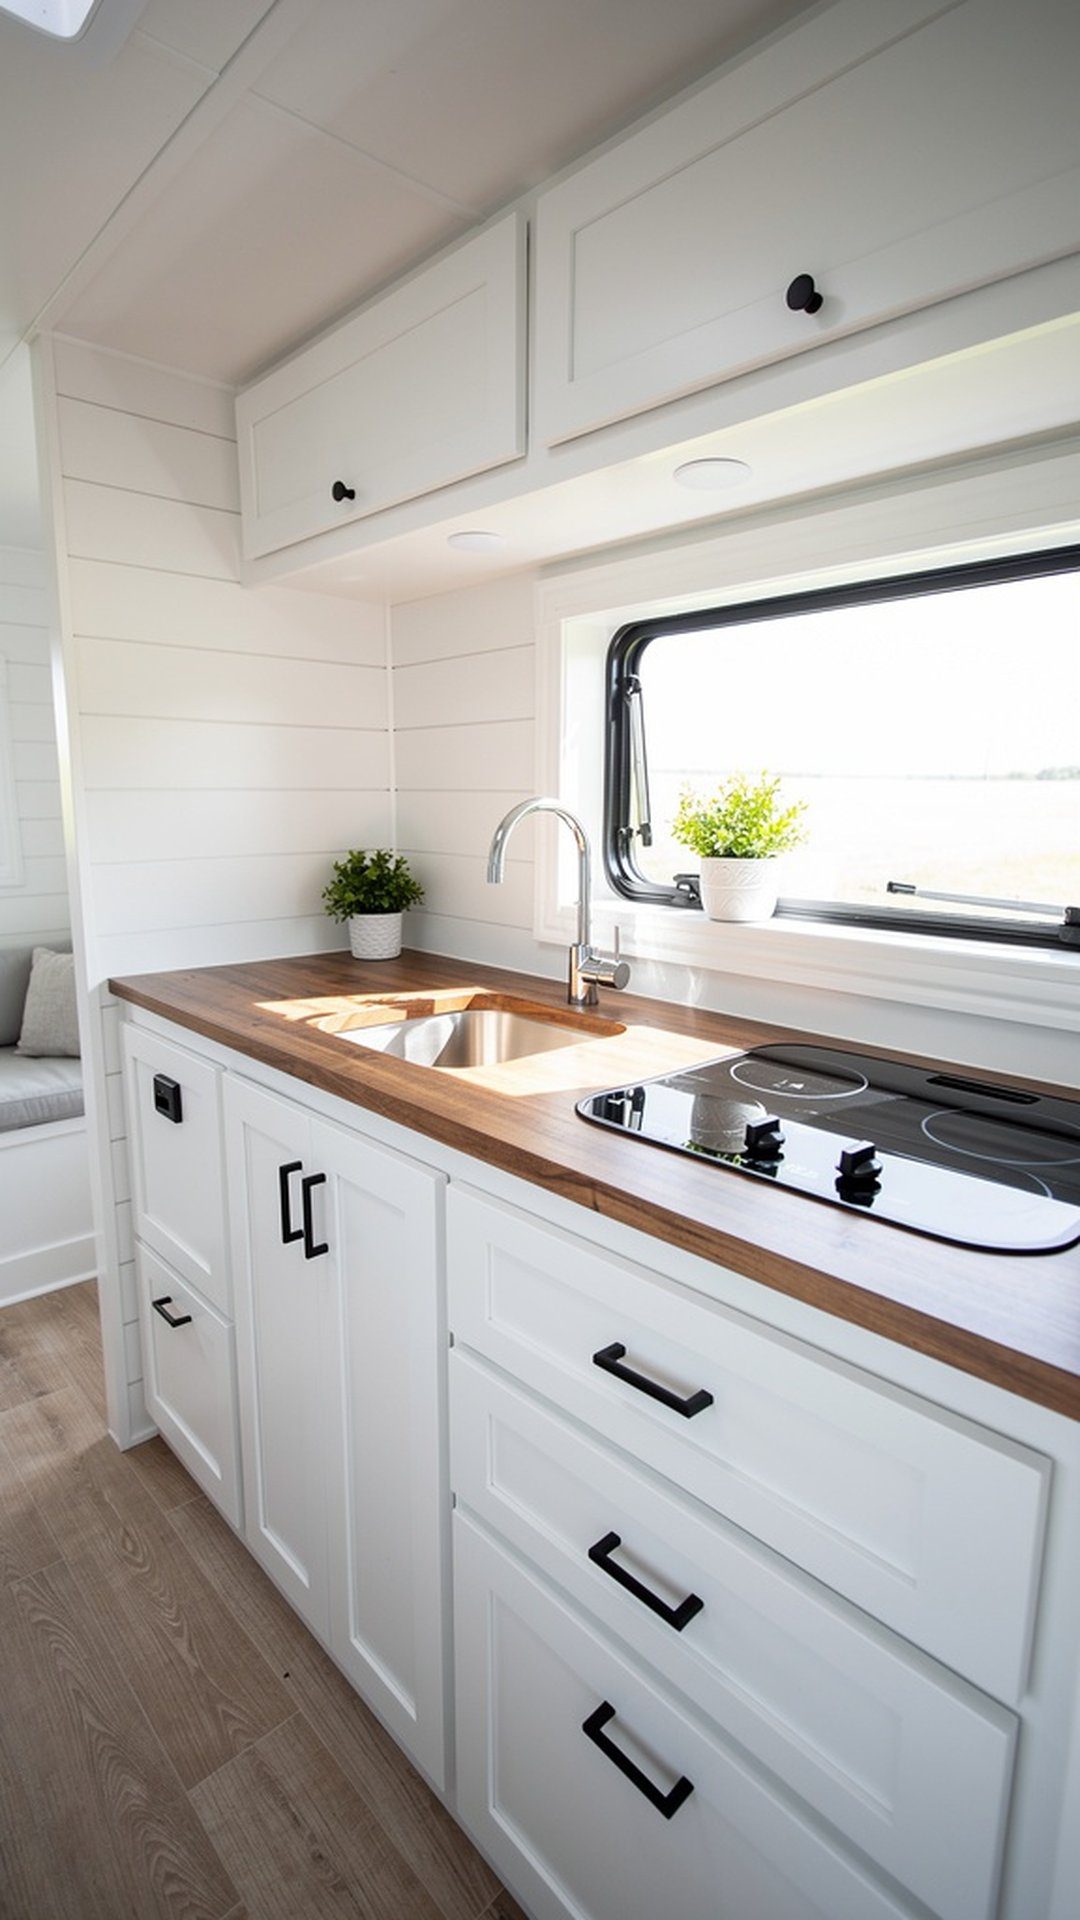
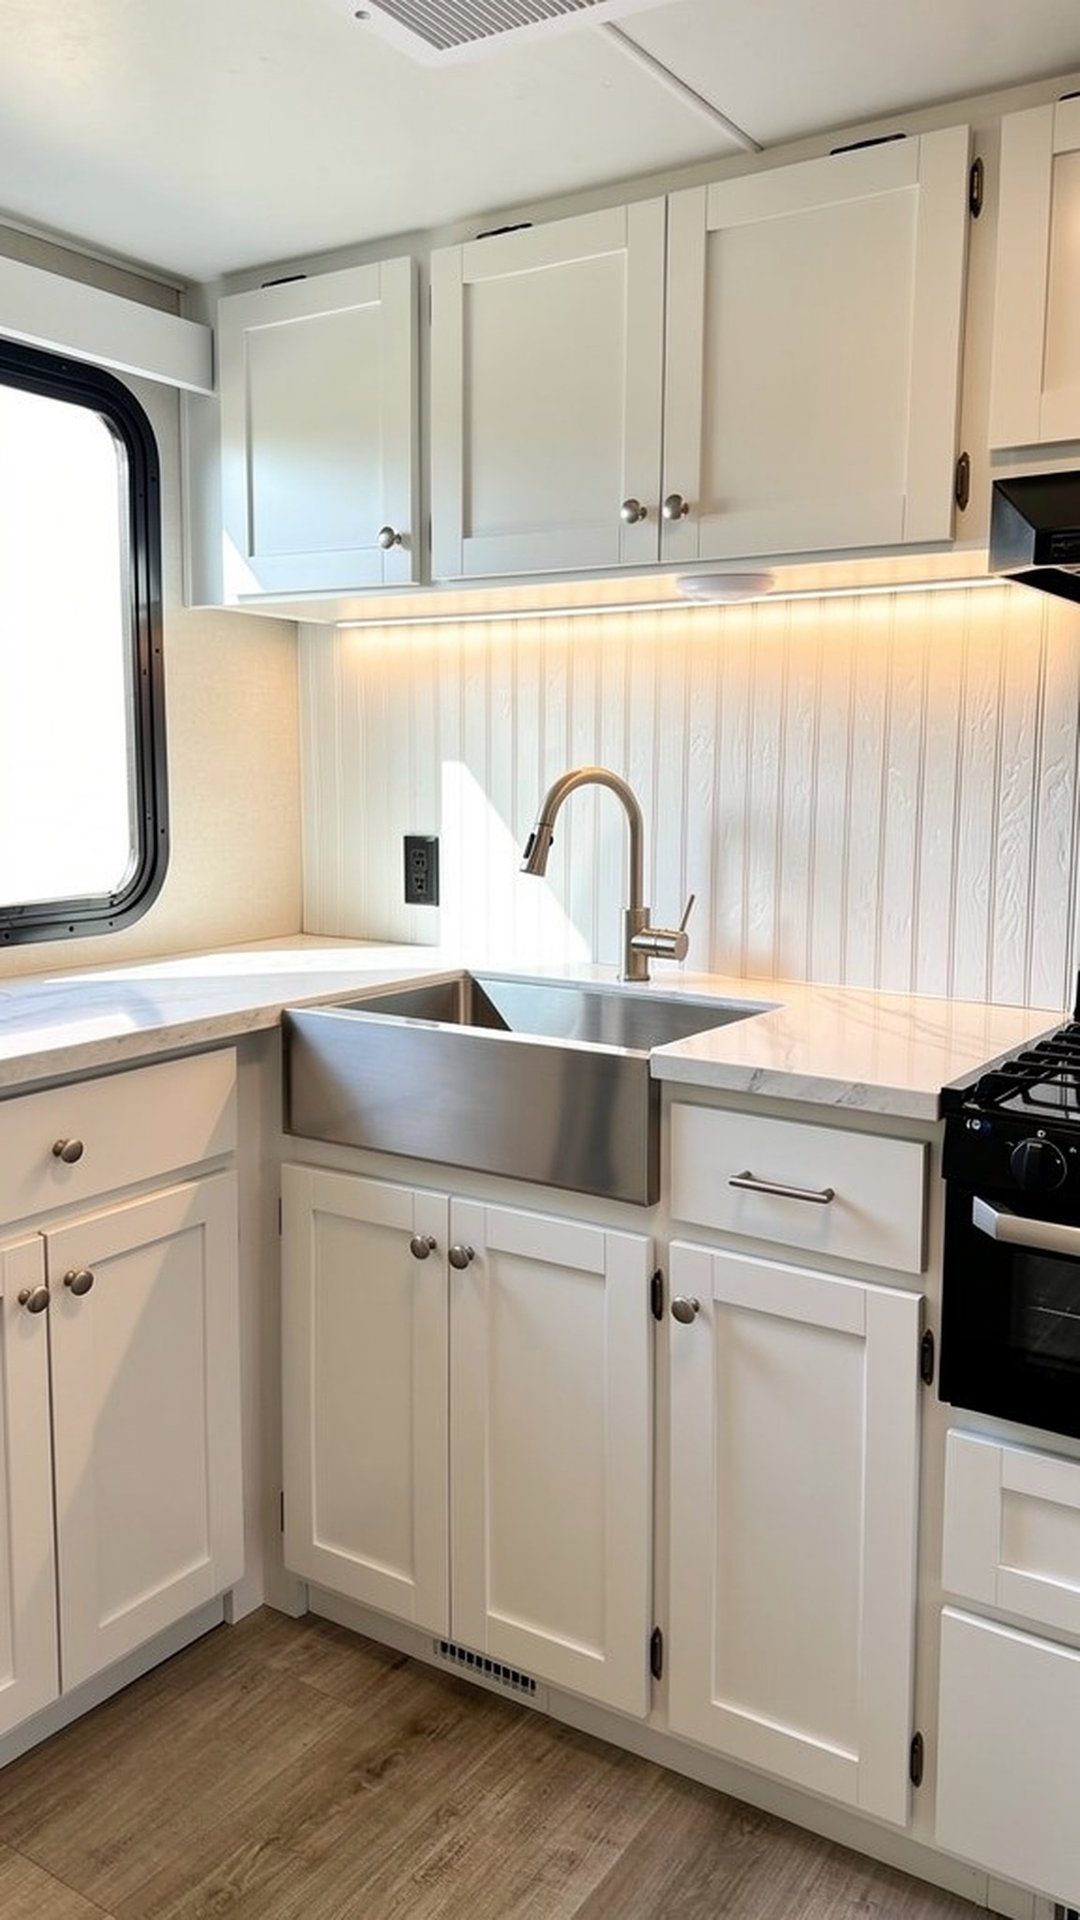
The timeless appeal of white horizontal shiplap creates a clean, bright foundation that makes any camper kitchen feel more spacious and inviting. This classic installation reflects natural light beautifully, which is especially valuable in compact RV spaces where every bit of brightness counts. White shiplap pairs effortlessly with any cabinet color and hardware style, making it the perfect backdrop for both modern and traditional camper kitchens.
Installing horizontal shiplap is one of the most straightforward DIY projects for RV owners. The linear pattern creates visual flow that draws the eye across your kitchen space, making narrow galleys appear wider. Use lightweight pine or pre-primed MDF boards to keep weight minimal while achieving maximum impact.
PRO TIP: Apply a semi-gloss or satin finish paint to your white shiplap backsplash for easy cleaning. These finishes resist moisture and grease better than flat paint, and you can wipe them down with a damp cloth after cooking without worrying about damaging the finish.
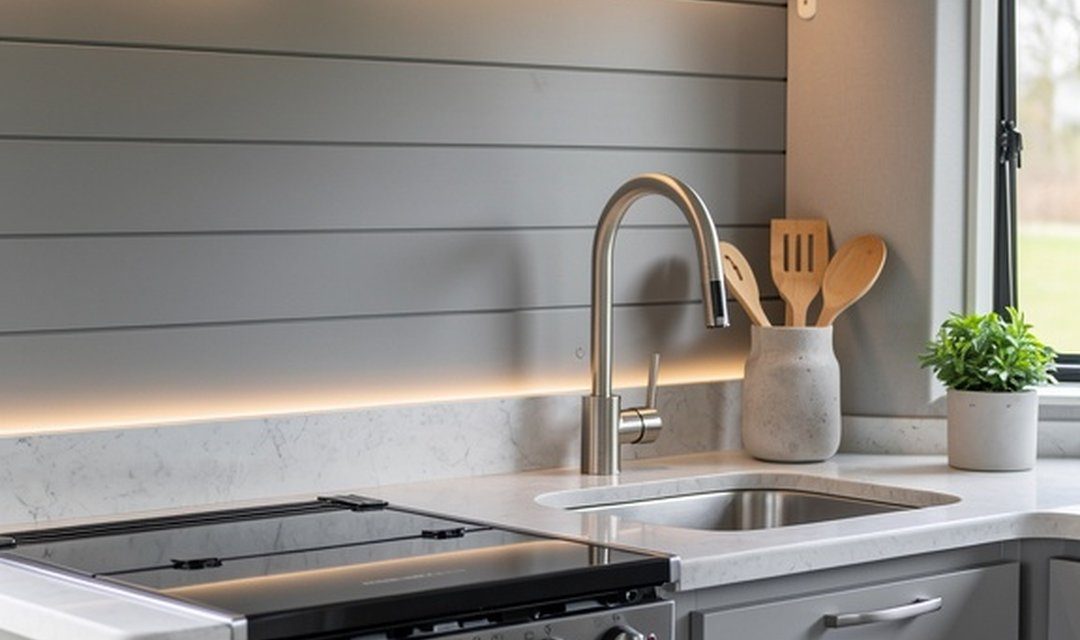
2. Modern Gray Shiplap
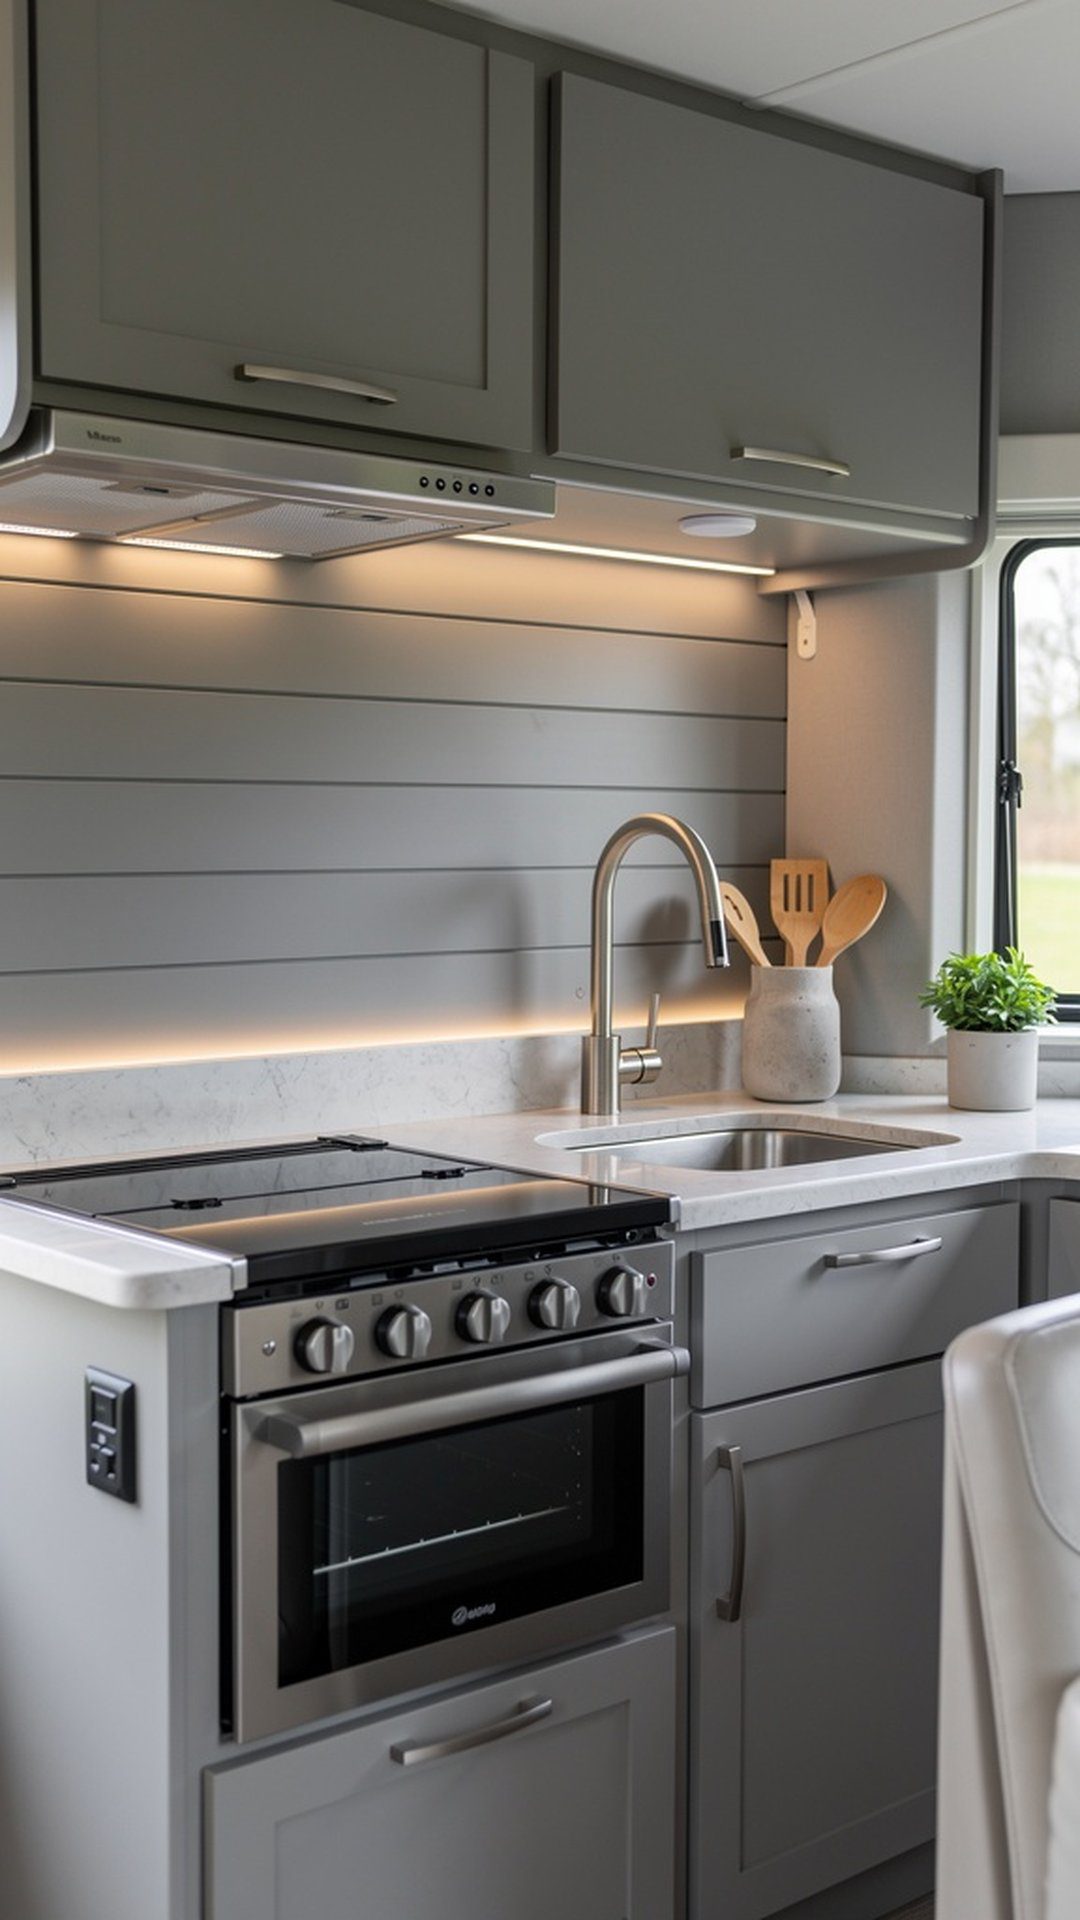
Gray shiplap brings sophisticated elegance to your camper kitchen with its contemporary neutral tone. This versatile shade complements stainless steel appliances, brushed nickel hardware, and both light and dark cabinetry. The subtle gray tones add depth and character without overwhelming your compact space, creating a designer look that feels current and polished.
Choose from cool grays for a modern vibe or warm grays with brown undertones for a cozier feel. Gray shiplap hides minor stains better than pure white, making it practical for busy camp cooks who spend lots of time preparing meals on the road. The neutral palette also provides flexibility when you want to refresh your kitchen decor with new accessories or textiles.
PRO TIP: Test your gray paint color on a sample board and view it in your camper at different times of day. RV lighting can dramatically change how gray appears, and what looks perfect in the store might read too blue or too brown in your space.
3. Natural Wood Shiplap
Embracing the natural beauty of wood grain brings organic warmth and cabin-like coziness to your camper kitchen. Unsealed or lightly stained shiplap showcases the unique patterns and variations in each board, creating a one-of-a-kind backsplash that celebrates natural materials. Cedar, pine, or poplar each offer distinct grain patterns and tones, from honey gold to rich amber.
Natural wood shiplap pairs beautifully with rustic, farmhouse, or Scandinavian-inspired RV interiors. The texture and depth of real wood add visual interest that painted surfaces can’t match. To protect the wood while maintaining its natural appearance, apply a clear matte or satin polyurethane sealer that guards against moisture and kitchen grease.
PRO TIP: Install a clear acrylic or tempered glass sheet over the shiplap directly behind your stove. This protective barrier allows you to enjoy the natural wood aesthetic while creating an easy-to-clean surface in the highest-splash zone of your kitchen.
4. Vertical Shiplap Installation
Installing shiplap vertically is a designer trick that makes camper ceilings appear higher and creates the illusion of expanded vertical space. This orientation draws the eye upward, which is particularly effective in RVs with standard or lower ceiling heights. Vertical boards add visual drama and create a distinct architectural statement that sets your kitchen apart from typical horizontal installations.
Vertical shiplap works especially well in narrow galley kitchens where horizontal lines might emphasize the tight width. The up-and-down pattern creates balance and can make cooking areas feel less cramped. Painting vertical shiplap in lighter colors amplifies the height-enhancing effect even further.
PRO TIP: When installing vertical shiplap, ensure your horizontal support blocking behind the wall is strong enough to anchor the boards securely. Use construction adhesive in addition to nails or screws for extra stability, especially important given the vibration and movement RVs experience on the road.
5. Bold Navy Blue Shiplap
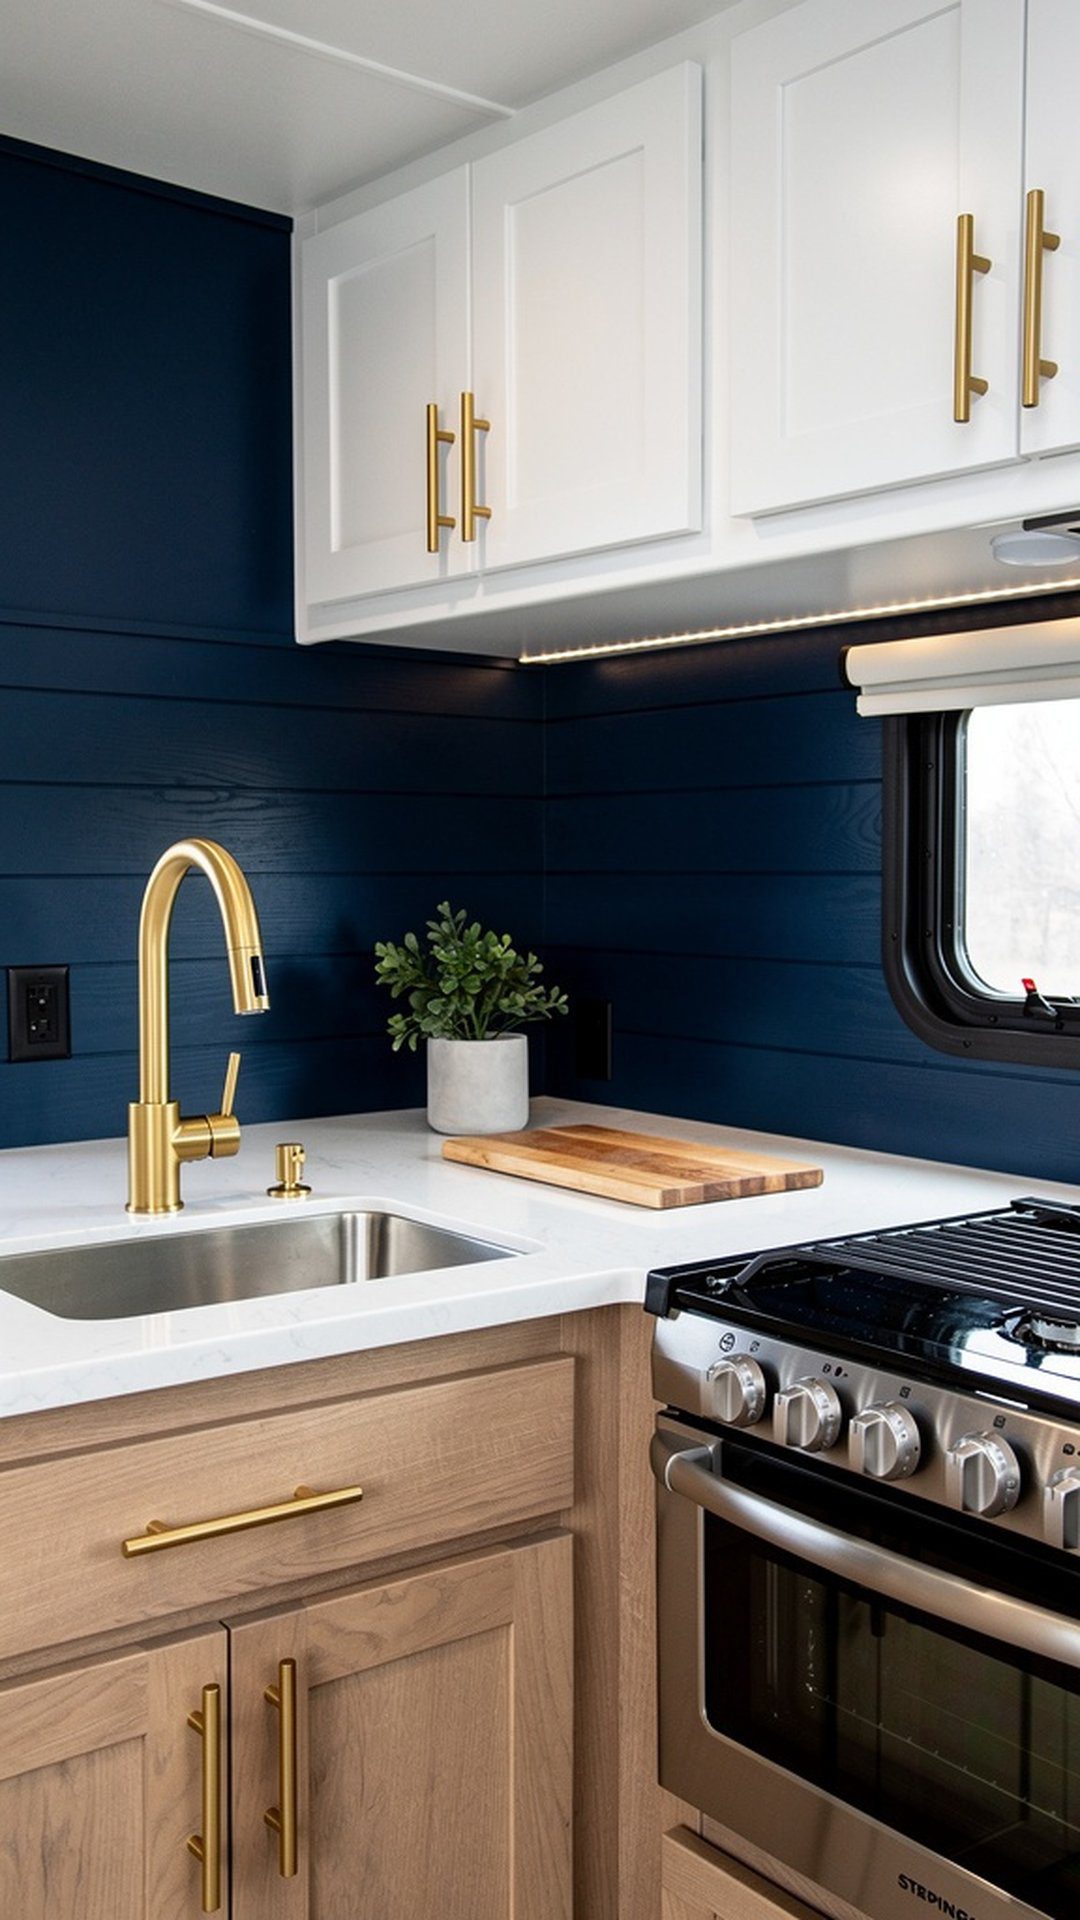
Make a dramatic design statement with navy blue shiplap that adds sophistication and personality to your camper kitchen. This rich, jewel-toned color creates striking contrast against white or cream cabinets while maintaining a sense of timeless elegance. Navy works beautifully with brass, gold, or copper hardware and fixtures, creating a high-end nautical or contemporary aesthetic.
Deep navy blue has the surprising ability to make small spaces feel intimate and cozy rather than cramped. The bold color creates a focal point that draws attention to your beautiful backsplash installation. Balance the dark walls with plenty of task lighting under cabinets to keep your work surfaces bright and functional.
PRO TIP: Use navy blue shiplap on a single accent wall behind your sink or stove, and keep adjacent walls lighter. This creates visual interest and depth without overwhelming your small space, giving you the drama of dark walls with the brightness small kitchens need.
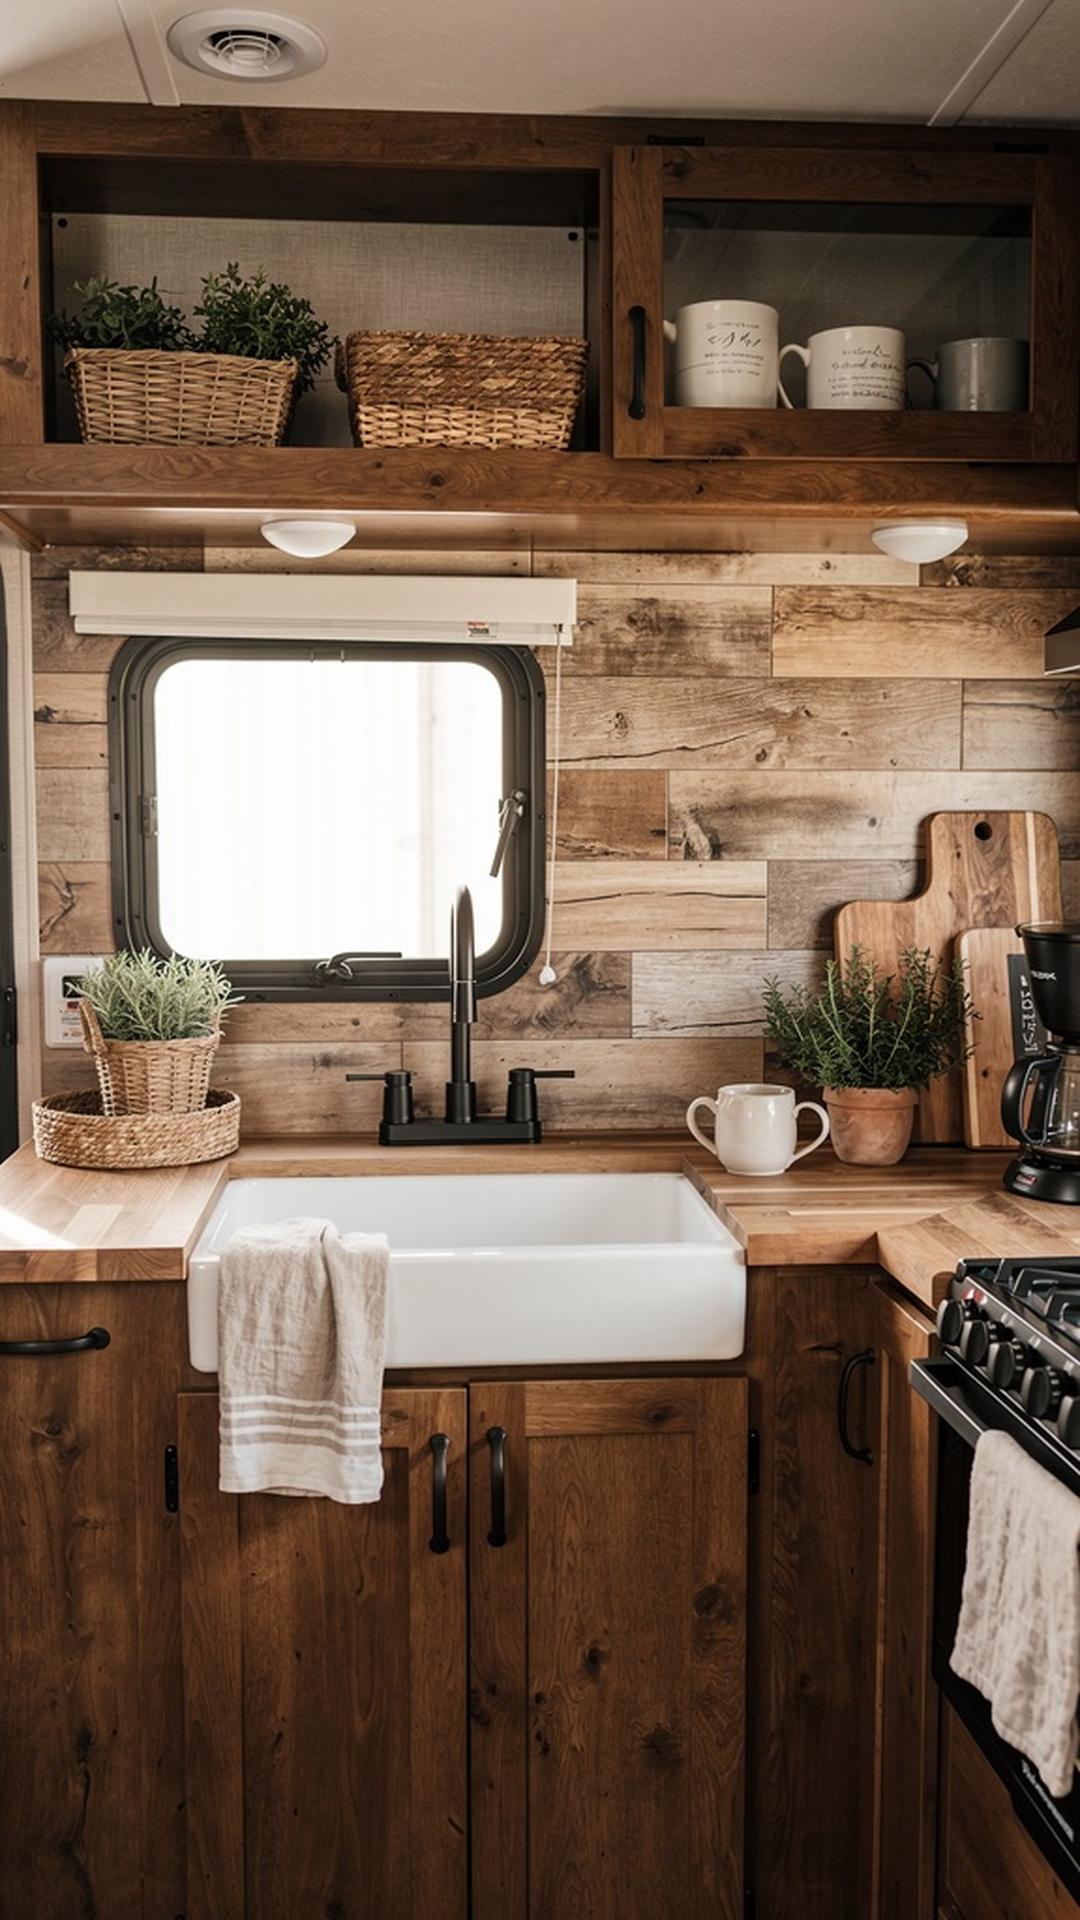
6. Reclaimed Wood Shiplap
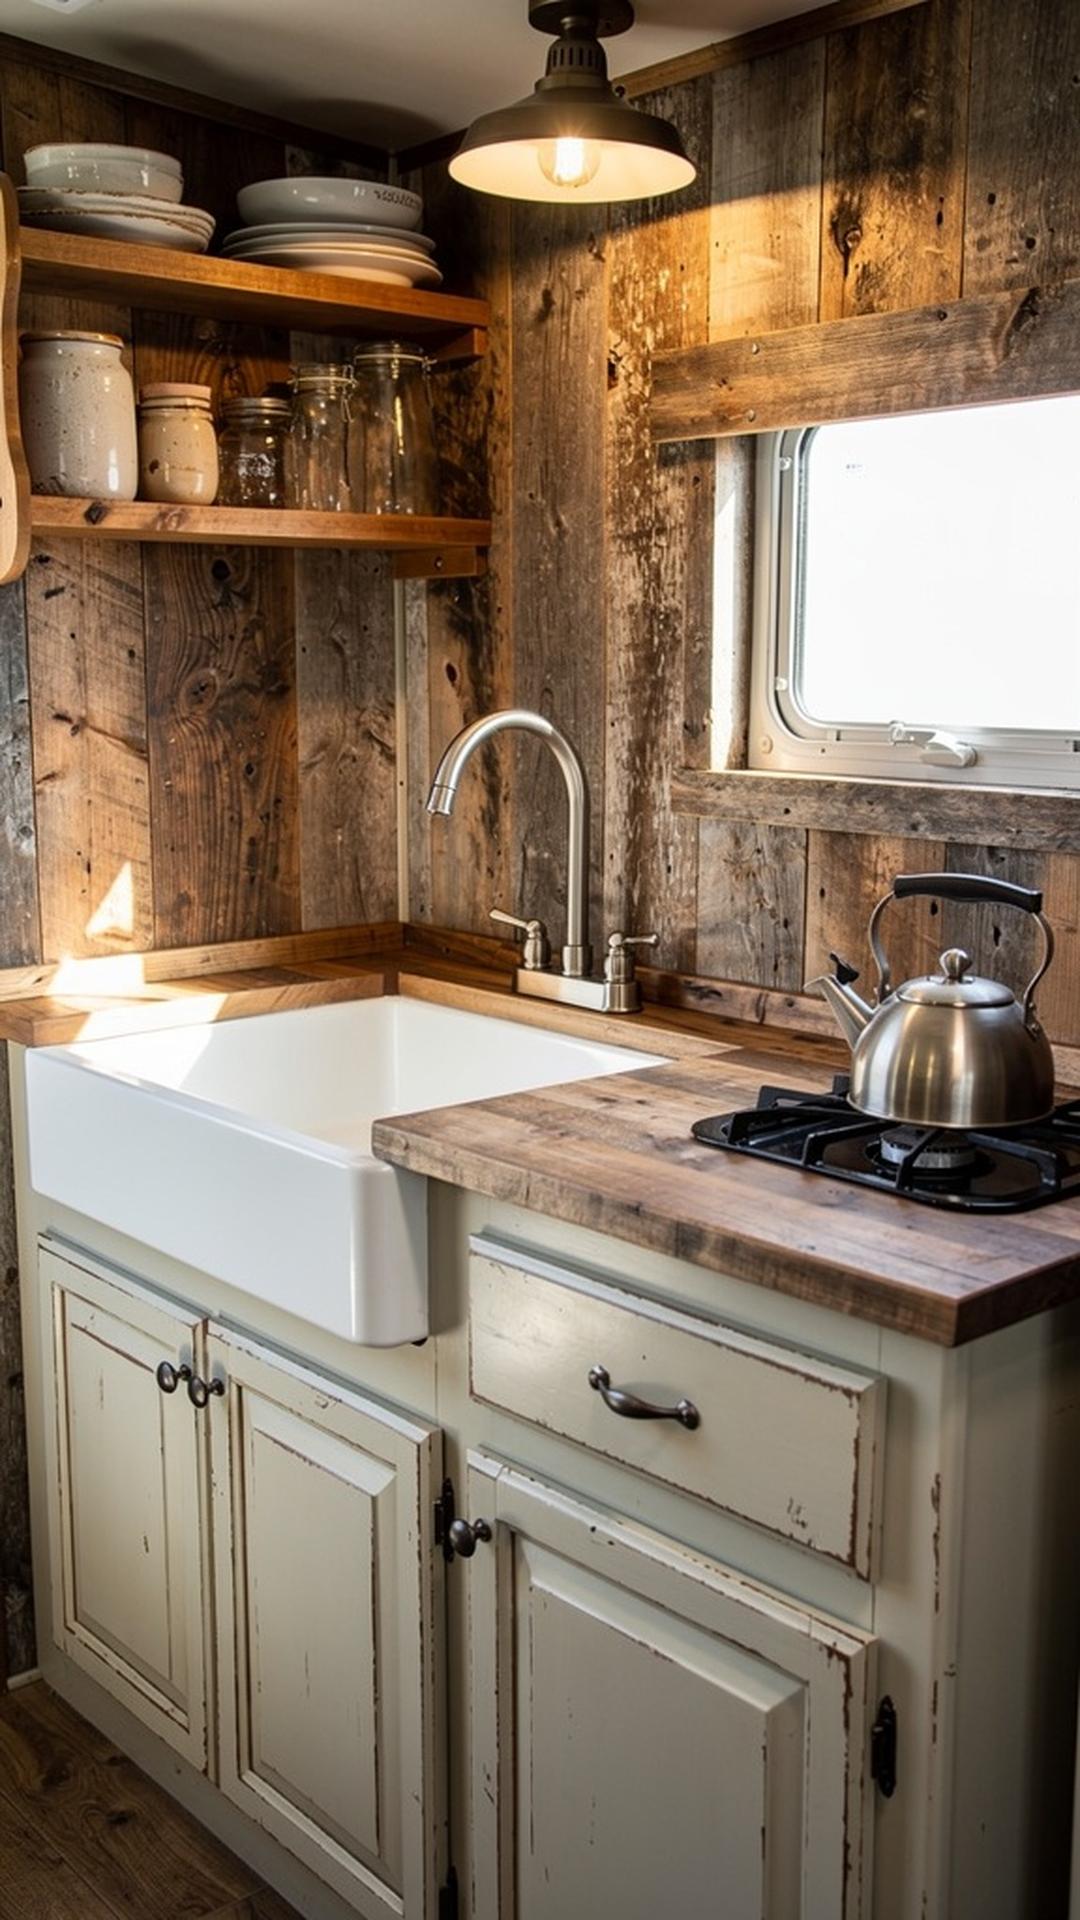
Reclaimed barn wood or weathered fence boards bring authentic character and history to your camper kitchen backsplash. Each piece tells a story through its aged patina, nail holes, and natural weathering patterns. The rustic texture and varied tones of reclaimed wood create a farmhouse aesthetic that feels genuine and lived-in, perfect for RVers who embrace a vintage or country lifestyle.
Salvaged wood is often lighter than new lumber since it’s been drying for decades, making it ideal for camper applications where weight matters. The mix of gray, brown, and weathered tones in reclaimed shiplap means you don’t need to paint or stain—the character is already built in. Each installation is truly unique since no two pieces of old wood are exactly alike.
PRO TIP: Clean and treat reclaimed wood properly before installation. Remove any loose splinters, check for insects or rot, and apply a wood sealer to prevent the old wood from continuing to deteriorate. Some RVers lightly sand weathered boards to create a cleaner surface while preserving the aged appearance.
7. Two-Tone Shiplap
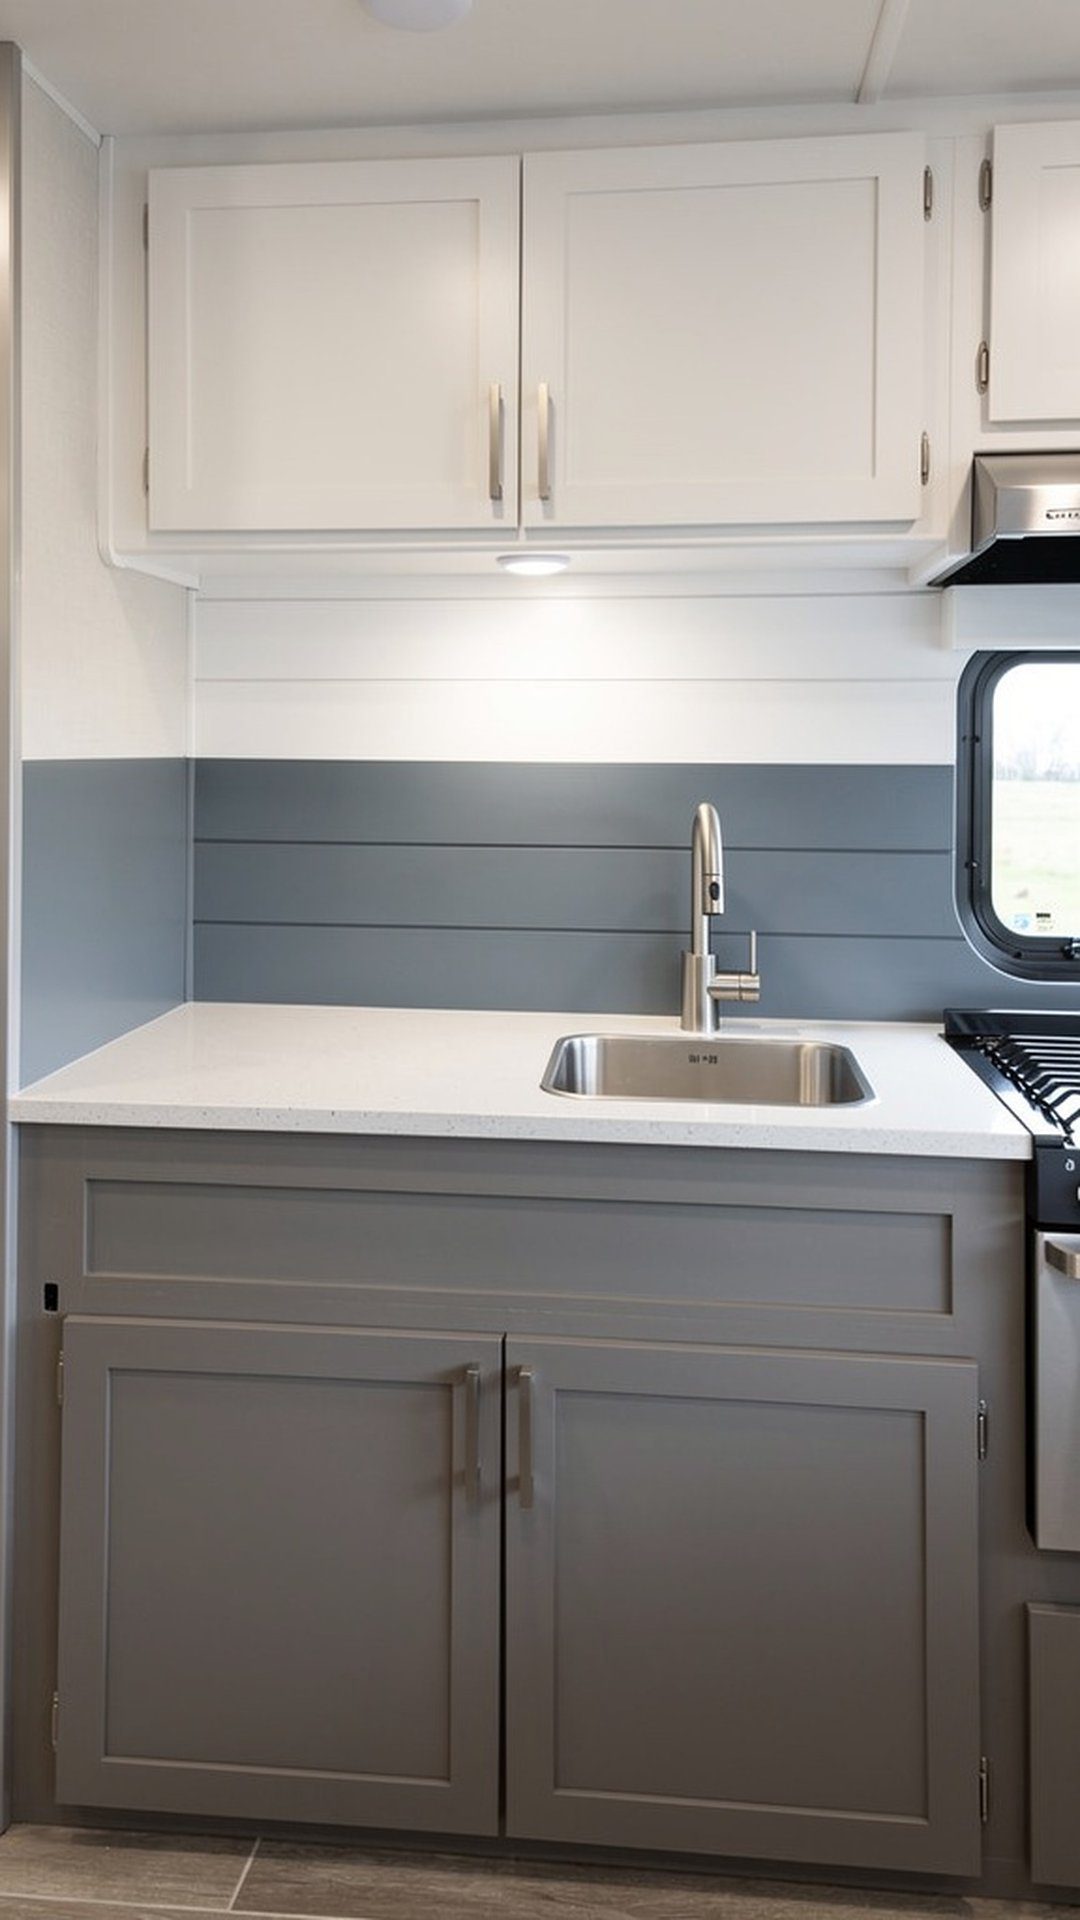
Create visual interest and dimension by painting your shiplap in two complementary colors divided horizontally. This design technique typically features a darker shade on the lower portion and a lighter color above, which helps hide splashes near countertops while keeping upper walls bright. The color division adds architectural detail and makes your backsplash installation feel more custom and intentional.
Two-tone shiplap allows you to incorporate bold colors without overwhelming your small space. Try navy below with white above, or sage green paired with cream. The horizontal color break creates a chair rail effect that adds sophistication and visual weight to your kitchen walls. This approach works particularly well in campers with taller wall spaces between counters and cabinets.
PRO TIP: Use painter’s tape to create a perfectly straight line where your two colors meet. Apply the lighter color first and let it dry completely, then tape off and paint the darker shade. Remove tape while the second coat is still slightly wet for the cleanest edge.
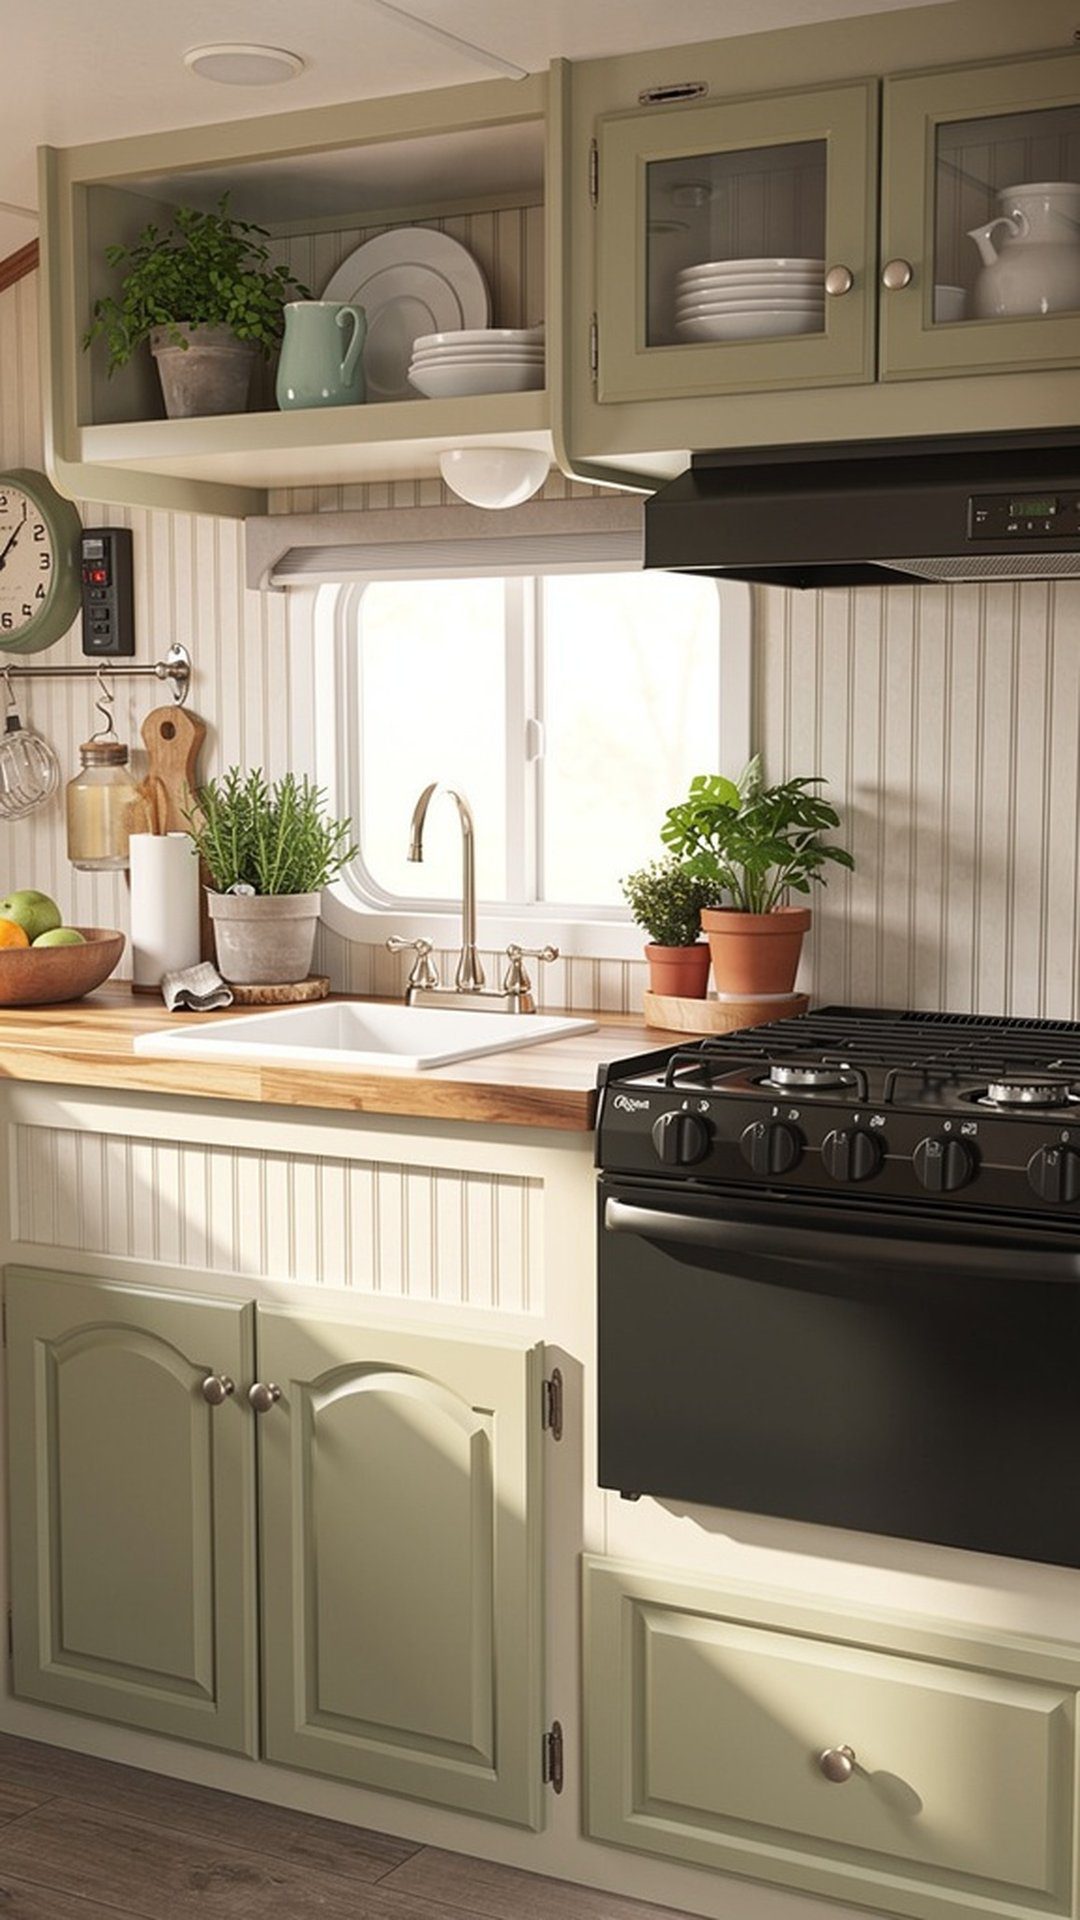
8. Soft Sage Green Shiplap
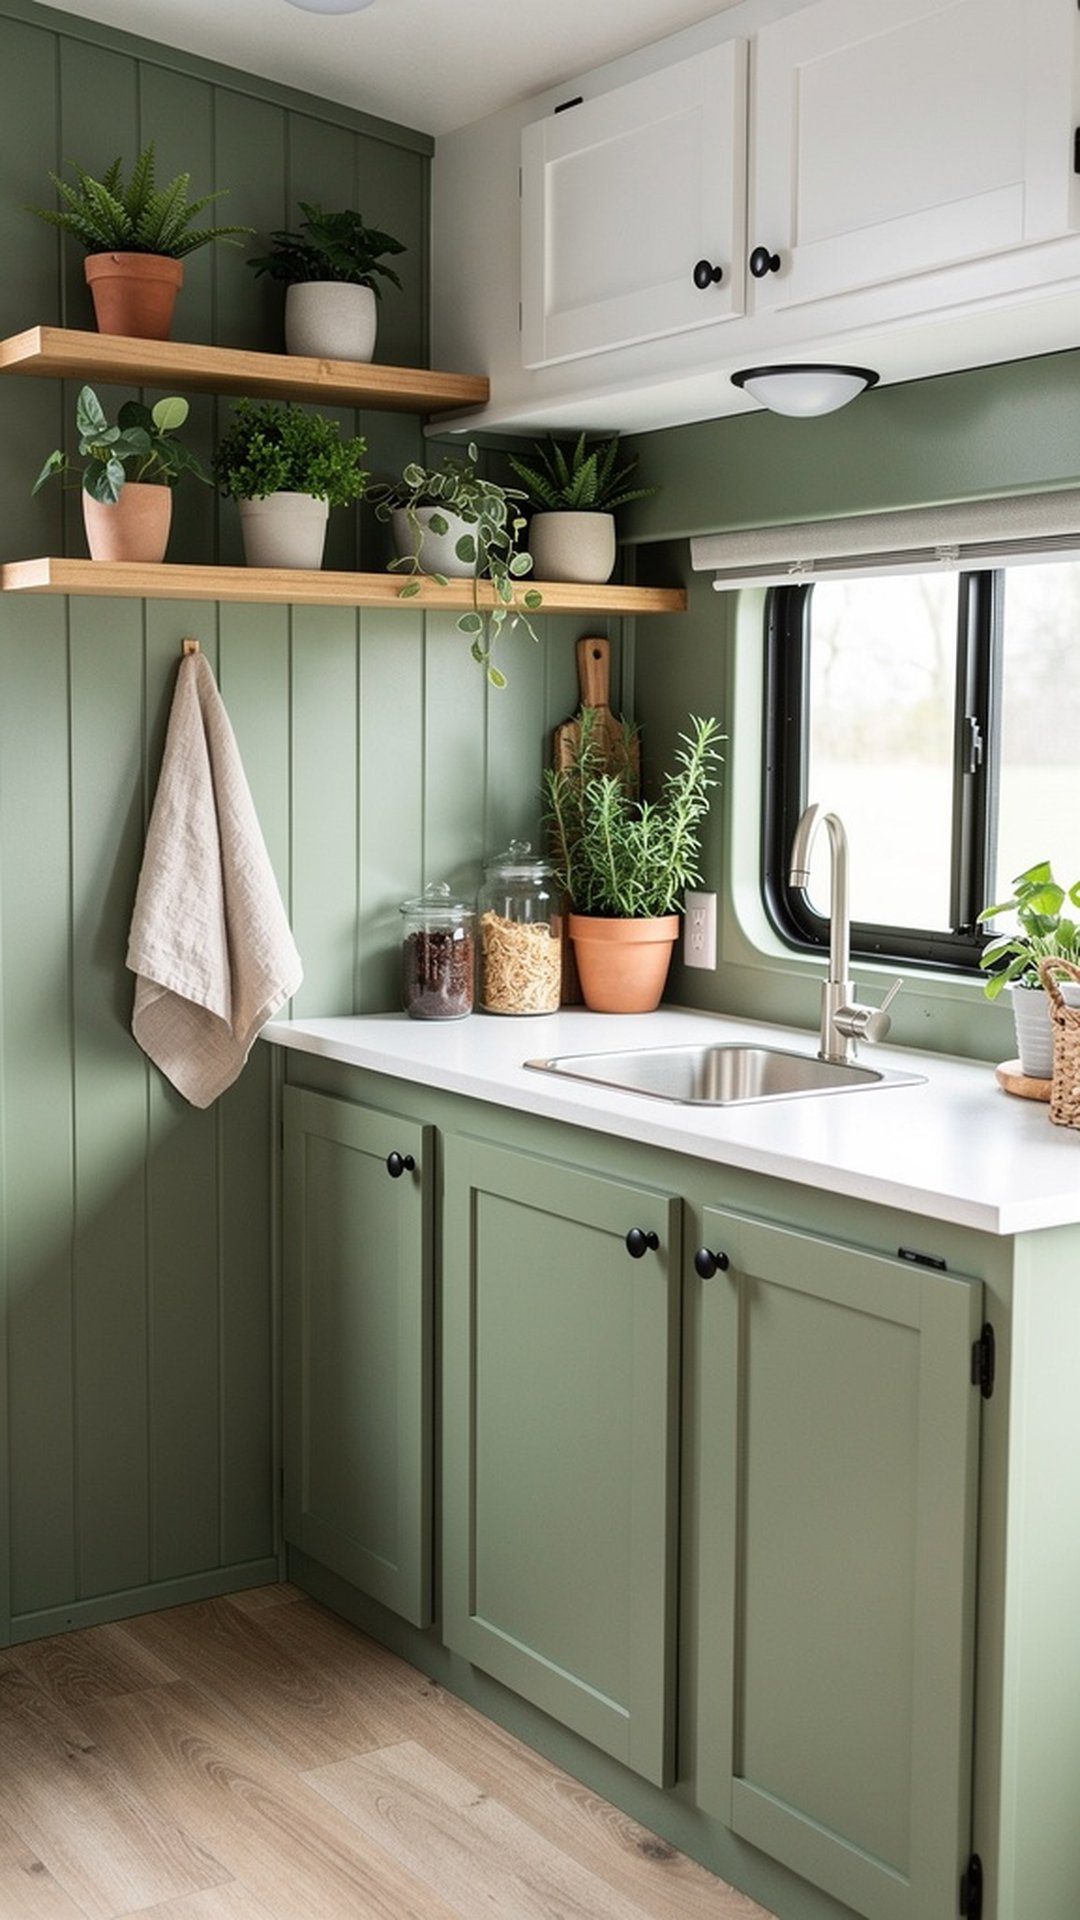
Soft sage green shiplap brings calming, nature-inspired tones into your camper kitchen, creating a serene backdrop that connects your indoor space with the outdoor adventures you love. This muted green feels fresh and contemporary without being trendy, and it pairs beautifully with natural wood, white cabinets, and brass or black hardware. Sage green has an inherent organic quality that makes your kitchen feel like a peaceful retreat.
Green tones have been shown to reduce stress and create a sense of tranquility, making your camper kitchen a more pleasant space for meal preparation. Sage is sophisticated enough for modern aesthetics yet soft enough for farmhouse or cottage styles. The subtle color adds personality while remaining neutral enough to work with changing decor styles over the years.
PRO TIP: Balance sage green walls with plenty of warm wood accents and natural textures to prevent the space from feeling too cool or clinical. Open shelving displaying wooden cutting boards, rattan baskets, or pottery in warm earth tones creates the perfect complement to green shiplap.
9. Herringbone Pattern Shiplap

Take your shiplap installation to the next level with a sophisticated herringbone pattern that creates dynamic visual movement. This diagonal V-shaped arrangement transforms simple boards into an eye-catching geometric design that looks far more complex and expensive than it actually is. Herringbone shiplap becomes a true focal point that elevates your entire camper kitchen aesthetic.
While herringbone requires more careful planning and precise cutting, the stunning result is worth the extra effort for DIYers who want a show-stopping backsplash. The pattern works beautifully in both painted and natural wood finishes. The diagonal lines create energy and interest without requiring multiple colors or additional decoration.
PRO TIP: Create a template or jig for cutting your angled ends to ensure consistency throughout your herringbone installation. Start from the center of your wall and work outward to maintain symmetry, and dry-fit several rows before permanently attaching to catch any alignment issues early.
10. Whitewashed Shiplap
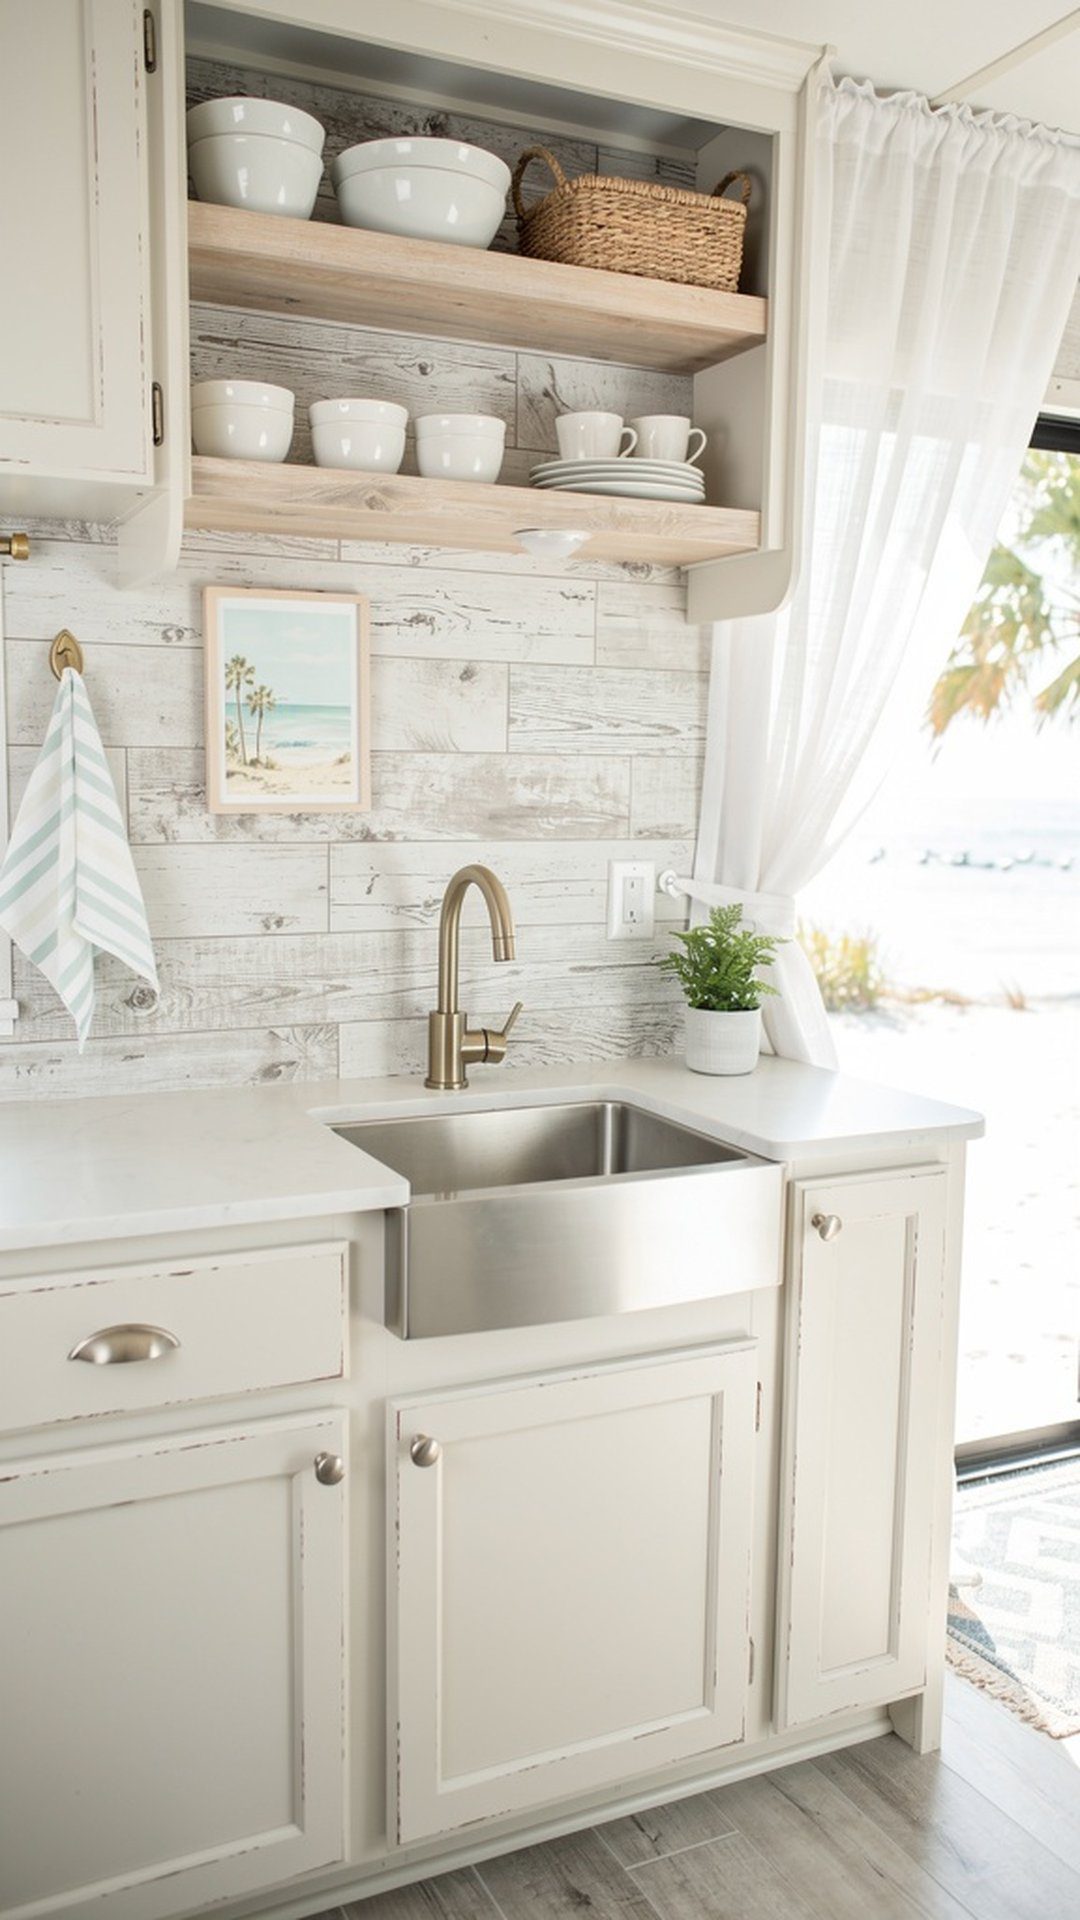
Whitewashing creates a soft, beachy aesthetic by allowing the natural wood grain to show through a translucent white finish. This technique gives you the brightness of white shiplap while maintaining the organic texture and character of real wood. Whitewashed shiplap feels casual and relaxed, perfect for RVers who embrace coastal, Scandinavian, or shabby chic design styles.
The semi-transparent finish creates subtle variations across your backsplash as each board absorbs the whitewash differently based on its grain pattern and porosity. This lived-in, imperfect quality adds charm and prevents your kitchen from looking too staged or sterile. Whitewashed shiplap brightens spaces without the starkness of solid white paint.
PRO TIP: Make your own whitewash by diluting white latex paint with water (typically 1 part paint to 2-3 parts water). Apply with a brush and immediately wipe with a clean rag, removing more or less to control the opacity. Work on one or two boards at a time before the mixture dries.
11. Dramatic Black Shiplap
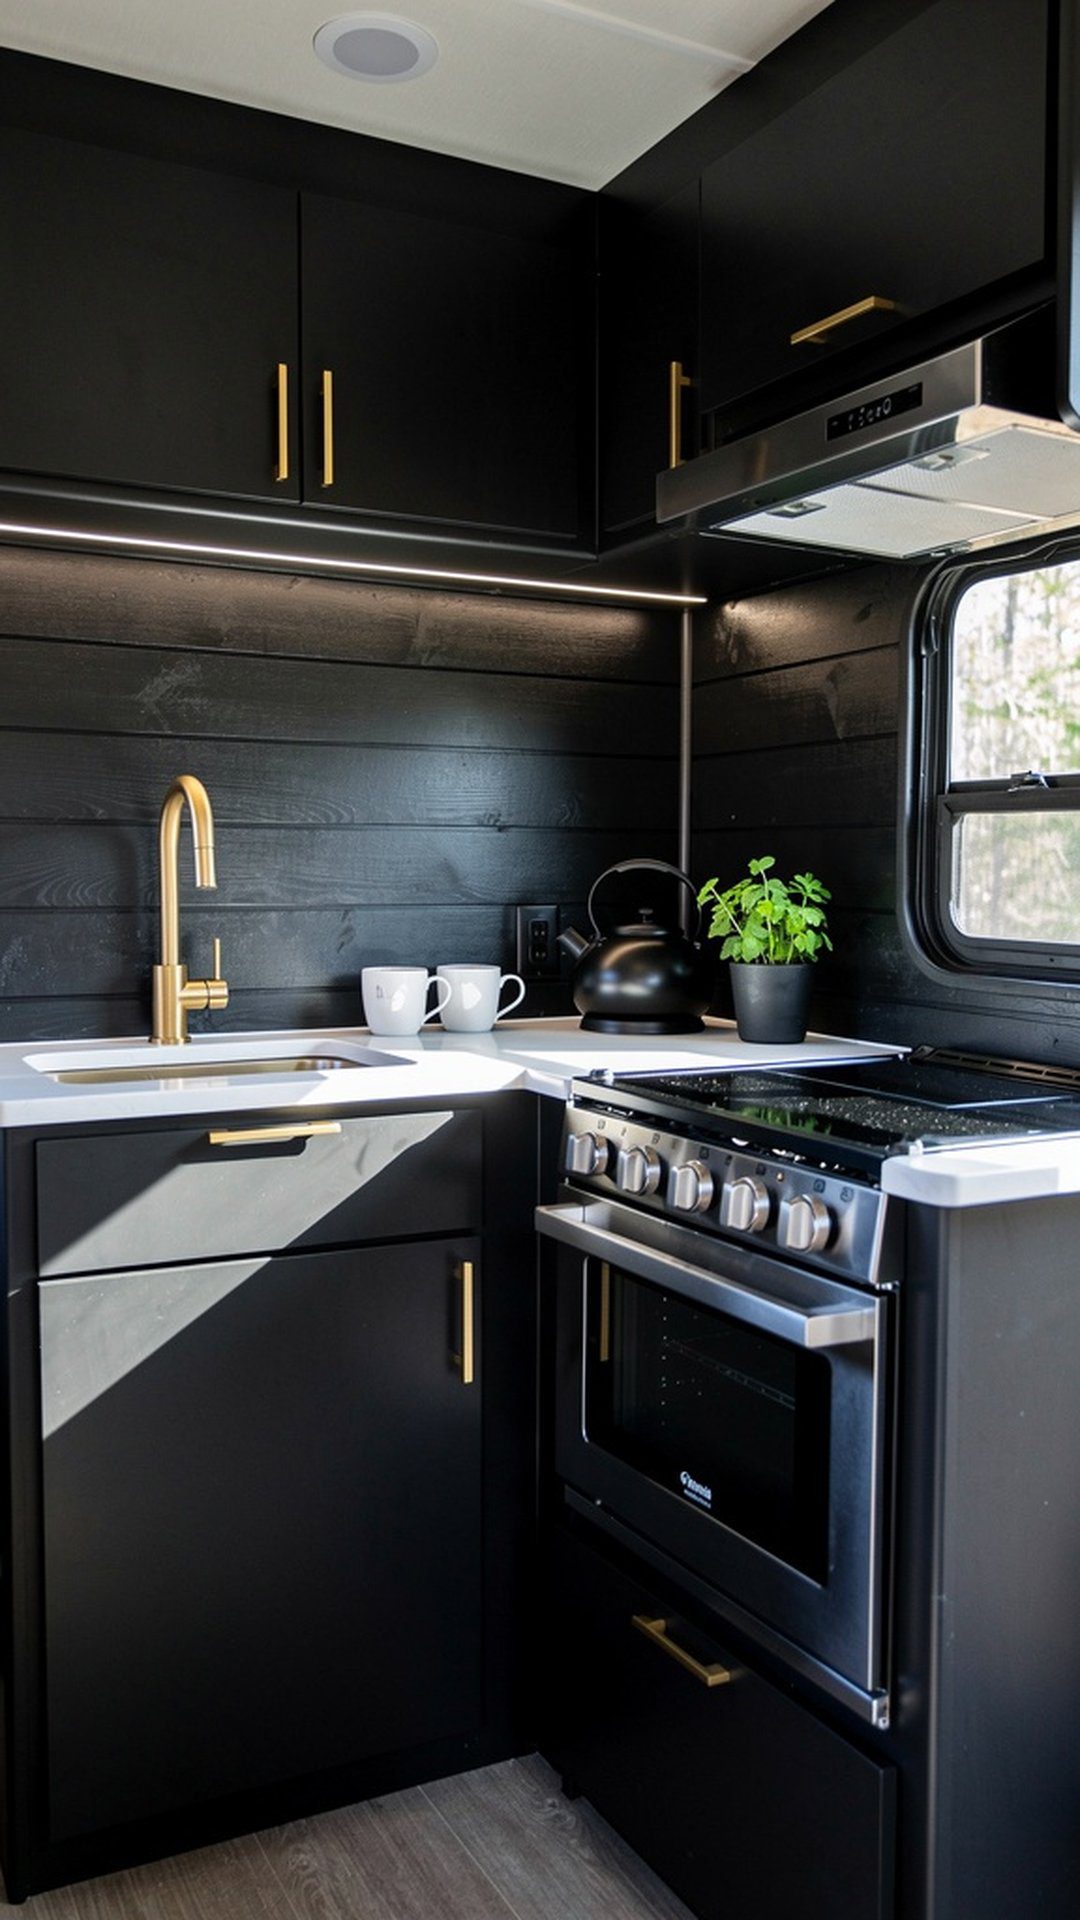
Black shiplap creates bold, modern drama that completely transforms a camper kitchen into a sophisticated space with designer appeal. This daring choice works surprisingly well in small areas when paired with excellent lighting and lighter elements that prevent the space from feeling cave-like. Black backgrounds make colorful dishes, brass fixtures, and open shelving displays truly pop with visual contrast.
A black backsplash hides stains and splashes better than any other color, making it surprisingly practical for busy camp kitchens. The dark walls create a moody, intimate atmosphere that feels upscale and intentional. Balance the darkness with white or light wood cabinets, plenty of under-cabinet lighting, and strategically placed mirrors or reflective surfaces.
PRO TIP: Use black shiplap in campers with larger windows or skylights that provide abundant natural light. Install LED strip lighting under upper cabinets and inside open shelving to compensate for the light-absorbing dark walls and keep work surfaces well-illuminated for cooking tasks.
12. Narrow Board Shiplap

Using narrower shiplap boards (3-4 inches instead of standard 6-8 inches) creates refined, delicate texture that feels more finished and intentional. The increased number of seams and shadow lines adds visual complexity and detail to your backsplash. Narrow boards create a more formal, sophisticated appearance compared to wider rustic planks, making them ideal for modern or transitional camper kitchens.
The tighter spacing of narrow boards can actually make walls appear taller when installed horizontally, and wider when installed vertically. This scaled-down proportion often works better in compact RV spaces where traditional wide boards might feel overwhelming. Narrow shiplap also uses less material per board, potentially reducing weight—an important consideration for campers.
PRO TIP: Purchase pre-cut shiplap panels with narrow boards already assembled rather than installing individual thin strips. These panels install much faster and ensure consistent spacing between boards, saving you hours of precise measuring and alignment work.
13. Distressed Painted Shiplap
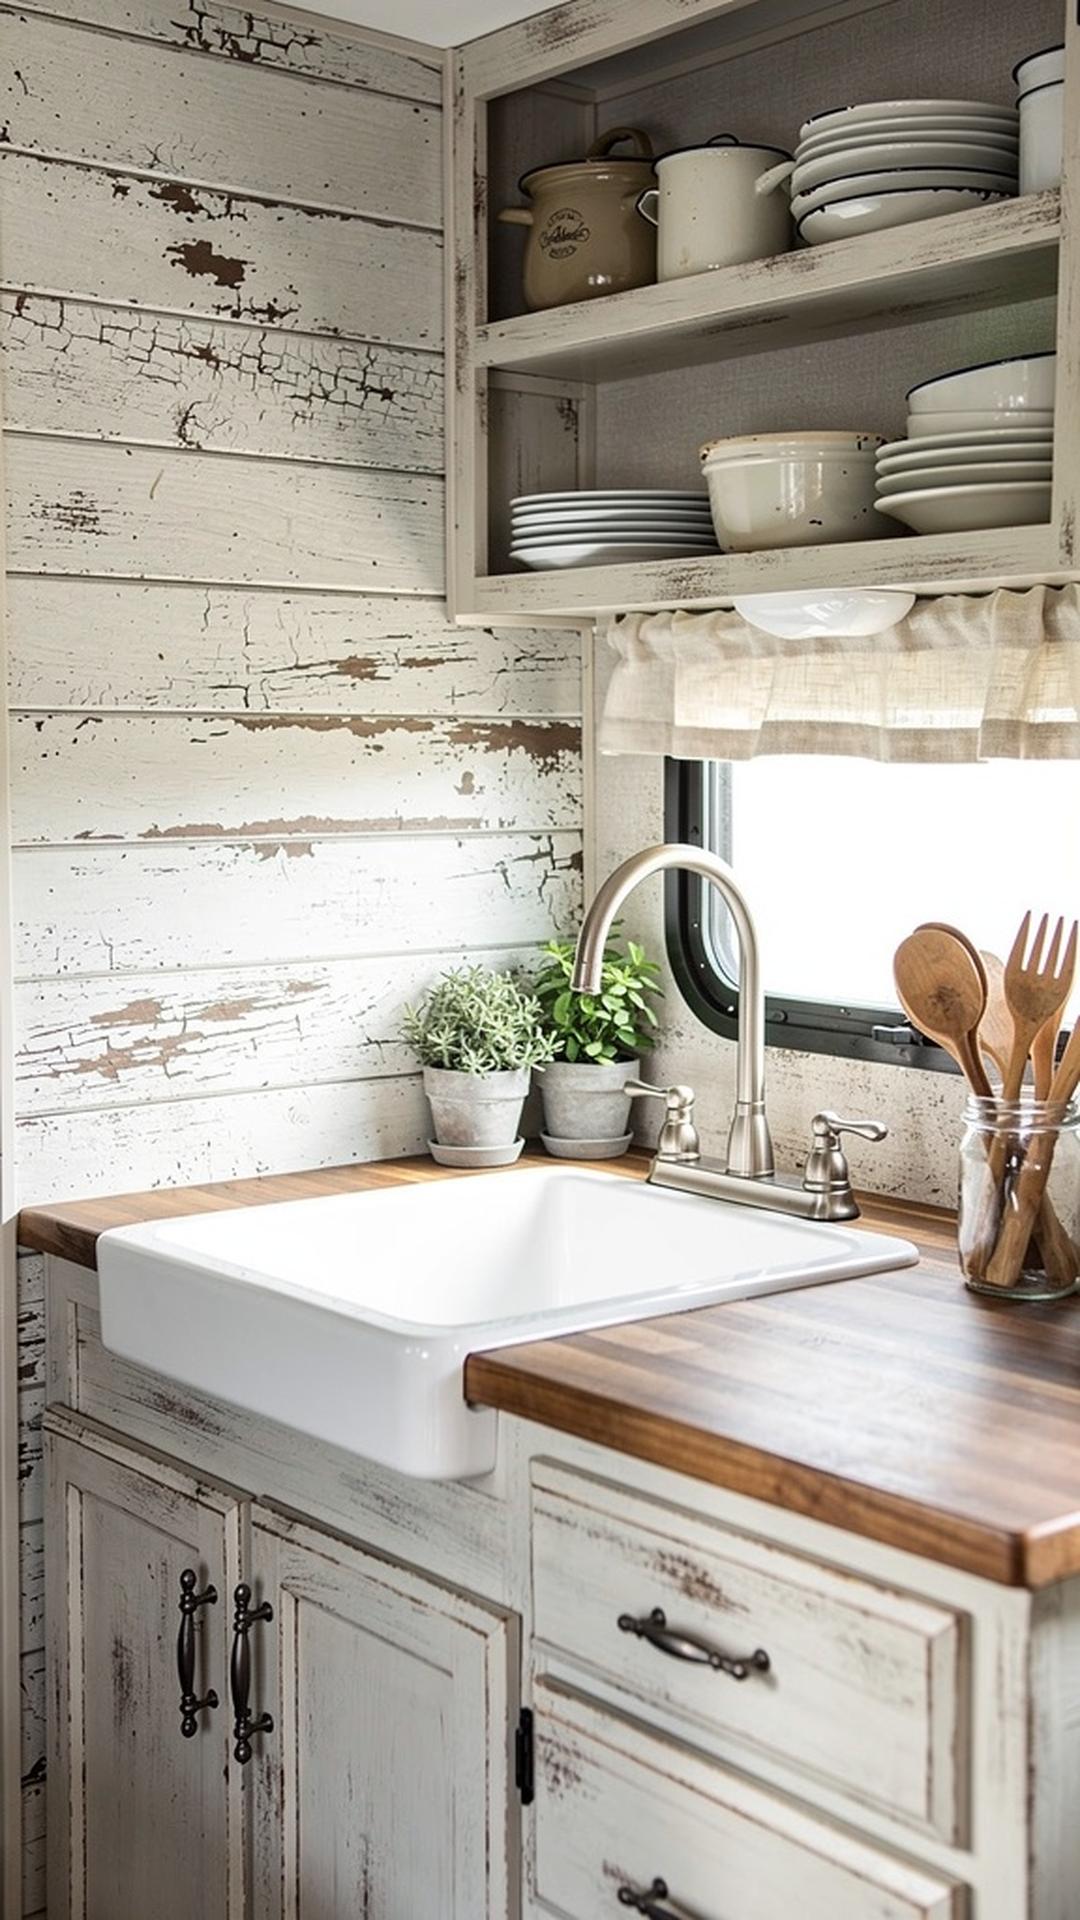
Distressed painted shiplap delivers vintage farmhouse charm through intentionally weathered finishes that create the appearance of aged, well-loved materials. This technique involves painting boards and then strategically sanding edges and surfaces to reveal bare wood underneath, creating an authentically worn appearance. The chippy, layered look adds character and warmth that makes your camper kitchen feel like it has history and soul.
Distressing is perfect for RVers who love shabby chic, cottage, or vintage aesthetics but want the practical protection of painted wood. The deliberately imperfect finish means new dings and scratches from camper life simply add to the character rather than detracting from your design. You can distress white, cream, or any color paint for custom vintage appeal.
PRO TIP: Apply a darker base coat, then paint your final color on top. When you sand through the top layer, the darker color shows through for authentic multi-layered aging. Focus distressing on edges, corners, and areas that would naturally wear over time for the most realistic weathered appearance.
14. Beadboard Shiplap
Beadboard shiplap combines the horizontal lines of traditional shiplap with vertical beaded grooves for extra dimension and cottage-style charm. This hybrid approach creates rich texture through dual directional elements—horizontal planks with vertical detail. Beadboard shiplap feels traditional and homey, evoking classic American cottages and farmhouses translated perfectly into your camper kitchen.
The vertical beading adds visual interest without requiring complex installation techniques or patterns. Many home improvement stores sell pre-milled beadboard shiplap that installs just as easily as plain boards but delivers enhanced aesthetic appeal. The additional grooves and shadows create depth that makes walls feel less flat and more architecturally interesting.
PRO TIP: When painting beadboard shiplap, use a small foam roller for the flat surfaces and a narrow brush to ensure paint reaches into all the grooves. Taking time to properly coat the recessed beaded details prevents unsightly bare wood lines and ensures a professional-looking finish.
15. Mixed Materials: Shiplap and Tile Combination
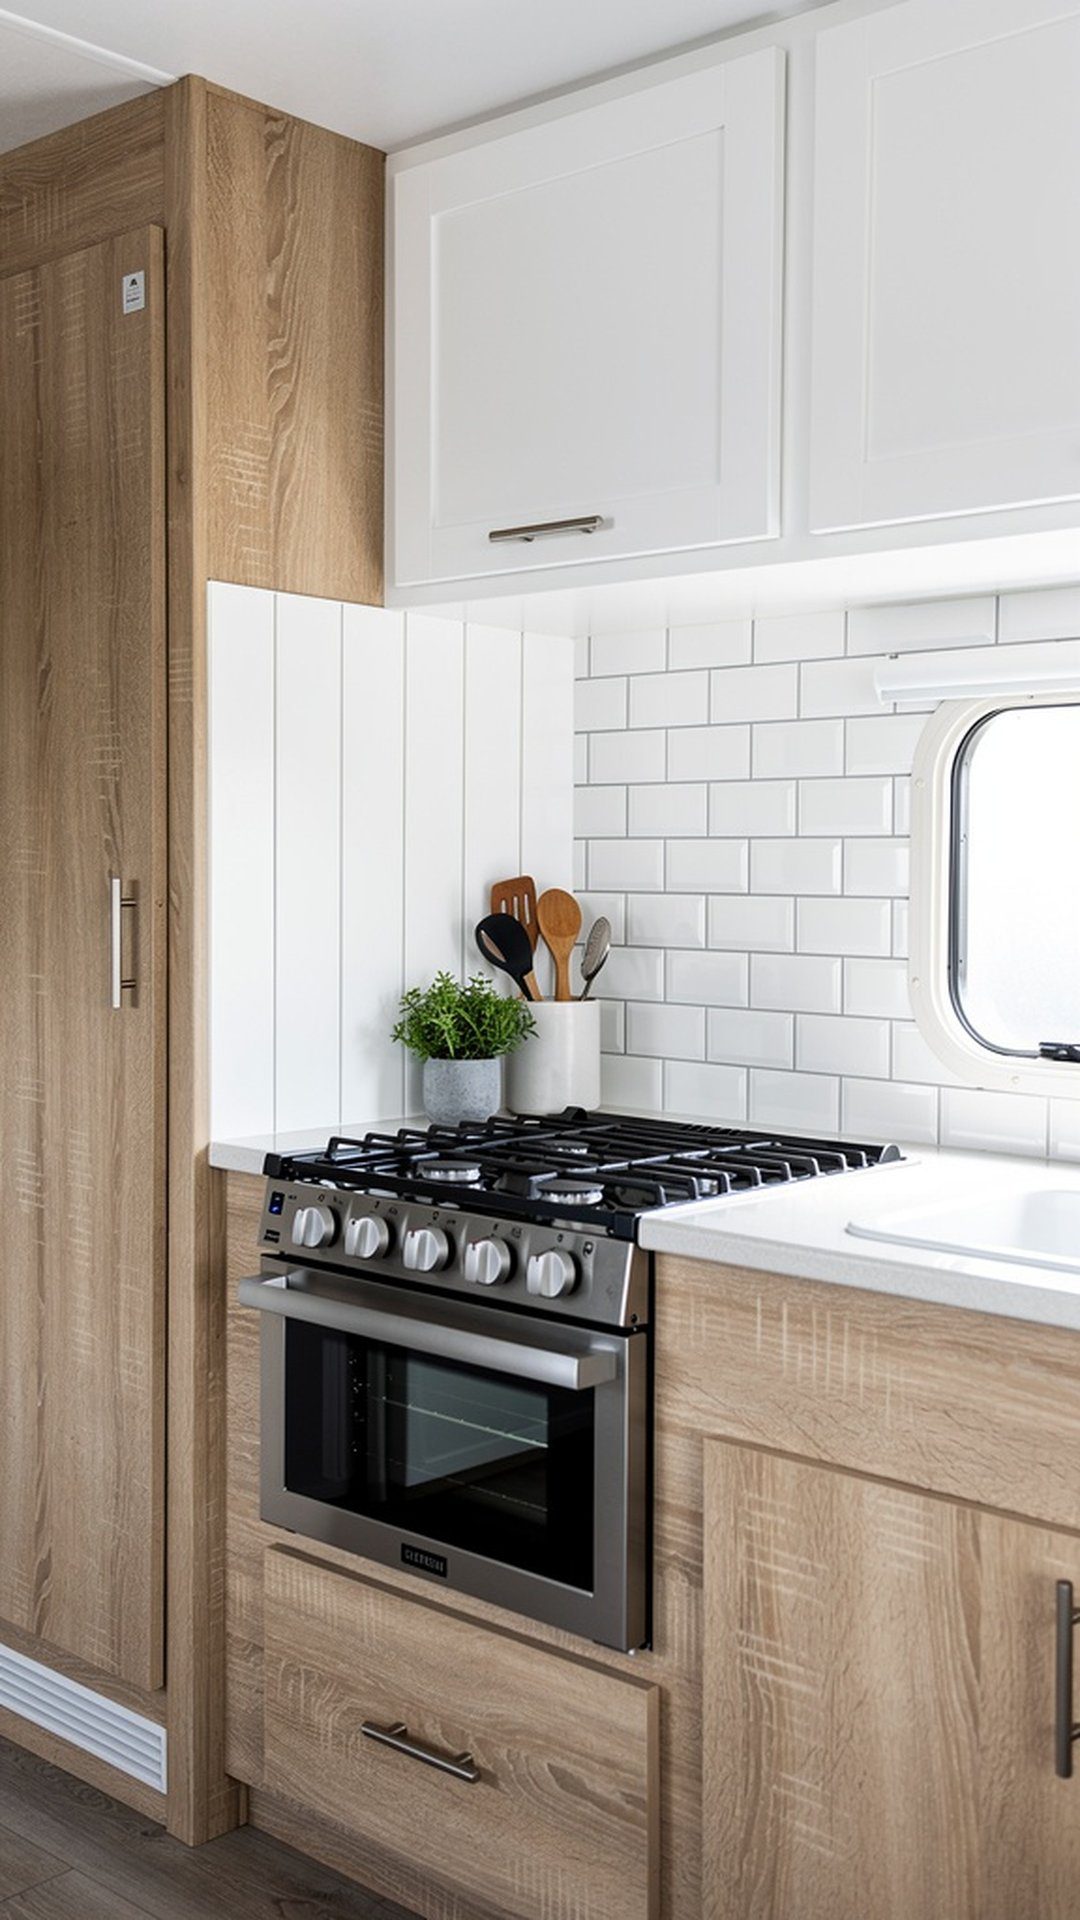
Combine shiplap with traditional backsplash tile for a hybrid design that offers both aesthetic interest and practical functionality. Install easy-clean tile directly behind your stove or sink where splashes are heaviest, and use shiplap on surrounding wall areas for warmth and texture. This mixed-material approach gives you the best of both worlds—the charm of wood with the cleaning ease of ceramic or glass tile.
The combination creates natural zoning in your kitchen, with tile defining your primary work areas and shiplap providing decorative backdrop. Choose subway tile, mosaic, or patterned ceramic that complements your shiplap color for a cohesive custom look. The material contrast adds visual layers and sophistication that feels professionally designed.
PRO TIP: Use thin, lightweight peel-and-stick tile for the ceramic portions to minimize weight addition to your RV. These modern adhesive tiles install without mortar or grout, making them perfect for camper applications, and they’re much lighter than traditional tile installations while still providing excellent splash protection.


