RV delamination is one of the most feared problems for recreational vehicle owners, and for good reason. This issue occurs when the outer layers of your RV’s walls separate from the inner structure, creating unsightly bubbles and potentially serious damage.
Yes, heat can absolutely cause RV delamination, and it’s actually one of the most common culprits behind this costly problem. When your RV sits in direct sunlight for extended periods, the intense heat can weaken the adhesive bonds that hold the wall layers together. This is especially true for older RVs or those with certain types of construction materials.
Understanding how heat affects your RV’s structure is crucial for preventing this expensive repair. This guide will walk you through the science behind heat-induced delamination, help you spot early warning signs, and provide practical solutions to protect your investment from sun damage and other common causes.
Key Takeaways
- Heat from sun exposure weakens the adhesive bonds between RV wall layers, causing them to separate and bubble
- Early detection through regular inspections can save you thousands in repair costs and prevent further structural damage
- Proper parking, maintenance, and protective measures can effectively prevent heat-induced delamination from occurring
How Heat Can Cause RV Delamination
Would you like to save this article?
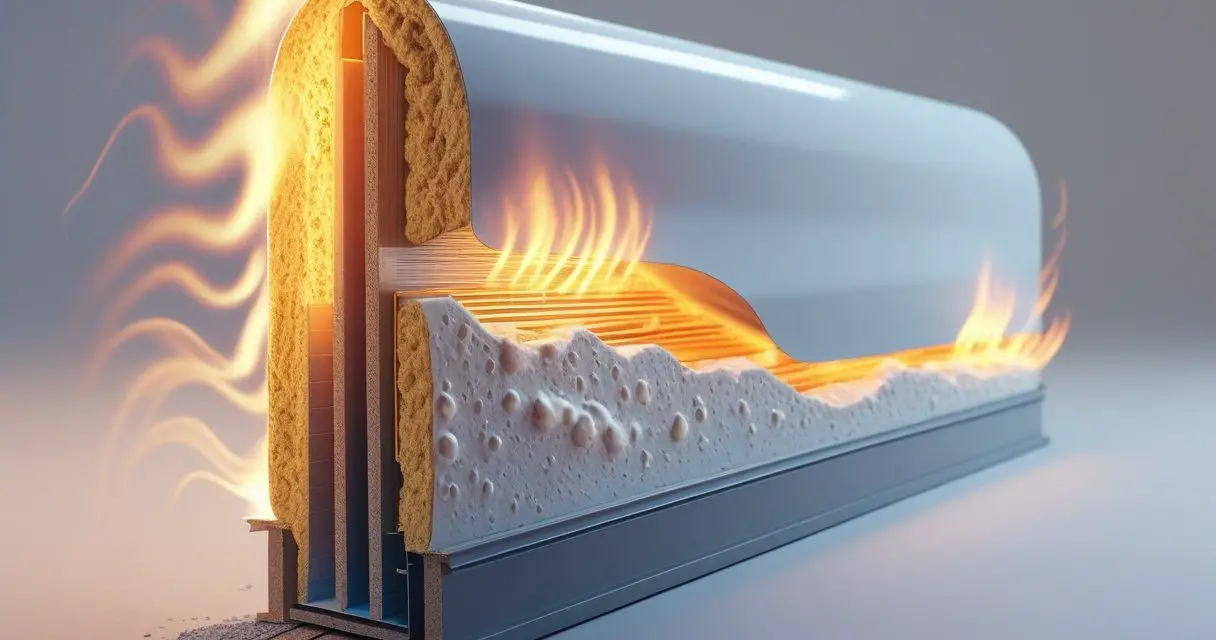
Heat creates serious problems for RV walls by weakening the glue that holds layers together and causing materials to expand at different rates. Direct sunlight and extreme temperatures break down adhesives over time, leading to bubbling and separation on your RV’s exterior.
Impact of Temperature Extremes on Adhesives
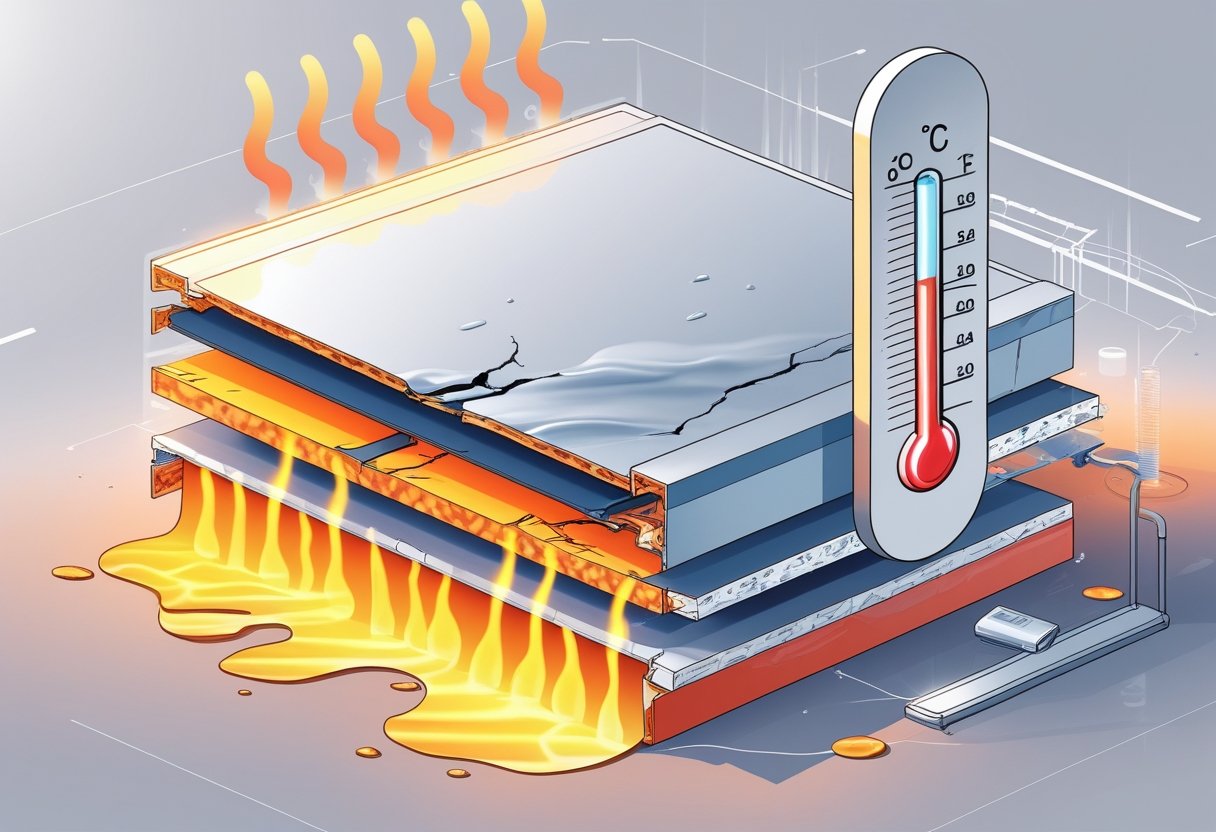
Temperature changes put major stress on the adhesives that bond your RV’s wall layers. The glue used in RV construction breaks down when exposed to high heat for long periods.
When temperatures rise above 90°F, adhesives start to soften. This softening makes the bond between layers weaker. Your RV’s walls can reach much higher temperatures than the outside air when sitting in direct sunlight.
Heat affects adhesives in these ways:
- Softens bonding agents at high temperatures
- Causes adhesive failure over repeated heat cycles
- Creates weak spots where layers can separate
- Reduces the glue’s ability to hold materials together
Different materials in your RV walls expand at different rates when heated. The outer fiberglass layer expands differently than the inner foam core. This creates tension that pulls the layers apart.
Manufacturing defects make heat damage worse. RVs built with cheaper adhesives or poor bonding techniques fail faster in hot weather.
Environmental Factors and Heat Exposure
Your RV faces intense heat from multiple sources that increase delamination risk. Direct sunlight heats exterior walls to temperatures much higher than air temperature.
RVs stored outdoors year-round face the most heat exposure. Dark-colored RVs absorb more heat than light-colored ones. The south-facing side of your RV gets the most sun damage.
Key heat sources include:
- Direct sunlight heating exterior walls
- Reflected heat from pavement and concrete
- Hot climates with sustained high temperatures
- Lack of shade or covered storage
Desert climates create the worst conditions for rv delamination. Daily temperature swings from hot days to cool nights stress wall materials. This cycle of heating and cooling weakens adhesives over time.
Poor ventilation inside your RV traps heat. This internal heat adds to the stress on wall materials from the inside.
Signs of Heat-Related Delamination
Heat-related sidewall delamination shows specific warning signs you can spot during regular inspections. Look for these problems on the sunny sides of your RV first.
Visual signs of heat damage:
- Bubbling or rippling on exterior walls
- Wavy appearance in fiberglass panels
- Small blisters that grow larger over time
- Soft spots when you press on the wall
Heat-related delamination often starts near windows and doors. These areas have more seams where heat can penetrate. The damage usually appears on south-facing walls that get the most sun.
Touch your RV’s walls on hot days. Areas that feel unusually soft or spongy may have heat-damaged adhesives. Delamination feels different from solid, properly bonded walls.
Early detection helps prevent small heat-damaged areas from spreading. Check your RV monthly during hot weather for new bubbles or soft spots.
Other Common Causes of RV Delamination
While heat plays a major role in RV delamination, water damage remains the leading cause of sidewall separation. Poor manufacturing quality and physical damage also create conditions that lead to delamination over time.
Water Damage and Moisture Intrusion
Water damage causes most RV delamination cases. Moisture gets into small cracks around windows, doors, and roof seams.
Once water enters the wall, it breaks down the adhesive between layers. The bond weakens and creates air pockets that look like bubbles on your RV’s exterior.
Common water entry points include:
- Window and door seals
- Roof vents and air conditioners
- Awning brackets
- Storage compartment doors
Sidewall delamination often starts small near these areas. You might see a tiny bubble that grows larger each season.
RVs stored outside year-round face higher risks. Rain, snow, and humidity constantly test your seals and create more chances for water to get inside your walls.
Manufacturing Defects and Adhesive Quality
Poor construction methods lead to early delamination problems. Some RV makers use low-quality adhesives that fail within a few years.
The wrong type of sealant can also cause issues. Different materials expand at different rates, which creates stress on the bonds between wall layers.
Quality factors that affect delamination:
- Adhesive type – Cheap glues break down faster
- Application method – Uneven coverage creates weak spots
- Material compatibility – Mismatched materials separate easier
Budget RVs often use weaker bonding agents to cut costs. These adhesives may work fine at first but fail when exposed to temperature changes and normal wear.
Even high-end RVs can have manufacturing defects. Poor quality control during assembly can leave gaps or weak bonds that lead to delamination later.
Physical Damage to the RV Exterior
Impact damage creates entry points for moisture and weakens wall structure. Tree branches, hail, and road debris can crack your RV’s outer skin.
Small impacts might not look serious at first. But they can damage the seal between wall layers and start the delamination process.
Types of physical damage that cause delamination:
- Hail dents that crack the outer layer
- Tree branch scratches that go deep
- Impact from opening doors too hard
- Stress cracks from road vibration
Road vibration puts constant stress on your RV walls. This movement can loosen adhesive bonds over many miles of travel.
Parking under trees increases your risk of branch damage. Even small scratches can let water into your walls if you don’t repair them quickly.
Identifying and Inspecting For RV Delamination
Regular inspections help you catch delamination early before it becomes a costly repair. Look for bubbles, soft spots, and loose panels on your RV’s exterior walls and surfaces.
Visual and Physical Inspection Techniques
Start by walking around your RV in good lighting. Look for bubbles or wrinkles on the sidewalls. These appear as raised areas where the outer layer has separated.
Press gently on suspicious areas with your palm. Healthy walls feel firm and solid. Delaminated sections feel soft or spongy when you push on them.
Check for visible gaps between panels. Run your hand along seams to feel for raised edges or loose spots.
Use a flashlight to inspect shadowed areas. Delamination often shows up better with light hitting the surface at an angle.
Take photos of problem areas. This helps you track changes over time.
Early Warning Signs
Bubbling is the most obvious sign of rv delamination. These bubbles can be small at first but grow larger without treatment.
Look for discoloration on walls. Water damage often causes yellow or brown stains before delamination appears.
Check for loose trim pieces around windows and doors. These often separate when the wall behind them delaminates.
Watch for wrinkled or wavy surfaces on what should be flat walls. This shows the outer layer is pulling away.
Small cracks in sealant around windows, vents, and roof edges let water in. Fix these immediately to prevent sidewall delamination.
Areas Most at Risk for Delamination
Sidewalls get the most sun and weather exposure. Check these areas first during inspections.
Around windows and doors where sealant fails most often. Water enters through these openings and causes damage behind the walls.
Lower sections of walls face more road debris and moisture. These areas need extra attention.
Slide-out rooms have more seams and moving parts. The constant movement can weaken adhesive bonds over time.
Roof edges where walls meet the roof collect water. Poor drainage here leads to water damage and delamination below.
Preventing Heat-Induced and Other Delamination Issues
Heat-related delamination requires a proactive approach that includes regular maintenance, proper storage practices, and using high-quality materials. These steps work together to protect your RV from both thermal stress and moisture damage.
Proper RV Maintenance Routines
Regular inspections are your first line of defense against delamination. Check your RV’s exterior every three months for signs of bubbling or cracking.
Focus on areas around windows, doors, and vents where heat and moisture commonly cause problems. Look for loose or cracked seals that could let water inside.
Clean your RV regularly to remove dirt and debris that can trap heat against the walls. Use mild soap and avoid pressure washing at close range.
Monthly maintenance tasks include:
- Inspecting all exterior seals
- Checking for soft spots in walls
- Examining roof seams and edges
- Testing window and door seals
Replace any damaged seals immediately. Small problems become expensive repairs if you ignore them.
Document your inspections with photos. This helps you track changes over time and catch problems early.
Protective Storage and Climate Control
Store your RV in covered or shaded areas whenever possible. Direct sunlight creates extreme temperature swings that stress the adhesive bonds.
Indoor storage is best for preventing heat damage. If indoor storage isn’t available, use RV covers designed for your specific model.
Storage best practices:
- Park in shade during hot weather
- Use reflective window covers
- Install roof vents for air circulation
- Consider portable fans for ventilation
Avoid storing your RV on hot pavement or concrete. These surfaces reflect heat upward and increase wall temperatures.
If you must store outside, position your RV to minimize sun exposure on the largest wall surfaces. East-west orientation often works best.
Maintain airflow inside your stored RV. Stagnant air creates hot spots that can weaken adhesives over time.
Importance of Using Quality Sealants
Quality sealants protect against both heat and moisture damage. Lap sealant specifically designed for RVs handles temperature changes better than generic products.
Replace seals every 2-3 years as part of your rv maintenance routine. Don’t wait until they fail completely.
Choose sealants based on your climate:
- Silicone-based for extreme heat
- Polyurethane for freeze-thaw cycles
- Self-leveling for roof applications
Clean old sealant completely before applying new material. Poor surface preparation leads to early failure.
Apply sealants during moderate temperatures between 50-80°F. Extreme heat or cold affects how well they bond and cure.
Use primer when recommended by the manufacturer. This extra step significantly improves adhesion and longevity.
Check sealant compatibility with your RV’s materials. Some products can damage certain plastics or rubber components.
Repairing RV Delamination: Options and Best Practices
Delamination repair can range from DIY projects using repair kits to professional services, with costs typically running $200-$500 for basic repairs. The right approach depends on the damage extent and your skill level.
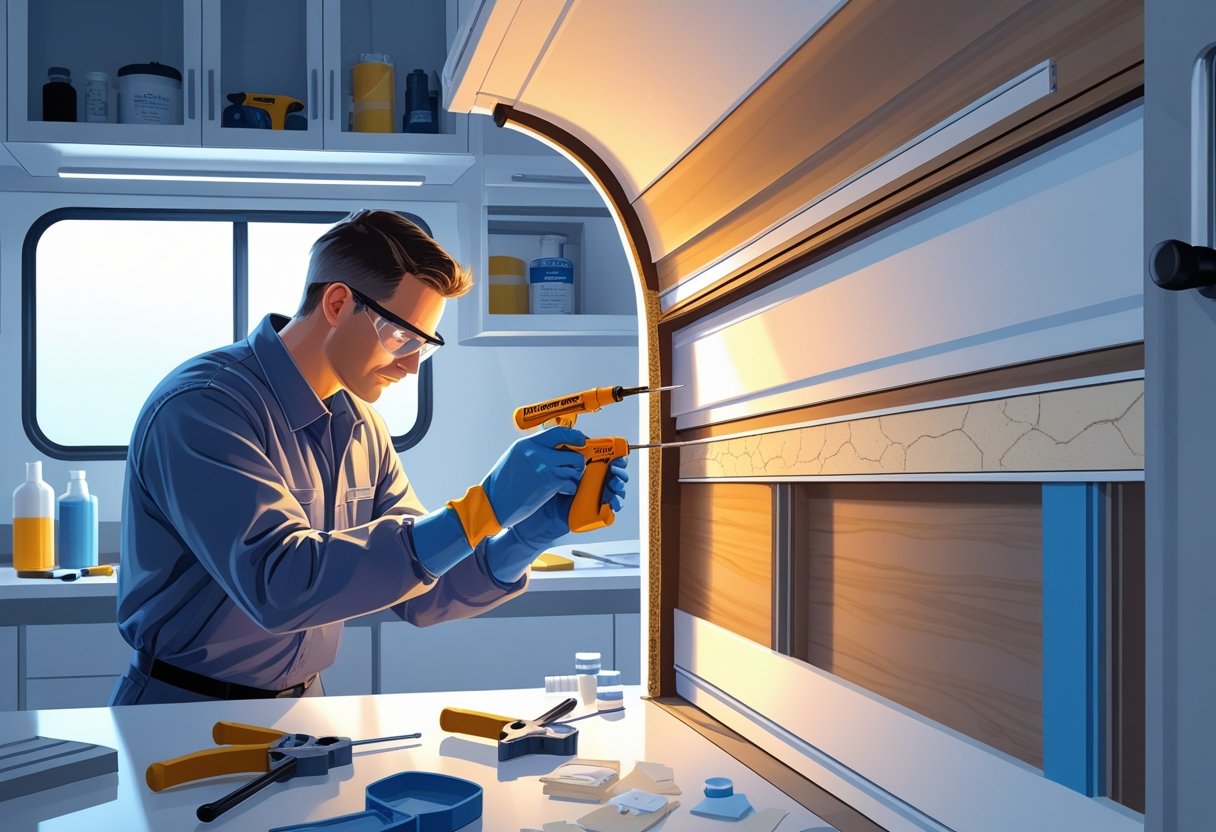
DIY Delamination Repair Kits
You can find delamination repair kits at auto parts stores or online. These kits typically include fiberglass cloth, resin, and hardener.
Start by cleaning the damaged area thoroughly. Remove any loose material with a sharp knife to create smooth edges.
Basic kit components include:
- Fiberglass cloth or mat
- Polyester resin
- Hardener
- Mixing cups
- Application brushes
Apply the fiberglass and resin mixture according to package directions. Press firmly to ensure proper adhesion to the surface.
Wear protective gear including gloves and safety glasses. Work in a well-ventilated area to avoid inhaling fumes.
Let the repair cure for several days before handling. Sand any rough spots with fine-grit sandpaper once fully cured.
Apply matching paint to blend the repair with your RV’s exterior finish.
Epoxy Resin Applications
Epoxy resin provides stronger bonding than standard polyester resin for RV delamination repair. It works well for smaller repair areas.
Clean the delaminated area completely before application. Any dirt or moisture will prevent proper bonding.
Epoxy resin advantages:
- Better adhesion strength
- More flexible when cured
- Resists water damage
- Longer working time
Apply epoxy resin to both surfaces of the separated layers. Press the layers together and clamp if possible.
Remove excess resin before it hardens completely. Use a putty knife to smooth the surface.
Temperature affects curing time. Warm conditions speed up the process while cold weather slows it down.
Some epoxy products require mixing two components. Follow the exact ratios listed in the instructions.
When to Seek Professional Repair
Call a professional if the delamination covers more than a few square feet. Large repairs require special tools and expertise.
Professional repair indicators:
- Structural damage to the RV frame
- Multiple wall areas affected
- Water damage throughout the interior
- Previous DIY repairs have failed
Professional repairs cost more but often include warranties. Expect to pay several hundred to thousands of dollars depending on damage extent.
RV dealerships and service centers can recommend qualified repair technicians. Look for shops that specialize in fiberglass work.
Professionals have access to better materials and equipment. They can also identify underlying problems that cause delamination.
If your RV has extensive delamination, the repair costs might exceed the vehicle’s value. Consider selling to a salvage buyer in these cases.
Long-Term Care and Maintenance to Prevent Recurrence
Regular maintenance checks and protective products form the foundation of preventing heat-related delamination from returning. Your RV needs consistent care to keep seals intact and moisture out.
Routine Inspection Tips
Check your RV’s exterior seals every three months, especially before and after hot weather periods. Focus on areas around windows, doors, and roof edges where heat can break down sealants.
Look for small cracks or gaps in the caulking. These spots let moisture in during rain and allow heat to weaken the bond between layers. Press gently on wall surfaces to feel for soft spots or slight give.
Key inspection areas:
- Window and door frames
- Roof seams and vents
- External storage compartments
- Slide-out seals
Use a flashlight to check for water stains inside cabinets near exterior walls. Dark spots or musty smells indicate moisture problems that need immediate attention.
Schedule professional inspections annually if your RV is over five years old. Technicians can spot early problems you might miss.
Recommended Products for Ongoing Protection
Lap sealant works best for roof seams and larger gaps. Dicor Self-Leveling Lap Sealant handles temperature changes well and stays flexible in heat. Apply it in spring before hot weather starts.
Use silicone-based caulks for window and door seals. These products resist UV damage and maintain flexibility in extreme temperatures.
Essential maintenance products:
- Eternabond tape for emergency repairs
- UV protectant spray for rubber seals
- Butyl tape for permanent sealing
- Roof coating for added protection
Replace weatherstripping every two to three years. Old rubber becomes brittle in heat and loses its sealing ability. Keep spare tubes of caulk and lap sealant on hand for quick fixes.


