
Would you like to save this article?
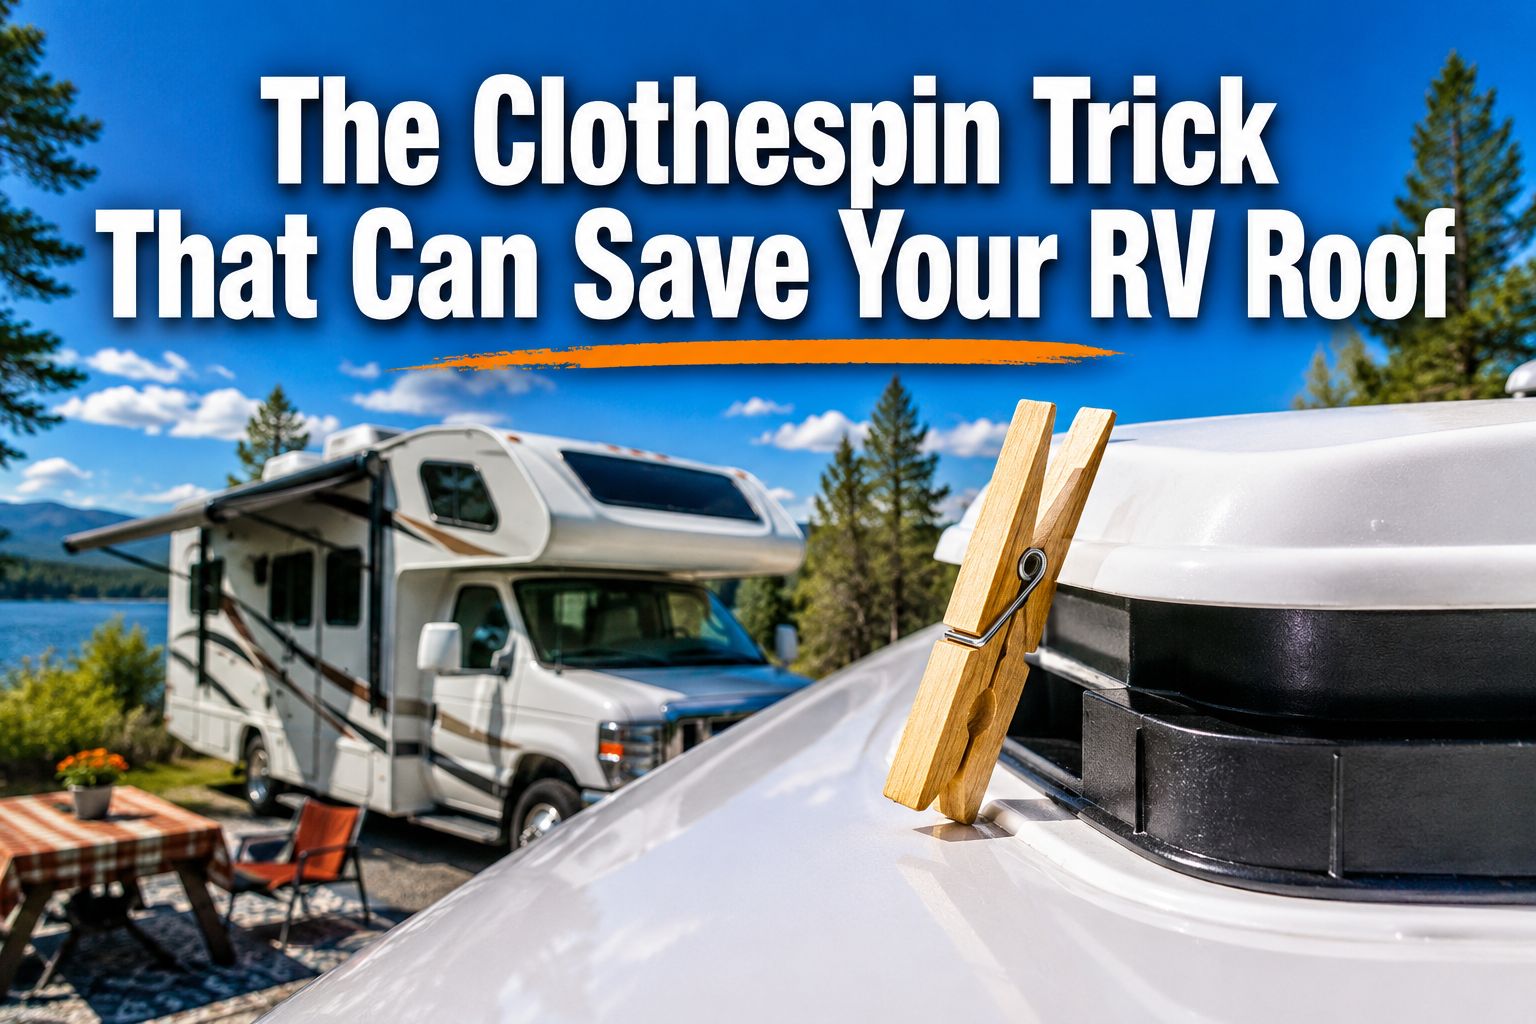
A single water leak can cost RV owners anywhere from $300 to over $10,000 in repairs — and most of those leaks start at the roof. Yet one of the simplest fixes in the RV world costs less than a dollar and fits in your pocket. The “Clothespin” Trick That Can Save Your RV Roof is exactly the kind of clever, low-cost hack that seasoned RVers swear by, and once you learn it, you’ll wonder how you ever traveled without it.
Whether you’re a weekend warrior or a full-time road warrior, keeping your RV roof in great shape is one of the most important things you can do to protect your investment. This guide breaks down the clothespin trick, why it works, and how to combine it with other smart roof habits to keep your rig dry, clean, and road-ready for years to come.
Key Takeaways
- 🪣 The clothespin trick redirects water runoff away from your RV’s sidewalls, preventing ugly black streaks and moisture damage.
- 🌿 Debris on slideout roofs is a hidden threat — a leaf blower trick can stop leaves from sneaking inside.
- 🔍 Roof seal inspections twice a year can catch small cracks before they become big, expensive leaks.
- 🌲 Parking choices matter — avoiding sap-producing trees protects your roof from sticky, hard-to-remove residue.
- 🧼 Regular cleaning (at least twice a year) keeps your RV roof strong and extends its lifespan significantly.
What Is the “Clothespin” Trick That Can Save Your RV Roof?
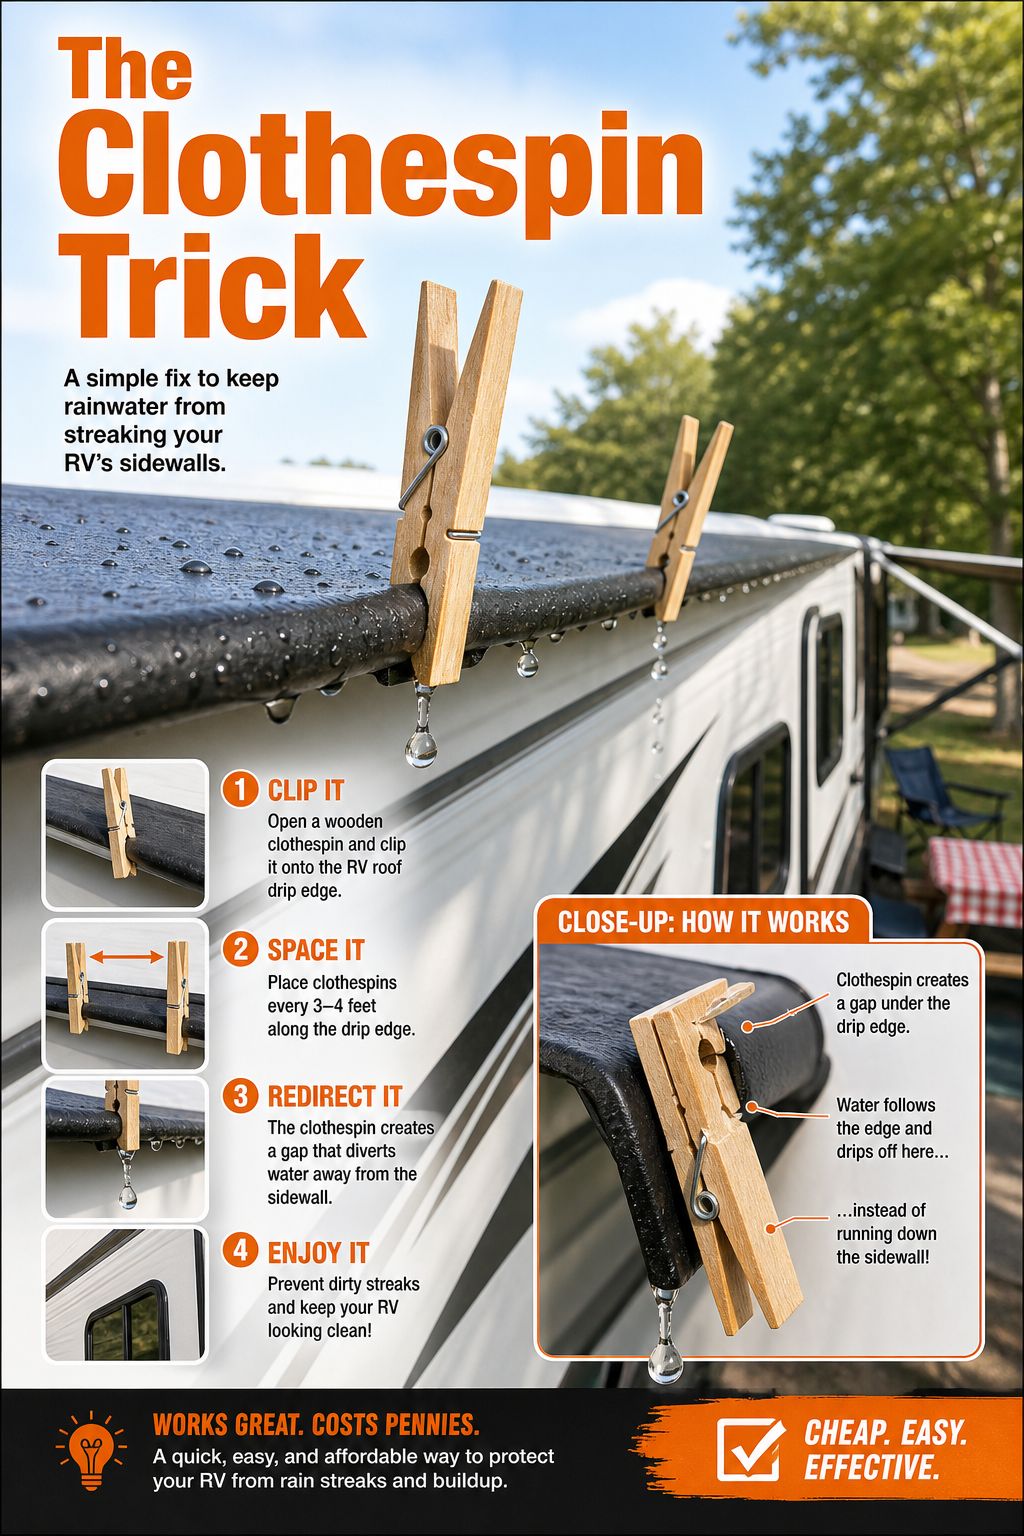
So what exactly is this famous trick? It’s surprisingly simple. A standard wooden clothespin — the kind you’d use to hang laundry — gets clipped to the drip edge of your RV roof. That’s the lip or edge where water naturally runs off the roof.
When it rains, water doesn’t just fall straight down. It tends to cling to the edge of the roof and run along the sidewall of your RV. Over time, this creates those dark, ugly black streaks you see on so many RVs. Those streaks aren’t just cosmetic problems. They can signal that moisture is working its way into your walls, seals, and structure.
The clothespin acts as a drip break. It interrupts the water’s path along the roof edge and forces it to drip straight down — away from the sidewall. It’s the same principle used in home construction with drip edges on gutters and rooflines.
💡 Pull Quote: “A 50-cent clothespin doing the job of a $500 repair — that’s the beauty of smart RV maintenance.”
Why Black Streaks Are More Than Just Ugly
Black streaks on your RV sidewall are caused by dirty water, algae, and oxidation running down from the roof. Left alone, they can:
- Stain the exterior finish permanently
- Signal water intrusion into wall panels
- Cause mold and mildew growth inside
- Reduce your RV’s resale value
Ensuring that water drains properly — and doesn’t cling to your sidewalls — is a key part of keeping your RV looking and performing its best. [1]
How to Use the Clothespin Trick
Here’s how to put the clothespin trick to work on your RV:
| Step | What to Do |
|---|---|
| 1 | Buy a pack of standard wooden clothespins (spring-loaded work best) |
| 2 | Walk around your RV and find the drip edge — the curved lip at the roof’s edge |
| 3 | Clip clothespins every 12 to 18 inches along the drip edge |
| 4 | Make sure each clothespin hangs slightly below the roof edge |
| 5 | Check them after travel — wind can sometimes knock them loose |
That’s it! No tools, no special skills, no expensive products. Just a simple, effective solution that anyone can do in about 10 minutes.
Other Clever Clothespin Uses for RVers
The humble clothespin isn’t just a one-trick pony in the RV world. These little gadgets can serve many purposes on the road: [6]
- 🪟 Clip curtains shut to block out early morning light
- 🪥 Hold toothbrushes upright so they don’t roll around
- 📦 Seal open snack bags to keep food fresh
- 🗺️ Clip maps or notes to sun visors for easy reference
- 🔌 Bundle and organize cables and cords
More Ways to Protect Your RV Roof Beyond the Clothespin Trick
The “Clothespin” Trick That Can Save Your RV Roof is a great starting point — but it works best as part of a complete roof care routine. Here are the most important habits every RV lover should build into their maintenance schedule.
Clean Your Roof Regularly
Dirt, grime, bird droppings, and organic matter build up on your RV roof faster than you might think. Experts recommend washing your RV roof at least twice a year. If you park under trees or in humid, moist environments, bump that up to four times a year (quarterly). [2]
Here’s what to keep in mind when cleaning:
- ✅ Use the right cleaner for your roof type (rubber, fiberglass, or aluminum)
- ✅ Avoid harsh chemicals that can break down rubber membranes
- ✅ Rinse thoroughly to remove all soap residue
- ✅ Let it dry completely before applying any sealant or protectant
⚠️ Warning: Never use petroleum-based cleaners on rubber (EPDM or TPO) roofs. They can cause the material to deteriorate quickly.
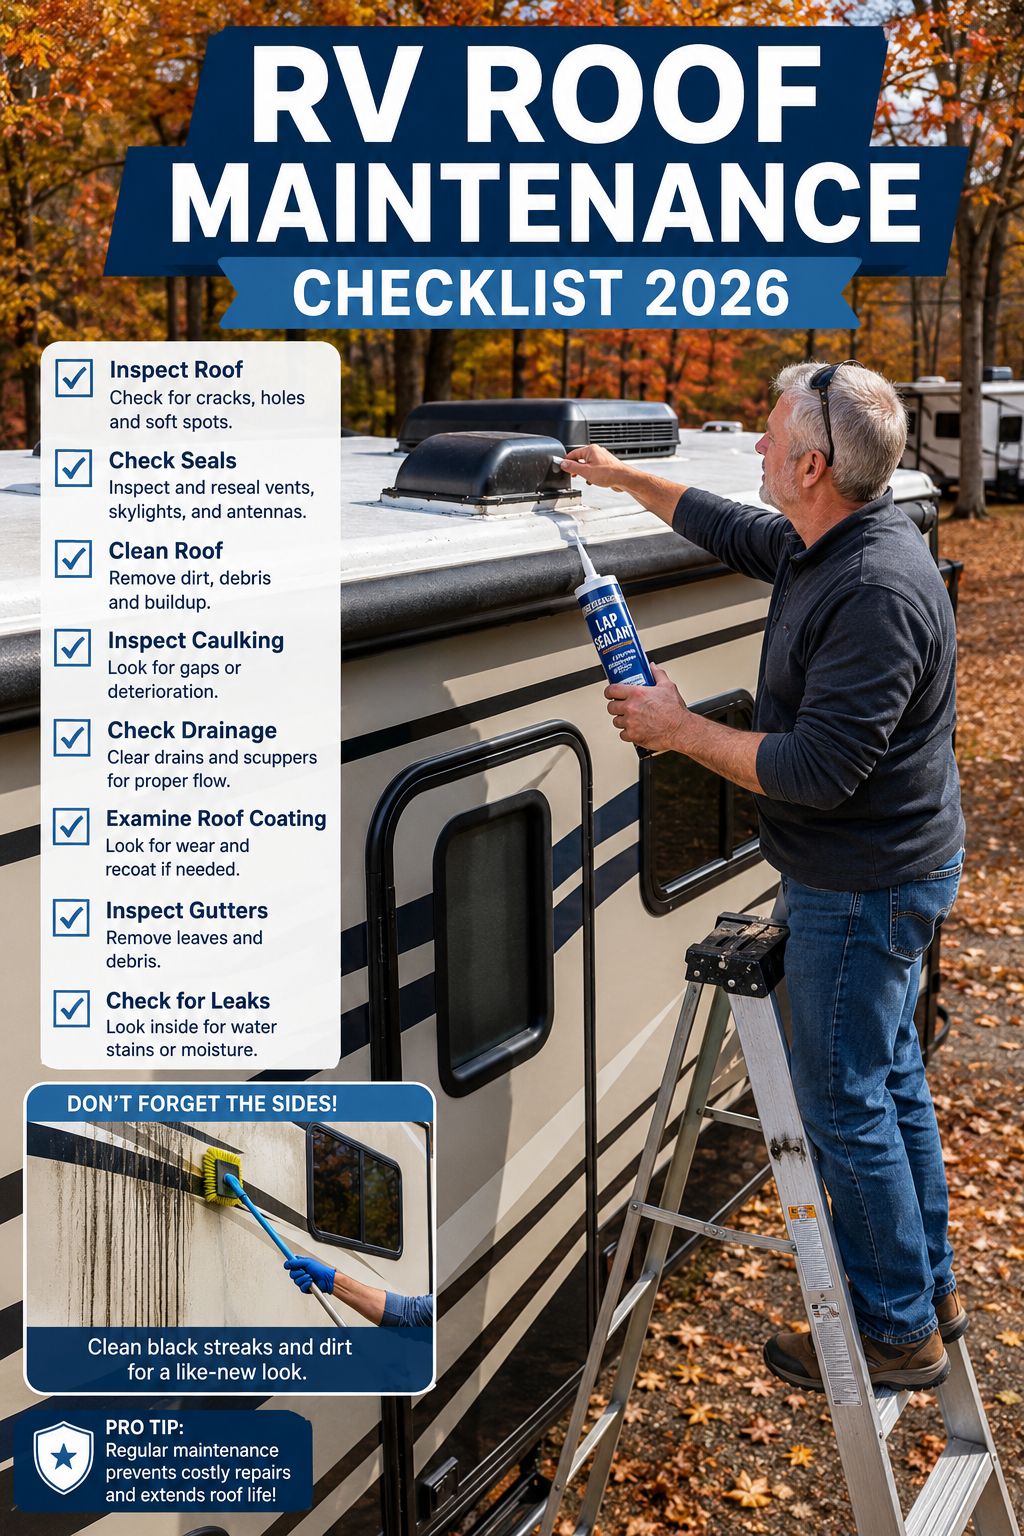
Inspect Your Roof Seals Often
This is one of the most overlooked parts of RV maintenance. The seals around your vents, air conditioner, skylights, and antennas are the most common entry points for water. Over time, these seals crack, shrink, and pull away from the surface. [4]
What to look for during a seal inspection:
- Cracks or gaps in the caulk or lap sealant
- Areas where the sealant has pulled away from fixtures
- Discoloration or soft spots around vents and AC units
- Any bubbling or lifting of the roof membrane
Make it a habit to get up on the roof (safely, with a proper ladder) at least twice a year — spring and fall are ideal. Catching a small crack early can save you thousands in water damage repairs.
The Slideout Debris Problem (And the Leaf Blower Fix)
Here’s a problem many RV owners don’t think about until it’s too late: leaves, pine needles, and debris collect on top of your slideouts. When you retract the slideout, all that debris gets dragged inside your RV.
The fix? A leaf blower with an extension nozzle. Before you bring in your slideout, use the leaf blower to clear off the top of the slide. It’s fast, easy, and costs almost nothing if you already own a leaf blower. [3]
This trick keeps your interior clean and also protects the slideout seals from being damaged by debris getting caught in them.
Be Smart About Where You Park
Your parking spot can make a big difference in how much work your roof has to do. Here are some smart parking tips:
🌲 Avoid these parking spots:
- Under pine trees (sap is nearly impossible to remove and damages roofs) [2]
- Under oak trees during acorn season (acorns can dent fiberglass)
- In areas with heavy bird activity
- Low-lying areas that collect moisture and promote mold
✅ Look for these instead:
- Open areas with good air circulation
- Spots with afternoon shade from buildings rather than trees
- Higher ground that drains well after rain
- Paved or gravel surfaces rather than grass
💡 Pro Tip: Tree sap is one of the toughest substances to remove from an RV roof. If you do get sap on your roof, act fast — the longer it sits, the harder it is to remove without damaging the surface.
Extend Your Downspouts
Another smart trick for preventing black streaks is making sure your roof downspouts direct water away from your RV’s sidewalls. Some RVs have short downspouts that dump water right against the side of the rig. Adding a simple extender — or even a piece of flexible tubing — can redirect that flow away from the walls. [1]
This works hand-in-hand with the clothespin trick to give your sidewalls maximum protection from water damage.
Use Vent Covers and Insulators
Vent covers and insulators are another smart addition to your RV roof protection plan. These covers: [5]
- Keep rain from entering through open vents
- Allow ventilation even during light rain
- Help maintain interior temperatures
- Protect vent fans from weather damage
Important: Make sure vent covers are securely fastened before you hit the road. A cover that comes loose at highway speed can cause damage to your roof or become a road hazard.
RV Roof Types and What They Need
Not all RV roofs are the same. Knowing what type of roof your RV has will help you choose the right products and cleaning methods.
| Roof Type | Common Materials | Special Care Needed |
|---|---|---|
| Rubber (EPDM) | Black or white rubber membrane | Avoid petroleum products; use rubber-safe cleaners |
| TPO | White thermoplastic | UV protectant recommended; avoid abrasive scrubbing |
| Fiberglass | Smooth, hard surface | Wax regularly; watch for cracks and crazing |
| Aluminum | Metal panels | Check for rust at seams; use metal-safe sealants |
Each roof type has its own strengths and weaknesses, but all of them benefit from regular cleaning, seal inspections, and smart water management — including the clothespin trick.
Building Your RV Roof Maintenance Schedule
Staying on top of roof maintenance doesn’t have to be complicated. Here’s a simple schedule to follow:
🗓️ Every Trip
- Check clothespins are still in place
- Look for obvious debris on the roof
- Inspect vent covers before driving
🗓️ Every 3 Months (or After Heavy Use)
- Full roof wash and rinse
- Quick visual check of all seals
- Clear slideout roofs with leaf blower
🗓️ Every 6 Months (Spring & Fall)
- Thorough seal inspection around all fixtures
- Apply fresh lap sealant where needed
- Check and tighten any loose vent covers
- Inspect for soft spots or membrane damage
🗓️ Once a Year
- Full roof inspection by a professional (or very thorough DIY inspection)
- Apply UV protectant or roof coating as recommended for your roof type
- Check all seams and edges for lifting or separation
Common RV Roof Mistakes to Avoid
Even experienced RVers make these mistakes. Watch out for:
❌ Skipping inspections — “Out of sight, out of mind” is the most expensive mindset in RV ownership.
❌ Using the wrong cleaner — Harsh chemicals can destroy rubber roofs in just a few applications.
❌ Ignoring small cracks — A hairline crack in a seal can let in enough water to rot your roof decking within one season.
❌ Parking under sap trees — Sap damage is often permanent and always frustrating.
❌ Not checking after travel — Highway vibration can loosen seals, vent covers, and yes — even clothespins.
❌ Forgetting the slideout tops — Those surfaces collect debris just like the main roof, but they’re easier to forget.
Conclusion
The “Clothespin” Trick That Can Save Your RV Roof is proof that the best solutions are often the simplest ones. For less than a dollar, you can redirect water away from your sidewalls, prevent black streaks, and protect your RV’s exterior from moisture damage that adds up fast.
But the clothespin trick works best when it’s part of a bigger commitment to roof care. Here are your actionable next steps:
- ✅ Buy a pack of wooden clothespins and clip them along your drip edge today
- ✅ Schedule a roof inspection this weekend — get up there and check those seals
- ✅ Mark your calendar for a full roof wash every three months
- ✅ Pick up a leaf blower or extension nozzle for slideout debris management
- ✅ Choose your parking spots wisely — avoid sap trees and low-lying areas
- ✅ Add vent covers if you don’t already have them
Your RV roof is your first line of defense against the elements. Treat it well, and it will protect everything — and everyone — inside. A little time and a handful of clothespins can make a bigger difference than you’d ever expect. 🏕️
References
[1] Membertip 6 – https://blog.goodsam.com/membertip-6/?utm_source=openai
[2] Keeping An Rv Roof In Tiptop Shape – https://www.rv.com/archive/keeping-an-rv-roof-in-tiptop-shape/?utm_source=openai
[3] Cheap Slideout Trick Leaves Debris Rv 1258 – https://www.rvtravel.com/cheap-slideout-trick-leaves-debris-rv-1258/?utm_source=openai
[4] How To Fix Leaking Rv Roof – https://patriotsrvservices.com/how-to-fix-leaking-rv-roof/?utm_source=openai
[5] Rv Smart Stick To It – https://www.rv.com/archive/rv-smart-stick-to-it/?utm_source=openai
[6] Useful Clothespin Home Hacks – https://www.ehow.com/13725144/useful-clothespin-home-hacks?utm_source=openai


