You can give a vintage camper fresh style without spending much money. This article shows simple ways to use thrifted finds and easy DIYs so your camper feels cozy, stylish, and true to its old-time charm. You’ll learn budget-friendly ideas that use things you can hunt for or make yourself to transform small spaces fast.
You’ll get practical, low-cost projects and decorating tips that fit a camper’s tiny layout and vintage vibe. Follow along and pick the ideas that match your taste, skill level, and the supplies you can find.
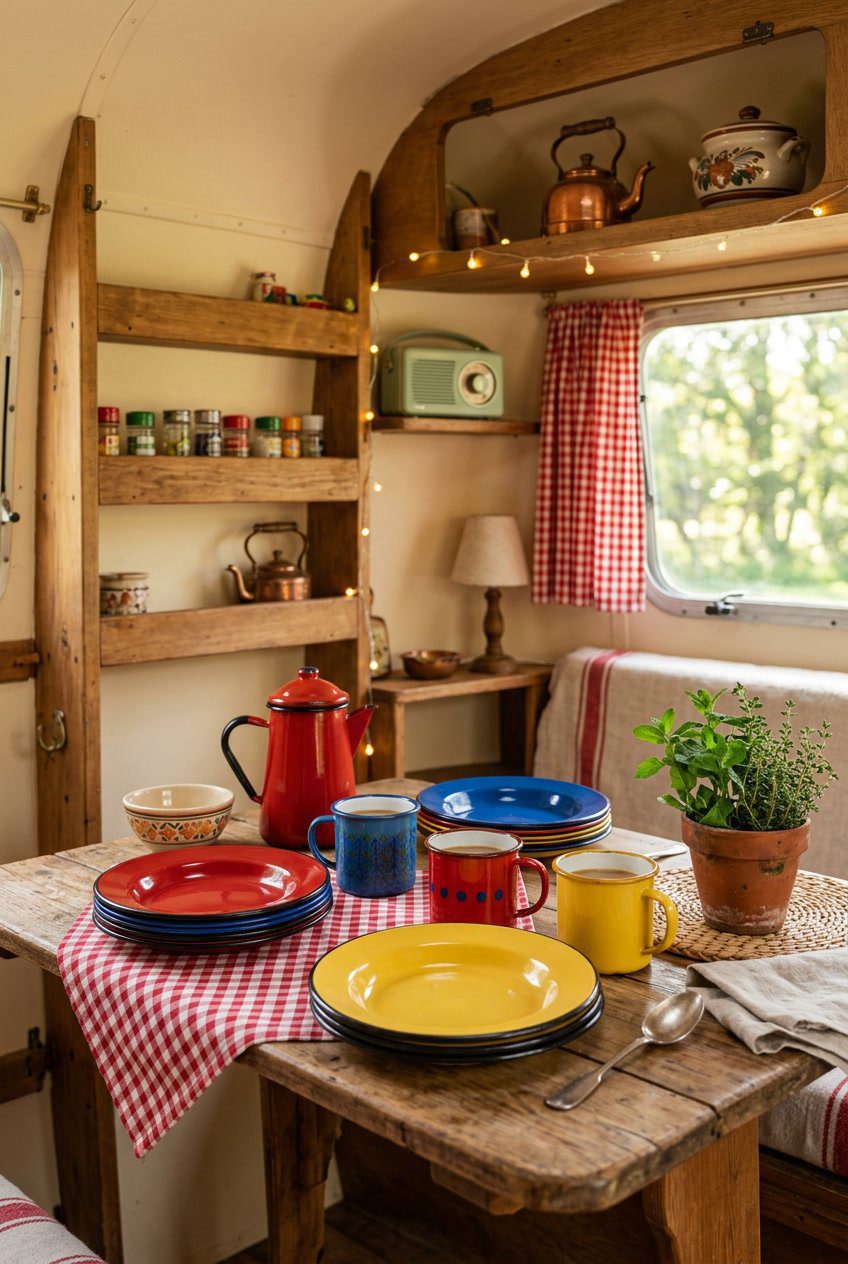
1) Retro enamelware plates and mugs
Would you like to save this article?
You can find enamelware at thrift stores, flea markets, or secondhand sales. Look for solid colors or simple speckles to match your camper’s vibe.
Enamelware is light and durable, which makes it great for small kitchens. It stacks easily, so you save space in cabinets or on open shelves.
Mix patterns and colors for a playful look, or stick to one color for a clean, vintage feel. Use mugs for plants or utensils if you want more function than dining ware.
PRO TIP
Clean chips and rust with a gentle scrub and baking soda. Replace pieces with serious damage to keep things safe while keeping the look authentic.
2) Mismatched vintage mason jar vases
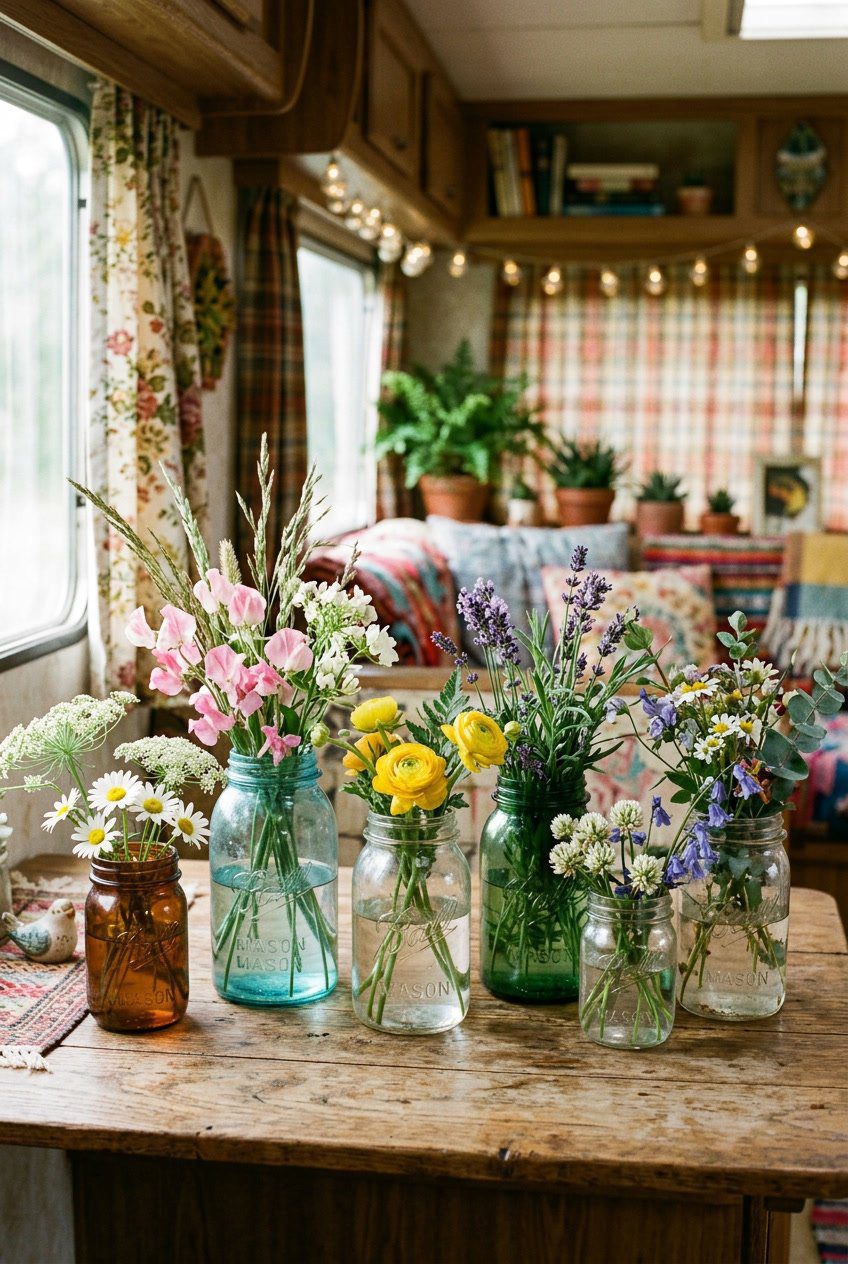
Mix a few old mason jars of different sizes and colors to make simple vases. You can place them on a shelf, table, or windowsill to add charm without spending much.
Use thrifted jars or clean ones you already have. Tie twine, ribbon, or a scrap of fabric around the neck for a rustic touch.
Fill jars with fresh flowers, dried stems, or even fairy lights for evening glow. Group three to five jars together; odd numbers look more natural.
PRO TIP
Paint the inside with watered-down chalk paint for a soft tint that won’t chip. Label one jar for utensils or wildflowers to keep things useful and pretty.
3) Wool Pendleton-style blanket repurpose
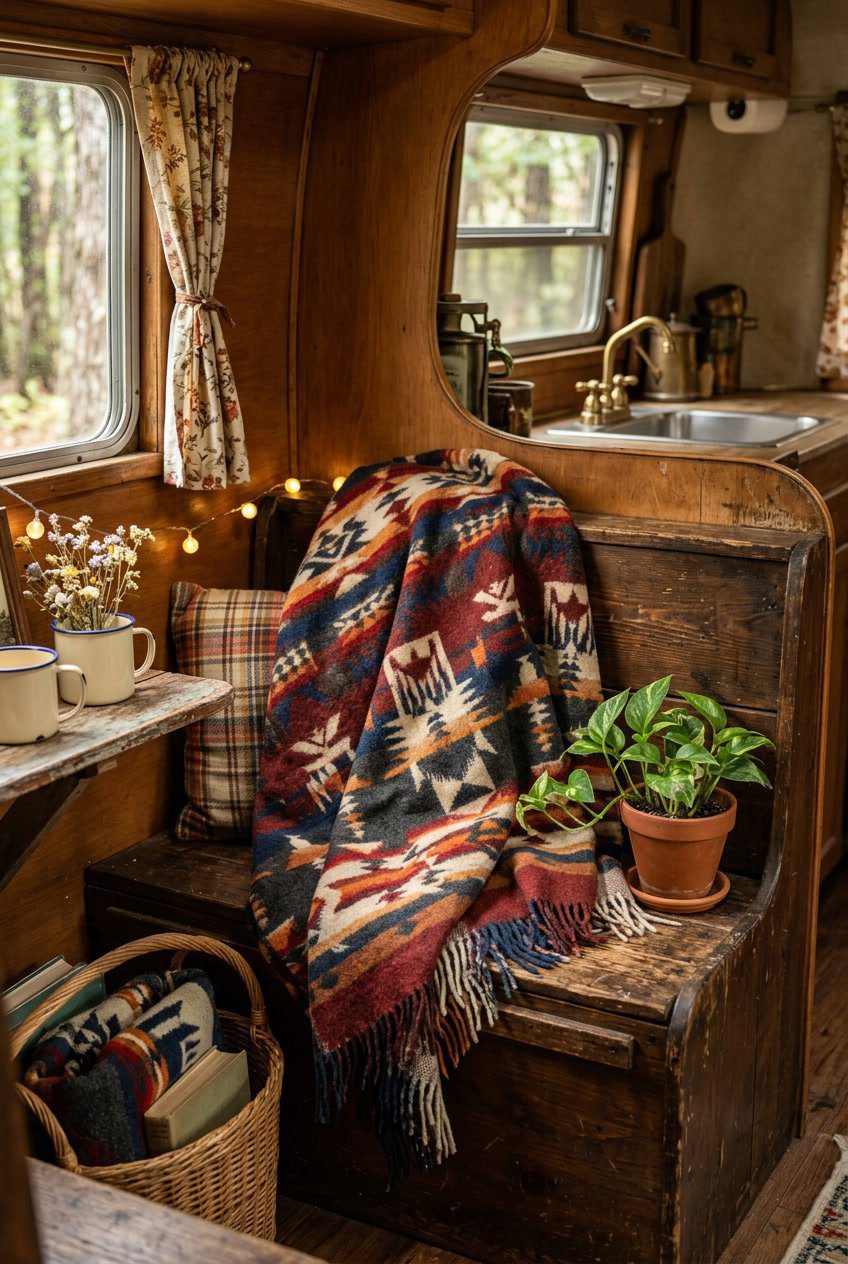
You can turn a thick wool blanket into a cozy camper throw, seat cover, or wall hanging. Cut it to fit your bench or dinette, then finish the edges with simple stitching to keep it from fraying.
Use the blanket as a picnic pad or layered rug near the door for warmth and easy clean-up. The heavy fabric blocks drafts and adds color without much work.
PRO TIP
If you need extra durability, back the blanket with cheap canvas or cotton and sew the layers together. Use sewing clips or a large needle and heavy thread if you don’t have a machine.
4) Salvaged wooden crate shelving
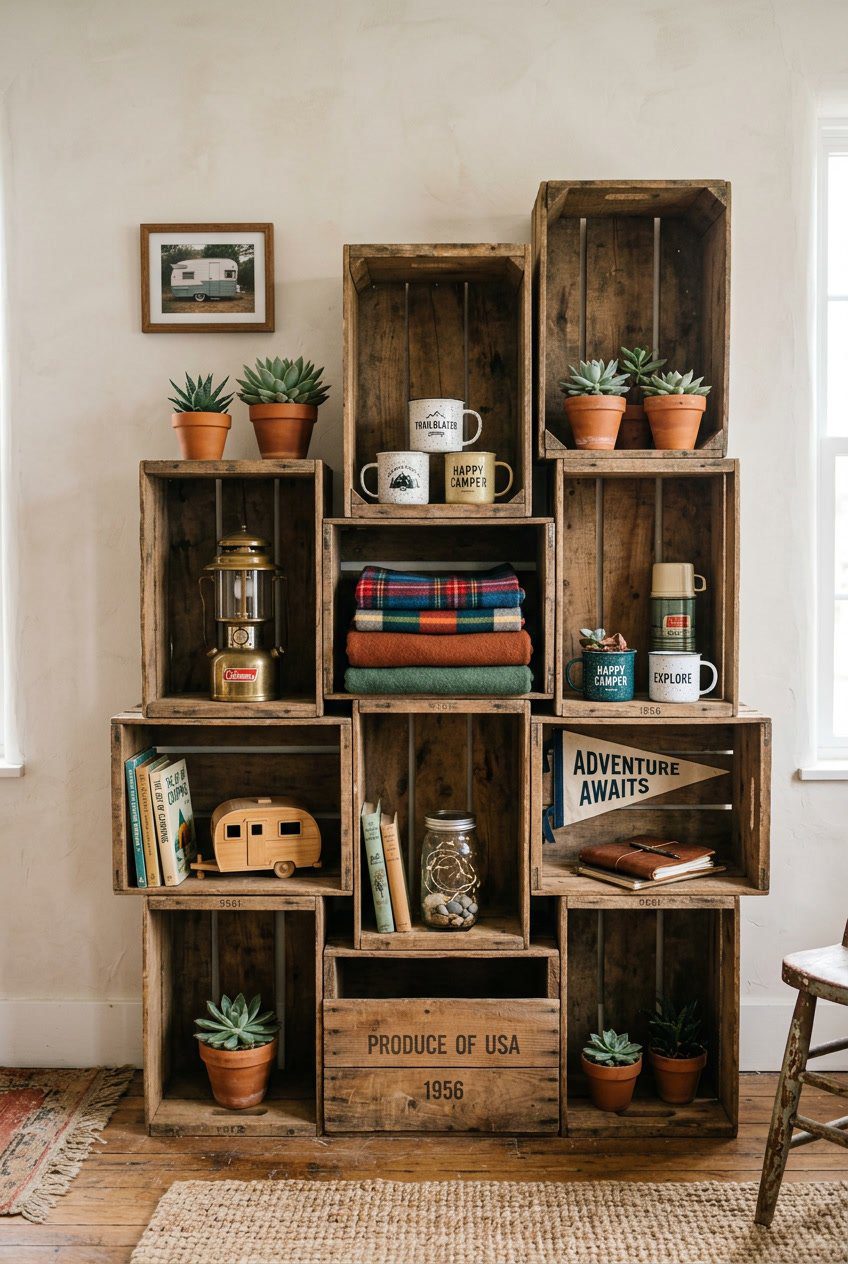
You can turn old wooden crates into rustic shelves that fit a camper’s small space. Stack them vertically or mount them to a wall to make open storage for dishes, books, or plants.
Sand rough edges and add a light coat of paint or stain to match your camper’s colors. Leave some wood bare for a vintage look. Secure crates with brackets or screws so they stay safe while you drive.
You can mix crate sizes for visual interest and function. Add fabric-lined baskets inside crates to hide clutter and protect fragile items.
PRO TIP
Check flea markets and yard sales for sturdy crates. Look for solid joints and minimal rot so your shelves last longer.
5) Macramé plant hanger DIY
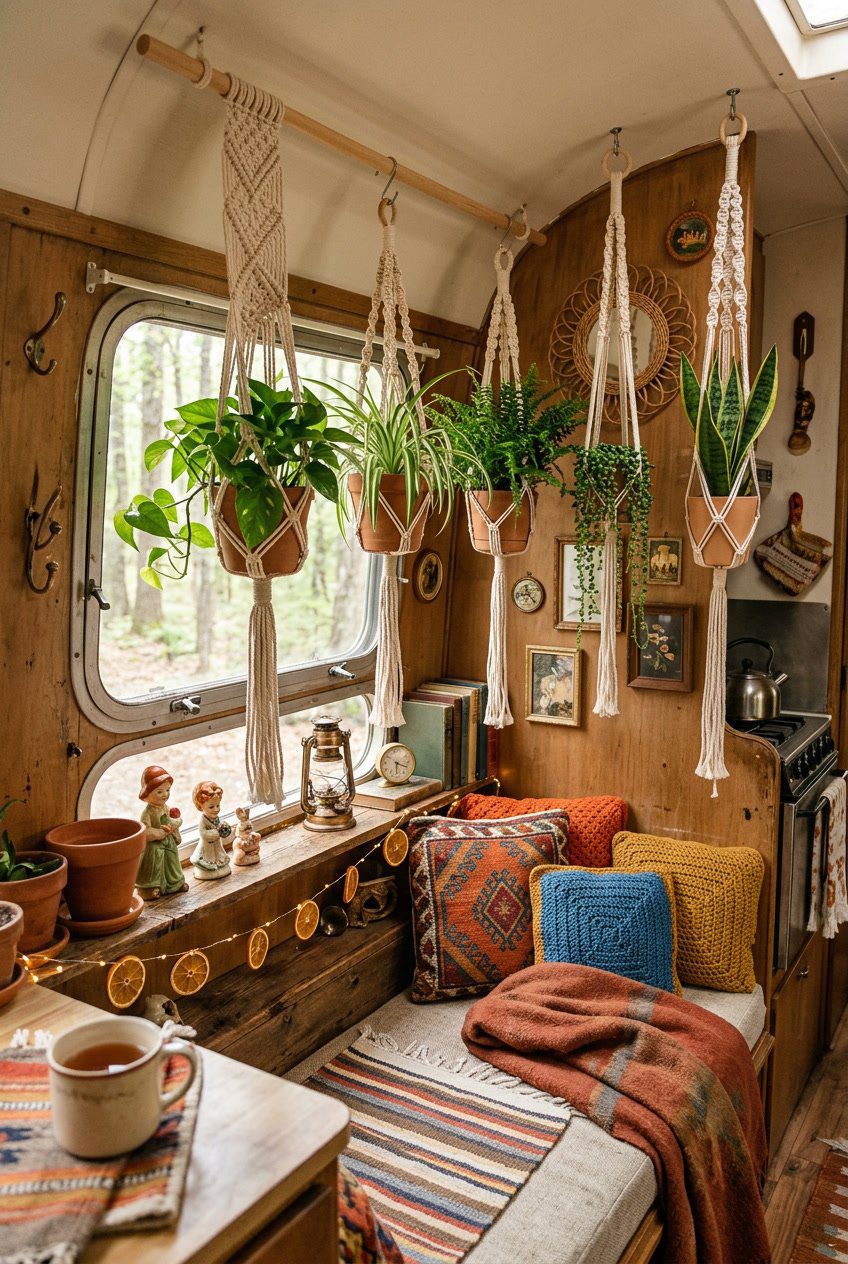
Macramé plant hangers add a cozy, vintage feel to your camper and save counter space. You can make one with simple cords and a few knots in less than an hour.
Start with three or four lengths of cord and a metal or wooden ring. Tie basic square knots and spiral knots; they hold plants well and look classic.
Choose a small pot with drainage or use a liner to avoid spills while you drive. Hang the planter near a window for light, but away from direct heat.
PRO TIP
Use recycled fabric strips or old rope to keep costs low and match your camper’s colors. Test the hanger’s strength before adding a plant to avoid accidents.
6) Vintage license plate wall art
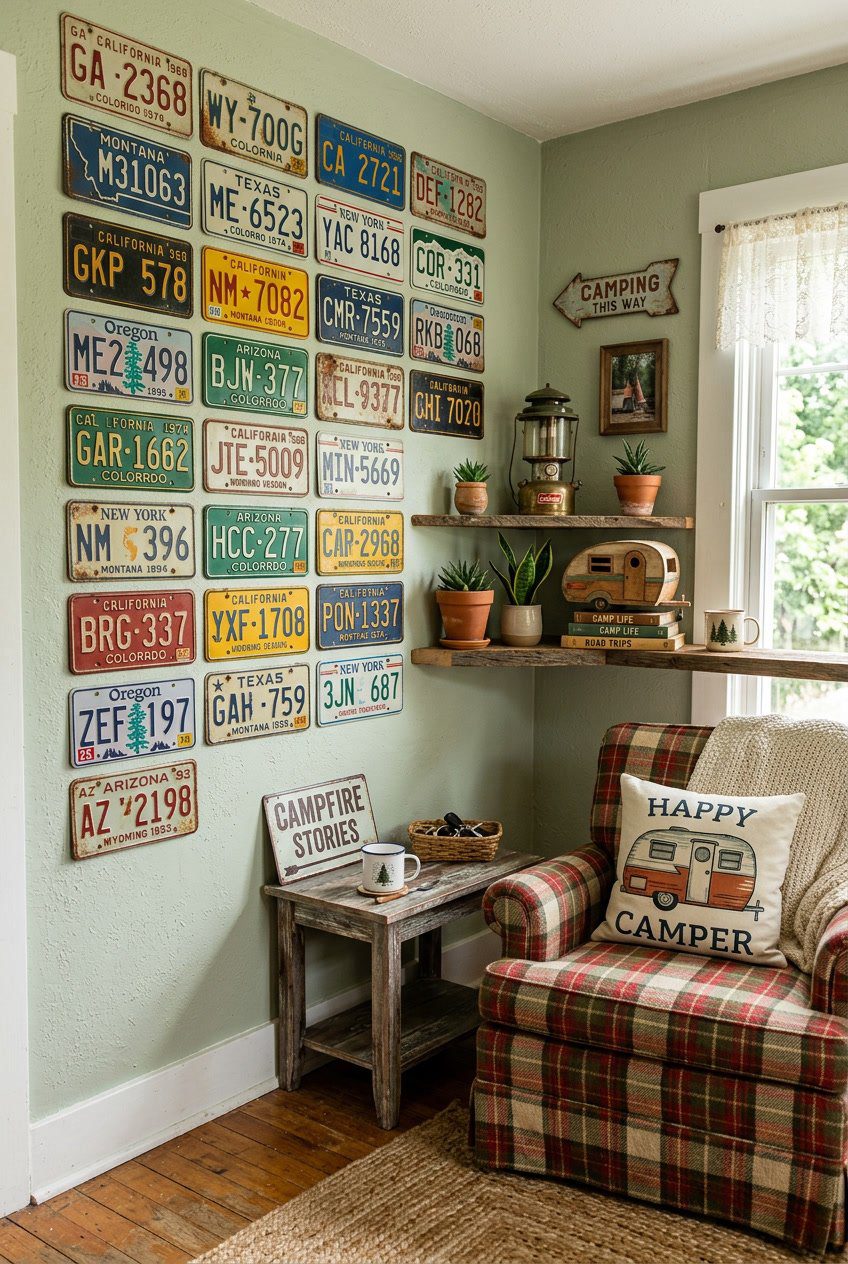
You can hunt thrift stores or flea markets for old license plates and turn them into eye-catching wall art. Mix colors, years, and states for a playful patchwork that fits small or large spaces.
Cut plates into shapes or mount them whole on a wooden board for a clean look. Drill small holes and use wire or screws to secure them, or attach with strong double-sided tape for a no-drill option.
Paint letters or stencils over plates to add initials, a camper name, or a simple map. Seal the pieces with a clear coat to protect them from dust and scratches.
PRO TIP
Arrange plates on the floor first to find a layout you like before you hang anything.
7) Antique brass lantern lighting
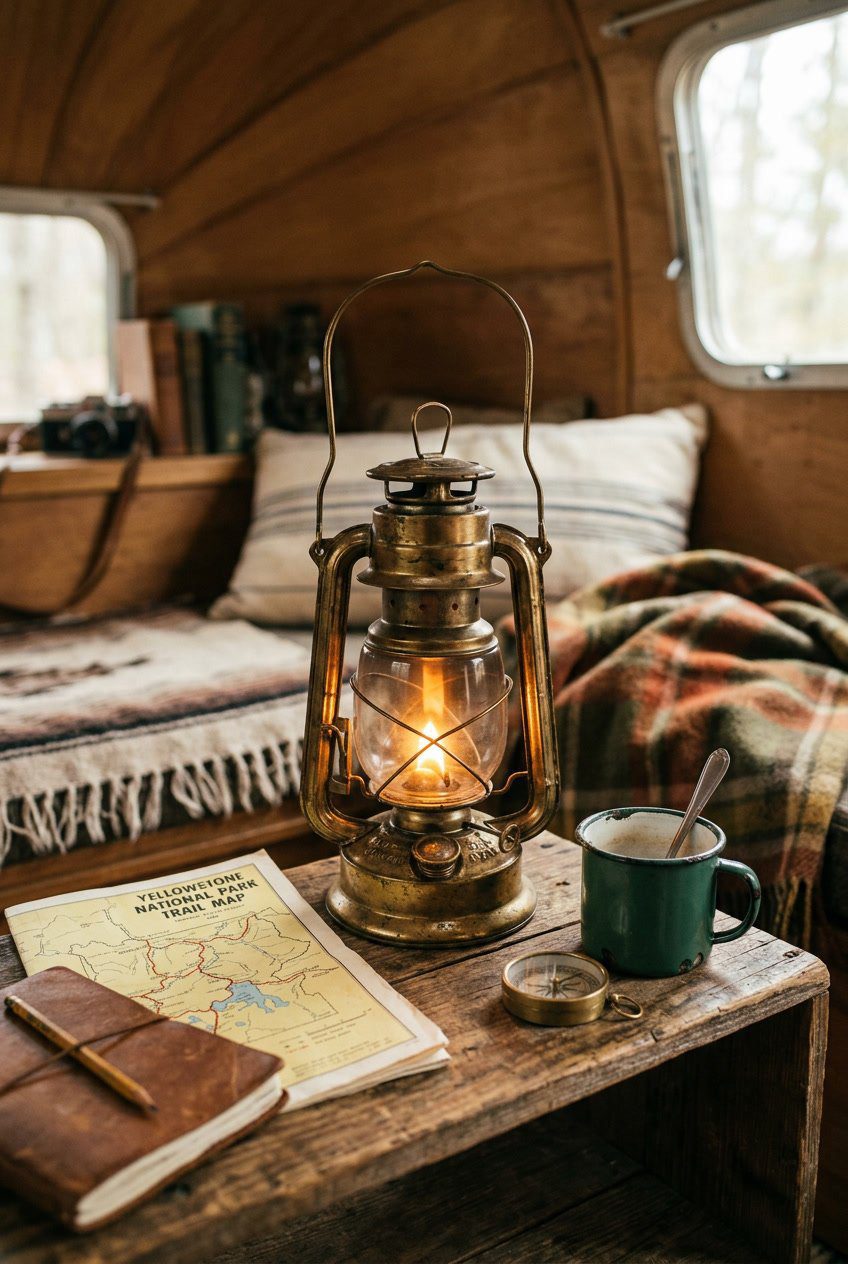
Antique brass lanterns add warm light and vintage charm to your camper. You can find them at thrift stores or flea markets and give them new life with simple cleaning.
Swap old wiring for safe LED bulbs to cut heat and power use. LED bulbs keep the look but make the lanterns camper-safe.
Mount a lantern by a dinette or the entry to create cozy light for reading and meals. Use a bracket or a short chain so the lantern sits steady while you travel.
PRO TIP
Look for lanterns with glass panels you can clean or replace. A little polish on the brass brings out the shine without harming the patina.
8) Turquoise chipped enamel sink accent
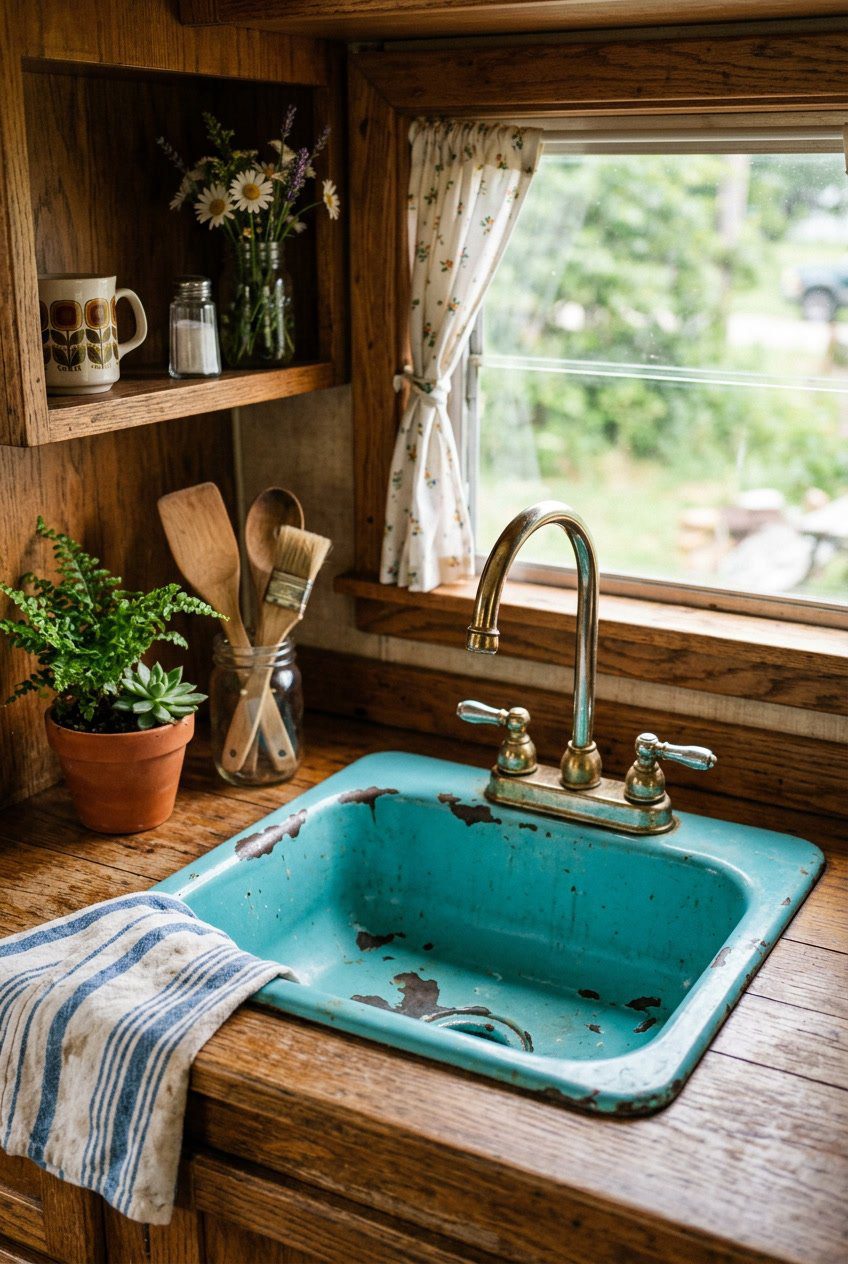
A chipped turquoise enamel sink adds instant vintage charm to your camper. You can mount a small sink as a focal point or use it as a planter or catchall on a shelf.
Leave some chips and wear to show age, but clean and seal any rusty spots to protect metal. A light sanding and clear matte sealant keeps the look while stopping further corrosion.
Pair the sink with warm wood, white tiles, or brass-tone fixtures for a balanced, retro vibe. Keep the rest of your colors muted so the turquoise stands out without overwhelming the small space.
PRO TIP
If the sink leaks or has heavy rust, use it as a decorative basin only and add a waterproof liner.
9) Upcycled suitcase nightstand
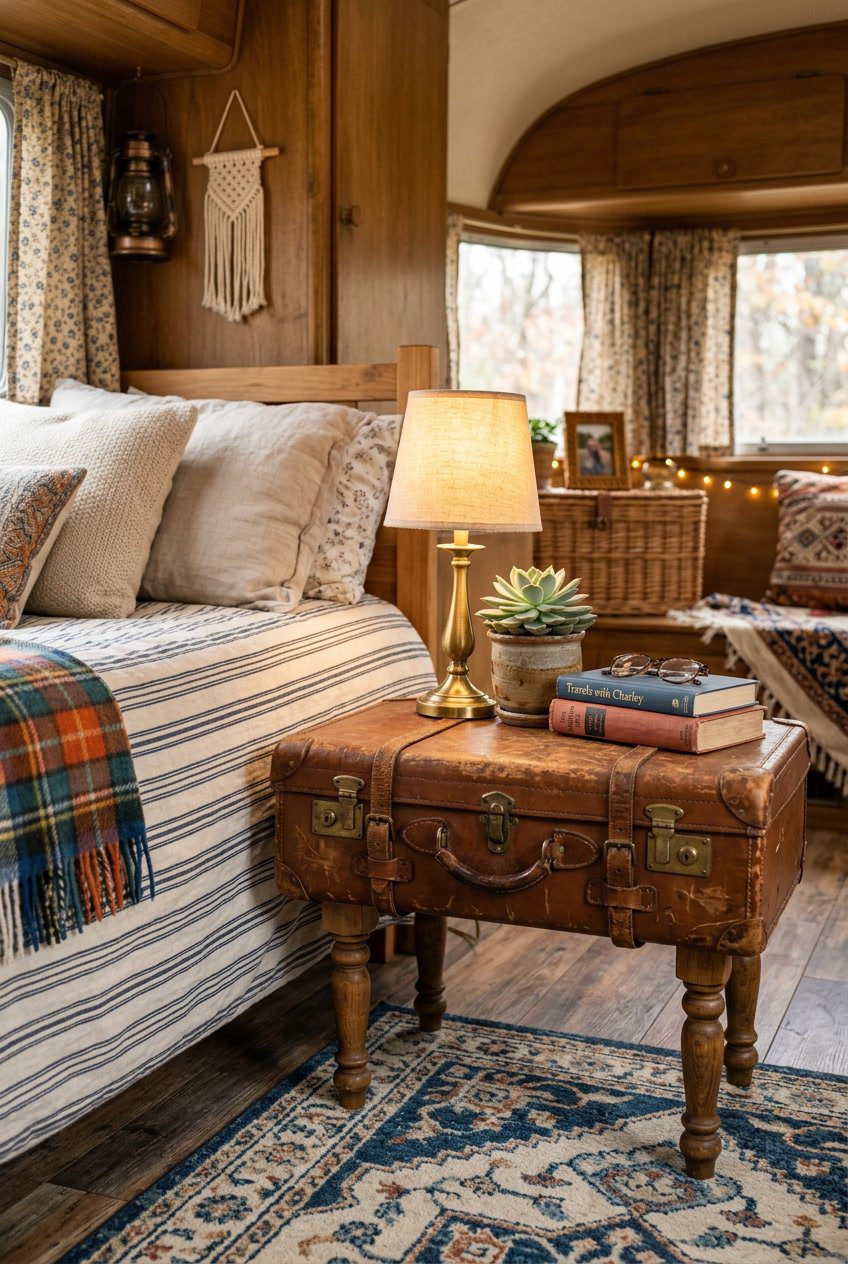
You can turn an old suitcase into a small nightstand with little time or money. Stack two suitcases or mount one on short legs to get the height you want. Paint or line the inside to match your camper’s colors.
Drill holes in the bottom for sturdy legs or attach a few hairpin legs for a mid-century look. Use the interior for books, a lamp, or chargers. Keep the latch working so you can close it while driving.
PRO TIP
Choose a hard-sided suitcase for better stability. Add felt pads under the legs to protect floors and stop sliding.
10) Threadbare Persian rug patchwork
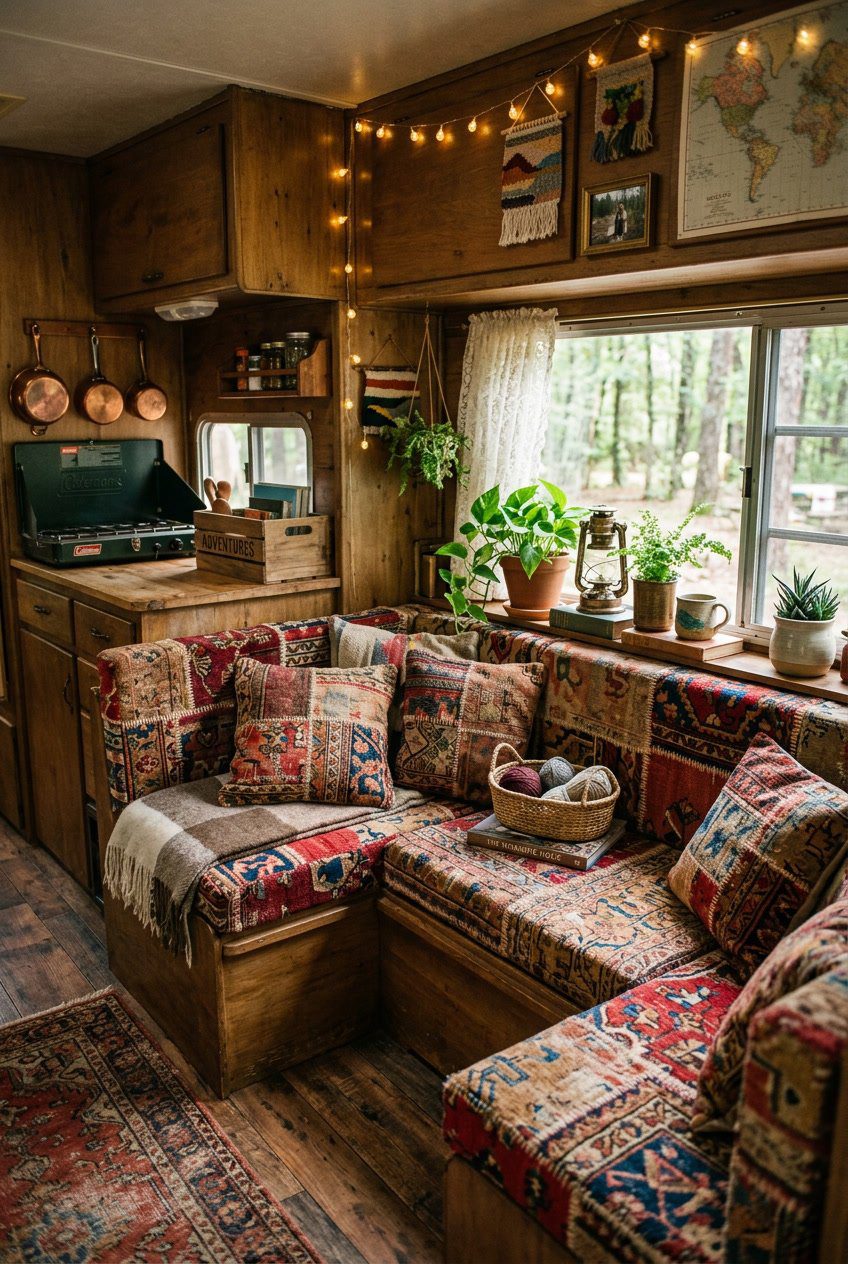
You can turn old, worn Persian rugs into cozy patchwork for your camper. Cut faded pieces into squares or strips and sew them together for a small rug or wall hanging. The mix of faded colors adds charm without looking perfect.
Patchwork lets you use tiny scraps too. Sew pieces onto a canvas or heavy fabric if you don’t want a full rug. That gives you a colorful mat that hides dirt and wear.
PRO TIP
Look for rugs at thrift shops or flea markets and pick ones with strong fabric even if the pile is thin. Use a simple zigzag stitch to keep frayed edges neat and save time.
11) Chippy-painted picnic table
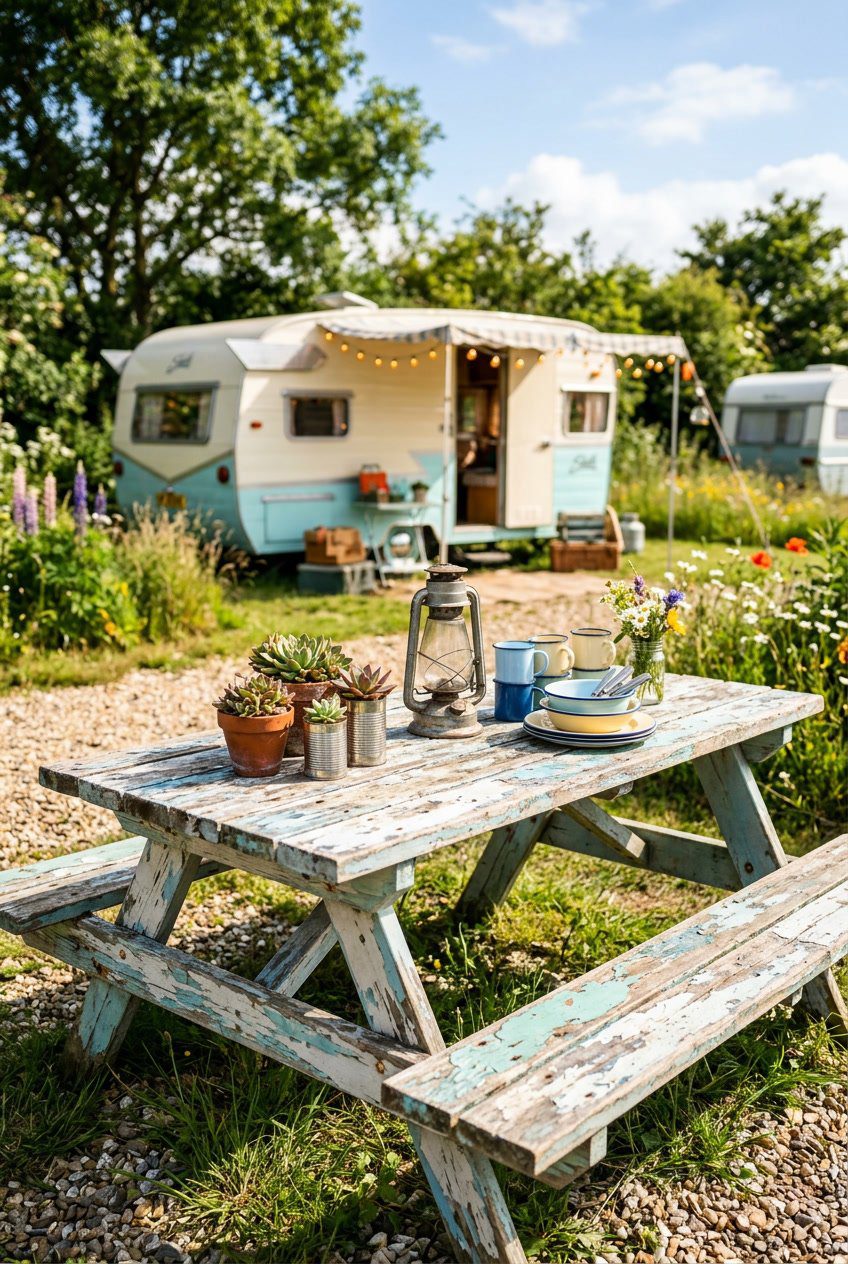
A chippy-painted picnic table adds instant vintage charm to your camper campsite. Look for a sturdy used table at thrift sales, flea markets, or online apps, then sand and paint it to get that worn, layered look.
You can layer two or three paint colors, then sand edges and spots to reveal the underlayers. Use a wax or clear coat to protect the finish while keeping the aged look.
PRO TIP
If you want a faster worn look, apply paint, let it dry, then rub coarse cloth or sandpaper over edges and flat surfaces. Keep a small touch-up kit with leftover paint to fix chips that go too far.
12) Vintage Pyrex mixing bowl display

Collect colorful glass bowls and stack them by size on a shelf or in a corner. The bowls add pattern and color without taking much space, and they feel cozy in a camper.
You can hang a few bowls on the wall with simple plate hangers or floating shelf brackets. That keeps counters clear and makes the bowls a focal point.
Use bowls with different patterns and hues to create a layered look. Mix solid colors with prints for visual interest, and keep the arrangement balanced.
PRO TIP
Look for chips or stains; small flaws add character but avoid cracks. Clean gently with warm water and mild soap to keep the glass bright.
13) Repurposed window frame mirror
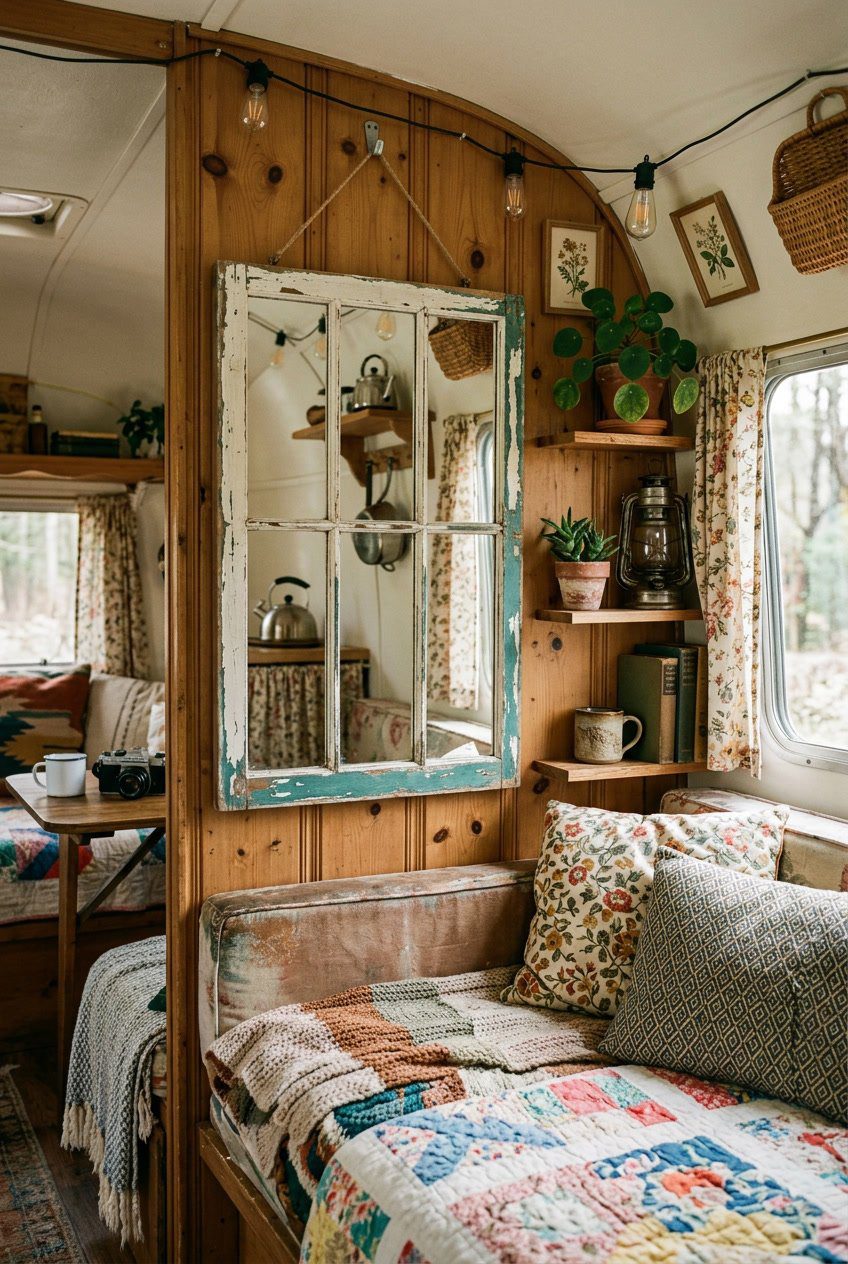
You can turn an old window frame into a mirror to add light and charm to your camper. Remove glass panes and fit mirror pieces, or take out the panes and have a glass shop cut mirrors to size. Paint the frame in a color that matches your camper, or sand it for a rustic look.
Hang the mirror on a wall across from a window to make the space feel larger. Use sturdy hooks or a French cleat for safety while driving. You’ll get a cozy, vintage touch without spending much.
PRO TIP
Seal the back of the mirror with a thin board to protect it from moisture and vibration.
14) Roaring 20s travel poster prints
Vintage travel posters add charm and a sense of adventure to your camper. Look for prints with bold colors, simple shapes, and stylish fonts that match the 1920s look.
You can thrift originals or buy affordable reproductions. Frame them in thin black or wood frames for a clean, timeless feel.
Arrange a small gallery wall above a dinette or bed. Vary sizes and keep spacing even so the display feels planned, not cluttered.
PRO TIP
Scan or photograph thrifted posters and print copies to protect originals. Use acid-free mats to keep prints safe from sun and moisture.
15) Hand-lettered chalkboard menu sign
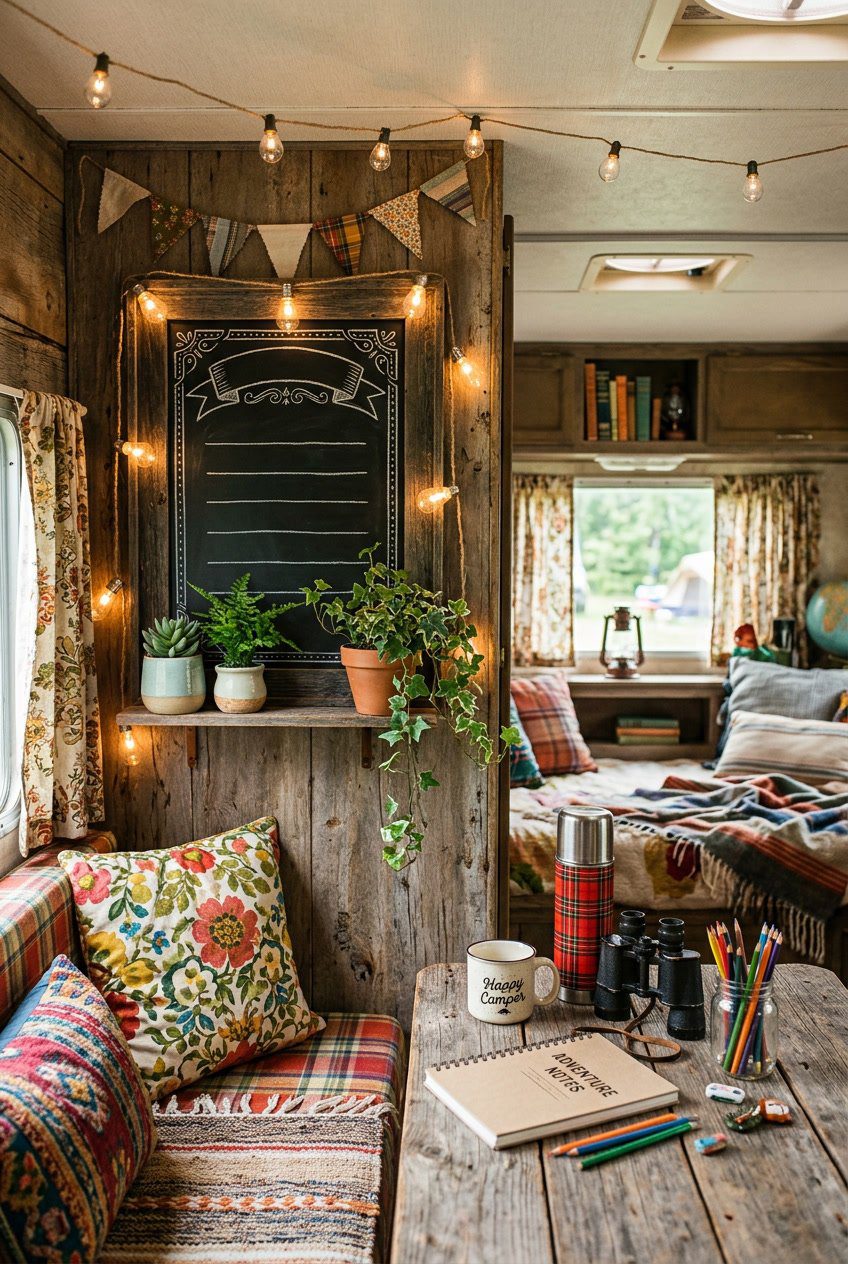
A chalkboard menu adds charm and function to your camper. You can list meals, drinks, or daily plans so everyone knows what’s next.
Hand-letter the board with simple fonts and little drawings. Use white chalk or chalk markers for clear contrast and wipeable changes.
Mount the board near the kitchen area or behind a seat where it’s easy to read. Attach with lightweight hooks or adhesive strips so it won’t fall while driving.
PRO TIP
Practice your lettering on paper before you write on the board. For a vintage look, distress the frame lightly with sandpaper.
16) Reupholstered midcentury dinette chairs
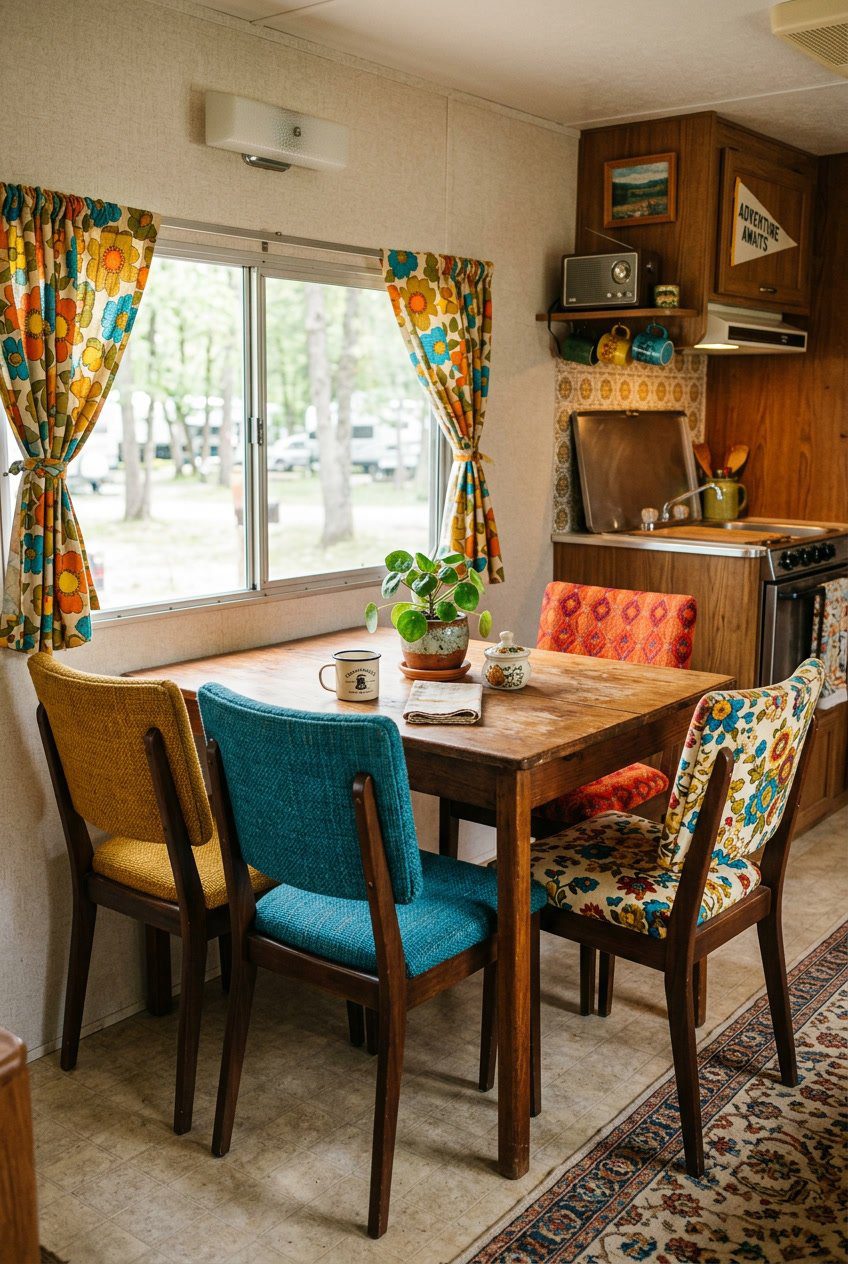
You can find midcentury dinette chairs at thrift stores or flea markets for low cost. Reupholstering them gives your camper a fresh, cozy look without spending much.
Remove the old fabric and replace the foam if it’s worn. Choose durable, easy-to-clean fabric in a color or pattern that matches your camper’s vibe.
If the wood or metal frame needs work, sand and paint it to revive the finish. Small repairs and a new seat cover make the chairs feel almost new.
PRO TIP
Pick tightly woven fabric that stands up to spills and sun. Use simple stitches or an affordable upholstery kit to keep the job quick and neat.
17) Crocheted doily bunting

You can turn thrifted doilies into a sweet bunting for your camper. Sew or clip them to twine and hang across a window, shelf, or the ceiling to add soft texture and light diffusion.
If you like color, dye the doilies with fabric dye or tea for a vintage look. White doilies work well too, keeping the space bright and airy.
PRO TIP
Mix shapes and sizes for a handmade, collected-over-time feel. Use small clothespins if you want to swap pieces often without sewing.
18) Rusty metal camping mug collection
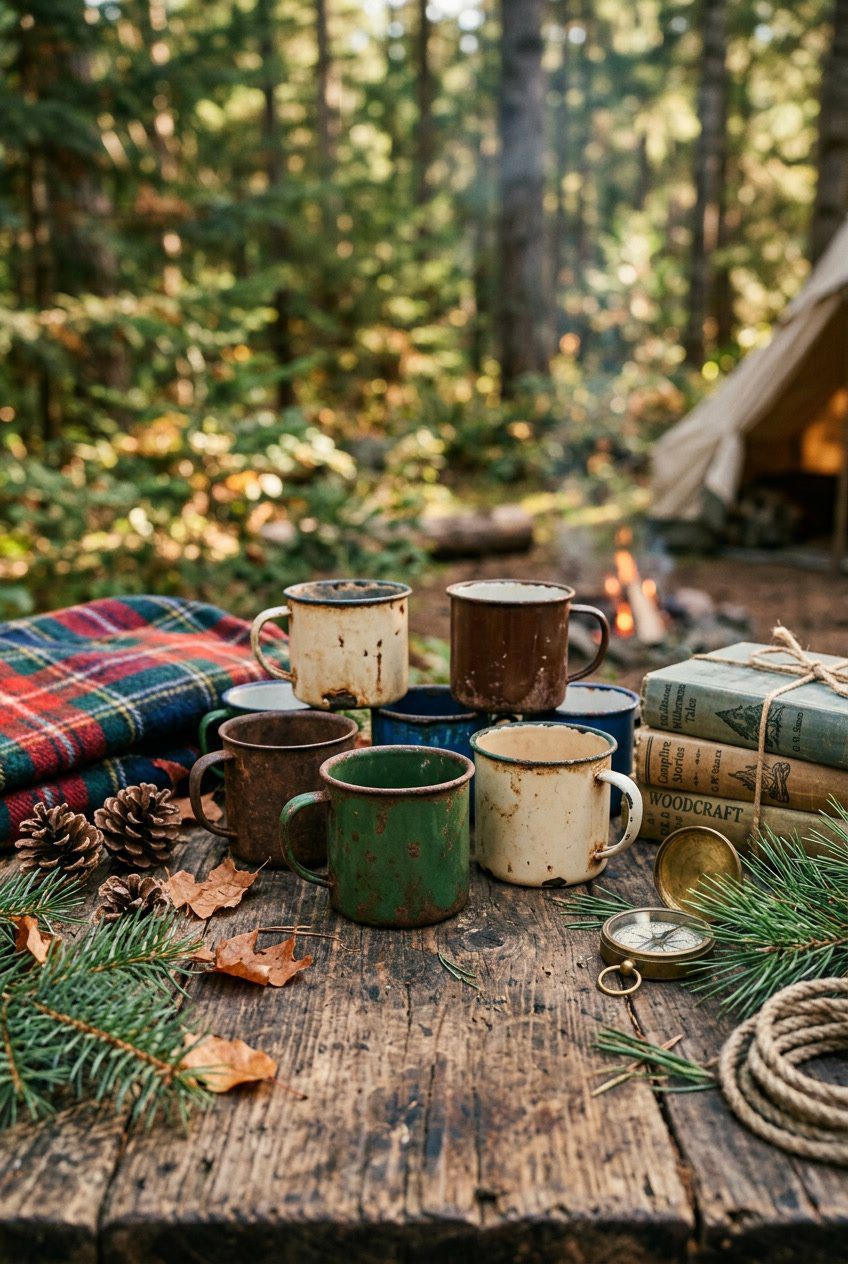
You can gather old metal camping mugs from thrift stores, yard sales, or flea markets. They add a worn, cozy feel to your camper without costing much.
Display them on a simple peg rail or open shelf. The rusted patina gives each mug character and tells a small story.
Use a few for real drinks after cleaning them well. Or turn some into planters for small herbs or succulents.
PRO TIP
Lightly seal the inside with a food-safe coating if you plan to drink from them often. If you keep them purely decorative, arrange mugs by size or color for a tidy, vintage look.


