Spring has arrived, and you’re itching to hit the open road in your beloved RV. But before you back out of that driveway or storage lot, there are some critical checks you absolutely cannot skip. According to experienced full-timers, skipping these 11 essential maintenance tasks could leave you stranded on the side of the road, facing expensive repairs, or worse—dealing with safety hazards that put your entire trip at risk.
Full-time RVers who have lived the lifestyle since 2022 have learned these lessons the hard way. Whether you’re a weekend warrior or a seasoned road warrior, these pre-season checks are your insurance policy against costly disasters. Research shows that proper RV maintenance can prevent up to 80% of roadside breakdowns, saving RVers thousands in emergency repairs and towing costs.
Would you like to save this article?
1. Don’t Assume Your RV Is Ready Just Because It “Looks Fine”
That RV sitting in storage might look pristine from the outside, but appearances can be deceiving. When your rig sits idle for months, all sorts of problems can develop beneath the surface. Critters love to make themselves at home in unoccupied RVs, insects build nests in vents, and mechanical issues you meant to fix last season? Yeah, you probably forgot about those.
Here’s the reality check you need: Most RV insurance claims occur within the first month of camping season because owners skip the pre-trip inspection. You might think your memory is sharp, but after a long winter, those mental notes about “fixing that thing” have vanished faster than toilet paper at a campground.
Pro Tip: Create a comprehensive pre-season checklist and actually use it. Your future self will thank you when you’re sipping coffee at a scenic campsite instead of waiting for a mobile mechanic.
2. Neglecting Tire and Suspension Checks (The Silent Trip Killers)
Your tires are literally the only thing between your RV and the pavement, yet they’re often the most overlooked component. RV tire blowouts cause approximately 11,000 accidents annually, and many could be prevented with simple pre-season checks.
Here’s what you need to inspect:
| Inspection Point | What to Look For | Why It Matters |
|---|---|---|
| Tire Pressure | Check against manufacturer specs | Under-inflation causes blowouts |
| Tire Age | Check DOT date code on sidewall | Tires expire after 5-7 years |
| Sidewall Condition | Look for cracks or bulges | Sun damage weakens tire structure |
| Wheel Bearings | Grease or replace as needed | Prevents wheel failure |
| Lug Nuts | Torque to factory specs | Loose wheels = disaster |
Imagine this scenario: you’re cruising down the highway, and suddenly—BOOM—a tire explodes. Rubber shreds fly everywhere, damaging your water tank, ripping off wheel wells, and leaving you stranded. One RV couple in Alaska experienced exactly this, watching their fresh water tank get punctured by flying rubber debris. They spent three days waiting for repairs in the middle of nowhere.
Investment Alert: A quality Tire Pressure Monitoring System (TPMS) isn’t optional—it’s essential. These systems alert you to pressure drops and overheating before a catastrophic failure occurs. The Haloview system, for example, gives real-time monitoring right from your driver’s seat.
3. Skipping Fresh Water System Sanitization
Nobody wants to drink sketchy water on vacation, but if you haven’t sanitized your fresh tank since last season, that’s exactly what you’re doing. Studies show that RV water tanks can harbor harmful bacteria, including E. coli and Legionella, especially after sitting dormant for months.
Beyond bacteria, mineral buildup and stale water can make your morning coffee taste like you brewed it in a swamp. Yuck.
Your sanitization checklist:
- Flush the fresh tank multiple times
- Replace ALL water filters (seriously, all of them)
- Sanitize with a bleach-free sanitizer
- Run water through every faucet to check for leaks
- Charge your water softener if you use one
Picture this: you fill your tank at a beautiful national park, but the water comes out yellowish-brown. Without proper filtration, you’re basically bathing in and drinking rusty soup. A three-stage filtration system like ClearSource can reduce contaminants by 99.9%, ensuring every drop is safe and clean.
Money-Saving Tip: Buy replacement filters in bulk. You can cut costs from $60 for three filters down to $20-30 by purchasing in larger quantities.
4. Forgetting About Your Holding Tanks
Let’s talk about the glamorous side of RV life: your poop tanks. Look, we know it’s not exciting, but improperly maintained holding tanks are the #1 complaint among RVers, causing awful smells, sensor failures, and even health hazards.
If your RV sat all winter with “stuff” in those tanks, you’ve essentially created a science experiment you definitely don’t want to study up close. Crusty buildup, rotten odors, and false sensor readings await you.
Tank maintenance essentials:
- Use a reverse flush system (Flush King) to blast out buildup
- Apply a high-quality enzyme tank treatment
- Clean gray tanks (they can smell worse than black tanks!)
- Use a sensor cleaning treatment to restore accuracy
Here’s a scenario nobody wants: you arrive at a gorgeous campsite, open your RV door, and get hit with an ungodly stench that makes your eyes water. Your trip is ruined before it starts because you neglected ten minutes of tank maintenance.
Product Spotlight: Liquefied brand offers a complete tank care package including black tank treatment, gray tank treatment, sensor cleaner, and fresh tank sanitizer. Using code TOMORROW saves you 20% on already discounted bundles.
5. Ignoring Battery Health and Electrical Connections
Batteries sitting in storage lose charge, and weak batteries mean no lights, no water pump, no furnace, and no fun. Dead or failing RV batteries are responsible for 35% of all campground frustrations, according to RV maintenance surveys.
But here’s the scarier part: loose electrical connections can literally start fires. One RV couple nearly lost their entire refrigerator control system because of a single loose connection that caused an electrical cascade failure.
Battery season prep:
- Check battery charge levels
- Inspect for corrosion or damage
- Consider upgrading to lithium batteries
- Tighten ALL electrical connections
- Check solar charge controllers
- Inspect breaker box connections
You wouldn’t believe how many RV fires start from something as simple as a loose wire connection. Twenty minutes of checking and tightening connections could save you from a $50,000+ disaster. That’s not dramatic—it’s documented reality in RV insurance claims.
Upgrade Option: Redodo lithium batteries offer superior performance and longevity compared to traditional lead-acid batteries, and they’re surprisingly affordable.
6. Not Inspecting Your Roof
Out of sight, out of mind, right? Wrong. Your RV roof is your first line of defense against water damage, which is the costliest repair issue in the RV industry, often exceeding $15,000 for major repairs.
If you’re not comfortable climbing up there, hire someone who is. A small crack in a seal that goes unnoticed can turn into catastrophic water damage that ruins your ceiling, walls, and even floor.
Roof inspection checklist:
- Check all seals and caulking for cracks
- Inspect for tears in the roofing material
- Look for tree damage from last season
- Clean solar panels (if equipped)
- Check AC unit seals
- Examine edge seals along roof sides
Imagine discovering water stains spreading across your ceiling while you’re three states away from home. That small crack you didn’t notice? It’s been leaking for months, and now you have mold, rot, and structural damage. Prevention costs pennies; repairs cost thousands.
7. Failing to Clean Your Air Conditioners
Here’s something creepy: wasps, birds, and other critters love building nests inside RV air conditioners. You turn on your AC expecting cool relief, and instead, you get a face full of debris, dead bugs, or worse—a unit that doesn’t work at all.
AC cleaning isn’t rocket science, but it requires getting on the roof and doing some basic maintenance that most people skip. You’ll need coil cleaner, a brush, and about 30 minutes per unit.
Think about this: you’re camping in 95-degree heat, and your AC unit won’t work because a wasp nest is blocking the airflow. Your whole family is miserable, and you can’t get a mobile tech out for three days. All because you skipped a simple cleaning.
Don’t forget: Replace inside air filters too. They’re cheap, easy to forget, and make a huge difference in air quality and cooling efficiency.
8. Overlooking Furnace and Water Heater Maintenance
Remember those critters we mentioned? They LOVE furnace vents and water heater compartments. One couple almost burned down their brand-new RV because they didn’t know to check for wasp nests in their furnace vent. They turned on the heat for the first time and nearly had a catastrophic fire.
Furnace and water heater maintenance:
- Install vent screens to block insects and rodents
- Check for nests or debris
- Replace anode rod in water heater
- Flush water heater tank
- Test both systems before hitting the road
Your water heater’s anode rod is a sacrificial component designed to corrode so your tank doesn’t. If your anode rod is worn down to nothing, your water heater tank will start corroding, leading to leaks and a $800+ replacement. A new anode rod costs about $15 and takes 10 minutes to replace.
You really don’t want to learn about anode rods the hard way—after your water heater starts leaking and floods your RV. Prevention is always cheaper than replacement, especially with these systems.
9. Neglecting Slide-Out Maintenance
If there’s one topic that dominates RV forums, it’s slide-out problems. Slide failures can leave you completely stuck, unable to travel or even close up your RV. Talk about a vacation killer.
Dirt, debris, and dried-out seals are the enemies of smooth slide operation. After months in storage, your slides need some TLC before you expect them to perform flawlessly.
Slide maintenance steps:
- Clean all slide seals thoroughly
- Apply seal conditioner
- Check and clean wiper flaps
- Lubricate slide mechanisms
- Run slides in and out multiple times
- Listen for unusual sounds
- Inspect for grooves on slide bottoms
Picture being at a beautiful campsite, ready to leave, and your slide won’t retract. You’re stuck there, potentially for days, waiting for a mobile tech. All because you didn’t spend 20 minutes cleaning and checking your slides before departure.
Pro tip: Look for deep grooves on the bottom of your slides—they indicate misalignment issues that need professional attention before they become major problems.
10. Skipping Electrical System and Surge Protection Checks
Your RV’s main power connection is a critical safety component that gets handled constantly and weathers the elements. Loose, corroded, or damaged electrical connections cause RV fires and electrical system failures that can destroy expensive appliances like refrigerators and air conditioners.
Check both ends of your power cable for:
- Burn marks or discoloration
- Corrosion on pins or receptacles
- Loose connections that wobble
- Cracked insulation or damaged casing
One RVer plugged into what seemed like a solid connection at a Florida RV park, but the connection was loose internally. It caused intermittent power issues that nearly damaged their entire electrical system. A $2 bungee cord to secure the connection would have prevented hours of troubleshooting and potential damage.
Essential equipment: A quality surge protector like the Hughes Power Watchdog is non-negotiable. Bad campground power can destroy your RV’s electrical system in seconds, and surge protectors pay for themselves the first time they save your equipment from a power spike.
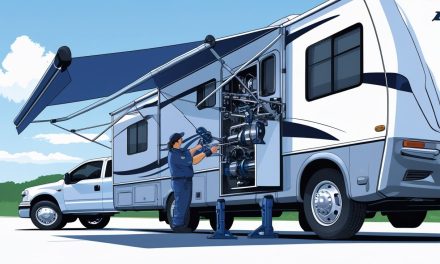
11. Failing to Inspect and Maintain Your Hitch System
Your hitch connection is literally what keeps your RV attached to your tow vehicle. Hitch failures cause devastating accidents, injuries, and even fatalities each year. This isn’t an area to cut corners.
Whether you have a fifth-wheel or travel trailer, your hitch system needs regular attention:
| Component | Maintenance Action | Frequency |
|---|---|---|
| Hitch mechanism | Apply heavy-duty grease | Before every trip |
| Pin box | Install lube plates | Once, then replace as worn |
| Breakaway cable | Inspect for damage | Before every trip |
| Seven-pin connector | Check for corrosion, test lights | Before every trip |
| Bolts and fasteners | Check tightness | Monthly |
Here’s a nightmare scenario: you’re towing down the highway, and your RV suddenly disconnects from your truck. The breakaway system activates, but you’re in a dangerous situation that could have been prevented with five minutes of inspection.
You’d be shocked how many RVers never check their turn signals and brake lights before pulling out. Getting pulled over for non-functioning lights is embarrassing; having brake lights fail in traffic is dangerous and potentially deadly.
BONUS: Take a Shakedown Trip
Before you embark on that epic cross-country adventure to the Grand Canyon, take a weekend shakedown trip to a local campground. This test run lets you discover problems close to home rather than 1,000 miles away.
During your shakedown trip:
- Test all systems under real conditions
- Check for leaks, rattles, or malfunctions
- Make a list of issues to address
- Ensure you have emergency contacts ready
- Verify registration, insurance, and roadside assistance
You’ll also want to check your insurance, roadside assistance coverage, and have emergency contact numbers ready. AAA RV Plus and Good Sam Roadside Assistance are popular options that can save you thousands if you need a tow.
Finding out your water pump doesn’t work at a campground 20 minutes from home? Annoying but fixable. Finding out 800 miles from home? That’s a vacation-ruining disaster.
Wrap-Up: An Ounce of Prevention Is Worth a Pound of Fun
You didn’t invest in an RV to spend your vacation time dealing with breakdowns and repairs. These 11 essential checks take just a few hours but can save you thousands of dollars, countless headaches, and maybe even prevent a dangerous situation.
The cost of prevention vs. the cost of failure:
- Pre-season inspection time: 4-6 hours
- Pre-season maintenance cost: $200-500
- Average roadside breakdown: $2,000-5,000
- Major repair from neglect: $5,000-15,000+
The math is simple. A Saturday spent preparing your RV is the best investment you’ll make all season.
Now get out there and create some amazing memories—safely and confidently—knowing your RV is ready for whatever adventures await!
SOURCES:
National Highway Traffic Safety Administration (NHTSA) – RV Tire Safety Data
https://www.nhtsa.gov/
RV Industry Association (RVIA) – Maintenance Statistics and Best Practices
https://www.rvia.org/
Centers for Disease Control and Prevention (CDC) – Water Quality in Recreational Vehicles
https://www.cdc.gov/
Recreational Vehicle Safety and Education Foundation (RVSEF)
https://www.rvsafety.org/
Like There’s No Tomorrow – Original YouTube Video
https://www.youtube.com/watch?v=6nnqlae8Ui8
Consumer Reports – RV Maintenance and Safety Guide
https://www.consumerreports.org/
National Fire Protection Association (NFPA) – RV Fire Safety Statistics
https://www.nfpa.org/


