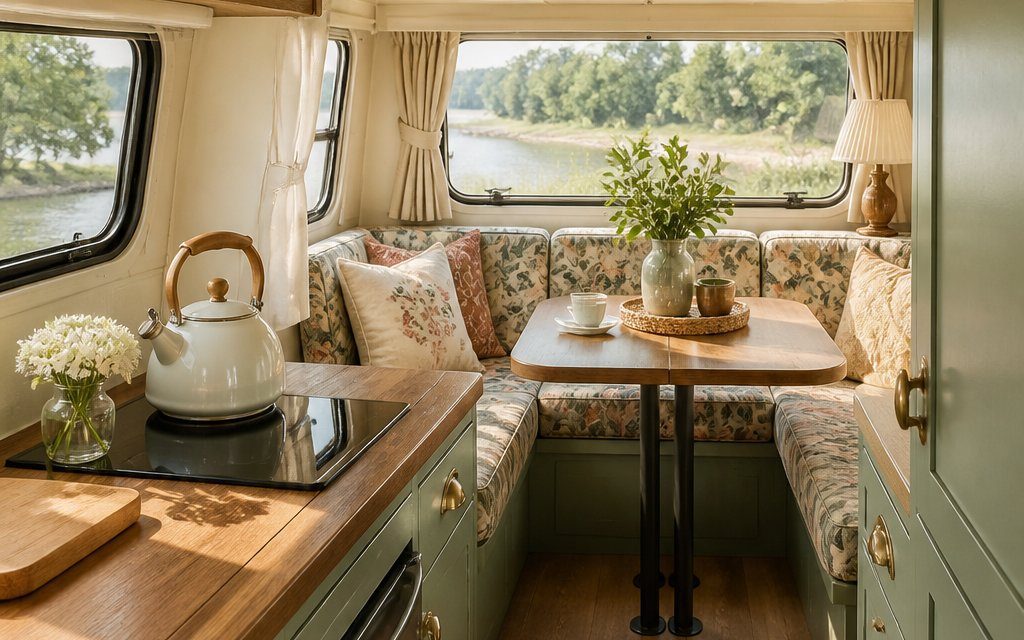
A newer camper can feel fresh and functional while still lacking the cozy character of an older travel trailer. With a few thoughtful updates, you can give your space a warm vintage look without changing its modern comforts.
You can add vintage charm through simple changes to color, texture, lighting, storage, and decor. These ideas will help you create a camper that feels personal, welcoming, and easy to enjoy on every trip.
1) Install retro peel-and-stick wallpaper
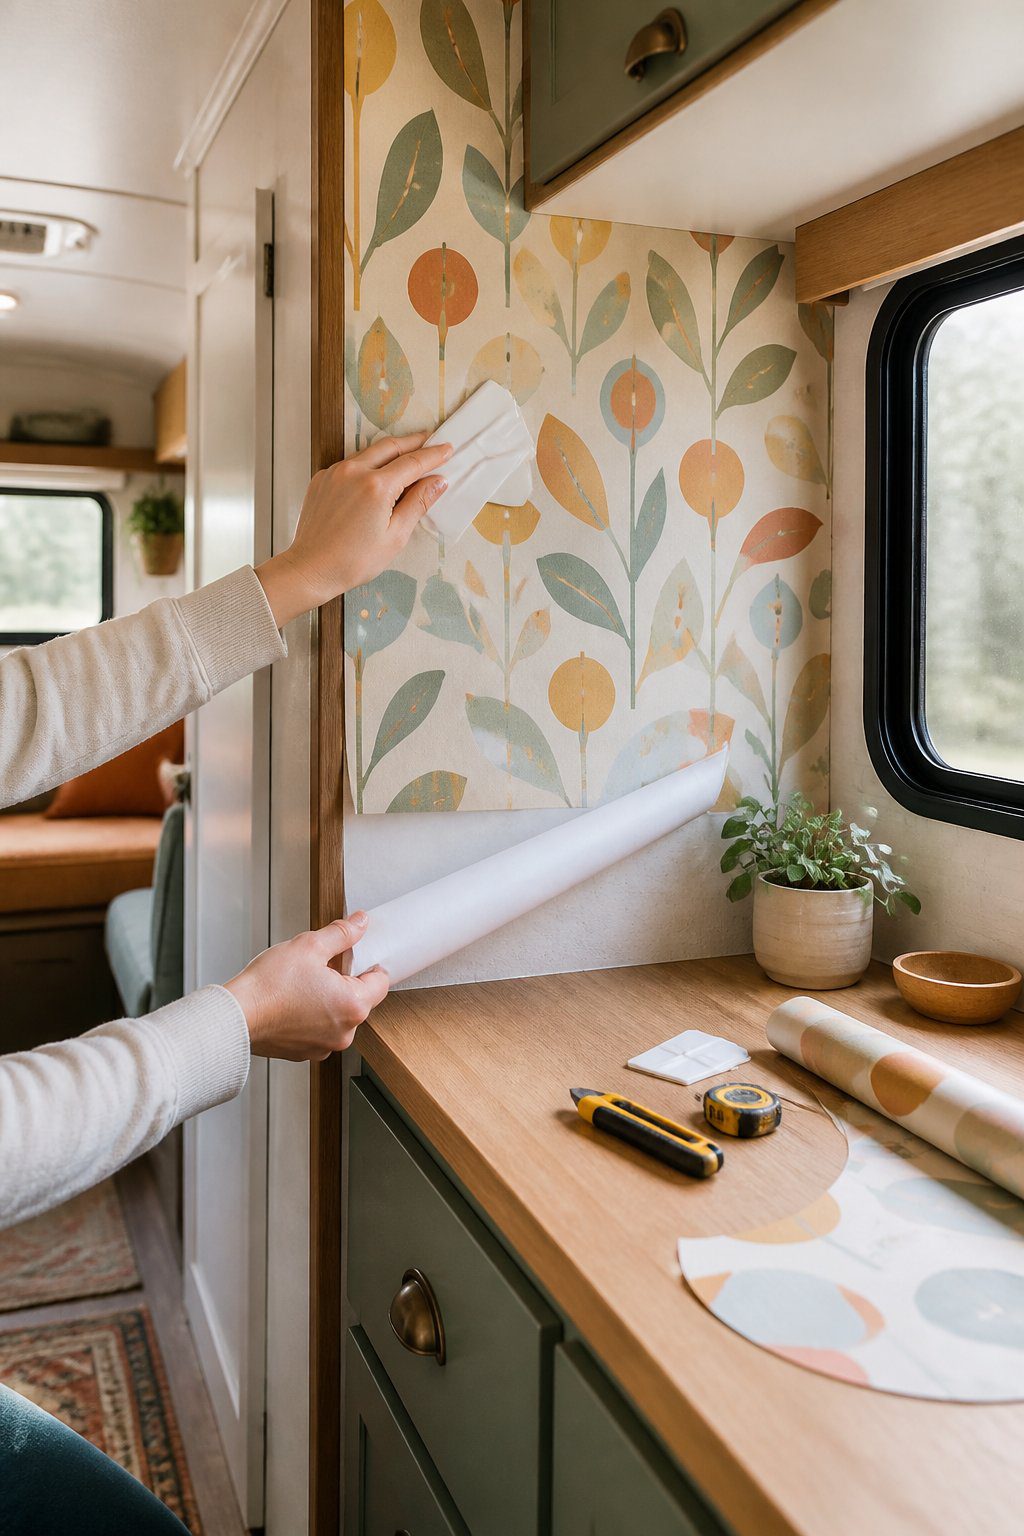
Give your newer camper a vintage look with peel-and-stick wallpaper in a classic pattern. Small florals, checkerboards, soft stripes, and muted geometric designs can add charm without making the space feel crowded.
Before applying it, clean and dry the wall surface. Measure each area carefully, then cut the wallpaper with a little extra material for trimming. Start at one edge and smooth the paper as you go to reduce bubbles and wrinkles.
Use it on an accent wall, inside open cabinets, or behind a dinette. Choose a removable style if you rent your camper or want to change the design later.
PRO TIP
Test a small piece first. Camper walls may have a textured finish, and some wallpaper may not stick well to uneven surfaces.
2) Add a vintage-inspired checkerboard backsplash
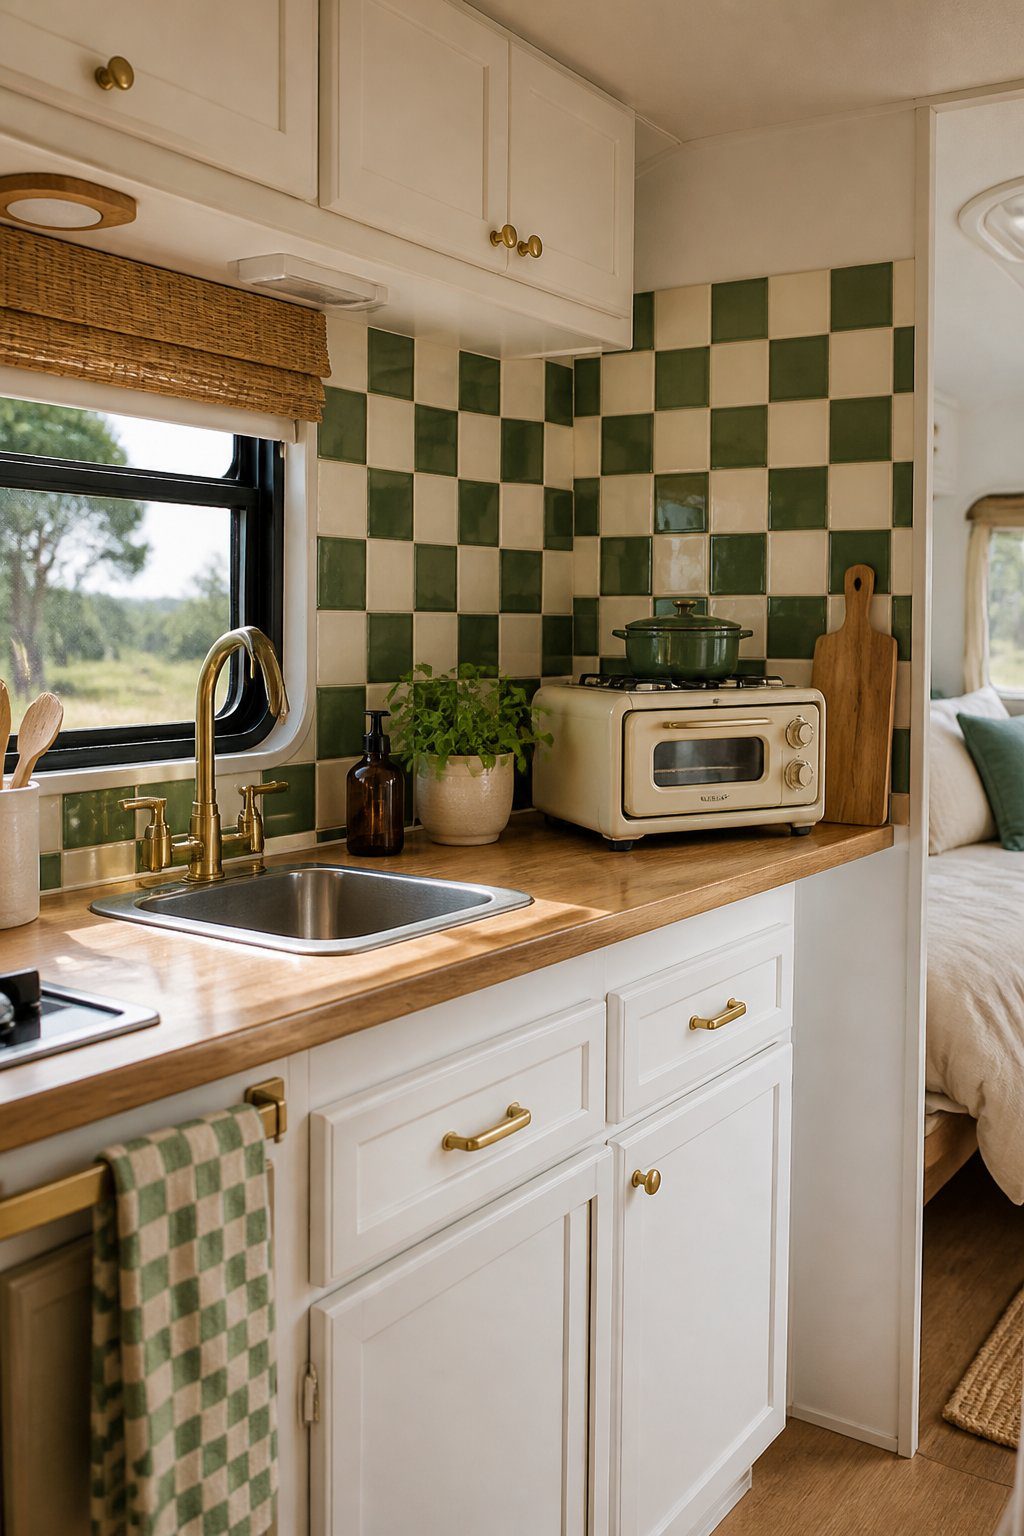
A checkerboard backsplash can give your newer camper a classic, playful look without a full renovation. Choose two colors that match your cabinets, upholstery, or curtains. Soft cream with muted green, blue, or red often feels more vintage than stark black and white.
Use lightweight peel-and-stick tiles made for smooth, clean surfaces. Before installing them, measure the wall and plan the pattern so the edges look balanced. Clean the surface well, press each tile firmly, and trim the last pieces with a sharp utility knife.
PRO TIP
Test your color choices with paper squares before you buy materials. Camper lighting can change how colors look, so check your sample during the day and at night. Seal exposed edges near the sink to help prevent moisture from lifting the tiles.
3) Use warm wood butcher-block countertops
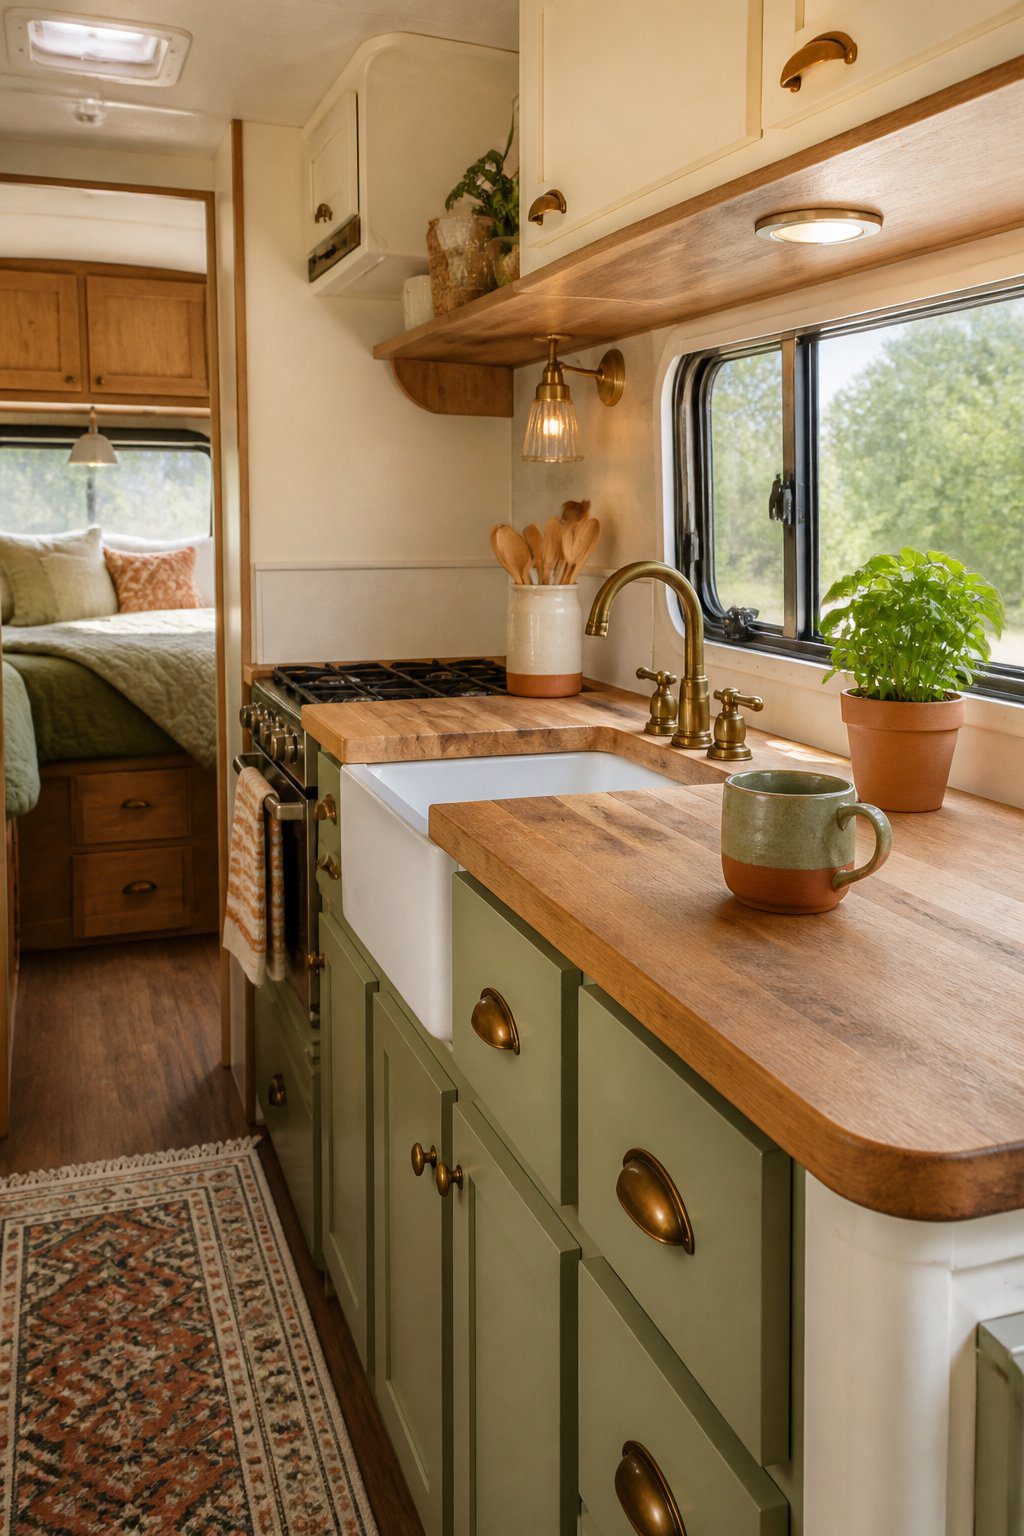
Butcher-block countertops add natural warmth to a newer camper. Their wood grain softens bright white cabinets, metal fixtures, and smooth plastic surfaces, helping the space feel more like a cozy vintage kitchen.
Choose a sealed countertop made for regular use, and measure your existing surface before buying materials. A medium wood tone works well with cream, olive, mustard, or muted blue accents. You can also pair the countertop with simple cabinet pulls for a more finished look.
PRO TIP
Use a cutting board or heat mat to protect the surface from knives, hot pans, and spills. Wipe up moisture quickly, especially around the sink, and reapply the recommended finish when the wood begins to look dry.
4) Swap in brass cabinet pulls
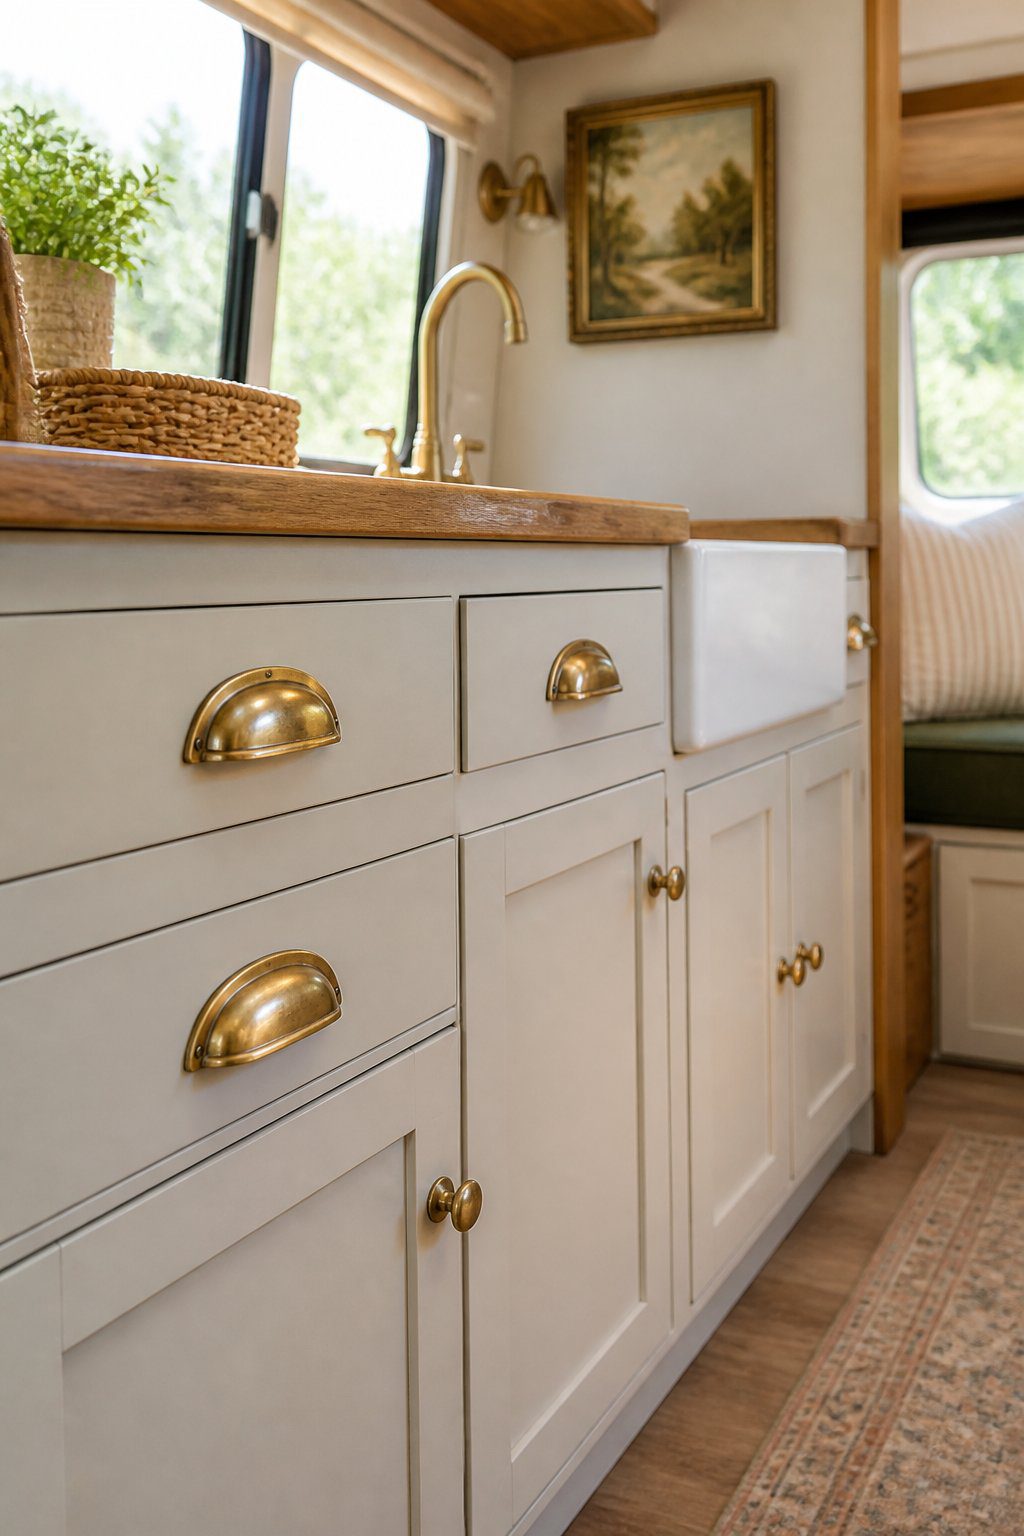
Replace plain cabinet knobs and handles with brass pulls to give your camper a warmer, vintage-inspired look. Choose simple shapes, such as small cups, bars, or rounded knobs, so the hardware feels classic without making the space look busy.
Before buying new pulls, measure the existing holes in your cabinet doors and drawers. Matching the hole spacing helps you avoid drilling new holes or filling old ones. If the measurements do not match, use a template to mark each new position accurately.
Look for brass with a soft, aged finish rather than a bright, mirror-like surface. You can also mix brass pulls with cream cabinets, wood accents, or patterned curtains for a cozy retro style. Secure each pull tightly, but avoid overtightening, which can damage thin camper cabinetry.
PRO TIP
Keep the original hardware in a labeled bag. You can reinstall it later if you change the design or sell the camper.
5) Hang gingham café curtains
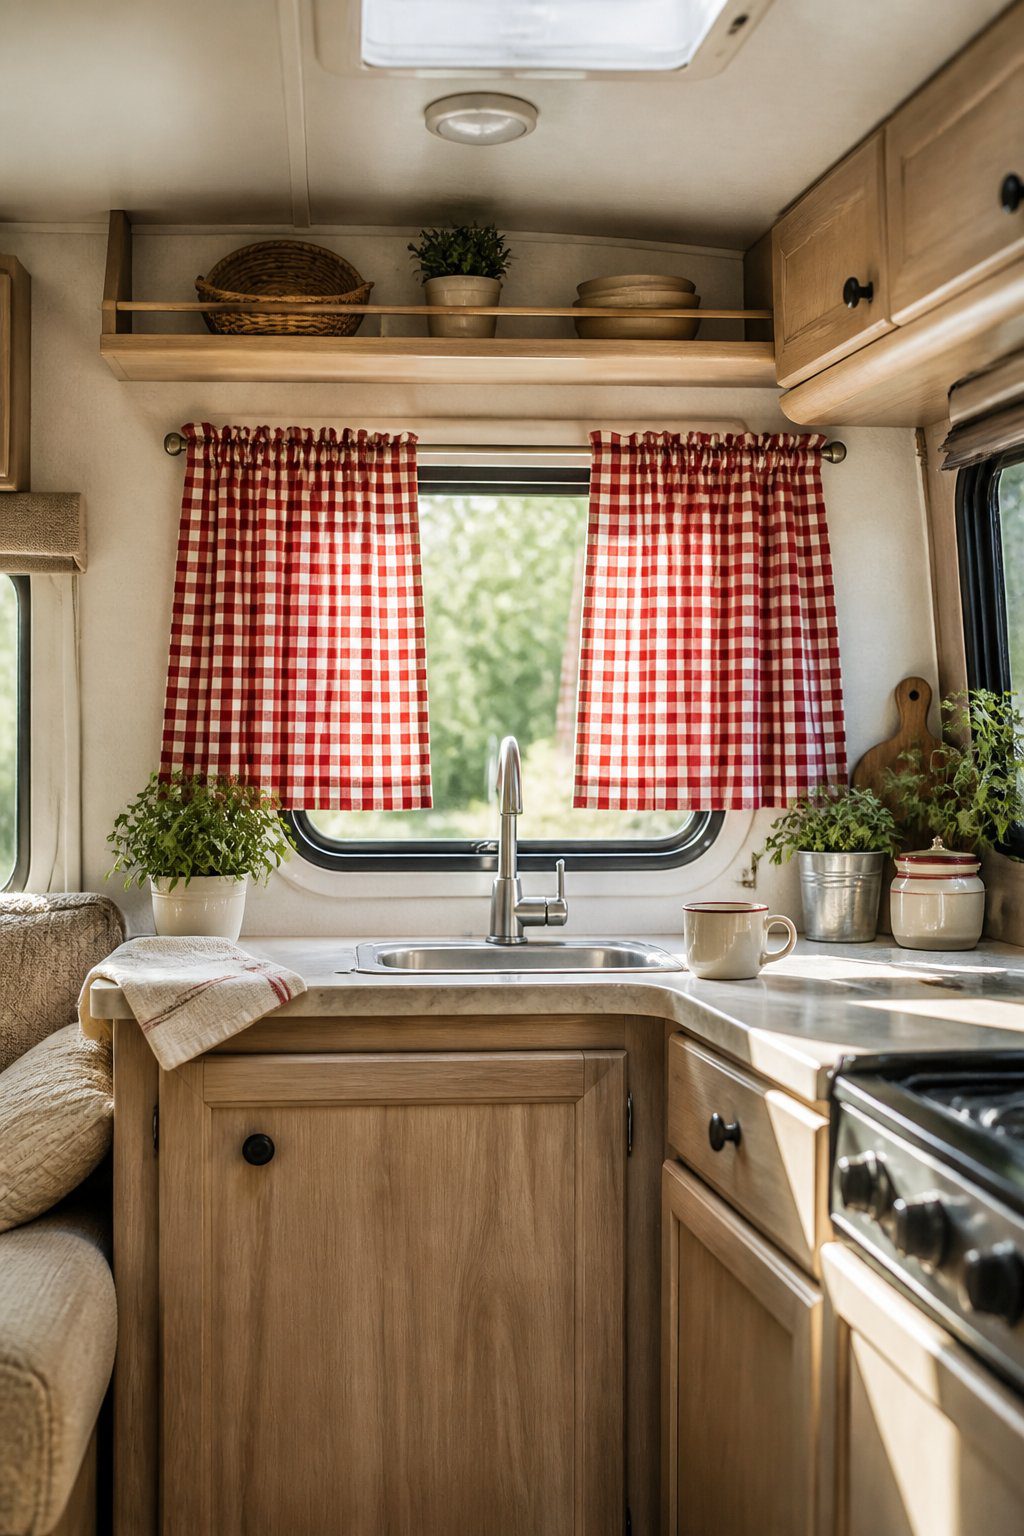
Gingham café curtains add a soft, old-fashioned touch without making your camper feel crowded. Hang them across the lower half of each window so you keep natural light while gaining privacy. Choose a small check in cream, red, blue, or green to match your existing colors.
Use lightweight fabric so the curtains move easily and do not add extra weight. A simple tension rod makes installation quick and avoids drilling into the walls. Leave the curtain rod visible for a casual look, or cover it with a narrow fabric valance.
PRO TIP
Measure each window separately before cutting or buying fabric. Camper windows may look alike but often have slightly different sizes. Wash the fabric first, then hem the edges to prevent shrinking and fraying later.
6) Paint cabinets in muted sage green
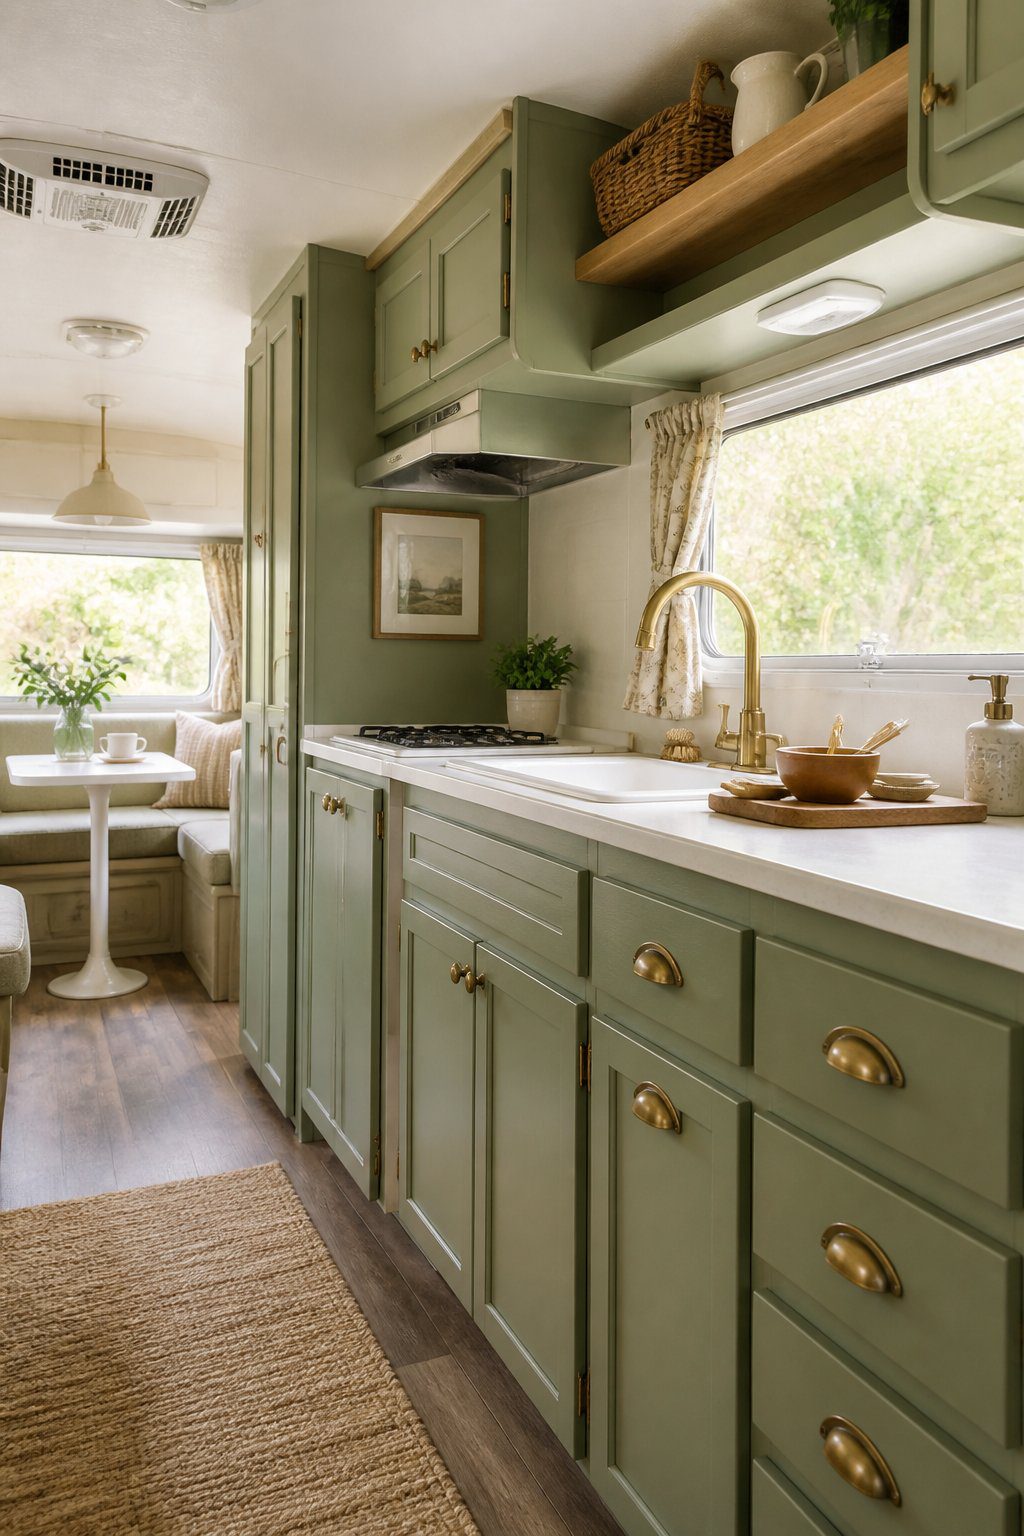
Muted sage green gives your newer camper a soft, vintage-inspired look without making the space feel dark. This color works well with cream walls, wood accents, brass hardware, and patterned fabrics.
Before painting, clean the cabinet doors and lightly sand the surfaces. Use a bonding primer, then apply two thin coats of cabinet paint. Let each coat dry fully before adding the next one, and remove the doors if possible for smoother results.
You can keep the original cabinet hardware or replace it with simple knobs and pulls in brushed brass, bronze, or ceramic. For a more relaxed finish, lightly distress a few edges after the paint dries, but use a gentle touch.
PRO TIP
Test your sage green paint in the camper first. Interior lighting can change how the color looks during the day and at night.
7) Install a classic red-and-white enamel sink
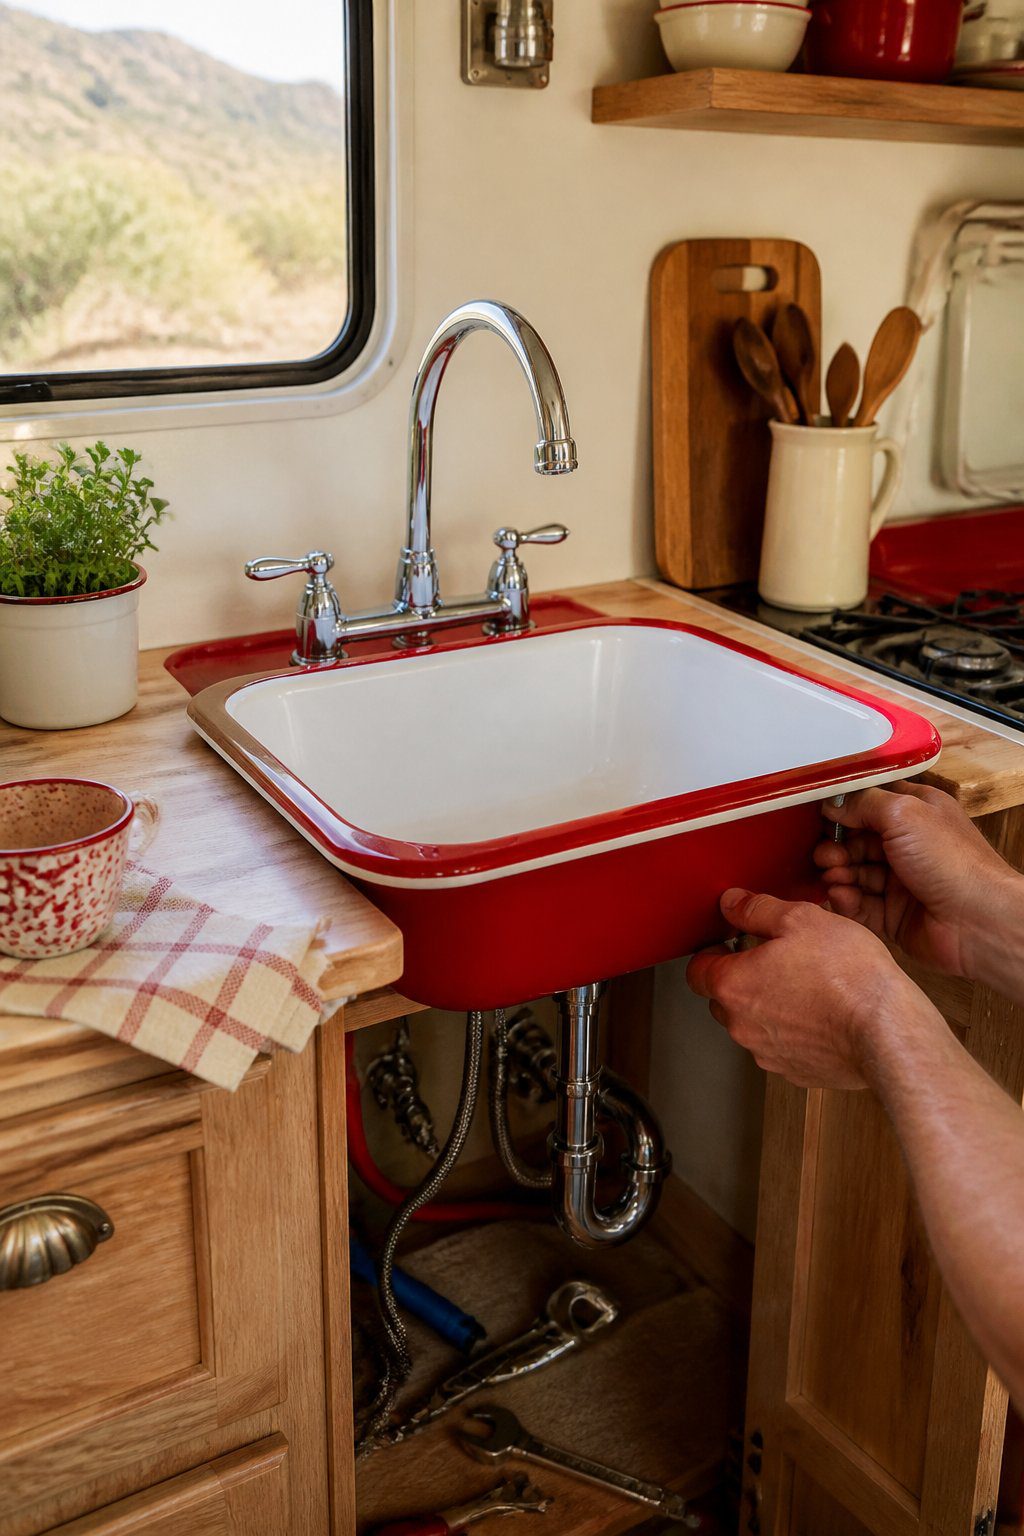
A red-and-white enamel sink can give your newer camper a cheerful vintage look. Choose a compact model that fits your cabinet opening and leaves enough room for the faucet, drain, and water lines.
Before you buy, measure the counter carefully. Check the sink’s depth as well, since a deep basin may reduce storage space below. Use a firm support frame if the counter needs extra strength.
Pair the sink with simple chrome fixtures, white tile, or red cabinet hardware. A striped curtain or checked towel can add more retro style without making the space feel crowded.
Seal the sink edge with waterproof caulk to help prevent leaks and water damage. Clean enamel with a soft sponge and mild soap, and avoid rough scrubbers that may scratch the finish.
8) Add woven rattan storage baskets
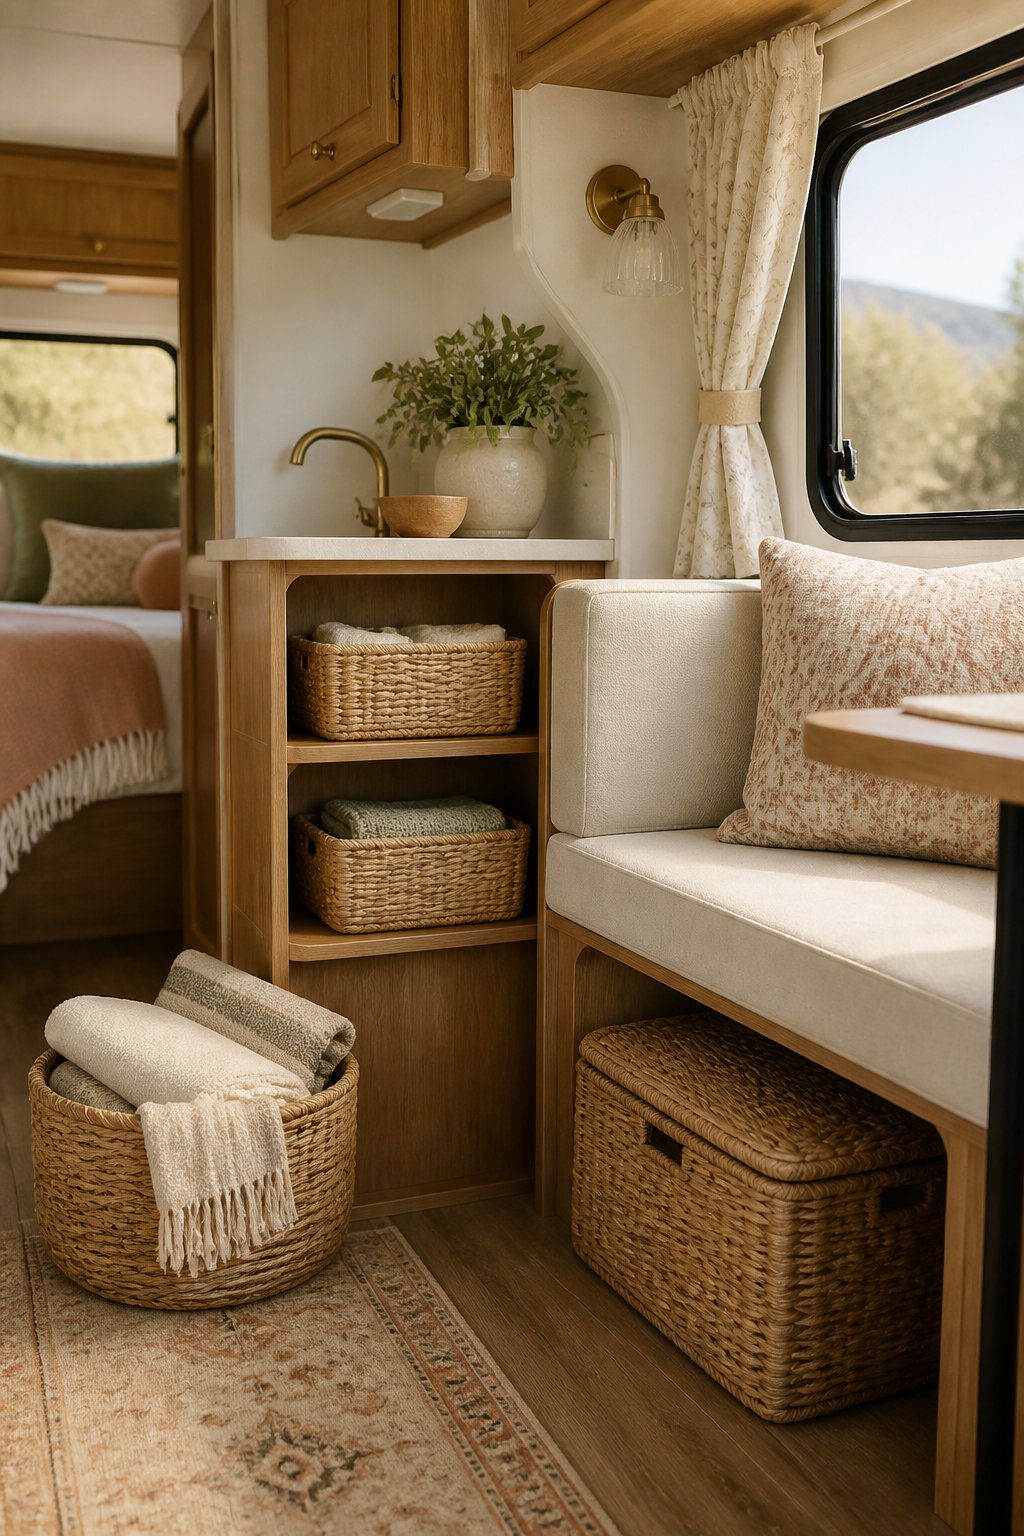
Woven rattan baskets add natural texture and a warm, vintage feel to a newer camper. Use them on open shelves, inside cubbies, or beneath a dinette bench to hide small items while keeping them easy to reach.
Choose baskets in similar shades so the space looks neat without feeling too matched. You can store towels, cooking tools, games, or travel papers inside them. Baskets with handles make it easier to move supplies around the camper.
PRO TIP
Measure each shelf or cabinet before you buy baskets. Leave a little extra space so you can pull them out without scraping the walls or nearby fixtures. If you want a softer look, line the baskets with washable fabric in a simple stripe or small floral print.
9) Style open shelves with enamelware
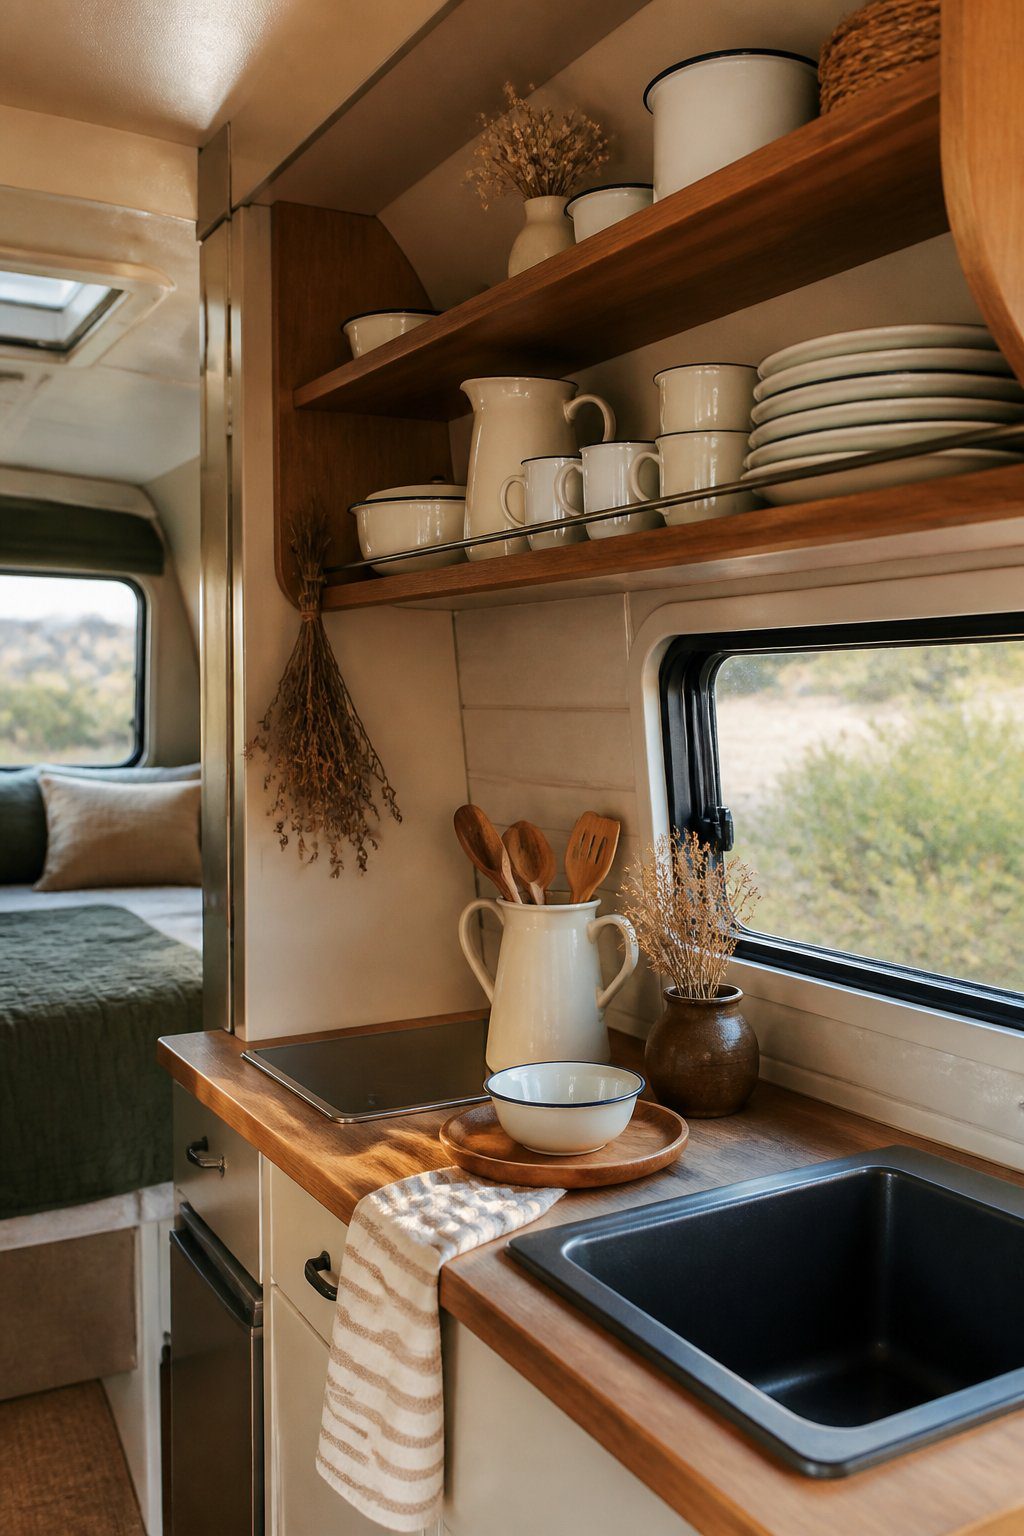
Open shelves give you an easy place to add vintage charm without making your camper feel crowded. Arrange enamelware plates, mugs, bowls, and small storage tins where you can see them. Choose a simple color palette, such as white with blue, red, or green accents, so the display looks collected instead of messy.
Place larger pieces toward the back and smaller items near the front. Keep a little open space between groups to make cleaning and packing easier. Use shelf liners or small nonslip pads to help protect the dishes while your camper moves.
PRO TIP
Mix useful pieces with a few decorative ones, such as an old-style colander or metal pitcher. Secure fragile items with discreet museum putty or removable clips, especially on shelves near the entry door.
10) Use an antique-style camper sign
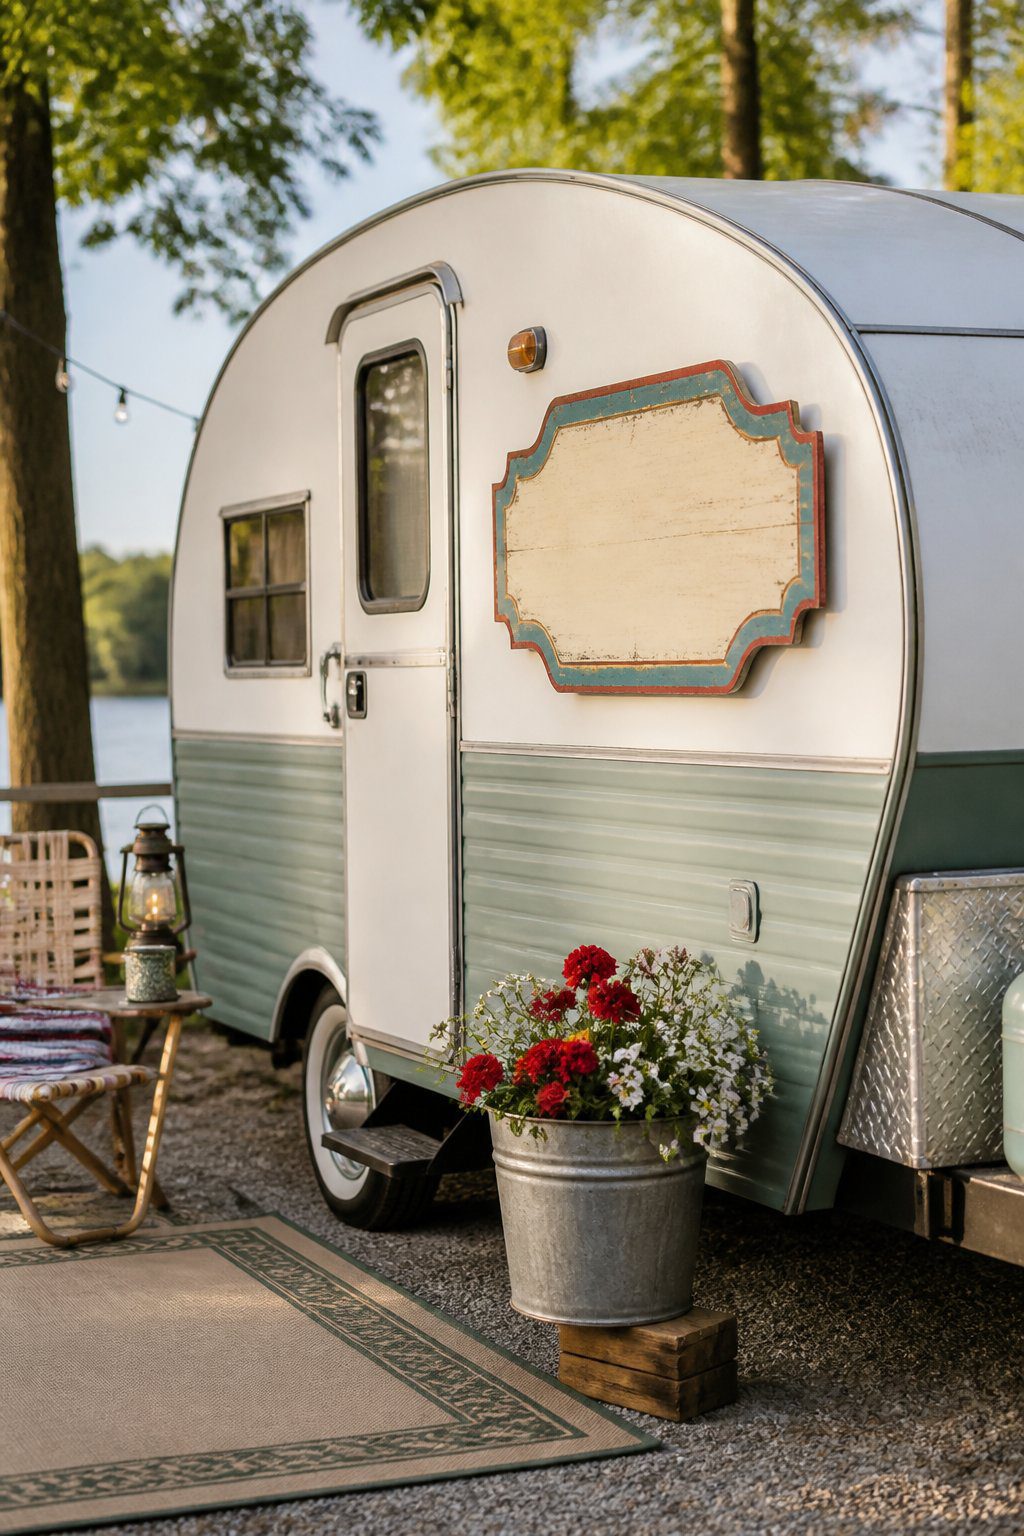
An antique-style camper sign can give your newer trailer a quick dose of vintage charm. Choose a design with simple lettering, muted colors, or a slightly worn finish that matches your decor. Place it near the entry door, above the sofa, or on an open wall.
Check the sign’s material before hanging it. Lightweight metal, wood, or printed canvas works well without adding much weight to the wall. Use removable mounting strips or small screws made for your wall type, and avoid blocking vents, windows, or storage doors.
PRO TIP
Pick a sign that reflects your camping style, such as a classic travel message or a simple outdoor scene. Keep the rest of the wall nearby uncluttered so the sign looks intentional instead of crowded.
11) Replace lighting with a schoolhouse pendant
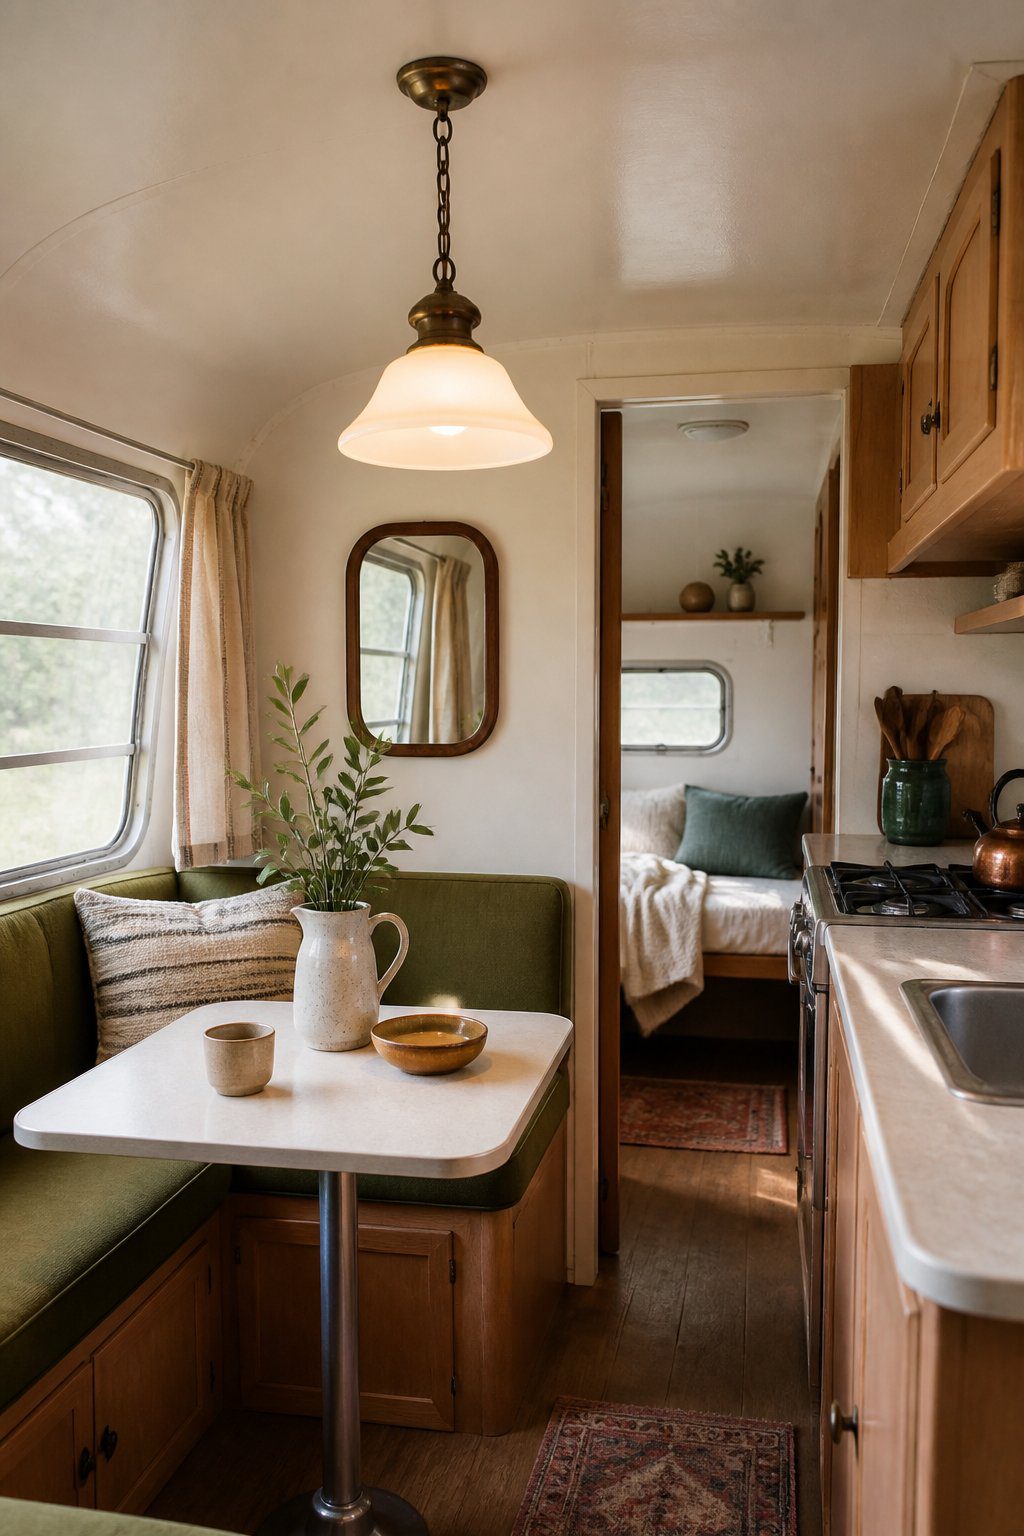
Swap the basic ceiling light for a schoolhouse pendant to give your camper a warm, vintage feel. Choose a fixture with a rounded glass shade, a simple metal finish, and a size that fits the room without blocking cabinet doors or walkways.
Before installing it, turn off the power and check the fixture’s weight and mounting needs. Use a model rated for the electrical system in your camper, and secure the wiring so it stays safe during travel. A short cord or compact fixture can work well in a low ceiling.
PRO TIP
Pick a soft white bulb with a warm color temperature. It will make wood cabinets, patterned fabrics, and brass or bronze details look more inviting without making the small space feel too dark.
12) Add a tufted dinette cushion
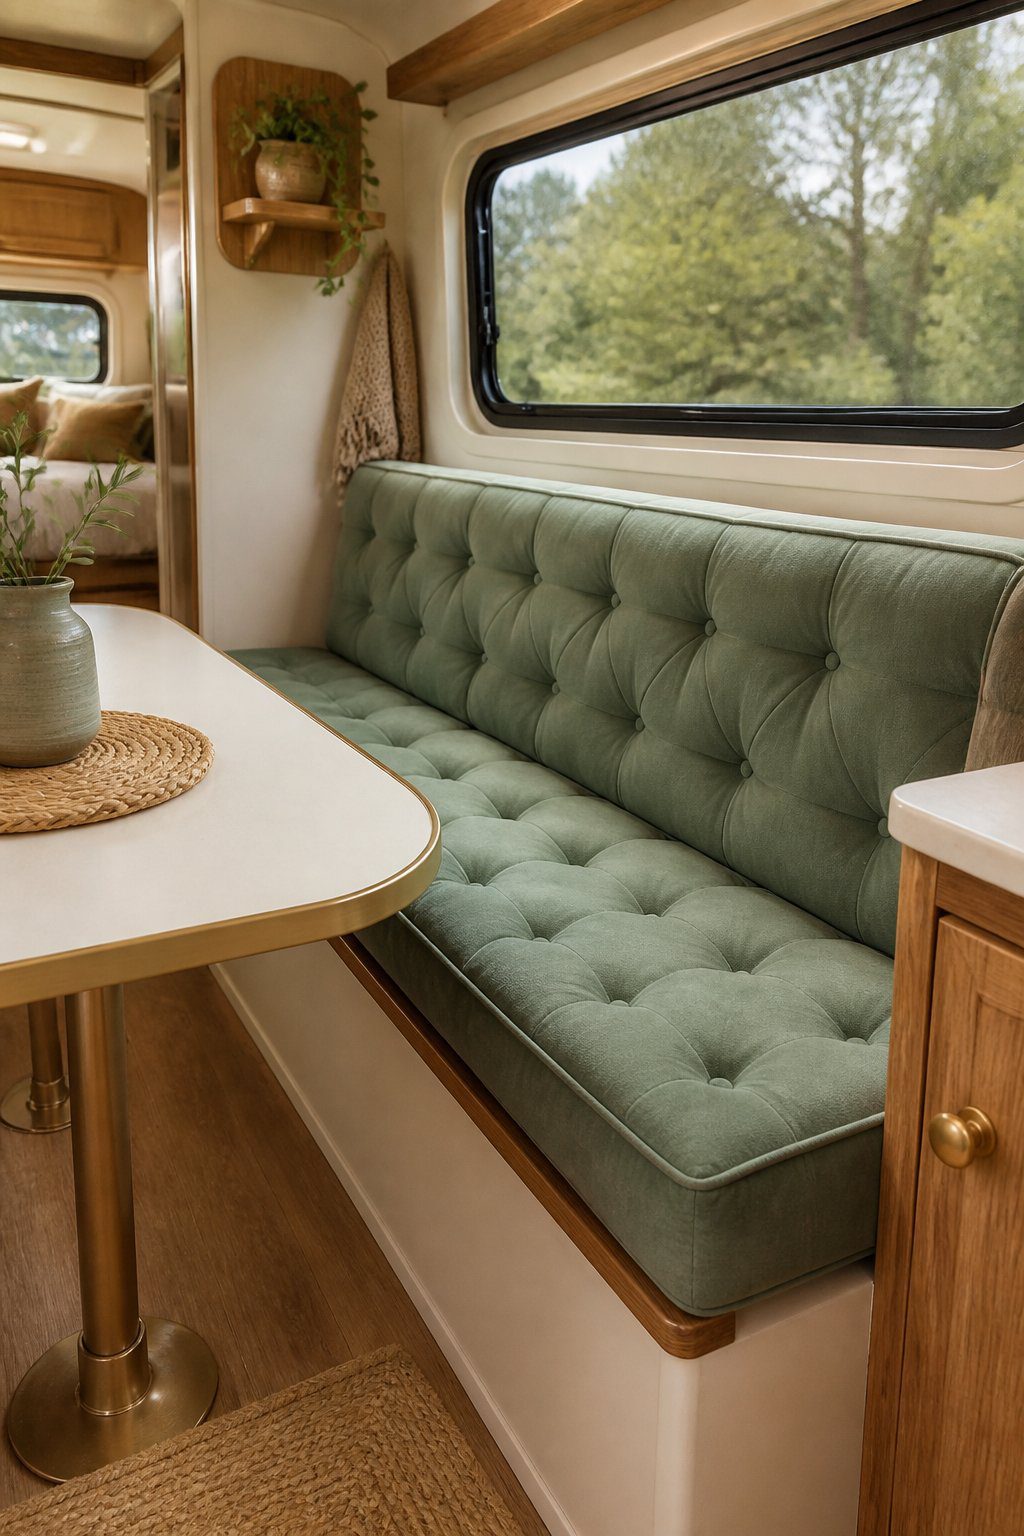
Give your camper’s dinette a vintage-inspired update with a tufted cushion. Choose firm foam and cover it with durable fabric in a warm color, such as cream, mustard, olive, or muted blue. These shades can add character without making the small space feel crowded.
Measure the seat carefully before cutting the foam. Add a thin layer of batting beneath the fabric to soften the edges, then secure the cover with buttons or stitched tufts. Keep the pattern simple so the cushion stays comfortable for meals, games, and relaxing.
PRO TIP
Use removable covers with a zipper or hidden snaps. You can wash them more easily and change the fabric later if you update your camper’s colors. A cushion that fits snugly will look polished and stay in place while you travel.
13) Lay a removable vintage-patterned rug
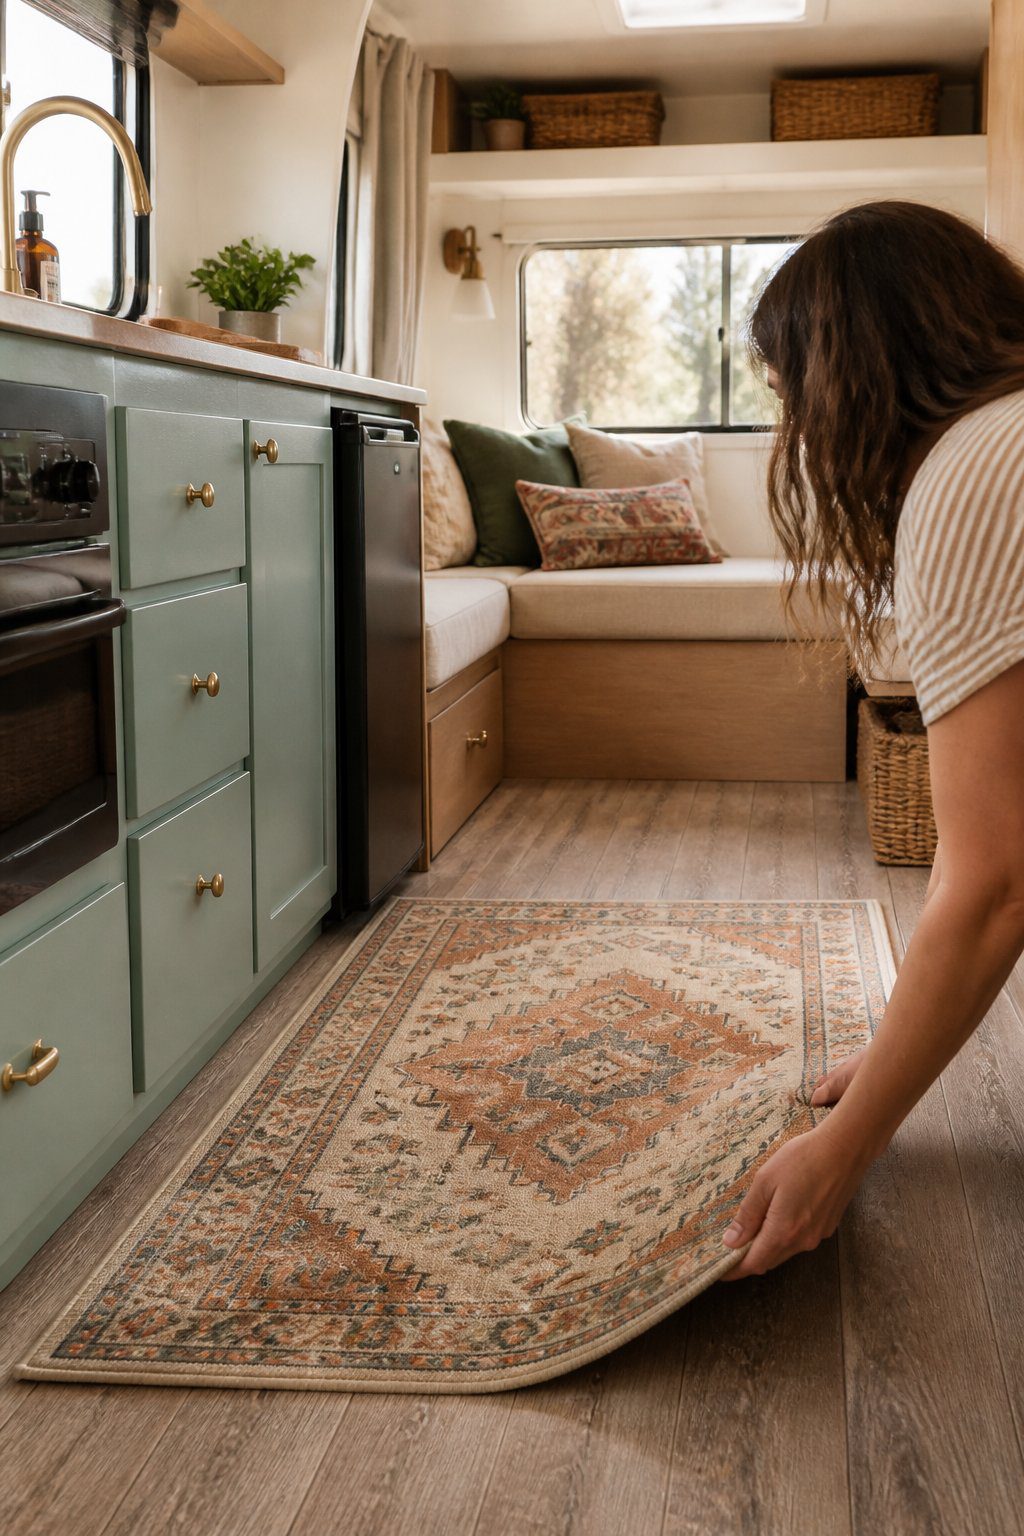
A vintage-patterned rug can add color, warmth, and personality to your newer camper without making a permanent change. Choose a removable style with faded floral shapes, simple geometric lines, or classic medallion details that match your curtains, cushions, or cabinet colors.
Measure the floor before buying, and leave enough room for doors, slide-outs, and storage compartments to open easily. A low-pile rug works well because it reduces tripping and makes cleaning simpler. Use a non-slip rug pad to help keep it in place while you travel.
PRO TIP
Pick a washable rug or one made for outdoor use. You can remove it quickly for muddy days, deep cleaning, or storage during winter. A smaller runner can also define the kitchen area without covering the entire floor.
14) Display amber glass jars
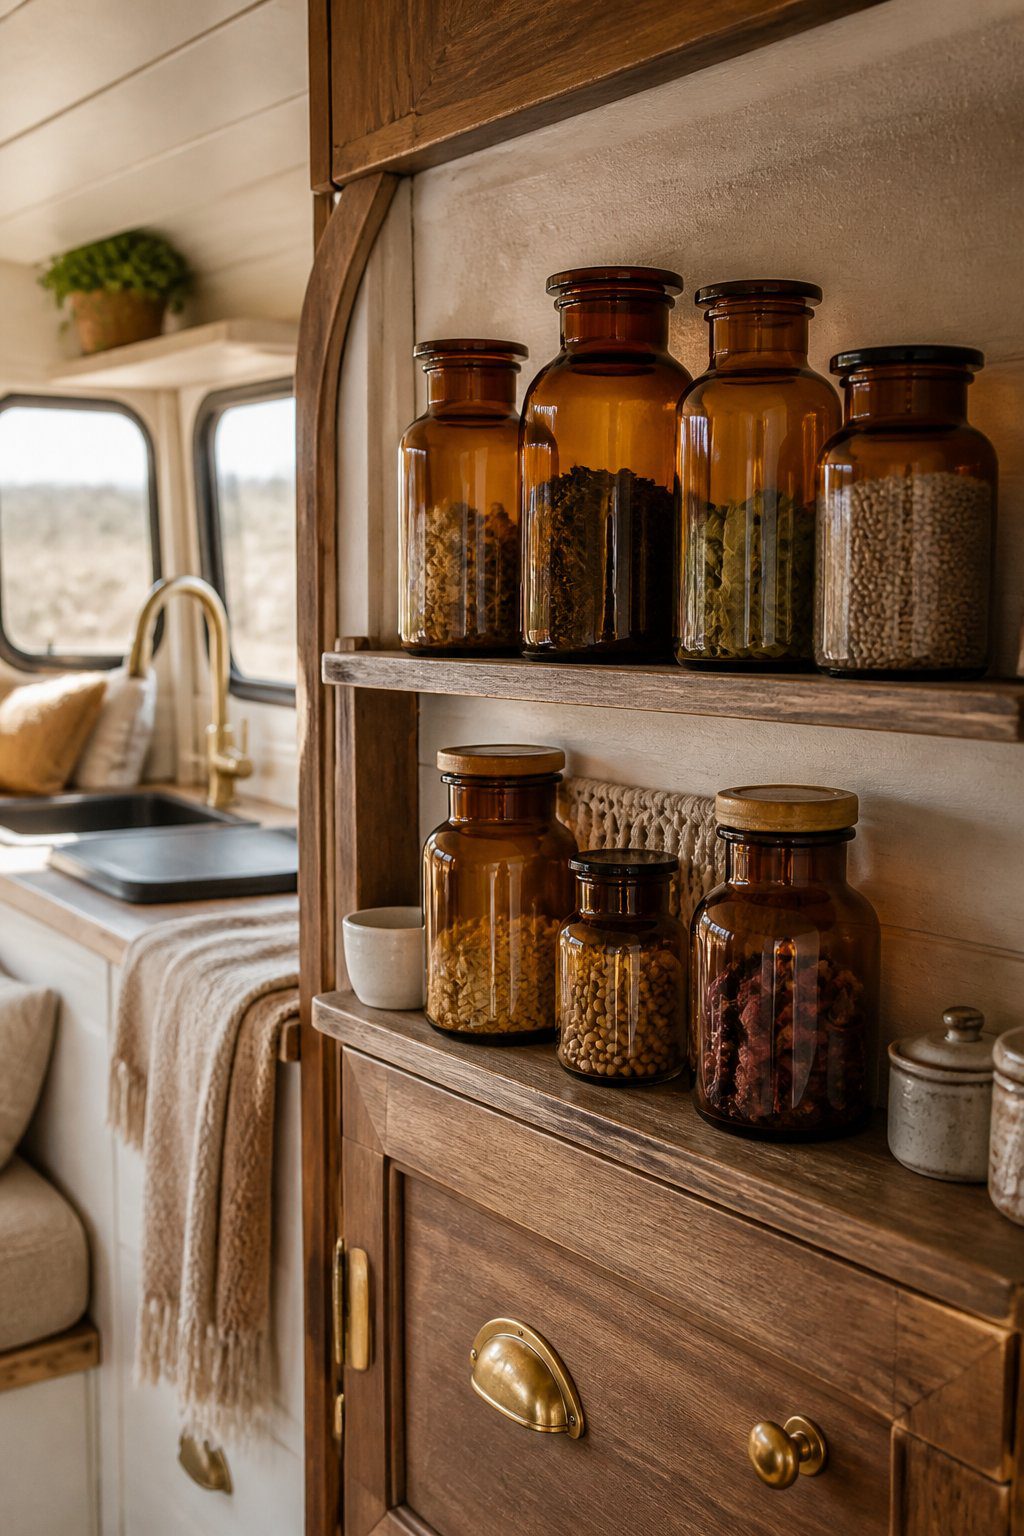
Amber glass jars add warm color and a vintage feel to your newer camper. Place a few on an open shelf, narrow counter, or small wall ledge where they can catch the light without getting in your way.
Use the jars to hold cotton swabs, tea bags, spices, or small travel items. Choose different sizes and shapes, but keep the colors similar so the display looks neat instead of crowded.
PRO TIP
Secure jars during travel with a shallow tray, shelf liner, or removable museum putty. Leave some empty space around each jar, and avoid placing glass near the sink or cooking area where it could fall or break.